
Is a Mountain Bike Chain Guide Worth It?
A chain is one of the most critical components of any bicycle. Its tension and ability to move up and down significantly affect the overall performance of the bike. It is important to ensure the chain moves smoothly across the entire cassette when riding. When riding on rough terrain, the chain might fall off the front chainring. To avoid something like this from happening, mountain bikers often use special chain guides. In this article we’ll discuss whether a mountain bike chain guide is worth it and what it enables you to do.
A mountain bike chain guide is worth it to prevent the chain from falling off the chainring, ensure smooth gear shifting, and minimize the risk of damage to the chain.
While a mountain bike chain guide like this can be beneficial, you should consider its pros and cons before purchasing one. This article will give you a better idea of how MTB chain guides work and if you need one for your bike. We also provide detailed instructions on choosing and fitting a mountain bike chain guide.
Similarly, you may be interested in learning if you need mountain bike or a road bike chains. Take a look at our related article to find out the differences.
What is a Mountain Bike Chain Guide?
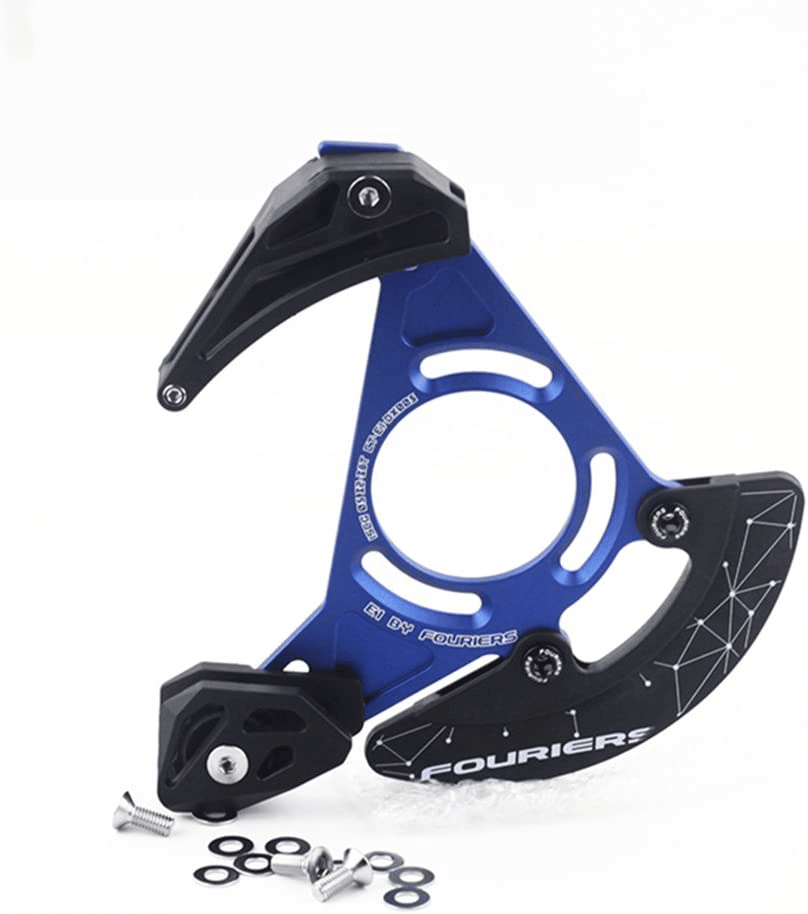
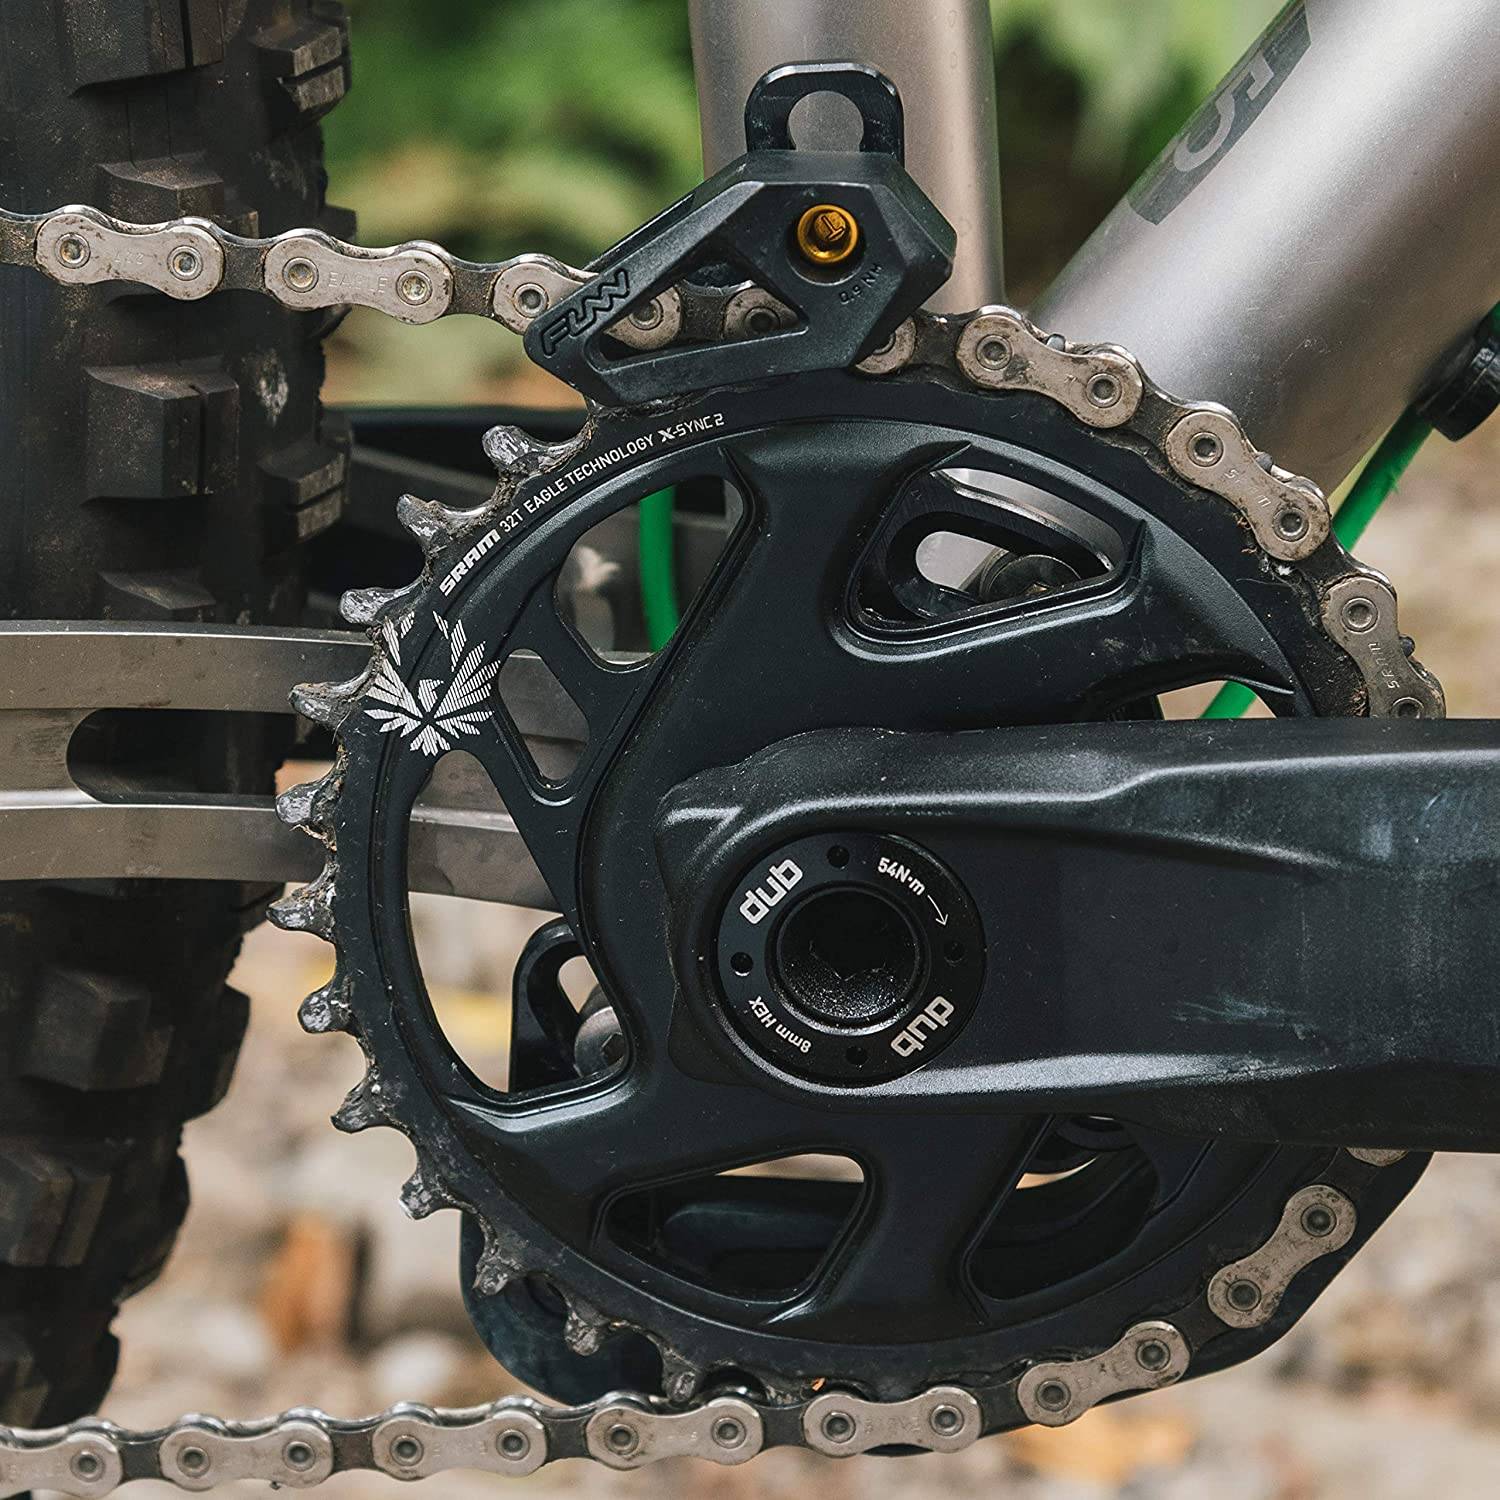
A mountain bike chain working its way off the chainring is a common problem, especially during trail riding, enduro, and downhill mountain biking. A mountain bike chain guide is used to solve the problem. This tiny plastic or carbon fiber gadget not only keeps your bike chain in place but also prevents you from injuring yourself on the trail.
A mountain bike chain guide keeps the chain aligned with the teeth on a chainring. Chain guides are typically made from aluminum alloy and plastic, and attach to the bike frame with clamps or screws.
As mountain bike chains like this come in various sizes, chain guides are also available in different styles. You can choose a suitable bike chain guide by considering its material and mounting type. Our steps for DIY mountain bike chain guide installation can help you to select the right guide for your bike as well as the various attachment methods.
Is an MTB Chain Guide Necessary?
While some drivetrain devices are essential for your mountain bike to function properly, there are optional parts you can add to your bike to customize it or improve the overall performance. A mountain bike chain guide is one of the optional bike chain tools that you can install on your MTB and in our opinion a mountain bike chain guide is worth it, especially for rough terrain.
A mountain bike chain guide is not necessary but it is handy when a bike chain continuously falls off the chainring. The benefits of installing a mountain bike chain guide include keeping the chain in place, avoiding chain damage, and offering the mountain biker extra security. The disadvantages of installing a mountain bike chain guide are additional weight, extra cost, debris accumulation, and bike aesthetics.
Instead of rushing to the nearest bike shop to buy a bike chain guide or shopping for one online, you should ensure that you actually need a chain guide. There might be other solutions to fix a loose or slipping chain. Our easy fixes for a mountain bike chain hitting the frame could be a useful resource for fixing common bike chain problems.
Also, be sure to brush up on our tips to choose the number of links in a mountain bike chain as well.
Benefits of Using a Mountain Bike Chain Guide
Before installing a mountain bike chain guide, you should learn more about its benefits to ensure that you actually need one.
The benefits of using a mountain bike chain guide are to keep the chain on the chainring, enhance the shifting performance, reduce the risks of damaging the chain, and offer the rider extra safety.
According to this article from the University of Southern Queensland installing accessories like bike chain guides is a useful modification to mountain bikes if the rider is looking to improve performance and cycling efficiency.
Here are some of the benefits of using a mountain bike chain guide:
Benefit 1. Keeps the Chain on the Chainring
A mountain bike chain guide is worth it because it prevents the chain from coming off the chainring. While this might not be the issue for some mountain bikers, those riding on rough trails often find it challenging to keep the chain in place. If you enjoy trail riding, enduro, or downhill biking, then installing a chain guide may actually make a huge difference. For more tips and tricks, be sure to read our article explaining the different mountain bike front chainring size options available. Incidentally you might want to check out our tips and tricks for buying downhill mountain bike armor so that you stay safe while riding.
Benefit 2. Improves the Overall Shifting Performance
Shifting gears on your mountain bike depends on how smoothly the chain rolls, so keeping it in place is key to improving the overall shifting performance. By installing a chain guide, you can restrict its movement and prevent it from slipping off the chainring. As a result, you will not have any shifting issues, no matter how rough the trail is.
Benefit 3. Minimizes the Risks of Damaging the Chain
When a bike chain comes off the chainring, it is often damaged. On many occasions, this also damages other drivetrain components or the bike frame itself. Believe it or not, your chain dropping off the chainring can cause damage that requires hundreds of dollars to be fixed. So, using a bike chain guide on your mountain bike prevents you from ruining the bike while riding on rough terrain.
Benefit 4. Keeps You Safe Throughout the Ride
Last but not least, a bike chain guide keeps you safe during the ride. This is because a chain that keeps slipping off the chainring can lead to crashes or other accidents. Our tips for quick and proper chain maintenance has several cleaning and lubrication tips to help you keep your chain moving smoothly to prevent accidents.
Similarly, you may be interested in just learning how to fix a mountain bike chain. If so, be sure to check out our related article for more information.
Is an MTB Chain Guide Necessary - the Downsides
While a mountain bike chain can come in handy on many occasions, it also has some drawbacks that you should consider before installing one on your bike.
The downsides of using a mountain bike chain guide are extra weight, additional cost, and the way it changes how the bike looks.
Here are some cons of installing a mountain bike chain guide:
Downside 1. Added Weight
If you prefer riding a lightweight mountain bike, adding optional accessories might not always be the best choice. Typically, mountain bike chain guides weigh between 30 and 100 grams, depending on the material they are made of. Although they may seem pretty much weightless, they still add some weight to your bike. So, only install a chain guide if it is necessary. In our opinion, a mountain bike chain guide is worth it if you ride on rough terrain frequently (especially during downhill runs on muddy or rocky terrain).
Downside 2. Extra Cost
You will need to spend money to buy a chain guide. So, another drawback of using a bike chain guide is its price. If your bike chain does not really come off the chainring on the trail, there is no need to pay an extra $25-$50 for an item you do not actually need.
Downside 3. The Overall Aesthetics of Your MTB
Although some bikers do not really pay attention to how their bike looks, others buy specific equipment and bike parts to make their MTBs look cooler which we explore in our mountain bike fender accessories guide. If this is the case, using a bike chain guide might not be the right option for you. Although it offers some benefits, it changes the way your bike looks. So, if a bike chain slipping off the chainring is not something you worry about, you should simply avoid installing a chain guide.
How to Choose a Mountain Bike Chain Guide
While a mountain bike chain guide is a tiny piece of plastic or carbon fiber, choosing the right one for your bike is key to benefiting from it. The size as well as method of attachment, need to be considered when choosing a chain guide.
Choose a mountain bike chain by determining if a bash guard is also required, checking the size of the chain, checking the type of the chain guide mounting system, choosing the right material, and paying attention to its weight.
So, once you’ve decided that a mountain bike chain guide is worth it, below is a step-by-step guide to choosing the best chain guide for your mountain bike:
Step 1. Decide if a Bash Guard is Needed
Oftentimes, mountain bikers use a bash guard in tandem with a chain guide for maximum protection. Although a mountain bike chain bash guard is usually not needed, it is an option for extremely rough terrain to protect the chain and the chainring from rocks and debris. This YouTube video tutorial by Regular Guy Mountain Biking explains how MTB bash guards work and can help you decide if you need one for your mountain bike.
Deciding if you need a bash guard will enable you to choose the right chain guide design. This is because some chain guides are installed behind the chainring, preventing you from adding a bash guard to your bike. If this is the case, consider getting a 2-in-1 bash guard and chain guide combo, just like this one.
Step 2. Check the Size of Your Bike Chain
As each manufacturer makes a uniquely shaped chain guide, it is important to choose the right one for your bike. To do so, you should always check the size or width of your bike chain and ensure that the chain guide can be attached to it. According to this paper from the Mechanical Engineering Faculty at Heriot-Watt University in Edinburgh, bicycle chain efficiency is improved when lightweight guides are attached to the bike chains.
Step 3. Check the Mounting System of the Chain Guide
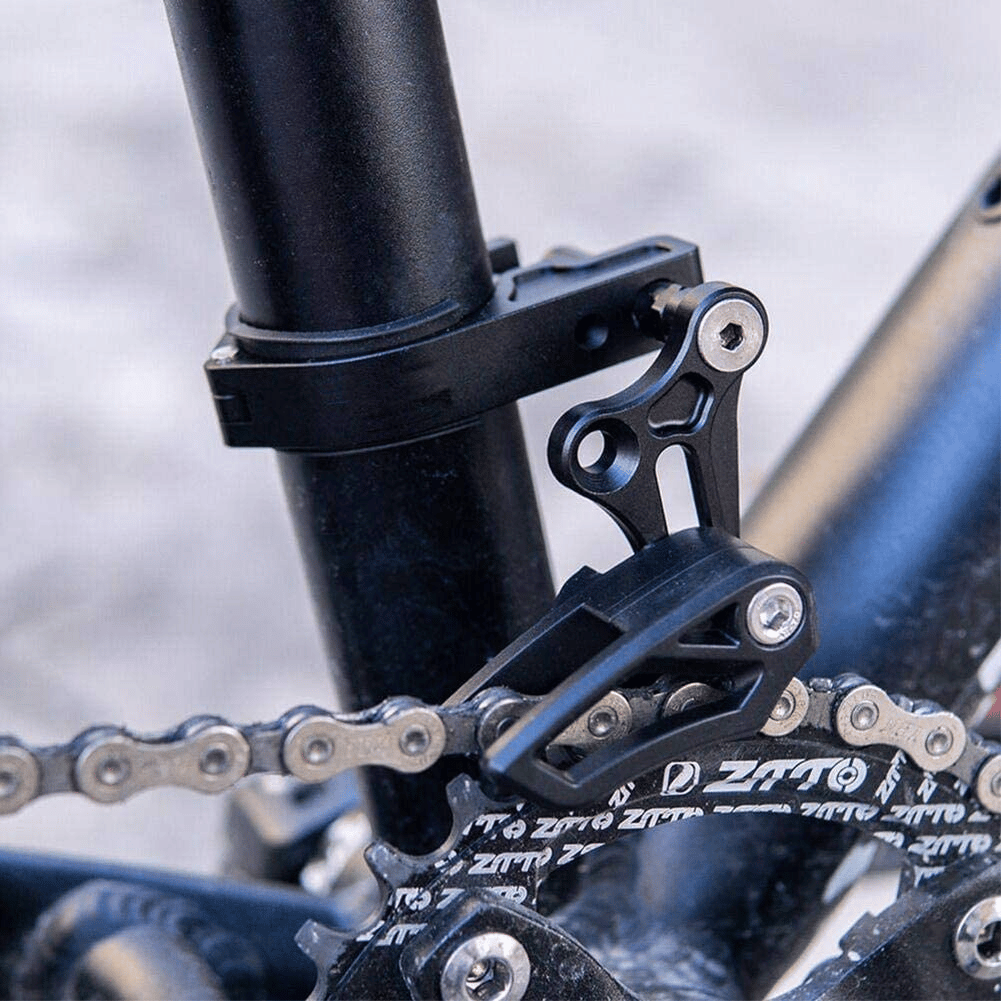
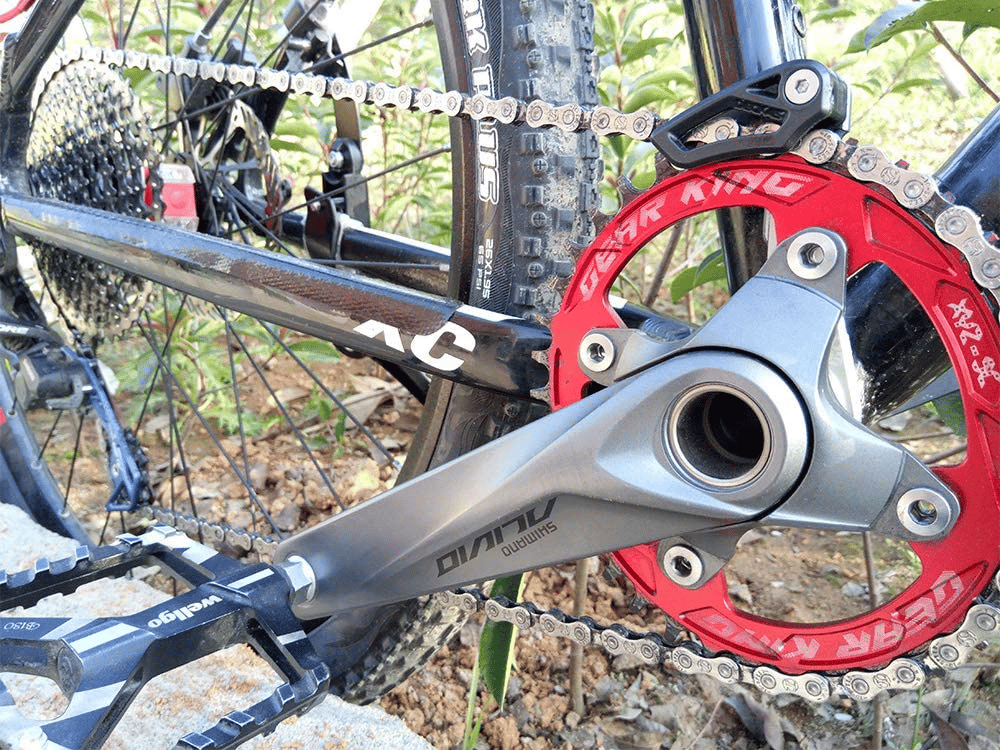
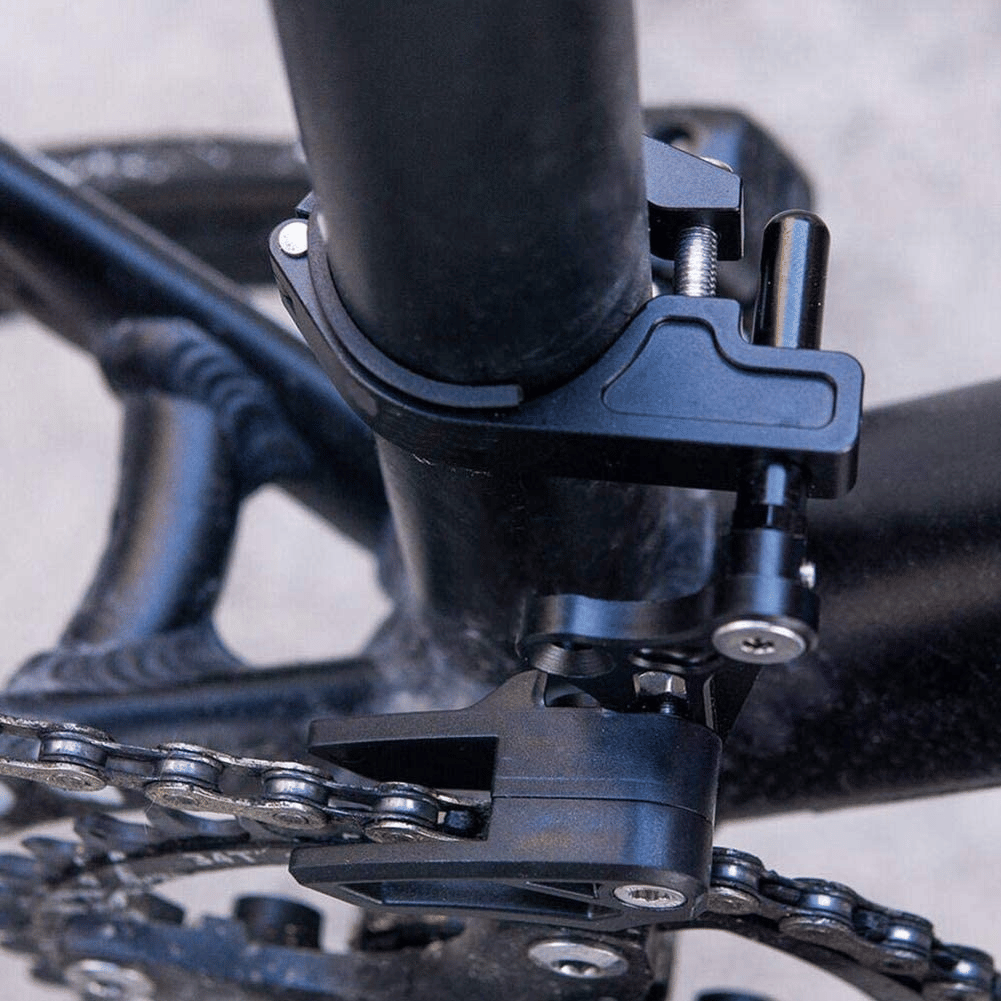
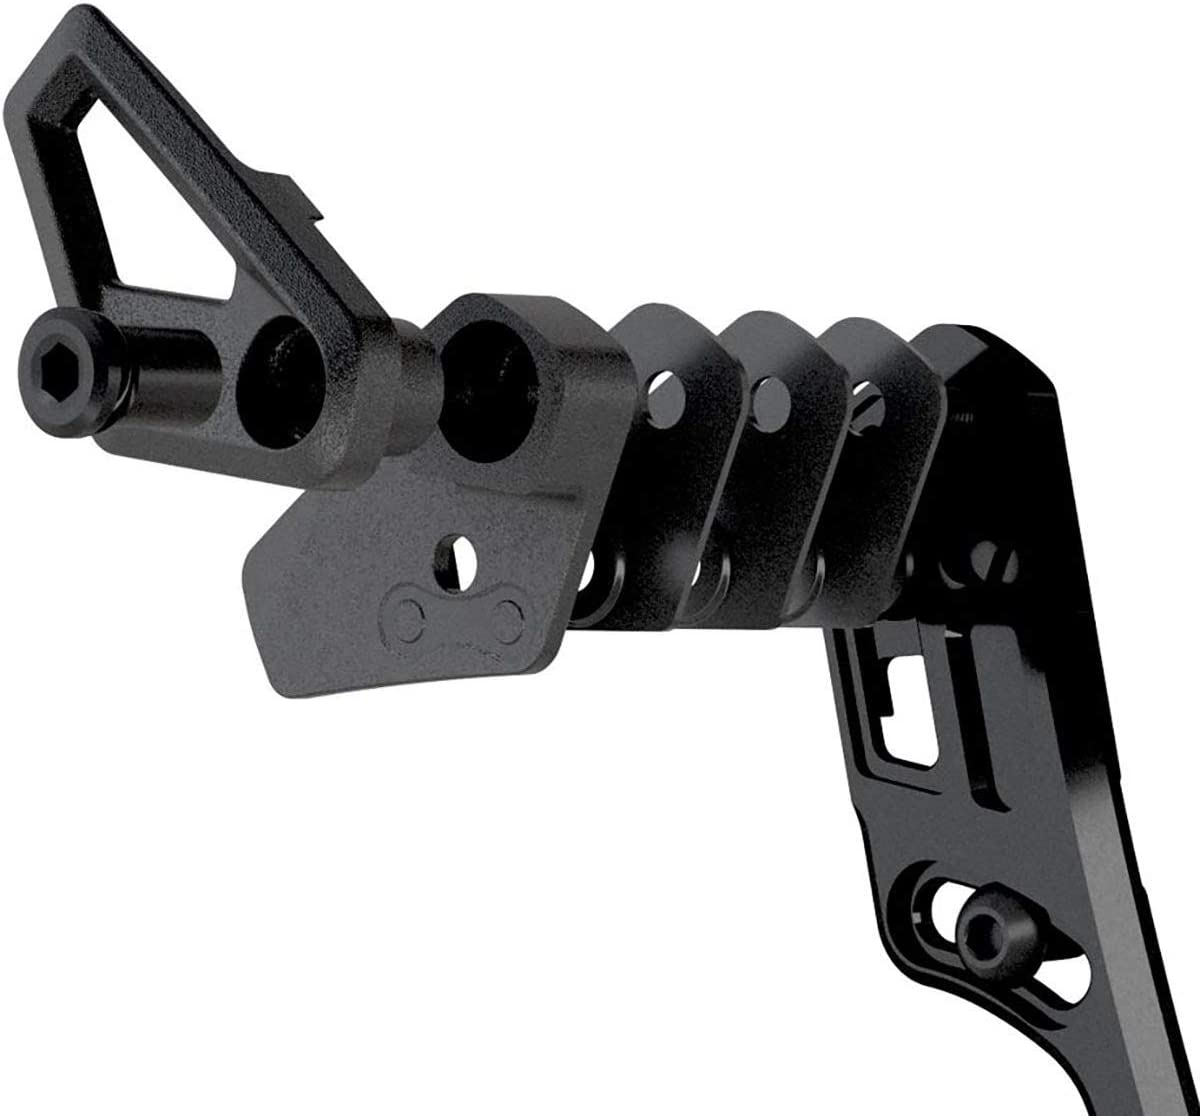
Since mountain bike chain guide designs vary from manufacturer to manufacturer, you should always check the mounting system before purchasing one. While some chain guides like this can be attached to the seatpost, others should be installed directly onto the cable below the chainstay. Besides that, some chain guides are designed to be attached behind the chainring. Therefore, you should choose a chain guide depending on the option that works best for you.
Step 4. Choose the Right Material and Weight for the Chain Guide
Last but not least, you should pay attention to the material and weight of the chain guide to buy the right one for you. While plastic chain guides are relatively lightweight (around 30-50g), they are also easy to break. On the other hand, carbon fiber chain guides are more durable but weigh more ( around 50-100g). When choosing a chain guide for your bike, think of how durable or lightweight you want it to be.
A Summary of the Tools Needed to Fit a Mountain Bike Chain Guide
| Tool Name | Function | Example | Price |
| MTB Chain Guide | To prevent the chain from falling off the chainring. | OneUp Components Chain Guide Iscg05 | ~ $60 |
| Screwdriver | To loosen or tighten screws behind the chainring. | Klein Tools 11-in-1 Screwdriver | ~ $15 |
| Allen Key | To loosen or tighten the bolt on the chain guide. | 30-Piece Allen Wrench Set | ~ $15 |
How to Fit an MTB Chain Guide
Correctly fitting a mountain bike chain guide to the frame is key to benefiting from it. As long as you follow some quick and easy steps, you can install a chain guide with little to no effort.
To fit a mountain bike chain guide, first, check its mounting system, then remove the bike frame screws behind the crank. Next, determine the right length of the slider and position the chain guide behind the chainring. Secure the screws and attach the upper guide part to the chain guide body. Finally, check if the chain runs smoothly without rubbing against the chain guide.
Here are the steps to follow when installing a chain guide on a mountain bike:
Step 1. Check the Mounting System of the Chain Guide
To install a bike chain guide properly, you should first check its mounting system. Some chain guides, like this one, can be attached to the seatpost of your bike and the installation process is pretty straightforward. You just need to tighten up a screw to mount the chain guide on the seatpost.
Other chain guides are designed to be mounted on the cable below the chainstay. Here is a YouTube video tutorial by Trial Track Trail demonstrating how to install a chain guide on a mountain bike in just a minute or two.
In addition, some chain guides can be installed right behind the crank. If this is the case, you will need to follow a few additional steps to fit the chain guide correctly. This video tutorial by Love MTB provides detailed instructions on how to fit a mountain bike chain guide behind the crank.
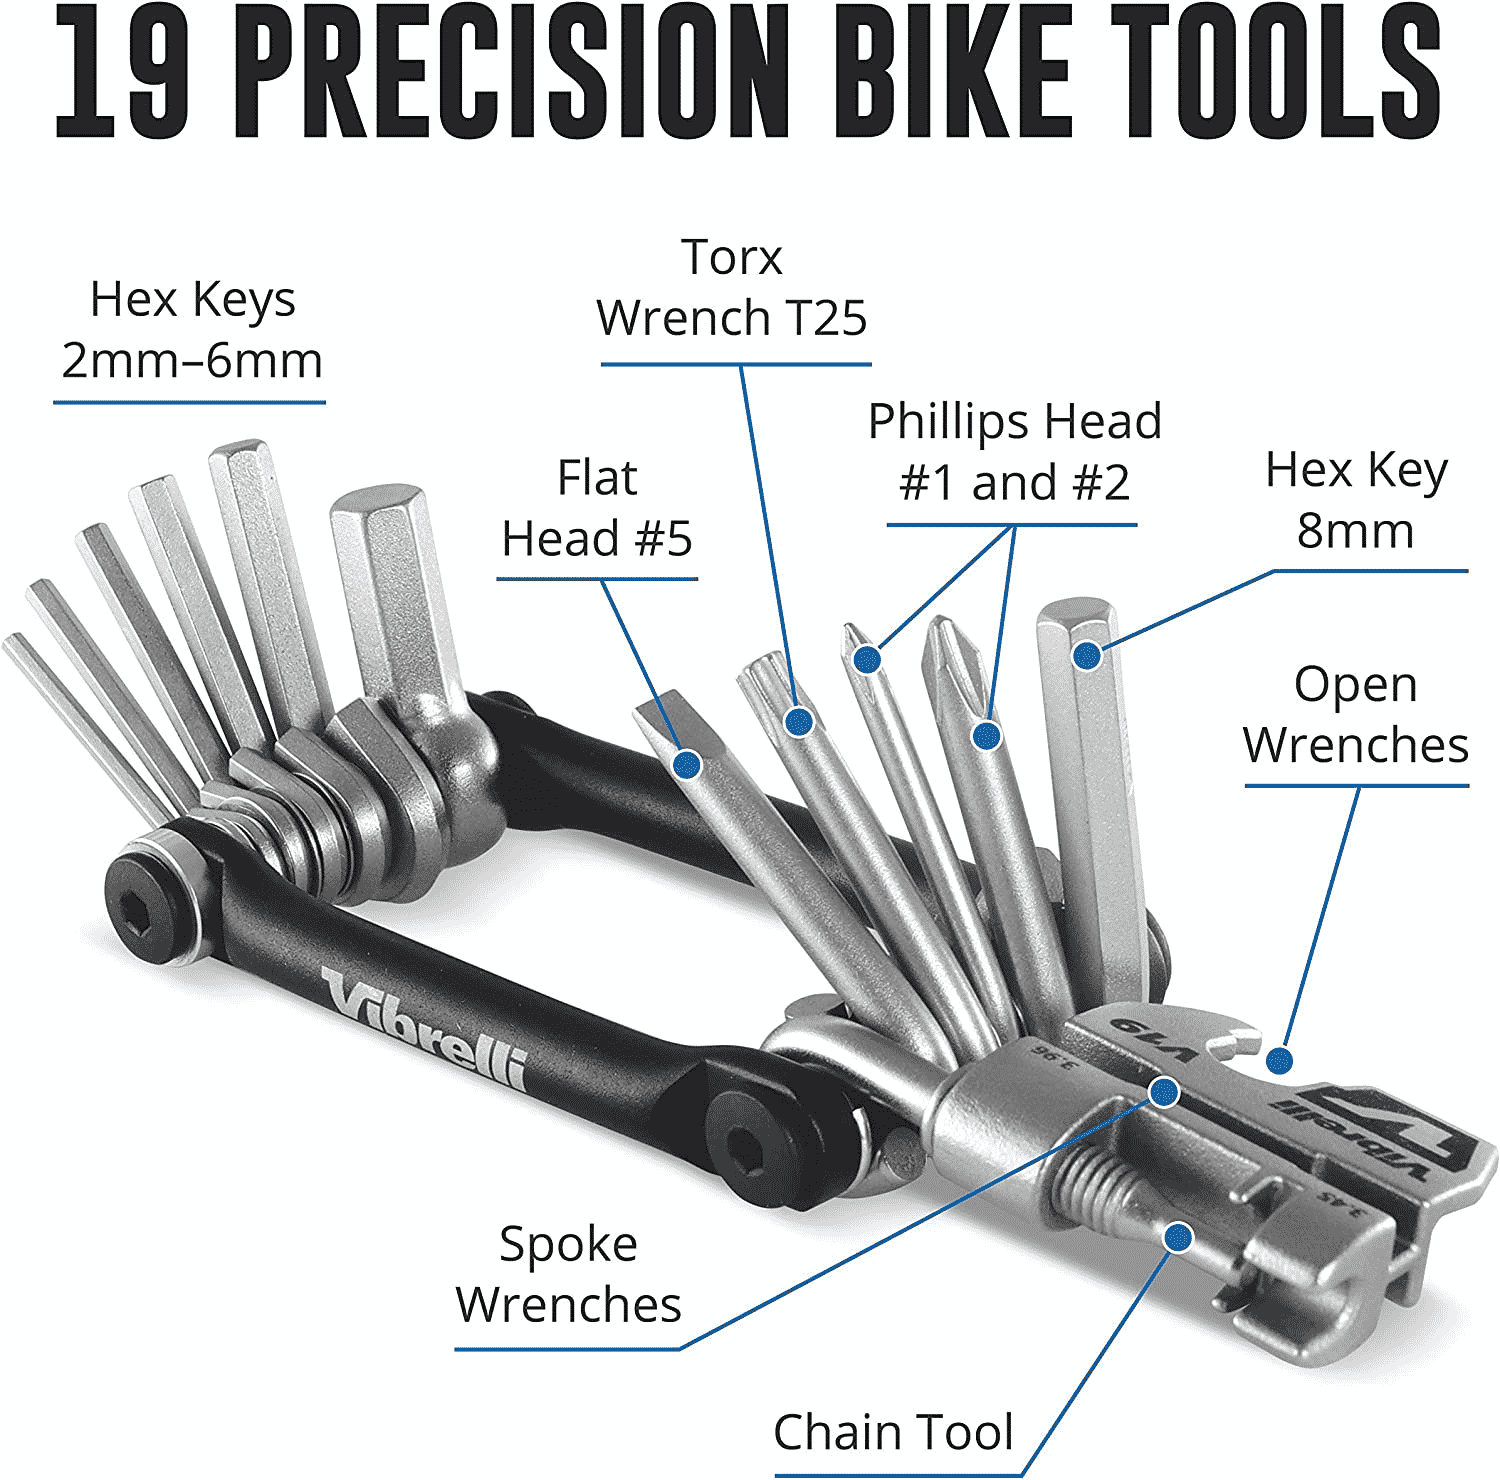
Step 2. Get the Tools You Will Need
The next step is to get the tools you will need to fit the chain guide. Ideally, you should get a screwdriver, an Allen wrench, and a bike chain guide itself. Alternatively, you can get a mountain bike multi-tool like this that comes with different shaped and sized screwdriver heads and hex keys.
While you are busy with the chain it may be a good idea to clean and lubricate it. Our step-by-step guide on how to clean a mountain bike chain properly and lube it will walk you through the supplies and tools you need.
Step 3. Remove the Screws From the Bike Frame Behind the Chainring
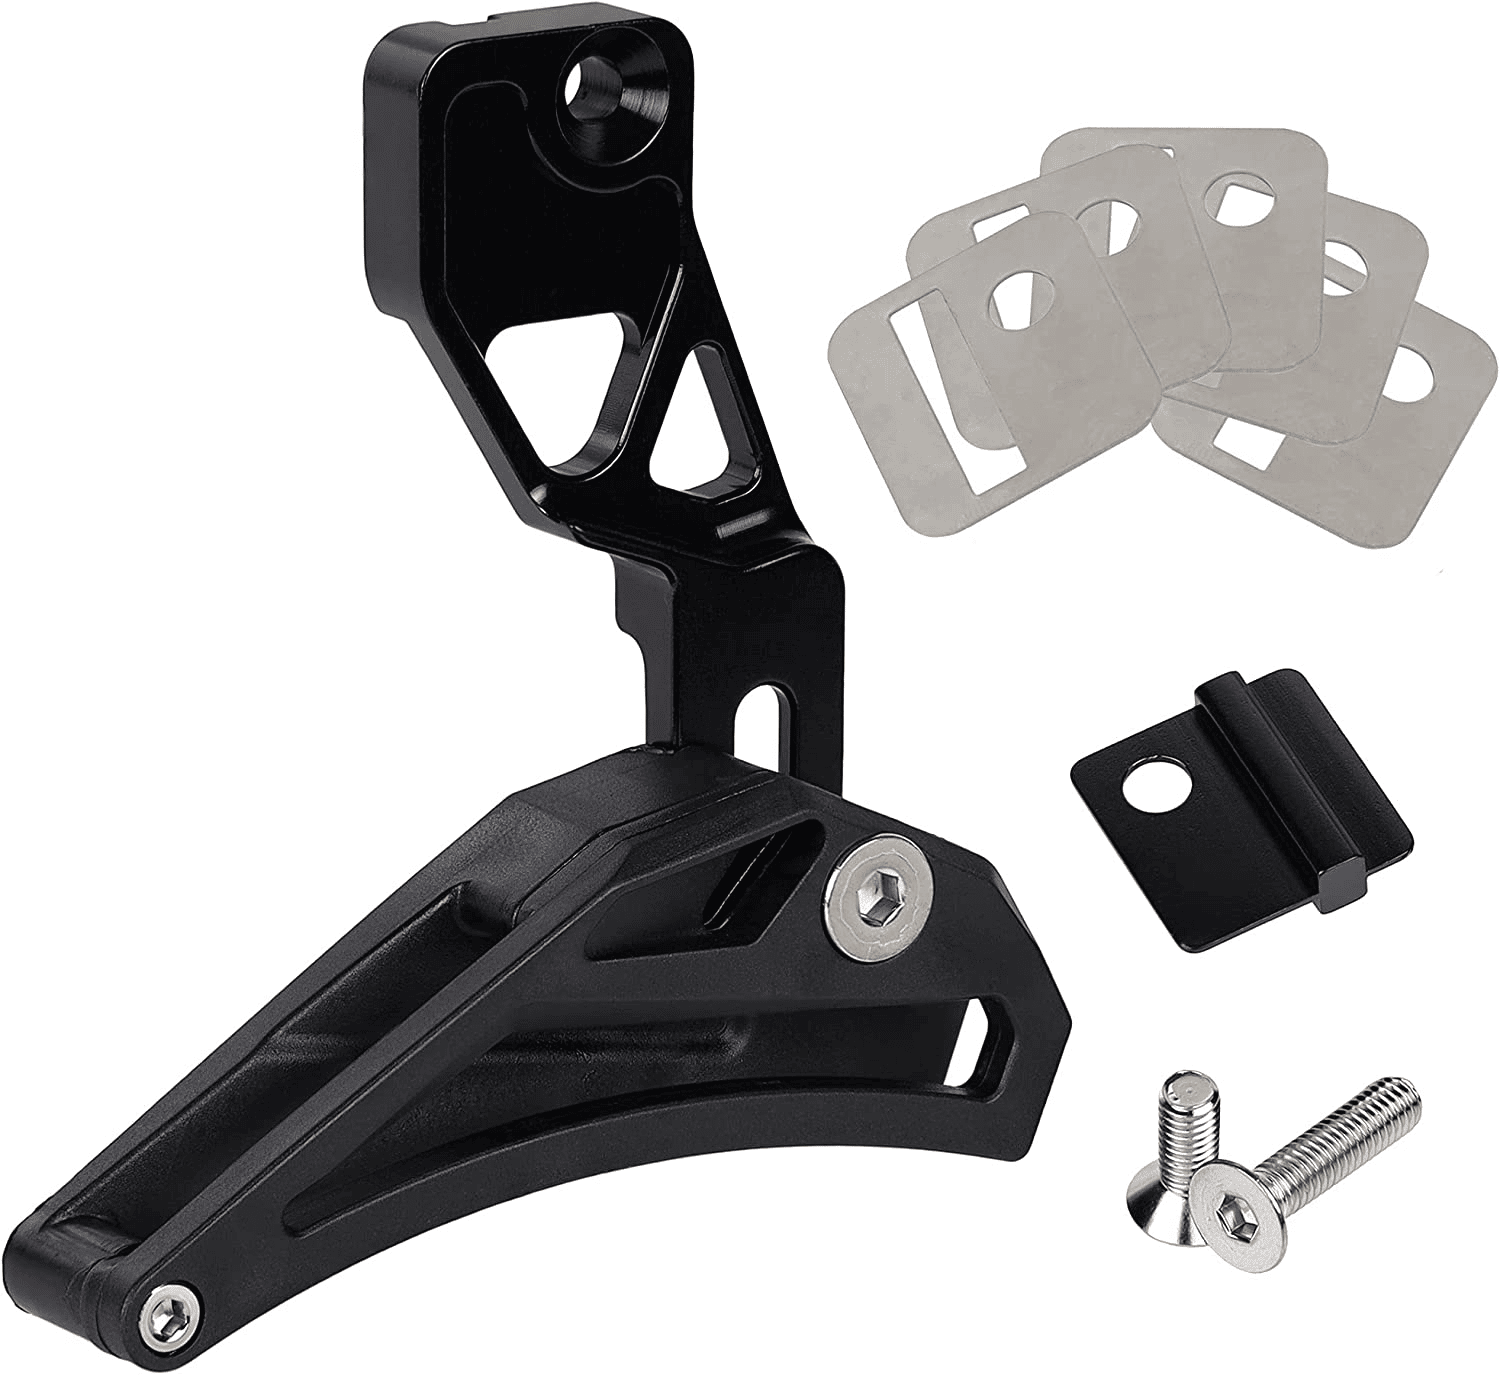
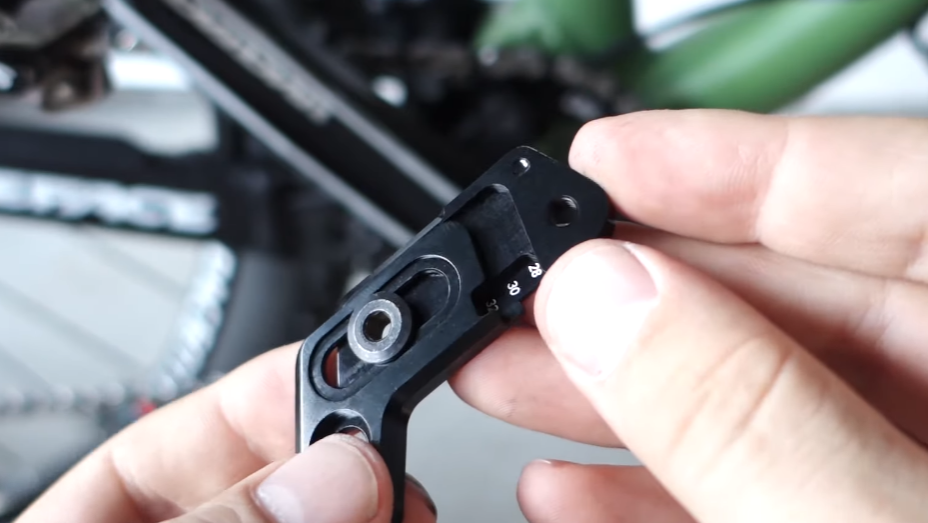
Modern bike chain guides are designed in a way that you do not need to remove the crank from the bike. Instead, you just remove the screws from the bike frame right behind the chainring to fit the chain guide. It is however, important to check that the holes on the guide line up with the screws on the frame.
Step 4. Determine the Right Length of the Slider
If your chain guide features a slider on the upper section, then you should determine its length. Simply place the chain guide behind the crank and check how high or low the guide should be. Ensure that the chain has enough room to run smoothly before assembling the chain guide.
Step 5. Slide the Chain Guide Behind the Chainring and Secure it with Screws
The next step is to slide the chain guide behind the crank and tighten up the screws with a screwdriver. Make sure the upper part of the chain guide is horizontally aligned with the chainring and that the chain is running through the center of the guide.
Step 6. Attach the Top Part of the Chain Guide
To finish up the installation process, attach the top part, which is the actual chain guide. Take a 4mm Allen key like this and tighten the bolt just a little bit. Then, flip the guide down into the right position and secure the bolt.
If your chain guide comes with some extra spacer shims, check if you need them. If the chain fits perfectly under the chain guide, there is no need to add the spacers.
Step 7. Make Sure the Chain Runs Smoothly
Before you hit the trail, do a final check to ensure that the chain runs smoothly. The chain should not be rubbing against the chain guide when pedaling. If you notice some touching, you should adjust the height or positioning of the chain guide for the chain to function properly.