
Mountain Bike Chain Guide Installation – Step by Step
The sprockets on the rear wheel cassette on a mountain bike keep the chain on the chainring but a chain guide gives you an extra sense of security that your chain won’t fall off during extremely strenuous rides. The chances of the chain falling off the ring are increased if you are an aggressive rider, ride bumpy trails, or cycle long distances. The last thing you want to worry about in a race is having your chain slip out of position so it would be a good idea to invest in and install a mountain bike chain guide if you are a racer. So, in this article we’ll cover how you can easily DIY mountain bike chain guide installation.
To install a mountain bike chain guide, start by selecting a chain guide that fits the mountain bike, get the right chain guide installation tools like an Allen wrench and multi-tool, take off the chain and remove the crankset taking care not to lose the washers, install the mountain bike chain guide, then put the chain back on, refit the crankset and adjust the chain guide alignment.
Installing a mountain bike chain guide like this can reduce the chances of serious accidents leading to injury by making sure that the chain stays in place. Chain guides can vary in terms of material, weight, style, and mounting type. Before buying a chain guide for your mountain bike, it is a good idea to consider which chain guide material is the best, which chain guide style you prefer, and what mounting type is compatible with your bike. Depending on all these factors and the mountain bike brand you have, the price of your chain guide can vary.
How Does a Chain Guide Work?
A chain guide is a small protective accessory for your bike's chain. It works by adding a protective layer to your bike's chain and makes sure that the chain stays on the chainring and does not slip at all.
A chain guide works by running the chain through an interior channel, preventing it from jumping off the front chainring, and stopping it from slipping off the sprockets. A chain guide is a valuable accessory that prevents chain-related accidents.
A chain that slips often is a sign that your bike's parts are getting old and they might need replacing. Usually, once in a while if your chain slips off, it is easier to repair it and set it back on the chain ring by pushing the rear derailleur and releasing its tension, but it's not easy to keep doing this procedure regularly. Our mountain bike chain maintenance guide offers some handy tips about checking and lubricating your chain to prevent its deterioration.
According to this article on bicycle accidents released by the Indiana Department of Road Safety, twenty percent of bicycle accidents, are a result of mechanical defects in the bike itself. This is why it is important to get a chain guide installed on your bike especially if you own a mountain bike and often ride off-road on bumpy trails.
Reasons to Install a Chain Guide
As with most things in life, prevention is better than cure—and taking good care of your mountain bike will mean you'll enjoy using it for much longer. Mountain bike chain guide installation can prolong the life span of your chain because it ensures the chain remains in place so that it doesn't slip off and break or damage other bicycle components.
A chain guide on a mountain bike keeps the chain in line with the teeth on the bike chainring when cycling on bumpy trails, prevents twigs and other trail debris from getting stuck between chain and chainring, and gives a sense of security by ensuring the chain won’t fall off.
1. Chain Guides Prevent the Chain From Falling Off
A chain guide like this is virtually weightless and very easy to attach; it also protects the chain and makes sure it doesn't fall off even during rough conditions or on hard trails. This article from ScienceDirect analyzes the shifting process on the rear derailleur to identify when chain slippage occurs and how a chain guide can reduce the slipping motion. You may also find interest in our related article explaining how to size a mountain bike chain, be sure to check that out too.
2. It Keeps the Chain in Line With the Teeth on the Chainring
One of the main purposes of a chain guide is to ensure the chain stays on your bike. They work in combination with the derailleurs to keep the chain on the chainring while the rider pedals or changes gears. A chain guide also assists with retaining tension on the chain so that it stays on the chainring teeth.
3. Prevent Objects from Getting Stuck Between the Chain and the Chainring
One of the benefits of the chain guide is that it helps prevent objects from getting stuck in the space between the chain and the chainring. If you use a chain guide, it ensures the chain stays in a line and it makes it harder for dirt and debris to get stuck in the chain of your bike.
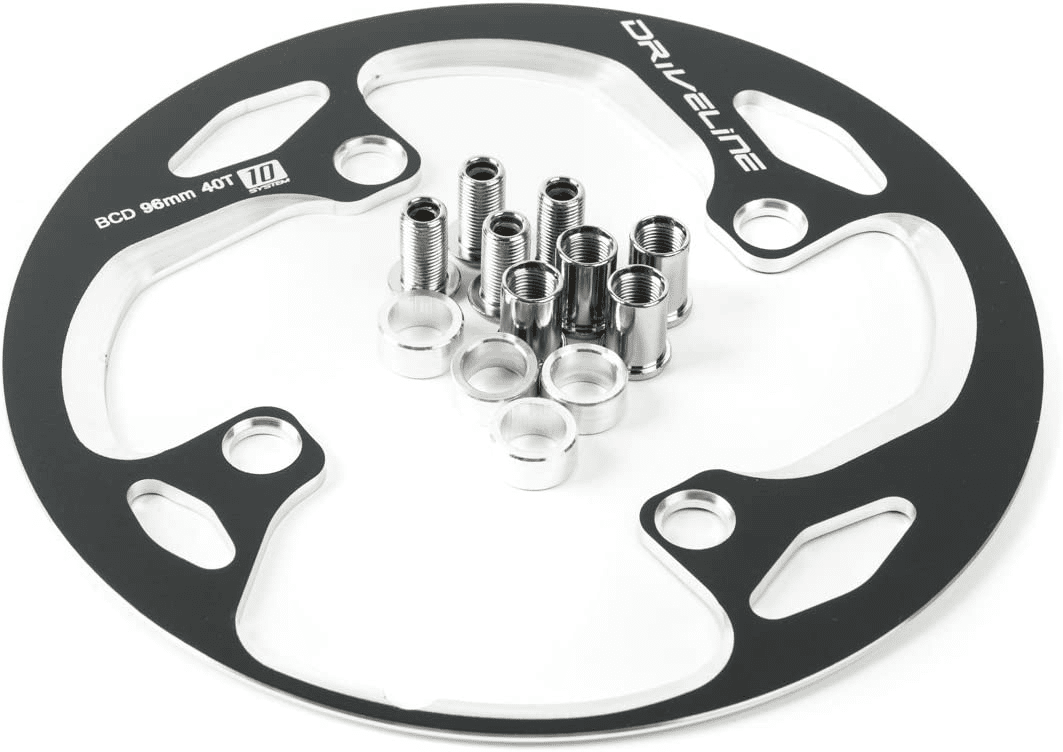
4. Provide a Place to Mount a Bash Guard
A chain guide provides a place on which to mount a bash guard. A bash guard like this serves a similar protective function to the chain guide, according to this article from ChainReactionCycles.com. It is a plate or a disc-like structure that is made up of aluminum or polycarbonate material and can withstand direct impact.
Tools Needed For Mountain Bike Chain Guide Installation
Having at least a basic tool kit will make minor adjustments like installing a bike chain guide a simple and pleasant task, so invest in some mountain bike tools as you go. Our mountain bike toolkit essentials guide is a great resource to help you build up your tool collection over time, while our article that provides mountable tool bag ideas will inspire you with tips and tricks on how to safely transport your essential tools when riding on trails.
The tools needed for mountain bike chain guide installation include hex keys, crank extractors, and a bike wrench. A bicycle multi-tool has several size hex keys to assist with installing a bike chain guide.
1. Hex Keys
These are the keys that are used as screwdrivers for bolts and nuts and are an essential mountain bike tool.
2. Crank Extractors
A crank extractor like this is a tool that is used to remove and reinstall a standard crank on a bicycle.
3. A Bike Wrench
A bike wrench from a set like this is used to tighten the bolts on your bike. It is one of the main tools if you're going to do any kind of modifications to your bike.
How to Install an MTB Chain Guide
During mountain bike chain guide installation you have to make sure that your chain is not worn out or damaged.
To install a mountain bike chain guide first measure the mounting tabs on the bike to determine if they are 56mm or 48 mm apart. Use an ISCG05 with mounting tabs that are 56mm apart, and use an ISCG Old chain guide for mounting tabs that are 48mm apart. Once the type of chain guide is selected determine the ball pattern on the chainring so that the guide slider can be adjusted to either the 30, 32, 34, 36, or 38 markings. A BB-mount chain guide needs to be installed on the crankset so the pedal and chainring need to be removed using a crank extractor.
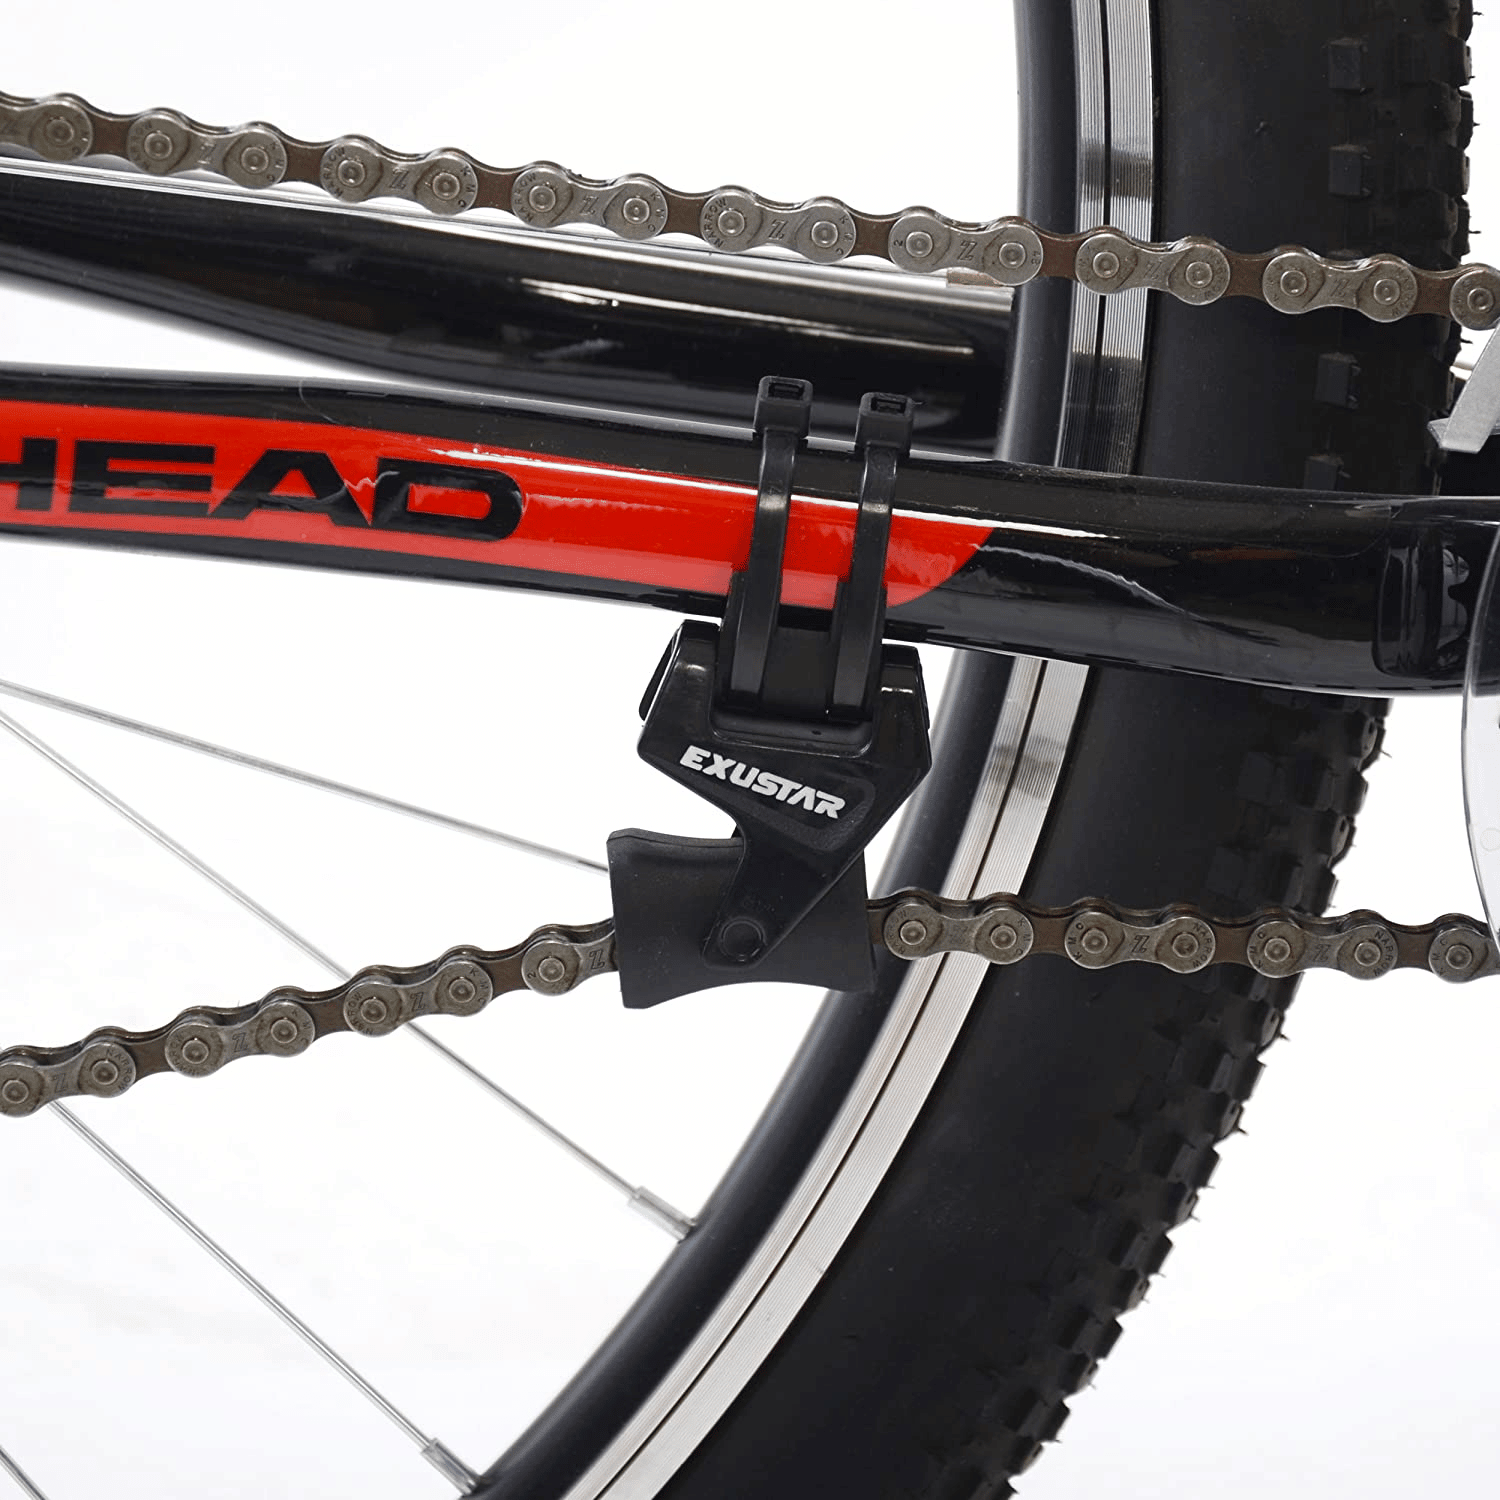
Before you install your mountain bike chain guide you have to keep a few things in mind. One of them is the type of chain you have and which chain guide would be a good match with your chain. Normally, there are two main types, one being the ISCG and the other one the ISCG-05 tabs as explained in this article by Wiggle. There are chain guides like these that can be fitted onto the chain without removing the chainring because they attach to the seat stay, but most of the popular chain guides like these will require the crankset to be removed so that it can be attached to the tabs on the bike frame.
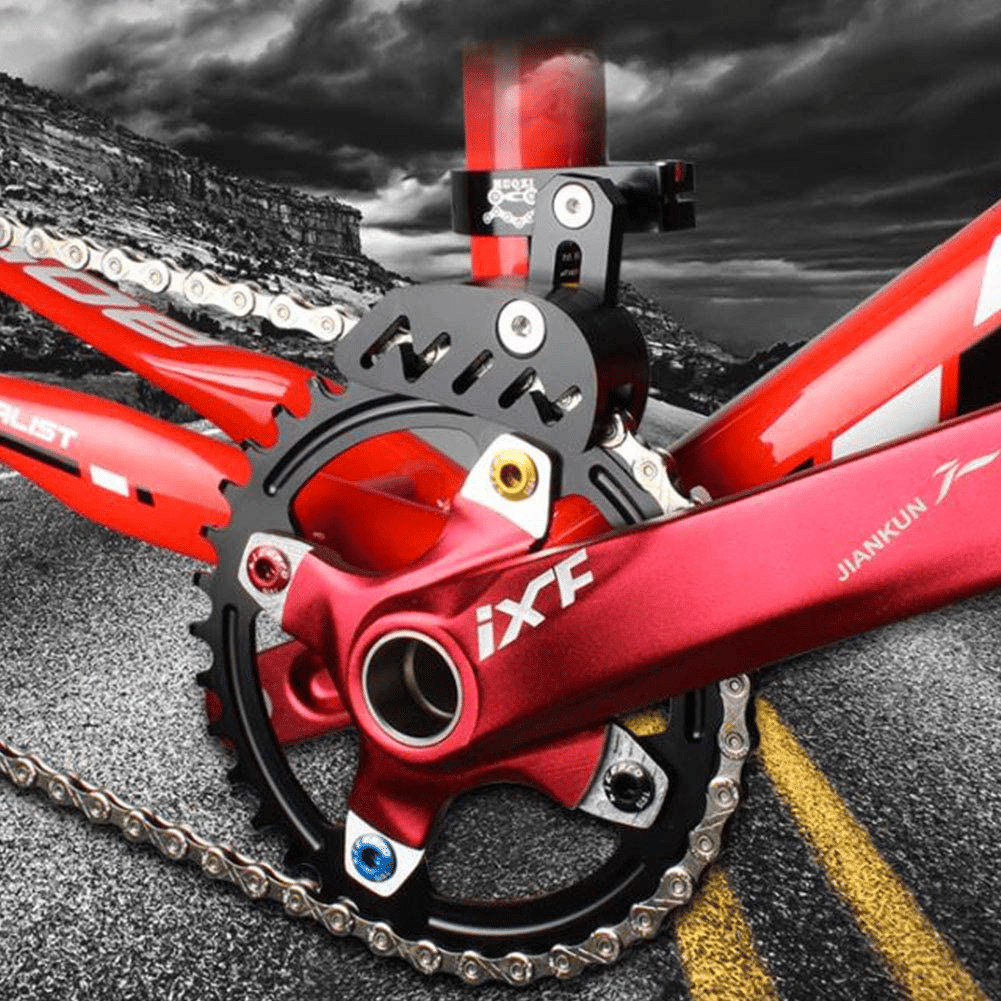
A BB-mount chain guide like this has a large round ring that fits onto the crankset behind the chainring, so the crankset and chainring need to be removed. The BB-mount offers precise adjustments to ensure the chain remains straight and taut, and is suitable for use on both round and oval chainrings. If you are unsure about your tab measurements, there are also chain guides like this available that can be attached to the bike frame with zip ties. Below you’ll find a general protocol for mountain bike chain guide installation, for more details refer to this user guide.
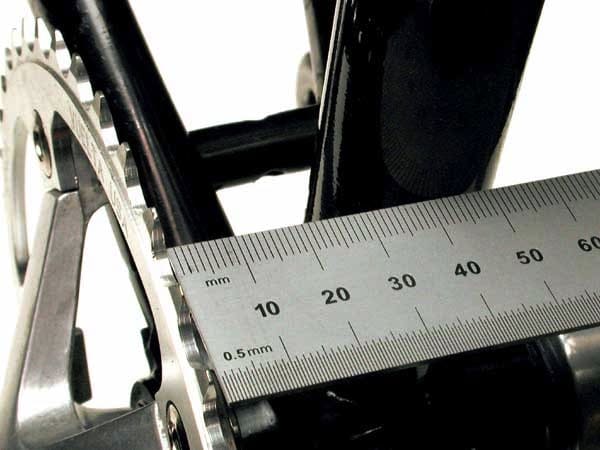
Step 1. Measure the Chainline to Determine What Chain Guide Type to Use
The chainline is measured from the center line of the frame to the center of the chain and you can simply measure it with a ruler. To install an ISCG chain guide your crankset must have at least a 50mm chainline measurement, but ideally 56mm, which is the typical measurement for newer bikes.
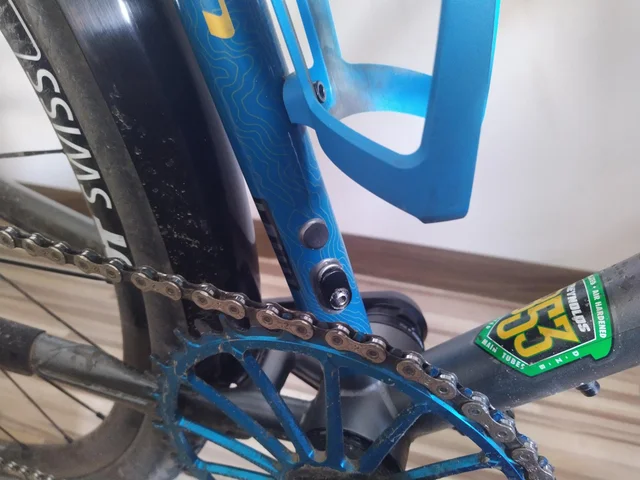
Step 2. Next Measure the Tabs on the Bike
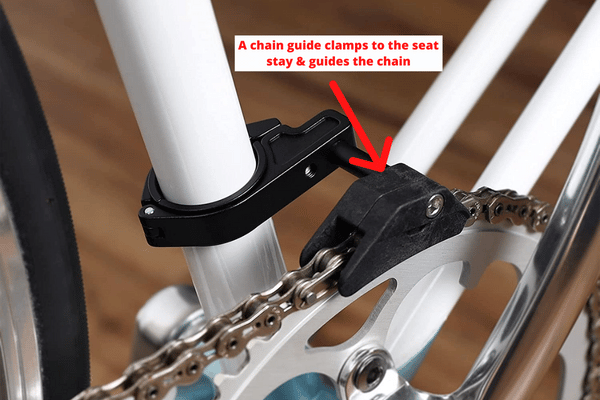
The tabs on the bike also influence what type of chain guide can be installed. If the tabs don’t line up with the holes on the chain guide then that guide can't be used on the bike. In this case, you will either need to find another chain guide with holes in the same position as the bike tabs or choose a chain guide that attaches to the seat stay with a clamp or fixes to the frame with zip ties.
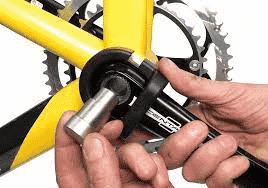
Step 3. Remove the Crankset and Chainring
Use a crank extractor to remove the crankset as well as the chainring, if you are installing an ISCG05, ISCG, or BB-mount chain guide. This will ensure you have easy access to be able to secure the chain guide properly.
Step 4. Adjust the Guide to Fit the Chain Pitch and Width
The chain guide needs to be adjusted according to the chain width and pitch to ensure the chain stays within the guide channel and has sufficient clearance so that the chain moves smoothly. Chains come in 2.4 mm, 3.2 mm, 4.0 mm, or 4.8 mm roller widths, which is the internal width between the inner plates. Chains used on modern bicycles have a 12.7 mm pitch, which is the distance from one pin center to another. These two measurements are indicated on the chains and will help you determine which chain is suitable for your bike. This guide from ChainGuide.com explains all the intricacies of bicycle chains and what chain is compatible with a particular bike.

Step 5. Attach the Chain Guide to the Bike
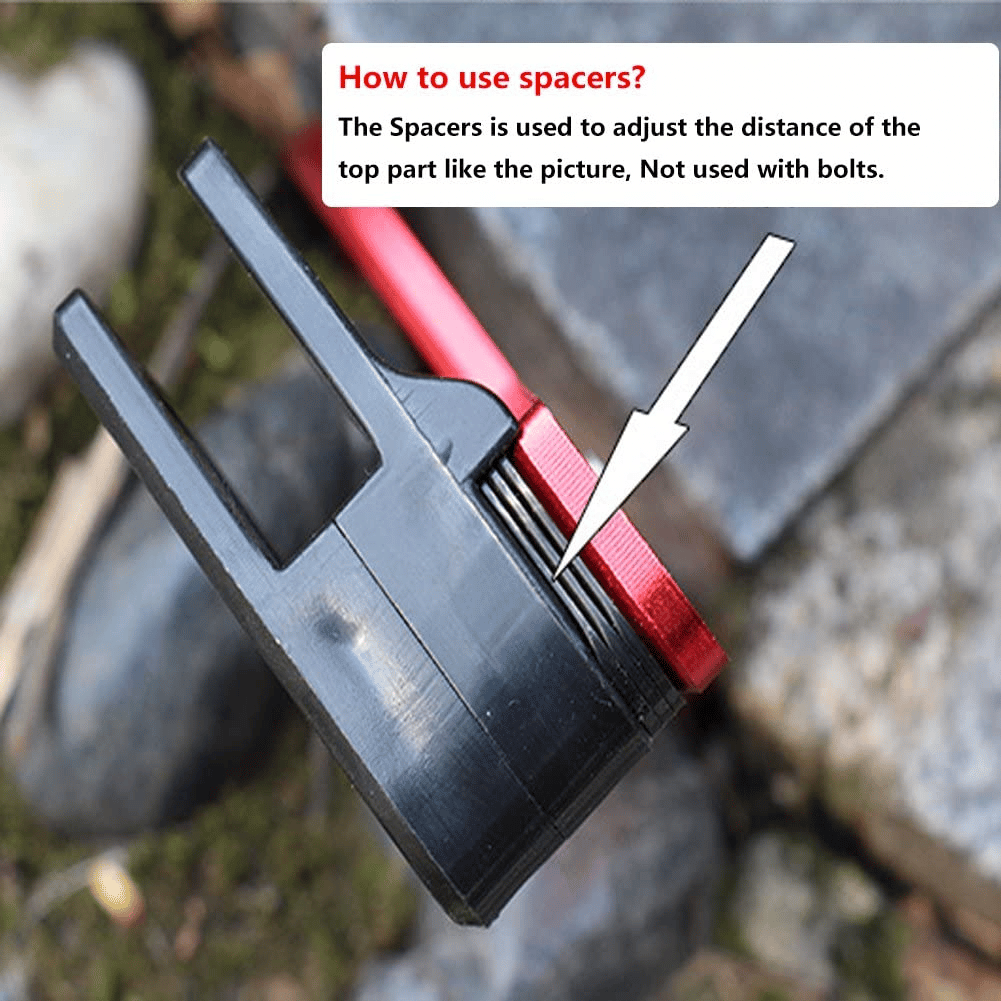
Place the chain guide on the bike but don’t tighten the screws completely because you will need to determine whether or not to reposition the guide with washers or spacers if necessary. While the guide slider will position the chain within the guide there will probably be slight adjustments you can make to ensure the chain runs smooth and straight.
Step 6. Position the Guide So That it is Centered Over the Chain
Use the included washers that often come with chain guides so that the chain runs through the center of the guide’s channel. Next, ensure the top guide is positioned horizontally on the chain with adequate clearance so that the chain doesn’t touch the chain guide. When you are satisfied with the guide’s position, tighten all the screws to retain this position.
Step 7. Reattach the Chainring and Crankset
The final step is to replace the chainring on the bike and position the chain on the sprockets, and then reattach the crankset and ensure all components are secure.
Summary of the Main Types of Chain Guides
| Type of Chain Guide | Type of Attachment Method | Example from Amazon |
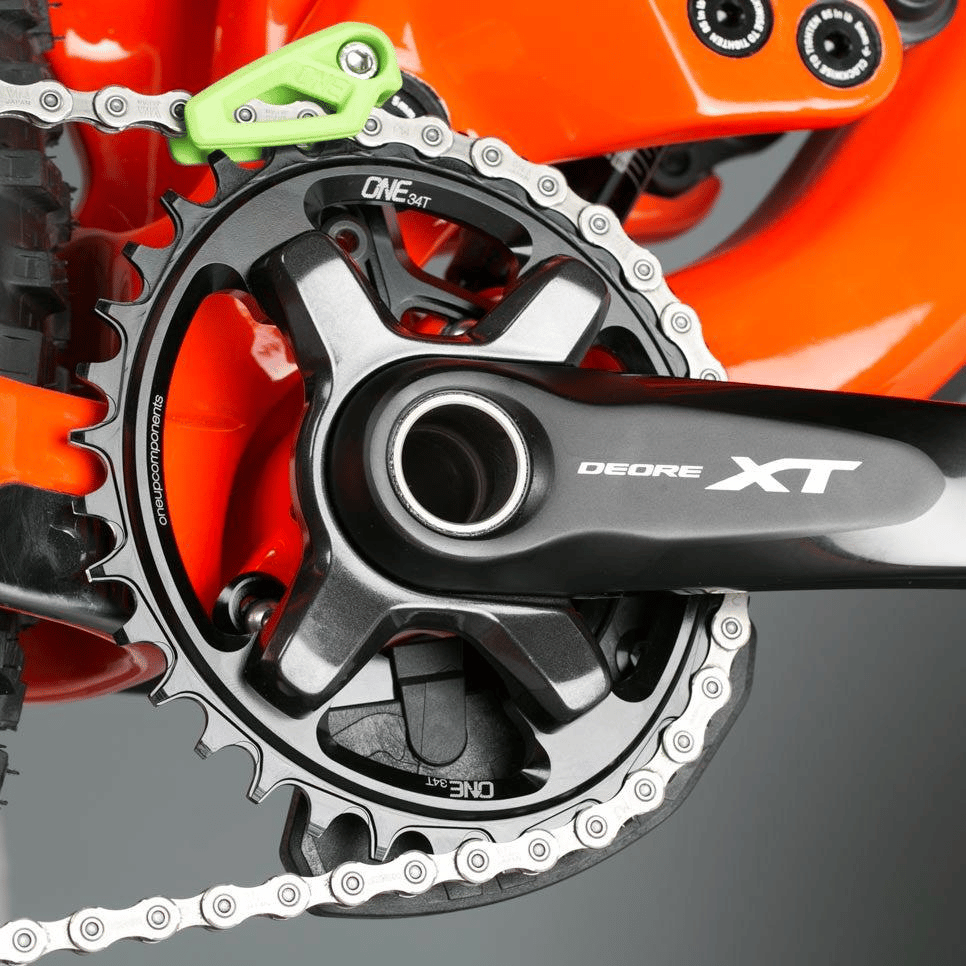
| ISCG05 | Attaches to tabs on the bike that are 56mm apart; common on new bikes | OneUp Components Chain Guide ISCG05 Top Guide, 26-38T |
| ISCG (OLD) | Attaches to tabs on the bike that are 48mm apart; common on older bikes | Aluminum Alloy Bike Chain Guide, Mountain CNC Single Ring ISCG03 |
| BB-MOUNT | Attaches to the crankset and fits behind the chainring | MRP 1x V3 Alloy Chain Guide 28-38T BB Mount |
| Seat Tube Clamp Chain Guide | Attaches to the rear wheel stays with zip ties | Cysky Chain Guide Mountain Bike, MTB Chain Guide Direct Mount Chainring Guard |
| Lower Attachment Chain Guide | Attaches to the seat stay with a clamp | Quintessentialz Chain Guide Mountain Bike Tensioner |
As you can see, installing a chain can be pretty involved. In order to prevent having to do this process more often than normal, be sure to read these quick and proper mountain bike chain maintenance tips and tricks. Additionally, you will be interested in learning how to replace a chain on a mountain bike or our step-by-step guide on how to clean mountain bike gears. Be sure to read our related article to find out more.
Factors to Consider When Selecting the Best MTB Chain Guide
When you're selecting a chain guide, you should make sure to select the best one. Choose a chain guide that fits the chain and is also durable. An ill-fitting chain guide can cause problems like wear on the chain that lead to the chain snapping.
To select the correct chain guide to fit on a mountain bike, check the material the chain guide is made of, whether the chain guide is compatible with 1x drivetrain systems or multiple speed drives, the drubaility of the chain guide, availability of extra features for mounting lower attachments, and the weight of the chain guide.
If you want to learn more about the various reasons why bike chains break then read our article about how to fix a mountain bike chain that keeps breaking. The most popular method of deciding when to change your bike's chain is known as the 2000 Mile Rule which is explained clearly in this article from Shimano. It states that after you've traveled around 2000 miles on your bike with the same chain it is time to replace it with a new one. Of course, every chain has its own lifespan but the general rule of thumb tells us that this is the normal time for most bike chains.
When your chain has become 0.75 percent longer than its original length, you should replace it soon because if it gets any longer than 1%, other parts of the drivetrain also start to get worn out. Our article about how to fix a chain that is too long discusses how to measure a chain to determine stretch as well as tips to fix the chain.
1. Chain Guide Materials
Chain guides like these are usually made from aluminum alloys which are considered a very durable material, and some plastic parts. Some companies also opt for aluminum, carbon, and nylon materials. The chain guides can vary in weight depending on the material that they are made of, but the difference in weight is not significant. Bike Addict makes its chain guides like these using different types of materials giving customers plenty of freedom to choose the best fit for their bike. They also provide a color customization option so that you can add a little style along with the protection.
2. Compatibility of the Chain Guide with Drive Stem
The compatibility of the chain guide with the drive stem matters the most. It is one of the most important factors to consider when buying a chain guide for your mountain bike. Before the existence of ISCG standards, installing chain guides involved the use of power tools and non-standard methods to install chain guides because the holes and tabs didn't previously align. So it required drilling holes into the frame to install a chain guide. The standardization by ISCG, which this article from The University of Queensland explains, has not only made the process of installation easier but also made finding the right chain guide a lot simpler.
3. The Durability of the Chain Guide
If you are going to make an investment, it is better to do it thoughtfully. We recommend prioritizing quality over quantity always, or at least whenever you can. A good quality chain guide like this is one that stands the test of time. To find a chain guide that is durable, it is a good idea to check the reviews of the product and see what others are saying about it. While the manufacturer’s claims about the durability of the chain guide can give you some insight into the product, checking out what the other customers are saying will give you a holistic picture and allow you to make a well-informed decision. From our research about chain guides, Uniteco's compact chain guide is a good example of a durable chain guide. The win scored at the EWS stage competition by Uniteco is a testimony to its quality.
4. Extra Holes in the Chain Guide to Mount a Bash Guard
Bash guards are usually used on trail bikes. Adding a bash guard to the bike can save both the chain and the chainring from potential damage caused by rocks and debris. If you are into racing or riding on rough trails and have a gravity or trail bike it is a good idea to have a bash guard mounted onto your chain guide for protection against impact damage.
Some chain guides have a bash guard component included like this one, while other chain guides already have extra holes on them that make the process of mounting a bash guard onto them very simple. However, not all chain guides have this feature; if you have already bought a chain guide without extra holes in it and you are thinking of mounting a bash guard, you will have to drill the holes yourself.
This SMCD-800-I chain component works very well when coupled with a bash guard and it may be a good combination in terms of durability because Shimano is a trusted brand in mountain biking.
5. Weight of the Chain Guide
Lightweight chain guides not only cause less strain on the chain but also ensure no extra weight is added to the bike. According to Cascade components, their chain guides only weigh around 93 grams which is an insignificant amount of weight. Their chain guide ensures smooth pedaling and protects the chain as they explain in their video tutorial.
Examples of MTB Chain Guides to Install, Their Features and Compatibility
| Example of Chain Guide from Amazon | Compatibility | Material | Weight | Extra Attachments |
| Cysky Chain Guide | Compatible with 1x drivetrain systems | Alloy with plastic top covers | 52 gms | Chain guides and spacers |
| Quintessentialz Chain Guide | 1x 2x and 3x multi-speed systems | Plastic | 34 gms | 2 Lower attachments |
Related articles:
How to tighten a mountain bike chain that's too long
Quick steps to clean a mountain bike chain properly
Mountain bike chain lube alternatives
Frequently Asked Questions About Chain Guides
Can You Use a Front Derailleur as a Chain Guide?
Bikes that have a front derailleur paired with chainrings usually do not require any chain guides because their chains automatically stay on the bike, according to this thread from Mtbr.com. Although the chain guides also help prevent debris and dirt from getting stuck in the chain.
Do Chain Guides Work With Oval Chainrings?
There are specific chain guides like this that work with oval chainrings as well as ones that are compatible with both round and oval chainrings like this one. Be sure to purchase a chain guide that fits your chain width and pitch as well as the shape of the chainring and you will have very few problems installing and using your chosen chain guide.