Easy Fixes For A Mountain Bike Chain Hitting the Frame
There's nothing more annoying and distracting than having your mountain bike chain hit your bike frame while riding. This is particularly common on rough terrains. Chain slap throws riders off their game, leading to a loss of focus. In addition, it's a recipe for scratching and damaging the paint, metal, or carbon of your bike frame. However, chain slap is not only avoidable but also easily fixable. In this article, we'll discuss exactly how to stop a mountain bike chain from hitting the bike’s frame.
To stop a mountain bike chain hitting the frame, shorten the chain, install a chainstay protector or guard, wrap the chainstay with a rubber strap, or increase the MTB chain tension.
What Causes Chain Slap on a Bicycle?
As threads on Quora discuss, chain slap is a common issue faced by bikers. According to this study by the International Sports Engineering Association, one of the major impacts that damage mountain bike frames is the contact of the chain on the chain stay. Recurring impacts can cause cracks, delaminating, and failure, especially for composite mountain bike frames.
A mountain bike chain will hit the bike frame if the chain is too long, if there's a dent in the frame, if the chain is stretched, and if there's a missing spacer between the cassette lockring and axle end cap, making the bike chain come too close to the chain stay and seat stay which makes the chain hit them on jumps and rocky trails.
Another common chain issue is having the chain slip off frequently. To learn how to fix that issue, our article on how to fix a mountain bike chain that keeps coming off will prove helpful.
1. The Chain is too long
A chain that's too long is usually caused by improper installation of your bike chain. When installing a bike chain, it is necessary to calculate the correct chain size as new chains are usually too long. Our detailed guide on mountain bike chain installation provides further information on this.
Failure to install the correct chain size can lead to the chain having too much slack. If that happens, the chain will keep hitting the chainstay and other components as you ride. It can also lead to a loose rear derailleur position with the chain getting caught or stuck on different chainrings when pedaling.

2. Bent Seat Stays
As you ride your bike with time, the seat stays bend gradually. A bike crash could also cause crooked seat stays. If the stay is severely bent, it will raise the dropout and result in the rear wheel sitting at an angle. In addition, the bend can worsen and develop into a crack in the stay. For steel frames, you can straighten out the stay by applying slight pressure to the bend. Never heat the tubes to straighten them as this will cause the frame to crack and split.

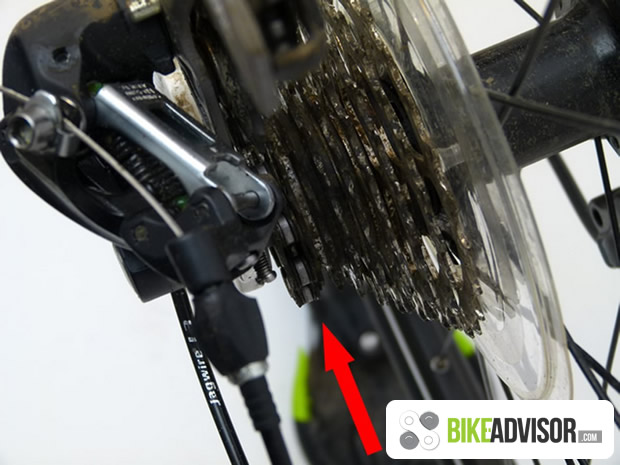
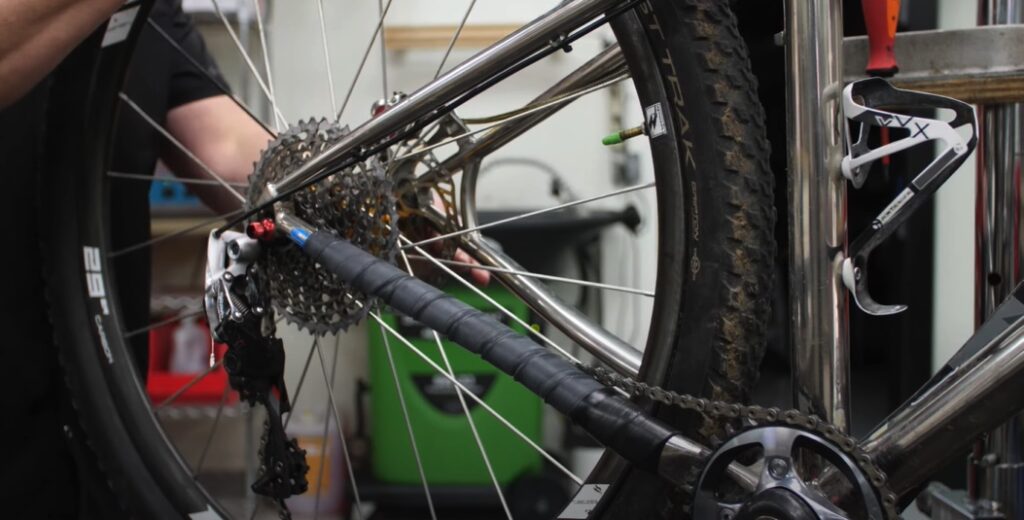
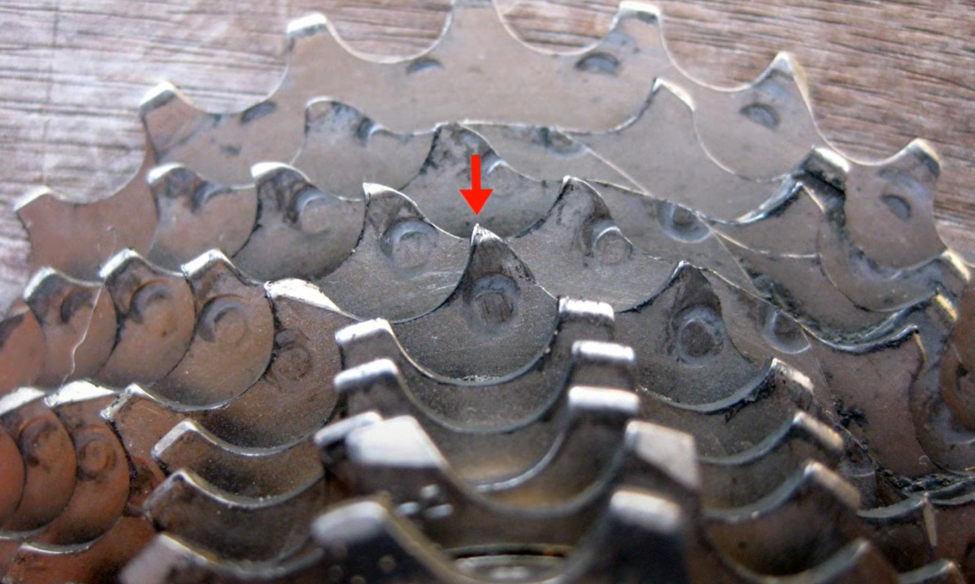
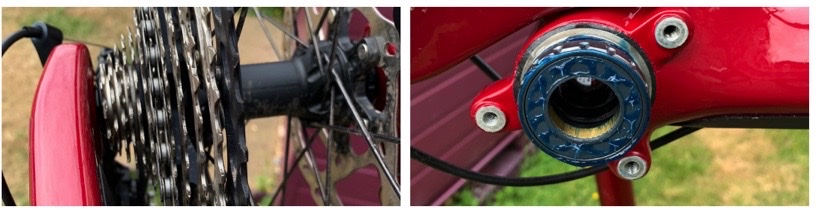
3. Missing Spacer Between the Cassette Lockring and the Axle End Cap
Another factor leading to chain slap is the absence of a suitable spacer like this between the cassette lockring and axle end cap. Setting up your cassette without using the spacer can put the dropout and axle too close together, leading to the chain rubbing against the dropout hanger. In addition, the cassette lockring will be flush with the axle cap, resulting in insufficient chain clearance. Riding in the smallest gear in this condition can be pretty uncomfortable. Cassettes usually come with spacers which can be used to prevent this.

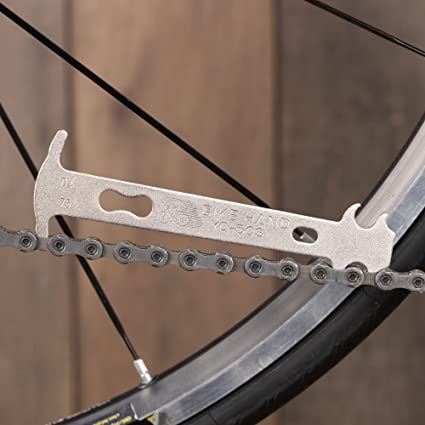
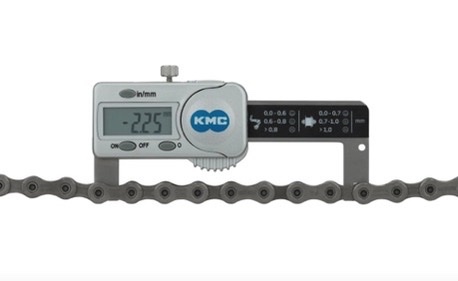
4. A Stretched Chain
A stretched chain usually occurs due to wear and tear and age and can be determined by using a chain wear indicator like this. As a result of the looseness, the chain will fail to fit on the cassette properly. This can cause the chain to keep hitting the chainstay as you ride, scratching, and damaging your frame. If your chain is worn out, our article on how to replace a chain on a mountain bike will help you to change it.
Methods to Stop Your Mountain Bike Chain from Hitting The Frame
There are methods for you to stop your mountain bike chain from hitting your bike's frame, that are inexpensive and easy to implement.
To fix a mountain bike chain hitting the bike’s frame, install a chainstay protector, wrap a tube around the frame, size the chain to the correct length, add a spacer after the axle end caps, install an MTB chin guide, install a new MTB chain, and tighten the MTB chain.
Here we explain each method of stopping your mountain bike chain from hitting the Bike’s Frame:
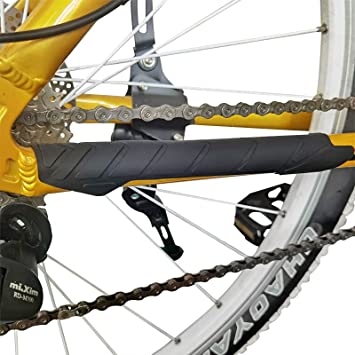
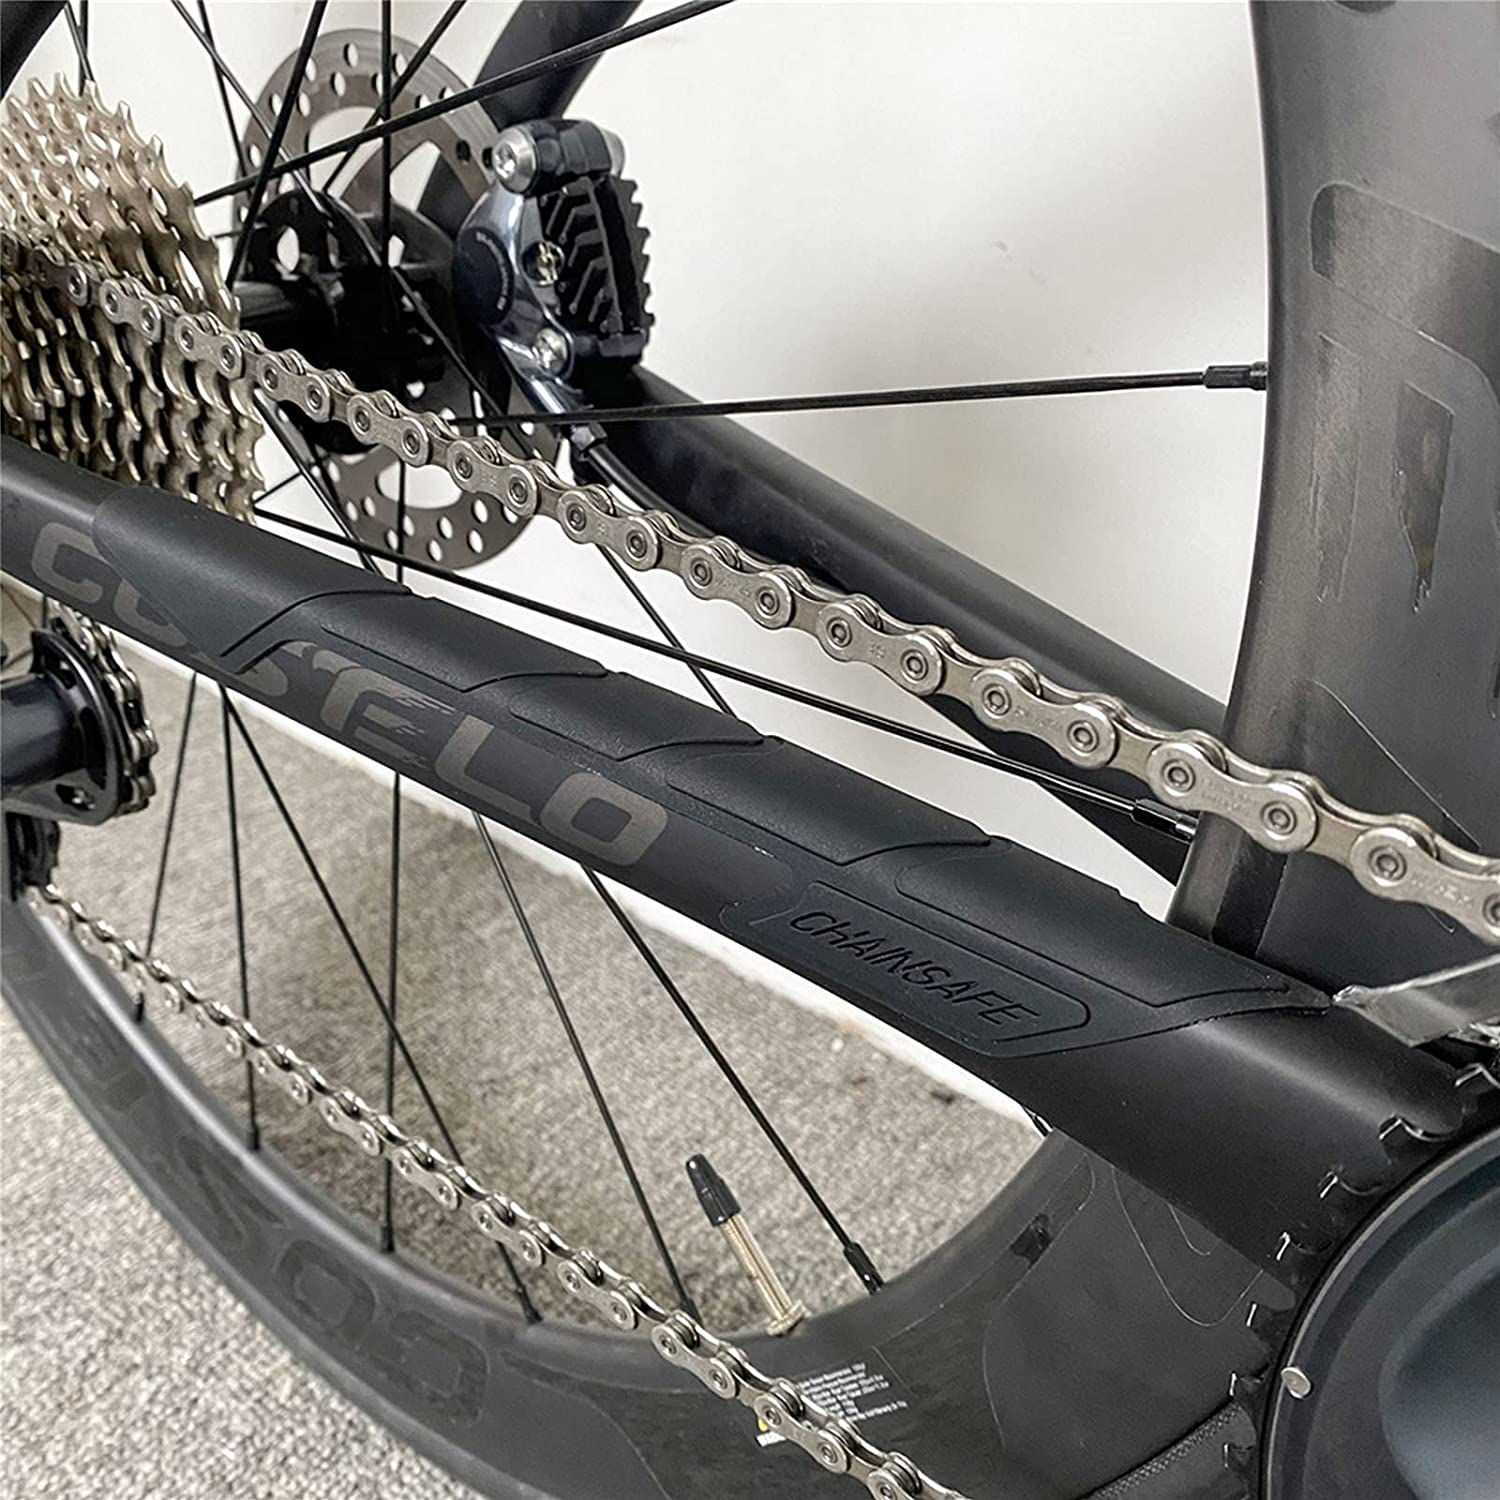
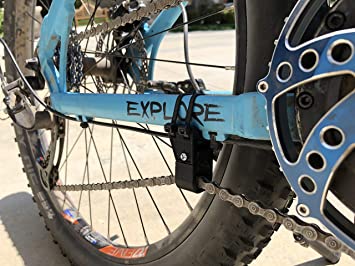
Method 1. Install a Chainstay Protector
One of the best methods to protect against chain slap is installing a chainstay protector like this. A chainstay protector is an item that covers the chainstay of your bike, serving as a barrier between the stay and chain. In addition to protecting the frame from constant wear, it also helps to dampen the noise from chain slaps. Fortunately, installing a chainstay protector is pretty straightforward.
Before installing a protector, you'll need to get a couple of tools together. You can read our mountain bike tool kit essentials article for tips on putting together a tool kit. In addition, our related article on mountain bike tool bag ideas will come in handy for tips on packing the necessary tools for your rides.
| Items Needed to Install Chainstay Protector | Why It Is Needed | Example From Amazon |
| Chain Splitter Tool | To disconnect and reconnect chains with a connection pin. | Universal Bike Chain Tool |
| Master Link Pliers | To disconnect and reconnect chains with a quick link. | Park Tool Master Link Pliers |
| Cleaning Kit | To clean the chainstay for installation. | Bike Cleaning Kit |
| Chainstay Protector | To protect the frame from the impact of a chain. | Bike Chainstay Protector |
Step 1. Remove the Bike Chain
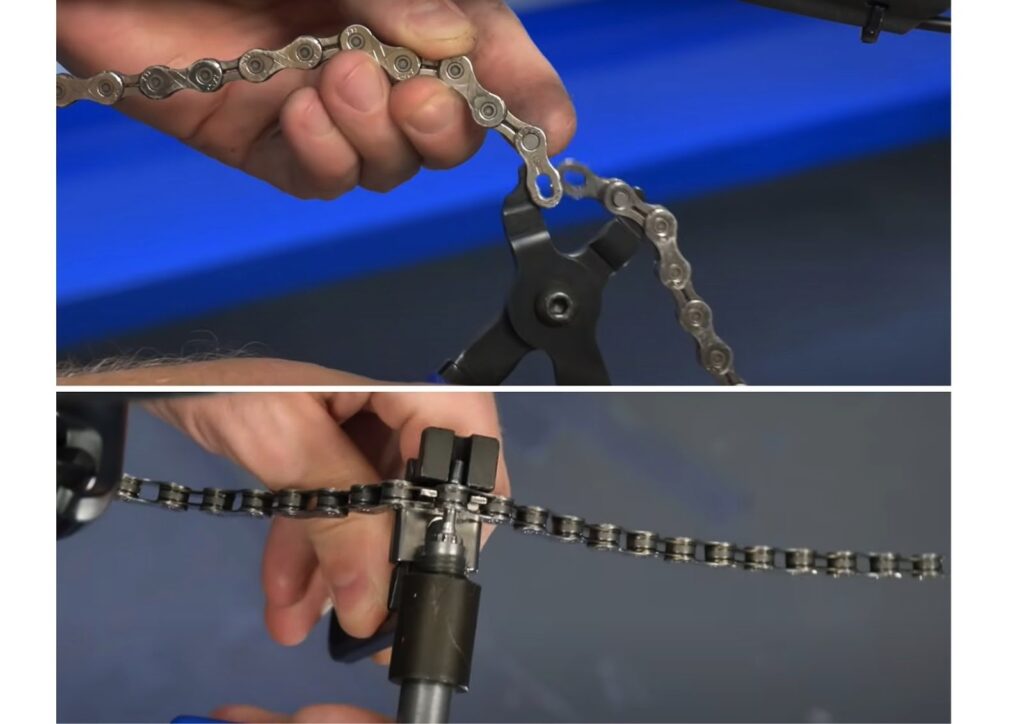
To make installing a chainstay protector easier, you must remove the bike chain first. Shift the rear derailleur to the lowest cog. Next, release chain tension by releasing the clutch mechanism or engaging the Cage Lock, depending on the type of derailleur your bike has. Check out this YouTube infomercial from SRAM for more information. This will help you access the quick link easier.
Next, locate the quick link or connection pin and split the chain using a master link plier like this or a chain tool like this, respectively.
Step 2. Remove the Rear Wheel
The next step to make installing the chainstay protector easier is to remove the rear wheel. To prevent the rear wheel from hitting the brake pads, open the side-pull brakes with the brake quick-release. Most bike wheels also have a quick release for easy removal and installation. Next, pull and extend the lever away from the frame to loosen the rear wheel. Then, lift your bike by the seat to help the wheel drop out. If it doesn't fall on its own, slightly hit or shake the frame to knock the wheel off.
If you realize the wheel actually needs to be replaced upon removal, check out our articles on how to change a mountain bike tire and how to choose mountain bike tires for maximum grip for some great advice.
Step 3. Clean the Chainstay
It is necessary to clean the chainstay and drivetrain before installing the protector. You can get a cleaning kit like this and use the detergent and a brush or cloth to clean the stay of any dirt and grime.
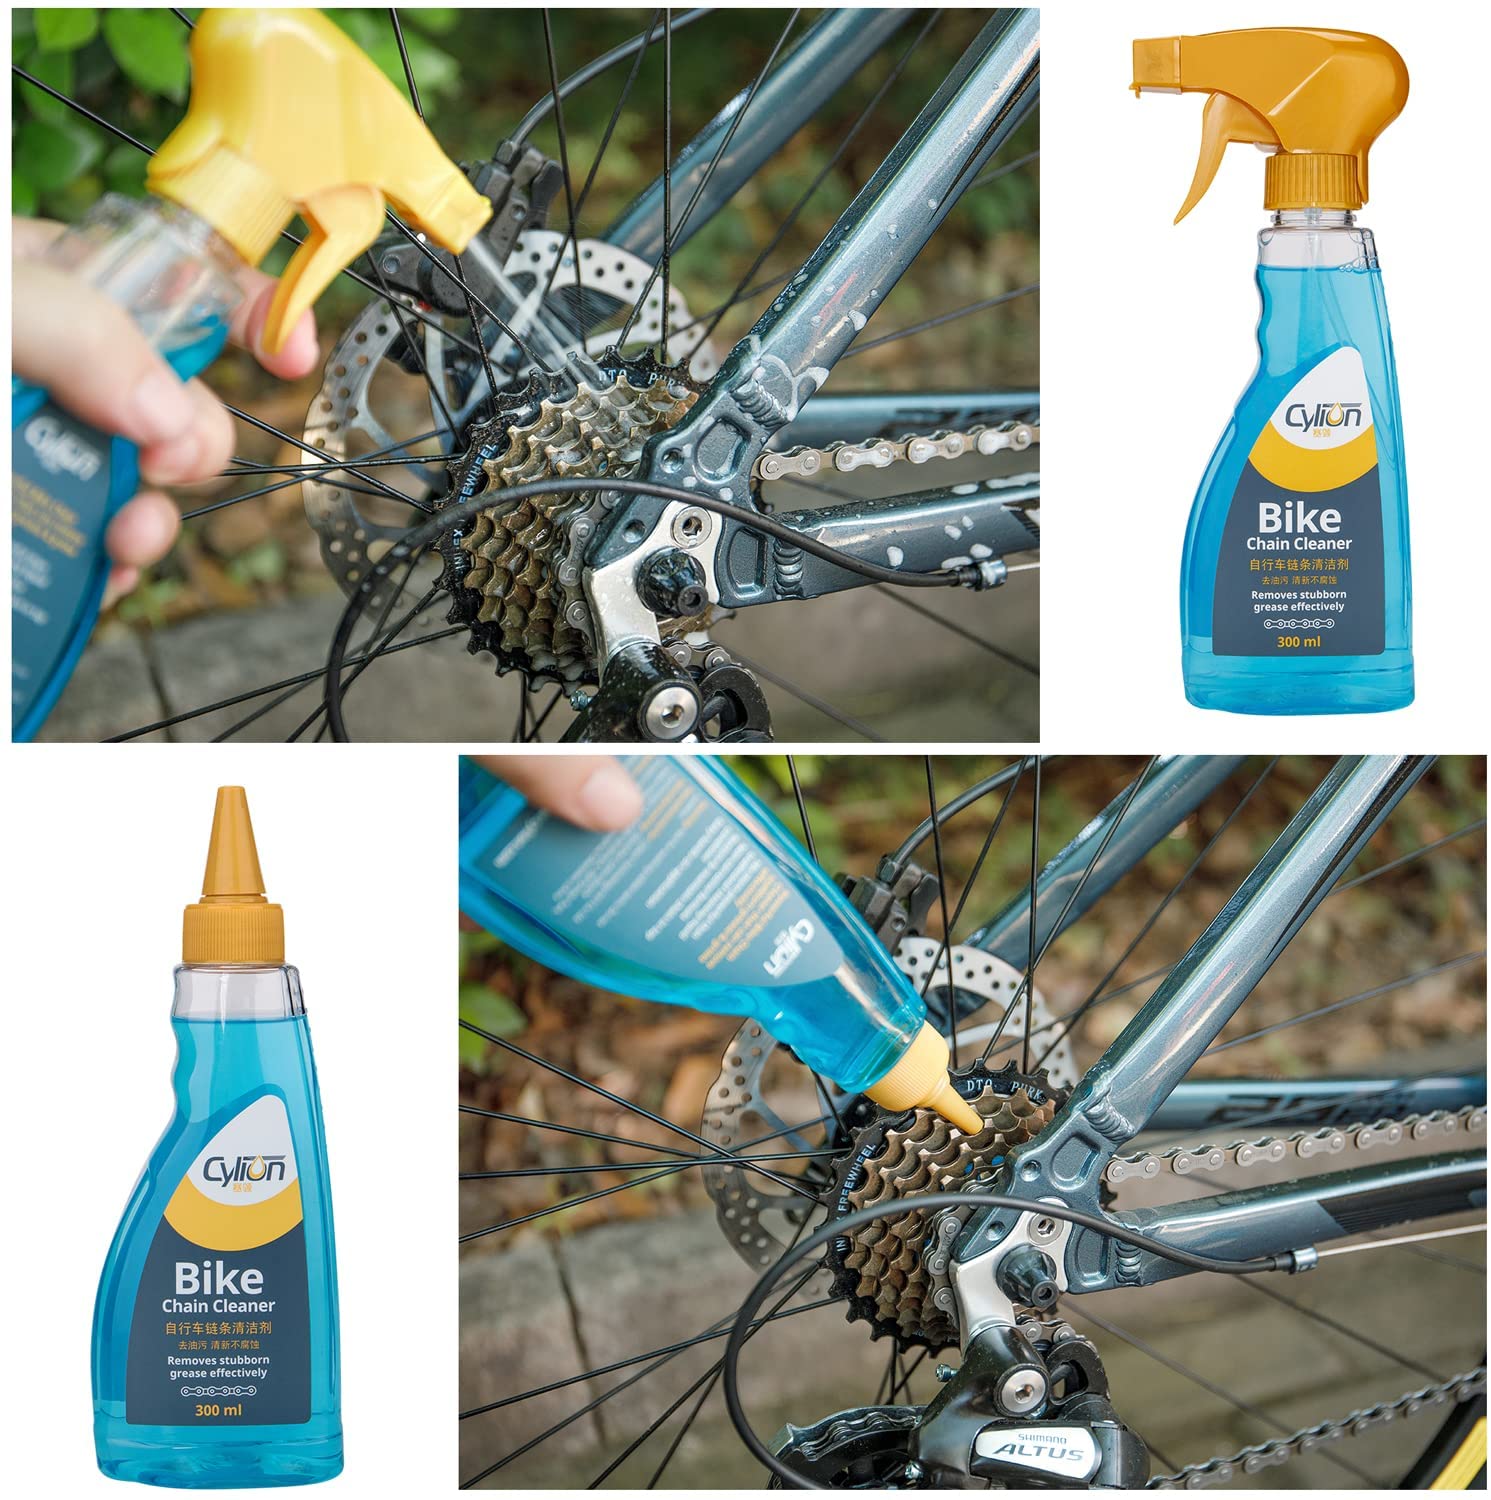
Similarly, be sure to learn some quick steps to clean a mountain bike chain properly for more tips and tricks.
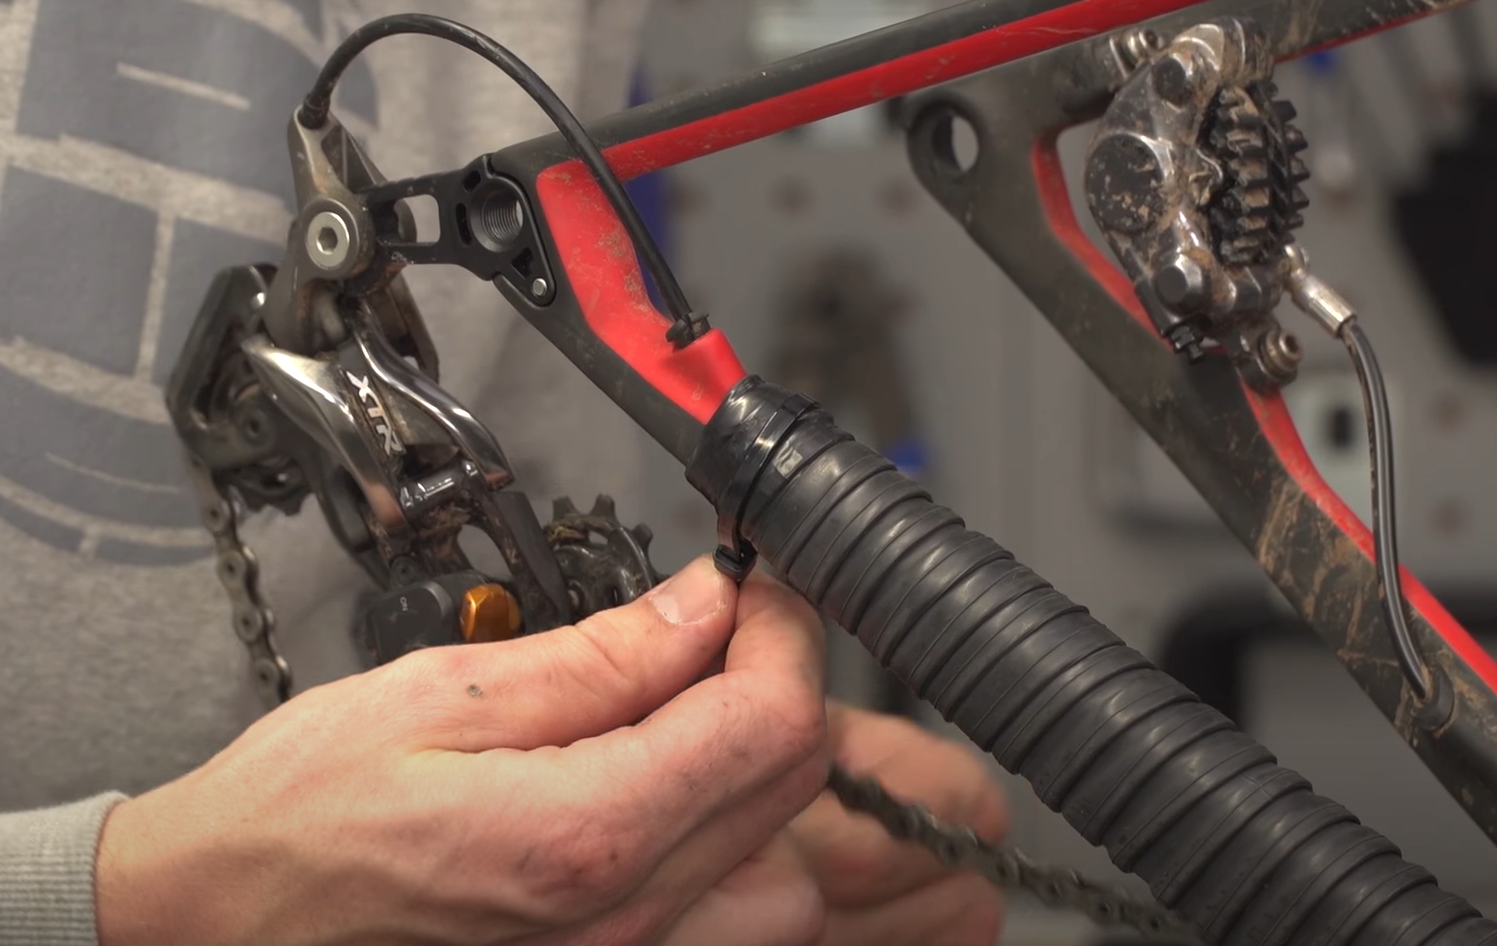
Step 4. Install the Chainstay Protector.
Now that the chain and wheel are off, it is time to install the chainstay protector. First, fit the rear derailleur cable housing in its channel in the protector. Next, install the top and bottom sections of the protector on the chainstay. Ensure the housing remains in the channel. Then, secure the protector in place by twisting it outward and around the chainstay. This video tutorial by Commercial World shows exactly how to do this step.
Step 5. Reinstall the Rear Wheel and Chain
Place the rear wheel back on the frame and lock it in with the quick-release mechanism. Close the brakes as well. Next, thread your chain through the derailleurs, cassette, and chainrings. Connect with a master link or connection pin as needed. Finally, release the derailleur cage or turn on the clutch mechanism.
Step 6. Test the Chain Tension
Now that everything is back in place, test to see that the installation is done properly. Check that the chain runs in the right direction and that the tension is accurate. You can also pedal the chain to see if it hits the chainstay or makes a noise if it does.
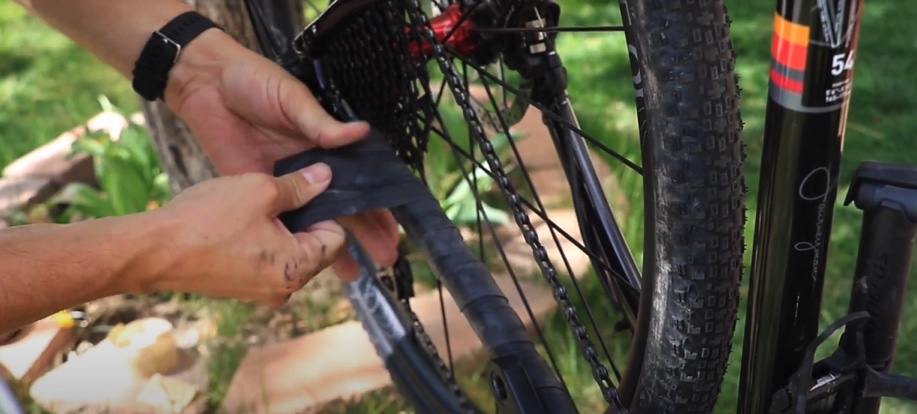
Method 2. Wrap a Tube Around the Frame
Another technique to deal with a mountain bike chain hitting the frame and the damage and annoying noise of chain slap is wrapping an inner tube like this around the frame. You can simply wrap an old used tube around the area of your bike where the chain hits, as this video tutorial by Mountain Bike Action Magazine explains, just like wrapping your bike's handlebar with grip tape. Check out our article on mountain bike grip taping techniques to learn about that process. Many manufacturers often put thin tape over chainstays to protect the frame. However, this is rarely sufficient. So, you might find it necessary to wrap a tube around it for protection.
Step 1. Prepare Your Bike
To make wrapping the tube more convenient, it is best to take off the chain and rear wheel. Shift to the smallest gear combination. Release the chain tension and disconnect the master link or connection pin in the chain. Take off the chain and engage the quick release lever to drop the wheel.
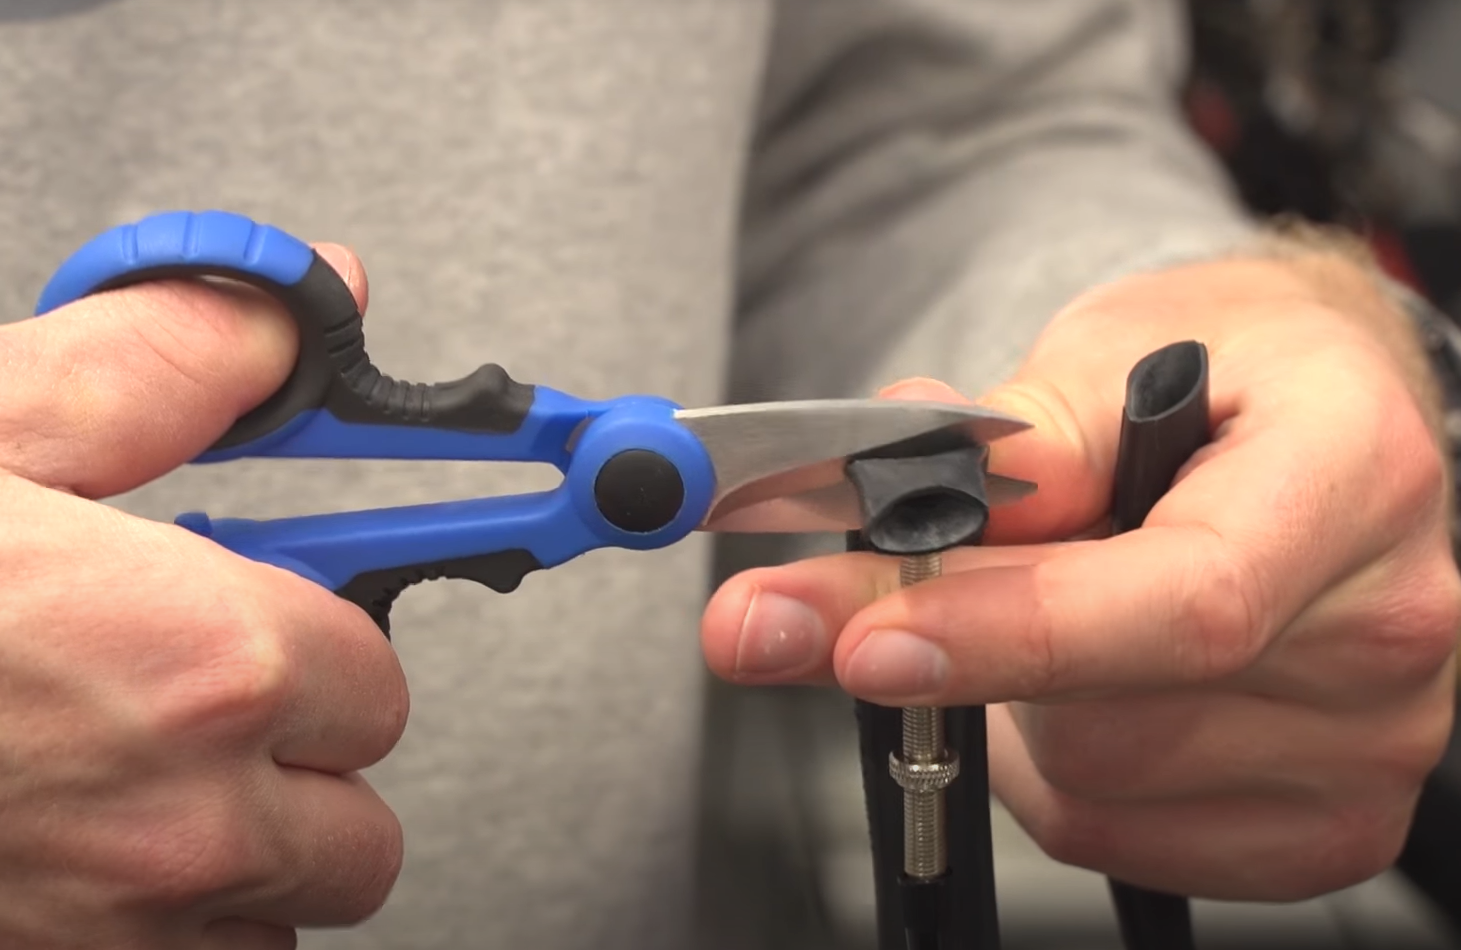
Step 2. Prepare Your Tube
Cut the tube near the stem to remove the valve stem. Next, cut the tube in half down the center, following any one of the seams. The tube might be too wide, so cut it lengthwise again till it is only about an inch wide.
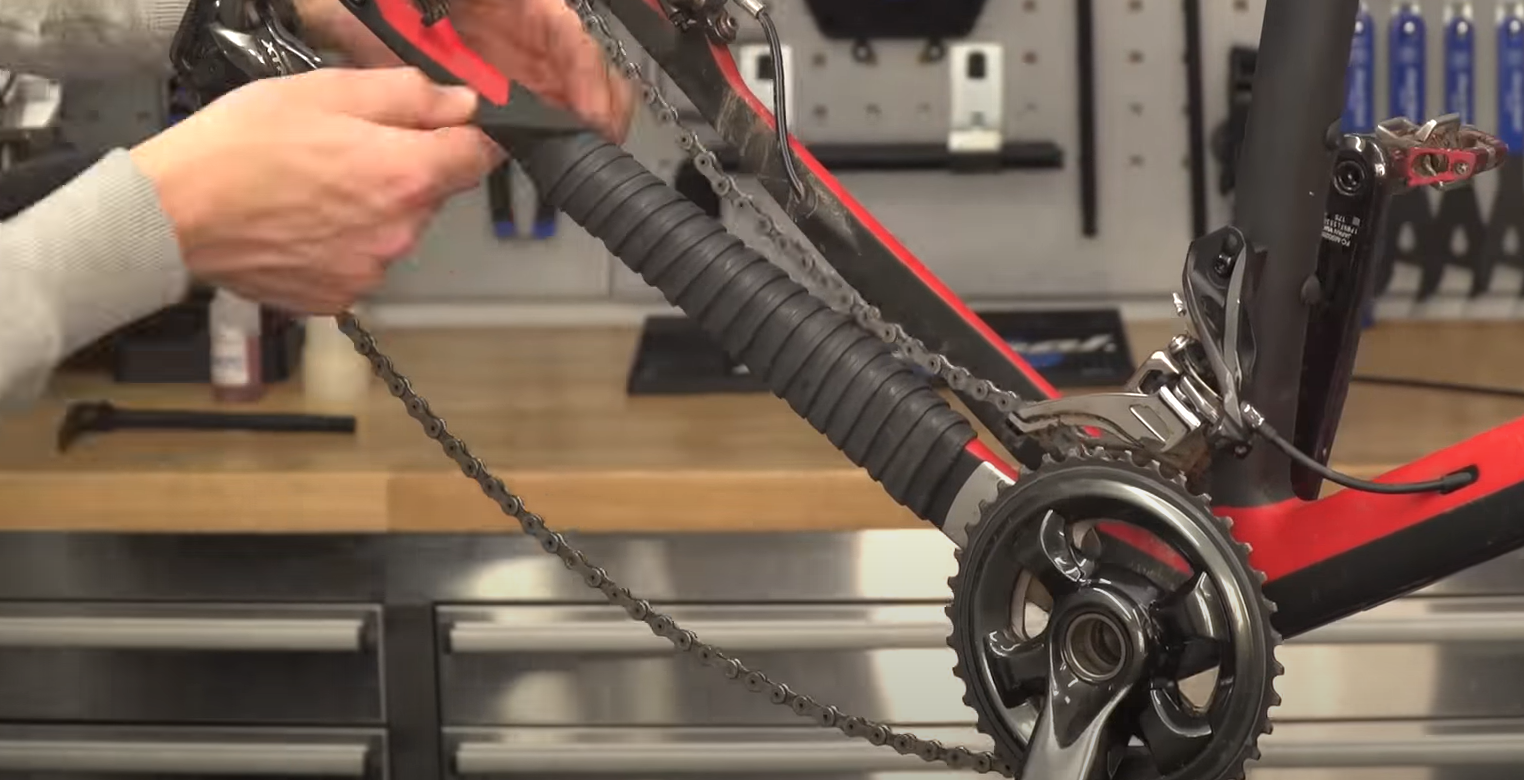
Step 3. Wrap the Tube Around the Frame
Begin by wrapping the tube close to the rear wheel axle. Make sure there is tension at the start of the tube by overlapping about half its width. This step is to prevent it from coming off prematurely. Ensure the tube is tight and flat as you wrap to the end of the stay. Wrap back again about halfway, finishing on the inside of the chainstay. In the end, you should have a coverage thickness of two tubes throughout the whole length. Repeat the process for any other bike part that suffers from chain slap.
Step 4. Cut the Tube and Tape it to the Frame
Hold on to the tube and cut it to length with scissors. Next, wrap some electrical tape like this around the end of the tube. Try to overlap the tape on the tube and secure it carefully to the bike’s frame. Then to make sure it is all connected securely use cable ties like this to finish at both ends over the electrical tape.
Step 5. Fit Everything Back into Place
Reinstall the rear wheel and thread the chain back through the normal position and direction. Test for chain tension and ensure that the tube doesn’t obstruct the chain.
Method 3. Size the Chain to the Correct Length
One of the leading causes of chain slap and a mountain bike chain hitting the frame is a chain that's too long. The excess length causes the chain to hit the frame as you ride. As a result, shortening the chain is an easy fix to stop this issue.
So how long should a mountain bike chain be? Getting the right length chain for your mountain bike chain is essential for a comfortable and trouble-free ride. New chains usually come in standard lengths ranging from 90 to 126 links and need to be shortened to the appropriate size. A long chain can lead to chain slap or chain drop, and a chain that's too short can damage your drivetrain. The chain should have sufficient length to route through the drivetrain with proper tension and shift smoothly through all the gears.
You can determine how long your bike chain should be by comparing it with the previous chain, using the chain length formula or the largest chainring and cog test. To get the right length by comparing the new chain against the old, simply lay them side by side and check for the same number of links.
You can also use a chain length formula to determine the accurate chain size which is Bike chain length = 2 x Chainstay length + Number of teeth on largest front chainring/4 + Number of largest rear cog teeth/4 + 1
Lastly, the largest chainring and cog test requires that you thread the chain over the largest front chainring and largest rear cog/sprocket. Pull the two ends of the bike chain together at the proper tension. Then, add 2 extra links together with the quick link to get the right length.
One result of sudden chain slap or chain drop is a bicycle-spoke injury which can be fatal, as this study released by The International Journal of the Care of the Injured discusses. Pedal straps help to protect your foot in these scenarios, as we explain in our article reviewing whether pedal straps are good. You can read through our step-by-step guide on how to install mountain bike pedal straps and toe clips to learn how to use them so that your rides are a little safer.
Here is a list of tools needed to size your bike chain properly.
| Items Needed to Size MTB Chain | Why It Is Needed | Example From Amazon |
| Item | Reasons | Example |
| Chain hook | To release the tension in the chain for easy location and splitting of the chain. | Joint Chain Hook Repair Tool |
| Chain Tool | To drive in and out the connection pin for disconnecting chains and removing excess links. | BikeHand Bike Chain Rivet Tool |
| Master Link Pliers | To engage and disengage quick links. | Pro Bike Master Link Chain Pliers |
| Bicycle Degreaser | To clean off grease and oil from the bike chain and drivetrain. | Runaway Bike Degreaser |
| Chain Lube | To lubricate the moving parts of the chain. | Muc Off C3 Ceramic Dry Chain Lube |
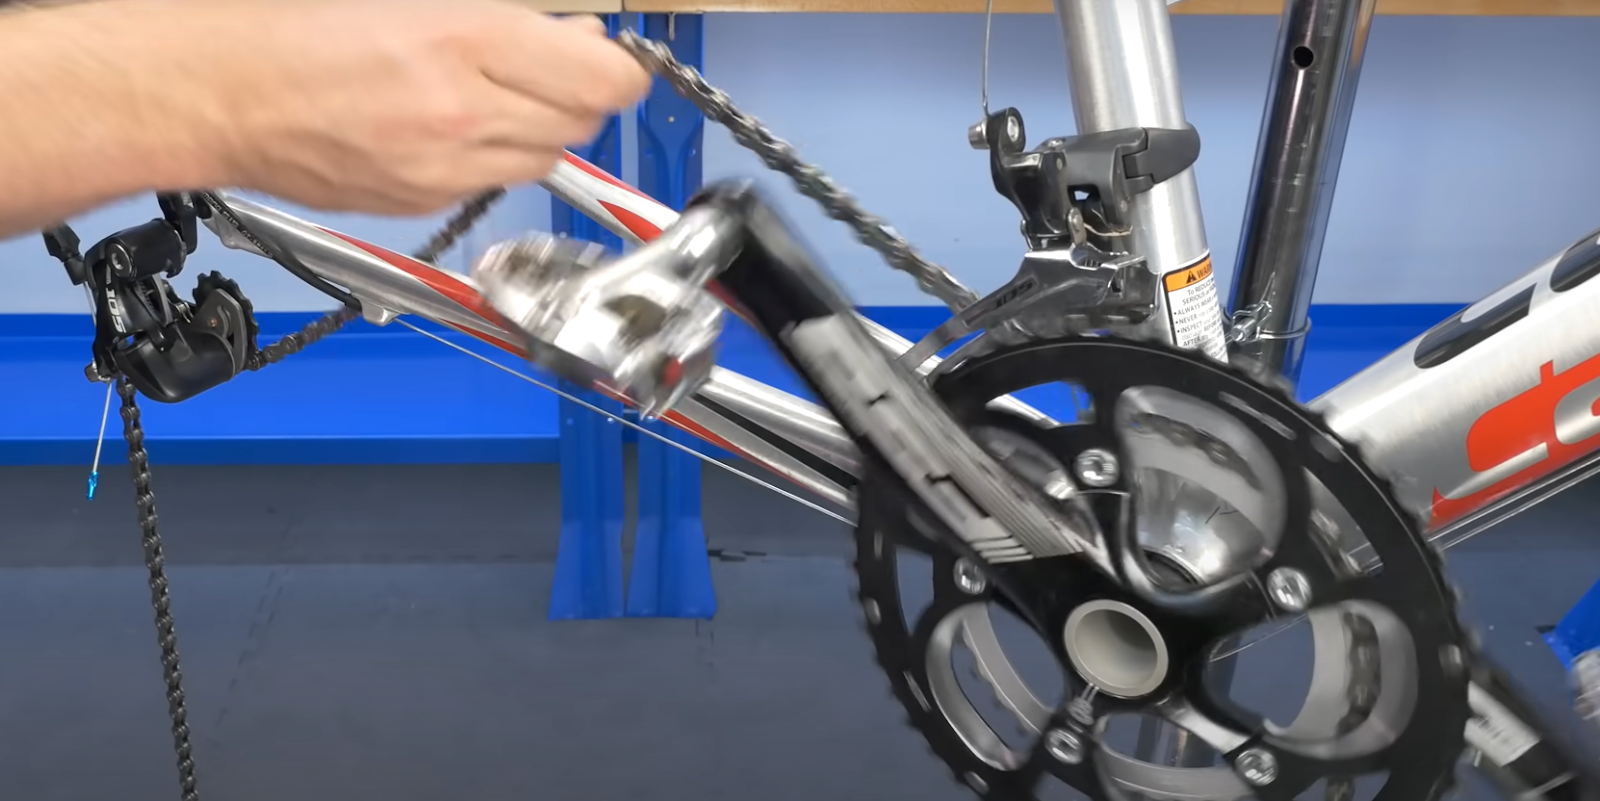
Step 1. Remove the Chain
If the chain is too long and hits the frame, remove it to size it correctly. First, shift the chain to the smallest chainring and smallest cog. Next, release the chain tension using a chain hook like this or the derailleur's cage lock or clutch mechanism. Then, disconnect the chain by splitting the quick link or connection pins. Lastly, unthread the chain off the bike carefully. You can take a picture to save the chain route for cross-checking later.
Step 2. Check for the Chain Length
Now that you have the chain, you can use any of the three methods discussed above to check the chain length. Here is a YouTube video tutorial by Park Tool that illustrates the process. You can check for the proper size by measuring the chain against a previous one. If the old chain is worn, you must account for the extra stretch. Alternatively, you can use the chain length formula or this chain length calculator app to calculate the correct length based on your chainstay length, largest front chainring, and largest rear cog. You can also manually check using the largest chainring and cog test. Mark the point where you need to remove the excess links from the chain.

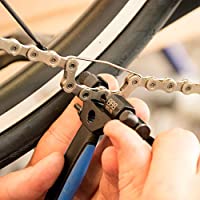
Step 3. Remove the Excess Links
When you have the correct length, you can now remove the excess links causing chain slaps using a chain tool like this. Turn the tool handle counterclockwise till it's backed out of the outer slot. Next, position the chain in the space at the point you marked. Turn the chain tool handle clockwise to tighten it till the pin connects with the chain link pin. Keep turning till you push out the connector pin to the other side. Ensure it is not pushed all the way so you can still reconnect the chain. Remove the extra links.

Step 4. Reinstall the Chain
Position the chain with the new length into its normal position. Check the picture you took to ensure you reinstall it correctly. Next, shift through all the gears to ensure that the chain is not too short. Then, check for the proper chain tension and test the other drivetrain components for optimal performance. Lastly, use this degreaser and this chain lube to clean and lubricate the chain's moving parts.
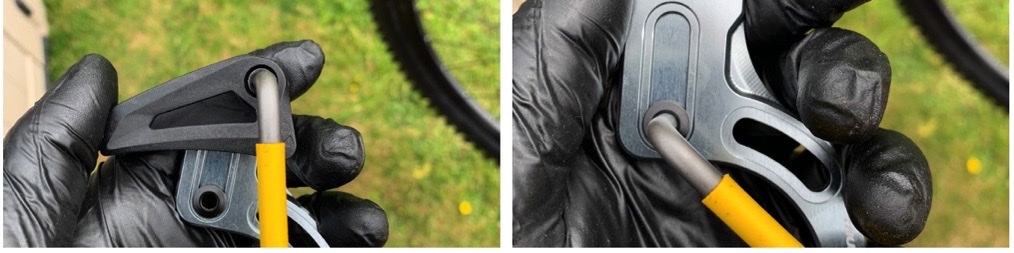
Method 4. Add a Spacer after the Axle End Caps
Adding a spacer like this prevents the cassette lockring from being in close contact with the axle end caps, thereby stopping the chain from hitting the frame. This will also enable you to ride and shift to all the gears from smallest to large conveniently and comfortably. Most cassettes come with spacers which can be installed for proper adjustments. Here are a few steps to help you add a spacer after the axle end caps:
Step 1. Remove the Wheel
The very first step is removing the rear wheel as you can't loosen or tighten the lockring with the wheel still attached. Next, shift to the smallest gear combination – the smallest cog and chainring. Next, turn on the clutch mechanism or put the derailleur in the cage lock position. Then, unthread the chain off the cassette. Lastly, pull the quick release lever on the wheel and remove it.
Step 2. Place the Wheel on a Workbench
Place the rear wheel you removed on a workbench to make working on it more convenient. You can also position it between your legs while sitting or standing to take advantage of your body weight when removing the lockring.
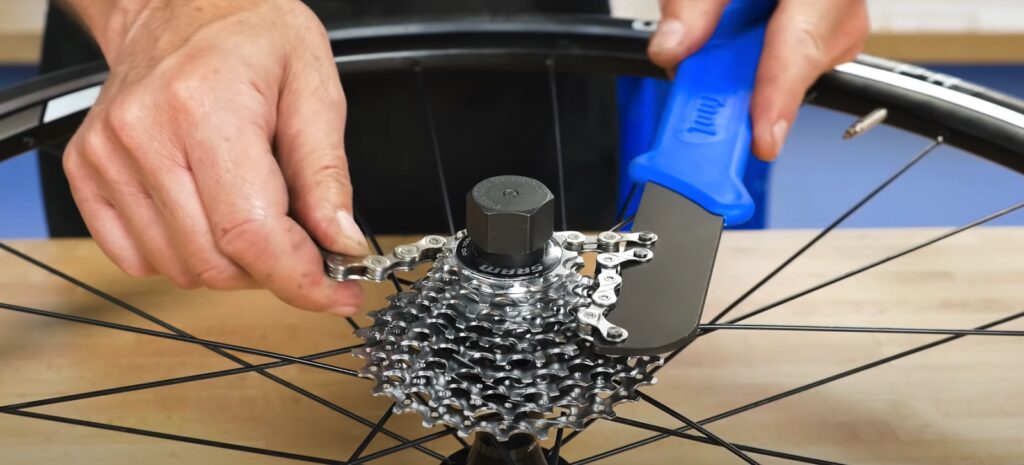
Step 3. Secure the Cassette
Use a chain whip like this to hold the cassette in place and prevent it from freewheeling while working on it. Engage the fixed section of the whip on a cog and wrap the free chain piece around the same cog. If using a plier-style chain whip like this, fit the whip around one of the smaller cogs to make it easier to squeeze.
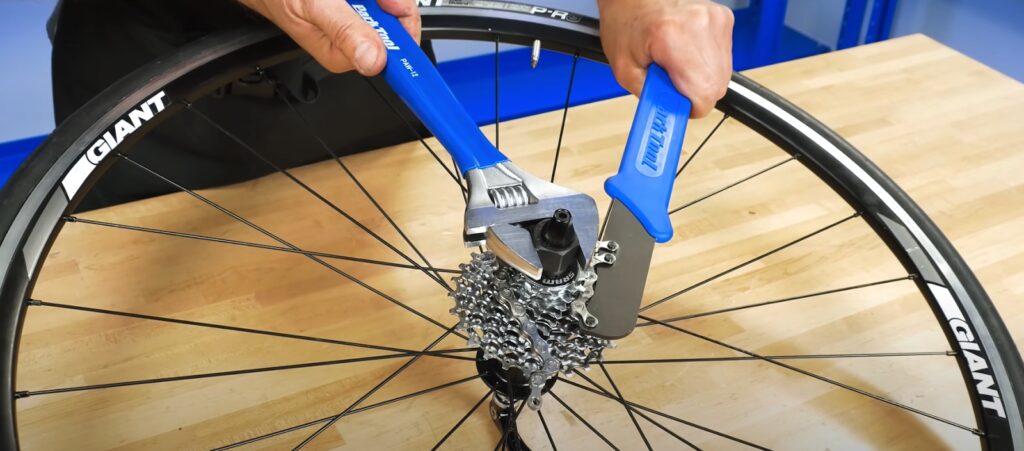
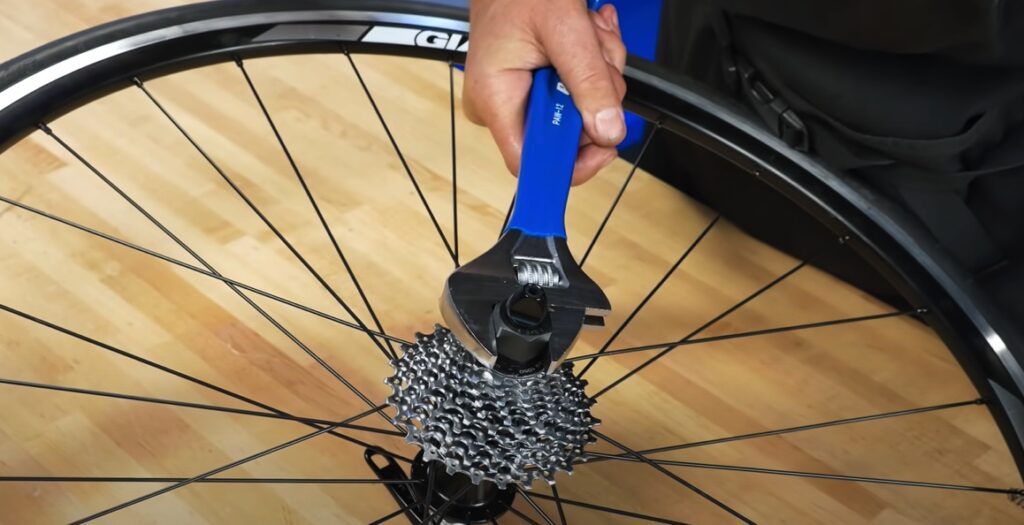
Step 4. Remove the Lockring and Cassette
Insert a chain lockring removal tool like this. Then, use a large adjustable wrench like this to turn the tool counterclockwise and remove the lockring. Once the lockring is out, remove the cassette stack. Check out this YouTube video tutorial by Park Tool for easy cassette removal and installation instructions.
Step 5. Check for Wear on the Cassette
With the cassette out, you need to check the cassette for signs of extreme wear or any problems that could have caused the chain slap. Then, if required, get a new cassette like this.
Step 6. Add a Spacer
Inspect the cassette. It might help to run a zip tie through it to keep the same orientation. Next, add a spacer in the position after the axle end caps or any other position as needed.

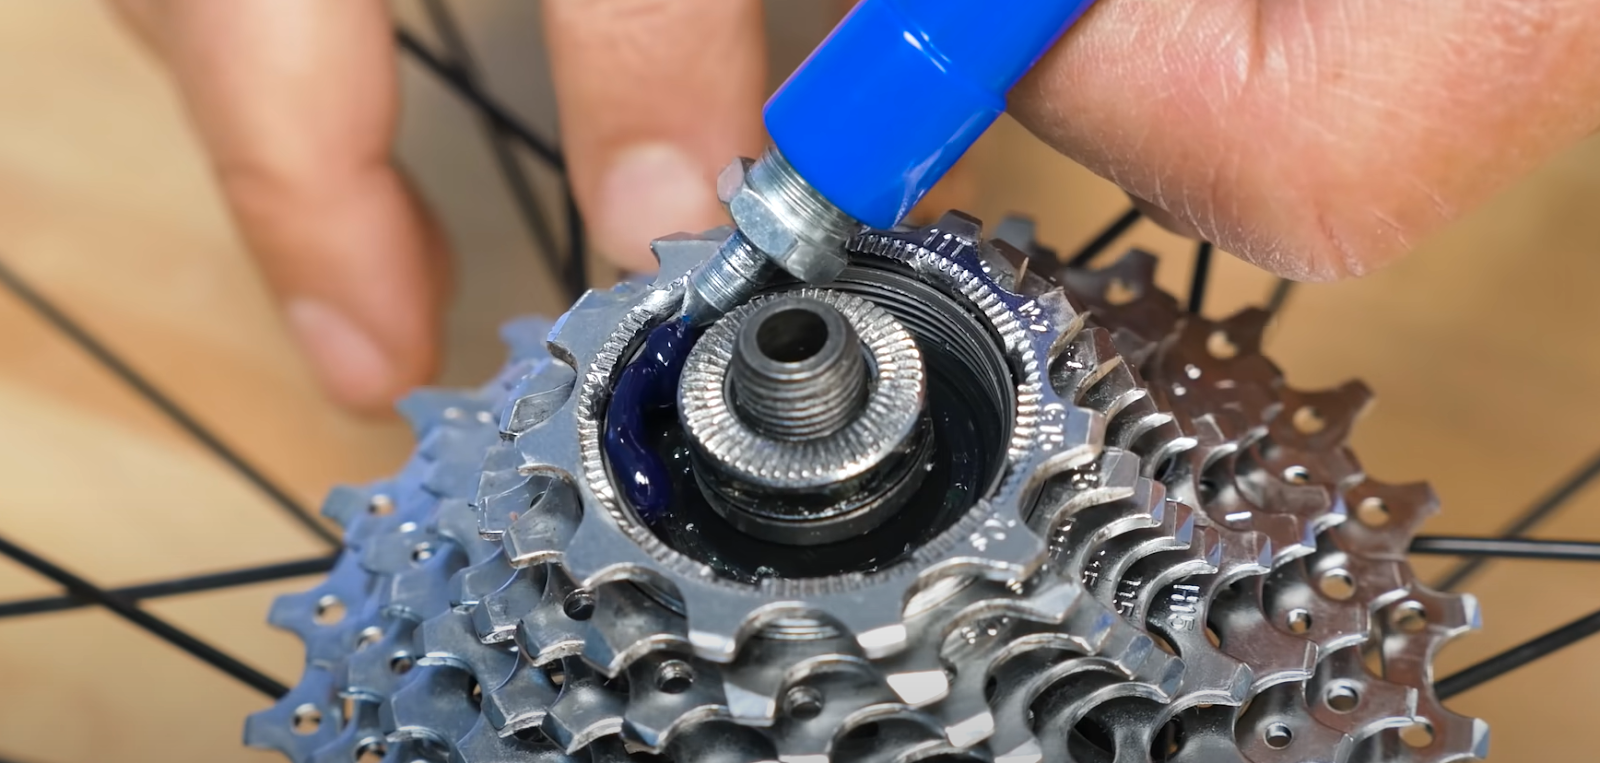
Step 7. Grease the Cassette
Use a lubricant like this or an anti-seize compound like this to grease the threads inside the freehub body. Also, grease the lockring ring and insert it back onto the cassette.
Step 8. Reinstall the Cassette
Place the cassette onto the freehubs. Insert the lockring tool and use a torque wrench like this to turn the lockring clockwise. This has the effect of tightening it. A torque of about 40Nm is usually recommended.
Step 9. Fit Everything Back into Place
Reinstall the rear wheel using the quick-release lever. Then thread the chain through the smallest cog in the cassette. Test and cross-check that the bike works smoothly. Also, check that the chain slap is gone.
Method 5. Install an MTB Chain Guide
A chain guide like this is a specialized bike accessory that helps to secure the chain in line with the chainring while pedaling. The guide helps prevent the chain from falling off and can help deal with chain slaps as well. In addition, they also keep obstacles on the trail like rocks or logs from damaging the chainrings. Another accessory that helps to protect from obstacles is a bike fender. Check out our detailed guides on how to install a mountain bike fender and how to install mudguards on a mountain bike for more information.
| Mountain Bike Chain Guide | Material | Drivetrain Compatibility | Example From Amazon |
| XTR Front Chain Guide | Aluminum; Resin material | 12-speed chains; 10-45t, 10-51t chainring | Shimano XTR CD800 Front Chain Device |
| D-type Chain Guide | CNC Aluminum | Single speed chains; 26t – 36t chainring; D-type derailleur | Funn Zippa Lite D-type Chain Guide |
| SL MTB Chain Guide | Alloy; Co-moulded HD2; TPU material | 36-40t, 32-36t chainring | MRP G5 SL Alloy MTB Chain Guide |
| E-type Chain Guide | CNC Aluminum; Composite | Single speed chains; 26t-36t; E-type derailleur | Funn Zippa Lite E-Type Chain Guide |
Step 1. Remove the Crankset from the Bike
Shift gears so that the chain lies in the middle of the cassette. Then, remove the crankset from your bike. You will need an Allen key and a crank extractor. Different crankset brands have different methods of removal so ensure you follow the manufacturer's instructions. Take care not to lose the washers on the spindle.
Step 2. Prepare the Chain Guide
Use a 4mm hex key like this to remove the top guide from the back plate of the chain guide. Then, loosen the height adjustment bolt and check that the height adjuster moves freely.
Step 3. Install the Back Plate
Attach the back plate to the bike frame using the bolts and washers. Rotate the back plate until it is vertically aligned and tighten the bolts with the hex key.
Step 4. Reinstall the Top Guide
Refit the drive-side crank arm to its correct position. Then, reinstall the top guide onto the back plate using the hex key. Next, thread the chain onto the chainring. Lift the height adjuster to about 3mm above the chain. Then, check that the chain is in the center of the guide. Tighten the height adjustment bolt if it is properly aligned.

Step 5. Test the Installation
Carefully cycle through the gears and check for any sign of the chain rubbing. Add or remove spacers to finetune the chain line if needed.
Step 6. Reinstall the Crankset
Now that the chain guide is fully set up, reinstall the crankset according to the manufacturer's instructions.
For more information on installing chain guides, check out this Nukeproof chain guide instruction manual.
Method 6. Install a New MTB chain
One of the causes of chain slap is an old and worn-out chain. Wear and tear lead to stretching on the chain, causing it to become slack and hit the bike frame. Therefore, installing a completely new chain like this might be necessary.
Step 1. Check for Chain Wear
You can use a manual chain wear checker like this to confirm that the chain is worn-out. You can also make use of a digital chain wear indicator like this. A rating of between 0.5 and 0.75 extra length indicates that it's time to replace the chain.
Step 2. Remove the Old Chain
Release the tension in the chain and then check if the chain uses a quick link or connection pin system. For quick links, use a master link plier to disengage the link and remove the chain from the bike. For connection pins, use a chain splitter tool to push the pin out and split the chain. Then unthread the chain from the drivetrain components and remove it from the bike.
Step 3. Check for the Proper Size of Your New Chain
As discussed, you can use the old chain to get the proper length for your chain. You can also use the chain length formula to calculate the chain length. Lastly, you can use the largest chainring and cog test to determine the right chain size.
Step 4. Install the New Chain
Remove any excess links from your new chain and run the chain over the smallest cog and around the upper jockey wheel. Next, run the chain through the derailleur cage and around the lower jockey wheel. Then, assemble the quick link or connection pin to connect the chain.

Step 5. Test the Installation
Cycle through all the gears to ensure the chain runs smoothly. Test the other drivetrain components as well. Finally, clean and lubricate the chain to finish the installation.
Method 7. Tighten the Loose Bike Chain
A loose bike chain will keep hitting and damaging the chainstay if not tightened quickly. The process is relatively easy and is the best option if your chain is still relatively new and doesn’t show any signs of stretching or damage.
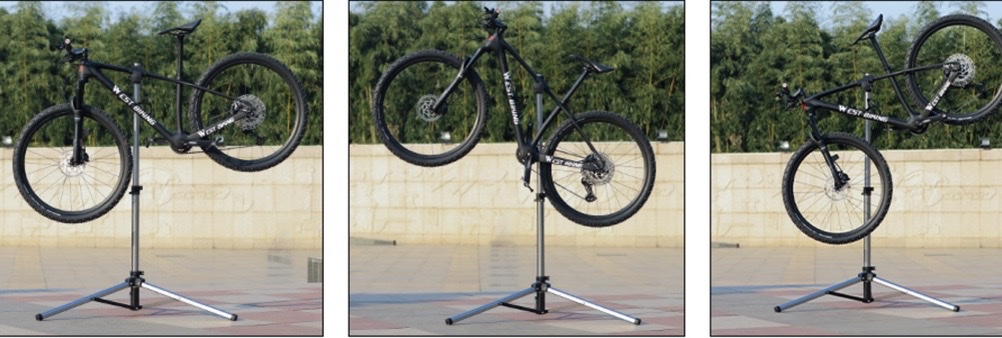
Step 1. Position the Bike
Place the bike on a bike stand like this or lay it on a soft surface to make the process easier. Then, disconnect the brakes to access the rear wheel.
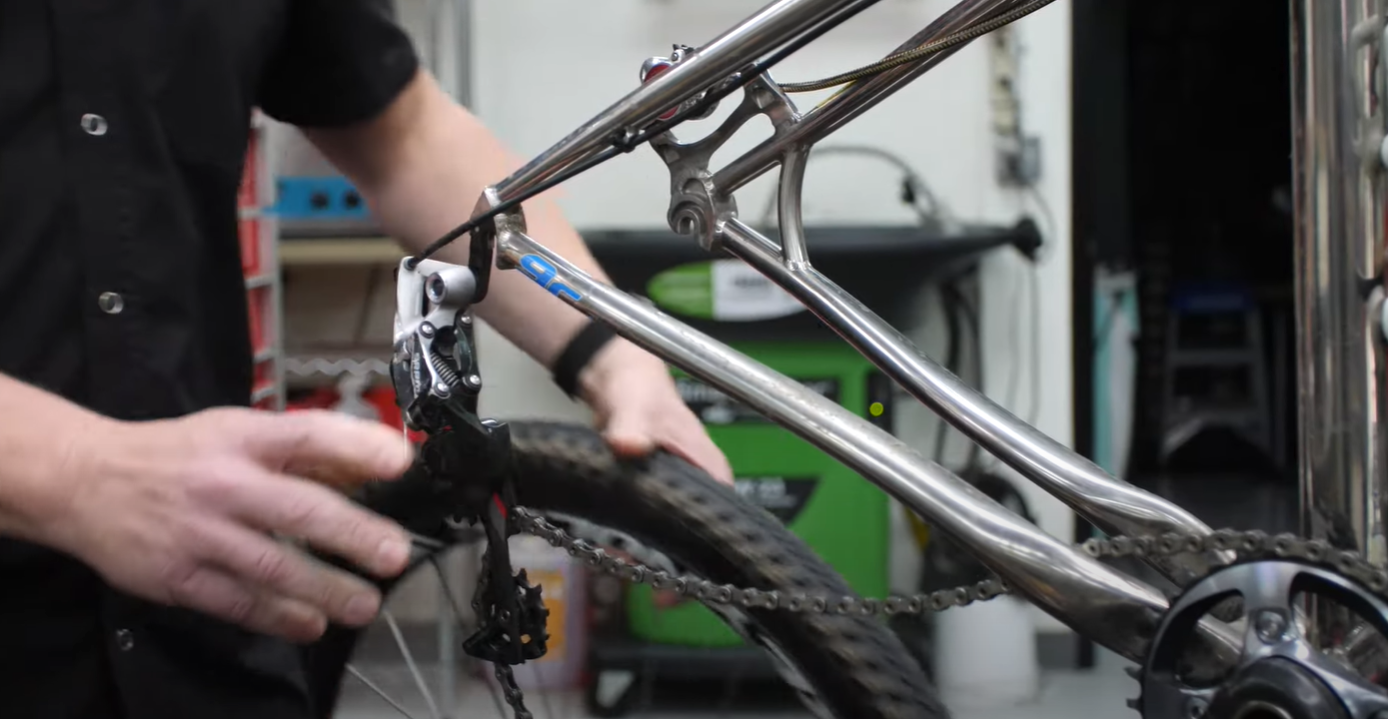
Step 2. Find the B-screw
The B-screw is usually located behind the rear derailleur and helps control the body angle of the derailleur.
Step 3. Increase Chain Tension
Use an Allen key like this to tighten the B-screw clockwise. This helps to increase the distance between the pulley and the cogs and moves the derailleur down and back. Pull back the wheel as you check the chain tension till you get the desired level.

Step 4. Test the Chain Tension
Cycle the chain in both directions to test the tension. The chain must be able to move freely for 0.5 inches in either direction.
Step 5. Put Everything Back in Place
Tighten the derailleur screw using the hex key and ensure the distance from the largest cog is about 6mm. Fit the rear tire back and reconnect the brakes. Cross-check the installation by spinning the tire to ensure it does not rub against the chain or bike frame.
How to Dampen the Sound of a Bicycle Chain Hitting the Frame
A quiet bike is a fast bike. From pros to amateurs, there's nothing riders hate more than a noisy bike. Riding while the chain hits the frame, making an irritating noise is a common frustrating experience.
To dampen the sound of a bicycle chain hitting the bike frame, tape the frame twice with electrical tape, mount a chain slap silencer on the chainstay, or double wrap the chainstay and seat stay with an old inner tube and tightly zip tie it to the frame.
Fortunately, there are several methods you can implement to keep your bike quiet and efficient while minimizing wear and extending your chain’s useful lifespan. This YouTube video tutorial by Zach Likes Bikes illustrates some of these methods.
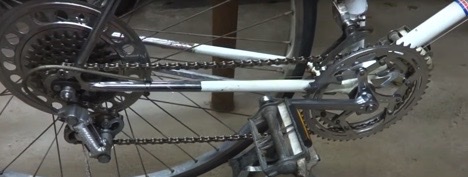
1. Wrap the MTB Frame Twice with an Electrical Tape
One of the solutions to help dampen the chain slap sound is to wrap the frame with electrical tape like this. Start at the crankset as far back as you can and cover the entire length of the chain stay and anywhere else the chain hits. It is usually best to overlap the first wrap to secure the taping. The tape should be replaced every two years or so, or if it starts tearing up.
Although this method will not stop the chain from slapping around, it will quiet the noise and prevent scratches and damage to the bike frame.
2. Mount a Chainstay Silencer on the Chainstay
Installing a reliable chainstay silencer helps to prevent chain slap and overstretching sideways, ensuring your bike runs efficiently. The silencer wraps around and contains the chain on your bike. This restricts the chain as it moves while riding, resulting in more peace and quiet. At the same time, the silencer does not over-limit the chain or make it difficult to move or shift through gears. Check out this installation guide by the Silencer manufacturer, StfuBike, for more details.
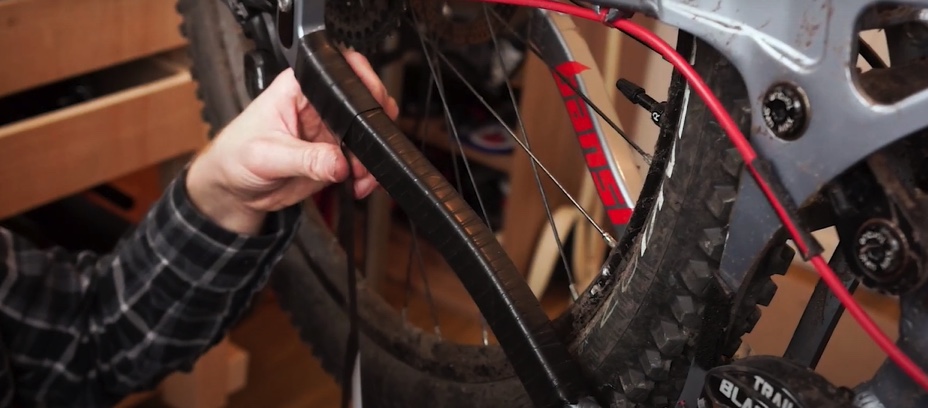
3. Wrap the Chainstay and Seat Stay with an Innertube
This is a popular method for dampening sound from chain-slap. A rubber inner tube is an excellent DIY chain protector option as it is cheap, lightweight, thin, and moldable to the frame. Inner tubes like this usually provide support and suspension for the bike tires. You can make use of an old one for this process.
Wrapping the chainstay and seat stay with the inner tube helps to muffle any sound from chain slap while riding on rough terrains. It also preserves your bike frame. To install the innertube, cut off the valve stem and wrap it around the frame, overlapping to secure the tube. Finish by wrapping electrical tape and fitting cable ties at the ends to ensure a secure hold.