
Adjusting Your Mountain Bike Handlebar Height: A Step-By-Step Guide With Tips
The mountain bike handlebar height plays a crucial role in the overall riding experience. A correctly adjusted handlebar height can greatly impact your riding performance, your ability to handle various terrains, and even affect your physical well-being. Thus, it is essential to understand how to adjust the mountain bike handlebar height to fit your specific needs.
Mountain bike handlebar height adjustment is beneficial for comfort and optimal riding. To adjust the handlebars on a bike with a threadless stem, uninstall the stem, add spacers into the steerer to adjust the height accordingly, and reinstall the stem. On a quill stem, uninstall the stem, adjust the height and reinstall. Adjust the handlebar height by flipping the stem, uninstalling it, turning it upside down, and reinstalling it. To install a height extender, uninstall the stem, insert the extender, and reinstall the stem onto the extender.
In this article, we will be looking at why you should consider adjusting your mountain bike handlebar height, the tools you need to adjust the height based on the type of stem, and how to adjust the height of the handlebar of a bike with a threadless stem and a quill stem. We also cover how to adjust the height of a bar by flipping it and how to fix a handlebar height extension. Finally, we discuss the height of the handlebar relative to the seat and its importance.
You may also be interested in learning how to choose the right mountain bike handlebar clamp diameter. Be sure to read our related article to find out more.
Why Should You Adjust Your Mountain Bike Handlebar Height?
The handlebar is adjustable for a reason. The manufacturers of mountain bikes are aware of diverse riding conditions, terrain requirements, and different body anatomies. This is why the handlebars of bikes do not come with a standard height but rather with an allowance for each rider to adjust to suit themselves.
The mountain bike handlebar height is an important aspect of the bike setup and adjusting it correctly can improve comfort, control, confidence, and performance while riding. Proper adjustment also helps ensure a safer ride.
Our tips and tricks to choose the right handlebar upgrades for your mountain bike explain the benefits of having the correct handlebar height.
You should adjust the handlebar height of your mountain bike for the following reasons:
Adjusting The Handlebar Height of a Mountain Bike Can Help Reduce Discomfort While Riding
The health benefits of riding a mountain bike are undisputed. However, things can go wrong and you can quickly develop a few medical conditions especially if you ride with your body bent in an uncomfortable position for a long time. This is often the case when your handlebar is not properly adjusted.
The most important factor when it comes to adjusting your handlebar is comfort. You want to be able to ride your bike for as long as possible in the most comfortable position. Back pains, among others, are some of the medical conditions listed in this article from the University of Utah, that you might end up with if the height of your bar is not appropriately fixed.
Our article about how to correctly fit a mountain bike seat explains how the seat angle, height, and type of saddle can affect riding comfort when taking the handlebar height into account.
Adjusting The Handlebar Height of a Mountain Bike Can Help Improve Control and Handling
Your expertise as a rider is showcased by how well you can control your handlebar. The last thing you want is to struggle with the bar, which will affect your balance irrespective of the terrain. One of the key things determining the ease with which you will control your bike’s bar is the bar’s height.
To have optimum control is to be able to ride your bike with enough allowance for your elbows so you can control the handlebar comfortably. At the same time, you want to be able to control the bike without leaning in too much or extending your arm because your bar height is too low. Also, you don’t want to lean back because the bar height is too high.
Adjusting The Handlebar Height of a Mountain Bike Can Help Increase Confidence and Performance
A slight change of 10mm in the height of your handlebar can affect your overall performance either positively or negatively. The effect of a change of between 20mm and 40mm can significantly impact your comfort and safety when riding. Often riders stick to a specific height, which is usually equal to the height of the seat.
However, unless you experiment with different heights, you will never know your peak performance. There is no standard height as two riders of equal height can have different measurements for limbs. Therefore, you should experiment with your handlebar at different heights until you find what suits you. Our mountain bike reach calculator guide explains how to measure each tube on your bike’s frame to determine what will be the best fit for your body type.
Related articles:
Is mountain biking good for beginners?
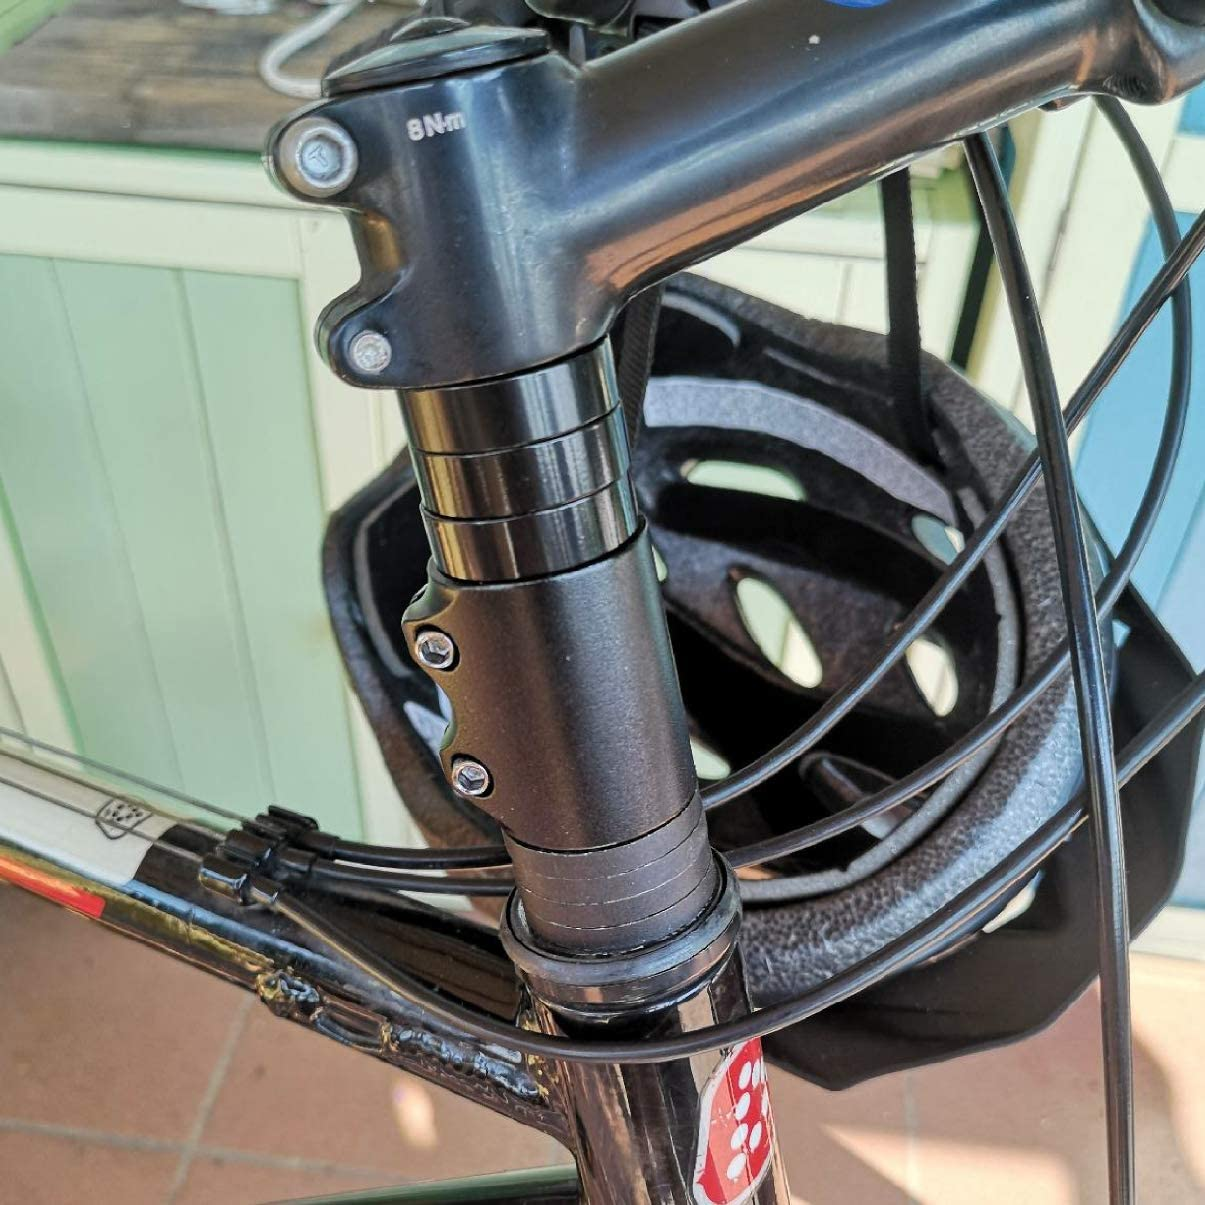
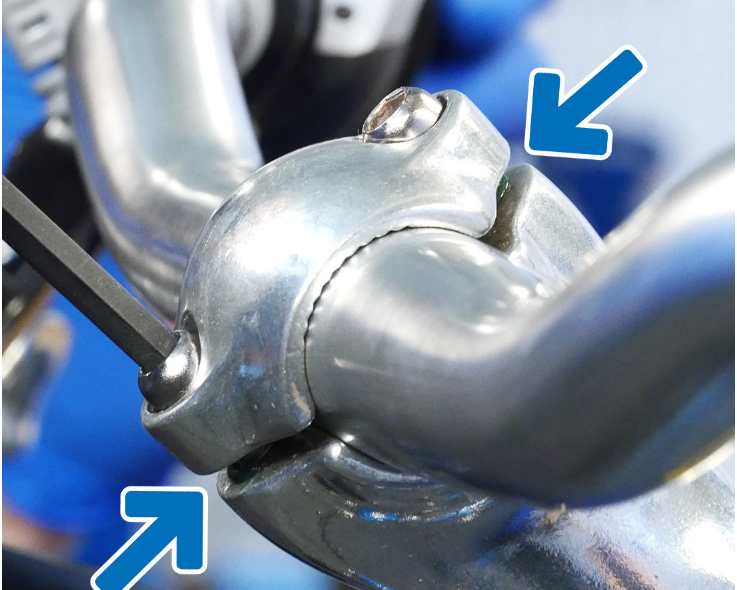
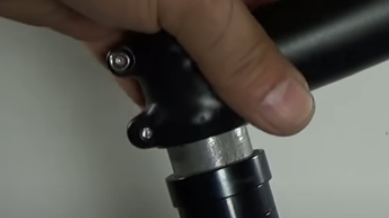
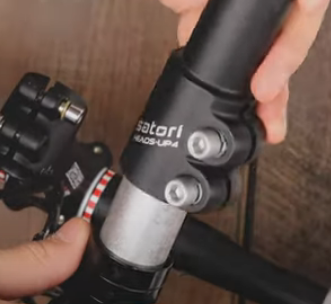
How To Raise the Handlebars on a Mountain Bike With a Threadless Stem
Threadless stems are stems inserted into the threaded steerer of a mountain bike and are easy to install and uninstall. The threadless stem comes with modern mountain bikes. They were invented to replace the quill stem which is notorious for needing heavy-duty equipment to fix.
To raise the handlebars on a mountain bike with a threadless stem, remove the top cap from the stem, unscrew the pinch bolt, and pull out the stem. Next, insert spacers onto the steerer. Then put back the stem to test the height, and install the stem.
This article by ParkTool.com explains exactly what a threadless stem is and how to adjust it. To adjust your handlebars you will need at least a basic toolkit which we cover in our mountain bike tool kit essentials guide. Also, check out this video tutorial by Bikewagon to see how to adjust the handlebar of your mountain bike that has a threadless stem.
Summary of the Tools Needed To Raise the Handlebar on a Mountain Bike With a Threadless Stem
| Tools Needed | Why You Need it | Price |
| Wrench Set | To unscrew bolts | ~ $95 |
| Grease | To aid friction in the steerer tube and bolts | ~ $10 |
| Allen Wrench Set | Multipurpose tool | ~ $15 |
Follow these steps to raise the handlebars of a mountain bike that has a threadless stem:
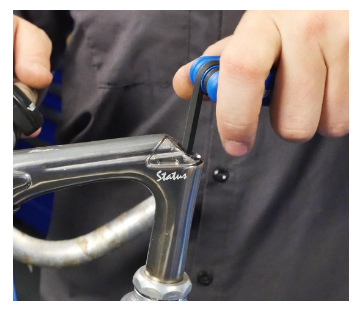
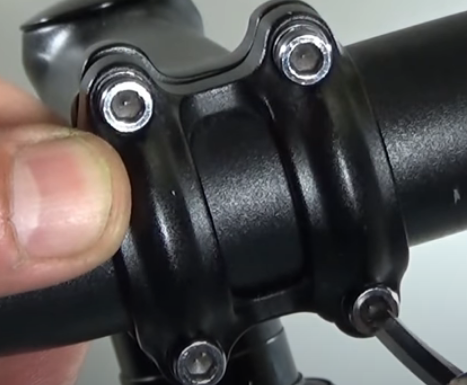
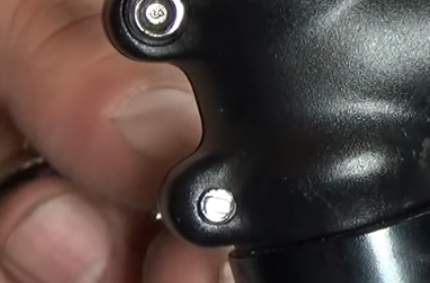
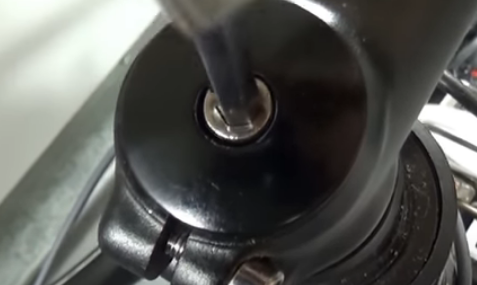
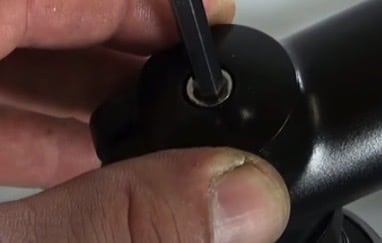
Step 1. Remove the Top Cap and the Pinch Bolts
The top cap helps hold your threadless stem and the steerer firmly while the steerer secures the stem as it turns left and right from the motion of the handlebar. Both have to be removed to be able to separate the entire stem from the steerer.

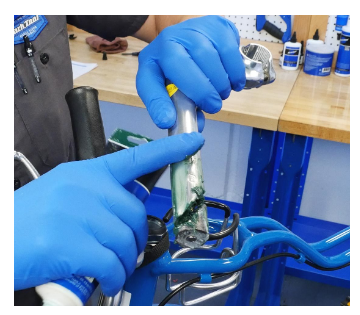
Step 2. Adjust the Stem to Your Preferred Height
Next, insert spacers like these into the steerer tube as explained in this article by Parktool, and reattach your stem to see if your desired height has been achieved. Note that spacers come in different standard sizes, so you will need to check your measurements. Repeat the process of trying out different spacers added to your stem until you achieve your desired height.


Step 3. Install the Stem
The final step after getting your desired height is to reinstall your stem. Simply put the top cap back and screw it in. Ensure your stem is properly aligned. Finally, screw back the pinch bolt. Note that the entire procedure requires a degree of accuracy. When installing your stem back, always ensure the top of your stem or spacer is 3mm right above the top of the steerer. Also, apply grease in the steerer, and pinch bolts before installing.
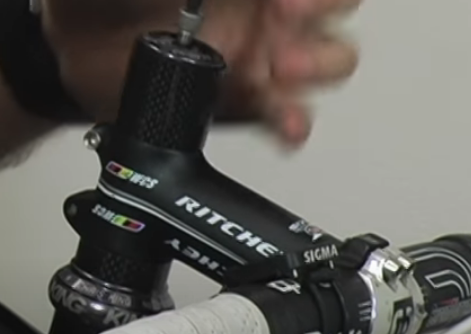
How To Raise the Handlebars on a Bike With a Quill Stem
A quill stem is a stem that is secured to the steerer tube and secured with a stem binder bolt and can still be found in old and cheaper bikes.
To adjust the height of a quill stem, uninstall the entire quill stem, including the handlebar. First, remove the faceplate, then loosen the stem bolt, adjust the stem to the desired height, and then reinstall the bar and secure it with the faceplate after greasing the components.
According to this article from ParkTool.com, quill stems were predominant before the invention of threadless stems. The stem is inserted into the threaded steerer tube of the bike and is then locked in using the stem binder bolt.
Summary of Tools Needed To Raise the Handlebar on a Mountain Bike With a Quill Stem
| Tools Needed | Why You Need it | Price |
| Punch Set | To loosen stem binder bolt | ~ $25 |
| Hammer | To loosen stem wedge | ~ $10 |
| Torque Wrench | To loosen stem wedge | ~ $45 |
| Toe Straps | To suspend the handlebar | ~ $5 |
Follow these steps to raise the handlebar on a mountain bike with a quill stem:
Step 1. Remove the Faceplate Stem
If the stem comes with a faceplate, you would have to first remove it. This will keep the handlebar hanging. You can use a toe strap or zip ties like these to suspend the bars. This will prevent the cables and other attachments from falling off.
Step 2. Loosen the Stem Binder Bolt
Loosen the stem binder bolt. It might get stuck. If so, strike the bolt using a mallet, like this, and a punch like this to break the wedge free from the head tube. This way your quill stem is free.
Step 3. Insert the Stem to Your Desired Height
Before inserting the stem, apply grease like this to the stem, the stem binder bolt, and the steerer tube. Then insert the stem, bearing in mind your desired height. Reinstall the stem binder bolt to hold it in place, taking care not to exceed the maximum height when reinstalling it.
Step 4. Insert the Bar and Hold it With the Faceplate
Insert the bar into the stem, centering it accordingly. Next, apply grease to the faceplate bolts. Attach the faceplate over the front of the bar and thread the bolt in. Remember to tighten them evenly.
How To Adjust Handlebar Height by Flipping the Stem
Flipping the handlebar height of your stem is another way to adjust the height of the stem. The difference in height wouldn't be as much as the previous methods, however, it can be effective if the adjustment you want isn't that much. Note that this process works only for threadless stems.
To adjust the handlebar height by flipping the stem, first, uninstall the handlebar from the stem by removing the faceplate. Next, uninstall the top bolt and the pinch bar holding the stem to the steerer tube, turn the stem upside down, and reinstall the entire component.
Tools Needed To Adjust Handlebar Height by Flipping the Stem
| Tools Needed | Why You Need it | Price |
| Allen Key | To unscrew the bolts | ~ $10 |
| Wrenches | To unscrew the bolts | ~ $25 |
Follow these steps to adjust handlebar height by flipping the stem:
Step 1. Remove the Faceplate
First, remove the faceplate. This will automatically free your handlebar. As usual, suspend it, making sure all the controls and cables that are attached to it do not get dislodged. Then, unscrew the pinch bolt from the stem.
Step 2. Remove the Top Cap
The next step is to remove the top cap. As stated earlier, the top cap holds the entire system together, and removing it means the fork of your mountain bike will hang free, so be careful not to damage any of your handlebar controls.
Step 3. Reverse the Stem
Reversing the stem is quite simple. Remove it from the steerer tube, turn it upside down, and insert it back. It's as simple as that. Once done, you can go back to fixing the entire headset back.

Step 4. Reinstall the Top Cap, the Pinch Bolt, the Handlebar, and the Faceplate
Put your top cap back and tighten it until you feel resistance. Don't force it, as you don’t want it to be overly tight because that will make steering the bicycle hard. Next, tighten your pinch bolt. Then fix your handlebar into the stem and make sure it is well centered. Finally, tighten and fix it in place by screwing in your faceplate.
What Is a Handlebar Height Extender?
A bike handlebar height extension as the name stipulates is a tube that can be attached to your mountain bike steerer to increase or extend the height. Your stem is then attached to this extender. Also called a quill extender, or stem riser, the handlebar height extension can raise your steerer to a staggering 6 inches. You may also be interested in learning the difference between flat and riser handlebars and how to choose the right one. If so, be sure to read our related article.
A handlebar height extender is a tool that can be used to raise the handlebars on a mountain bike by attaching it to the fork steerer. Increasing the height of the handlebars can lead to a more comfortable riding position and better control of the bike, making it a popular choice for riders looking to make adjustments to their bike’s setup.
How To Install a Mountain Bike Handlebar Height Extender
Before attempting to use an extender, ensure it is the same diameter as your steerer tube. Also, note that in using the extender, the cables attached to your handlebar will no longer be long enough, so you might have to swap them with longer cables.
To install a mountain bike handlebar height extender first uninstall the entire stem system of the bike. Next, insert the height extender into the steerer. Add the spacers and adjust the height of the stem accordingly before installing the entire stem.
Our guide on how to fix mountain bike grip shifters has a step-by-step guide on how to change the cables and cable housing which will help if you discover that your cables are too short when the handlebar height has been increased.
Tools Needed To Install a Mountain Bike Handlebar Height Extender
| Tools Needed | Why You Need it | Price |
| Wrench Set | To unscrew bolt | ~ $25 |
| Handlebar Extender | To increase the height of the steerer | ~ $15 |
| Allen Wrench | Multipurpose tool | $40 |
Follow these steps to install a mountain bike handlebar height extender:
Step 1. Remove the Stem and Attach the Bike Extender
The first thing you want to do is to completely remove your stem and handlebar system revealing your steerer. Do this following the steps provided in the previous section. Next, simply insert the quill extender into the bike steerer tube.
Step 2. Add Spacers If Necessary, Then Fit Your Handlebar Stem Into Extender
Insert spacers onto your extender, depending on how high you desire your handlebar to be. Then put in your stem (with the handlebar still attached to it). Remember the exact distance between the top of your extender and the top of the stem must be 3mm.

Step 3. Insert the Top Bolt and Adjust the Handlebar
Insert the top bolt and then tighten it. As mentioned earlier, do not over-tighten it. Also, adjust the handlebar well on the stem making sure it is appropriately positioned and correctly aligned. Our article that explains what to do if your mountain bike handlebar keeps twisting explains the dangers of an incorrectly fitted handlebar and how to fix it.


Step 4. Tighten the Top Bolt, the Faceplate, and the Pinch Bolts
Once your handlebar and other components have been well adjusted, tighten the top bolt, the faceplate, the pinch bolts, and ensure that everything is firmly connected.
Should the Mountain Bike Handlebar Height Be Relative to the Seat?
Comfort and efficiency when riding a bike are dependent on the height of the handlebar. If it is too high, you would have to lean back, which can affect your wrists, and hinder how you control the bike irrespective of the terrain. If it is too low, you would have to lean forward, way too much, affecting your back. However, the optimal height of a handlebar can only be determined, relative to the height of your seat.
The mountain bike handlebar height should be relative to the seat height. A beginner should set the handlebar height to be almost level with the head tube, intermediate riders can set the handlebar 3 inches below the saddle, and an experienced rider can experiment with slightly higher heights to be comfortable.
Our article about whether a mountain bike seat should be higher than the handlebar is a great resource that will help you determine the optimal height for these essential components.
In a nutshell, your handlebar can either be above, below, or at the same height as your seat. The recommended position is usually for the handlebar to be at the same height or 3 inches below the saddle. However, there is no consensus on the specific height ratio for optimal performance. You will have to experiment with different heights for both the handlebar and the seat to determine your comfort zone and pedaling efficiency.