
How to Fit a Mountain Bike Saddle, Adjust Angle and Height, and Maximize Comfort
Fitting your mountain bike saddle is one of the primary adjustments you should make before going for a ride. In this article, we’ll discuss how to fit a mountain bike saddle, adjust saddle height and saddle angle, and how to maximize comfort while riding.
To fit a mountain bike saddle, first determine saddle width. The saddle should be 40mm wider than the sit bones to ride comfortably on the tops of the handlebar. Then, adjust the saddle angle. Use a flat saddle angle for upright riding and a 4 degree forward tilt to make riding uphills easier. Finally, adjust the saddle height. To find saddle height multiply the inseam length by 1.09.
If you have never adjusted a bike saddle before, this article will help you get started. In the following sections, you will find step-by-step instructions on fitting an MTB saddle by choosing the right size and adjusting its height and angle. We also discuss this in our article about choosing the ideal mountain bike saddle position.
What Size MTB Saddle do I Need?
Before you even fit your MTB saddle, you should select its size based on the size of your sit bones, or anatomically speaking, your ischial tuberosity.
The size MTB saddle needed is dependent on the distance between the sit bones of the rider. Buy a 12cm and 13cm wide MTB saddle for 100mm and 110mm sit bone measurements. Buy a 14cm and 15cm wide MTB saddle for 120mm and 130mm sit bone measurements.
To choose the optimal MTB saddle width, you should first take measurements. There are many DIY methods of measuring your sit bones and one of the easiest ways will be discussed below.
How to Measure Your Sit Bones
Measuring the width of your sit bones is key to finding the best mountain bike saddle size for you. So, to fit a mountain bike saddle, first measure the sit bones.
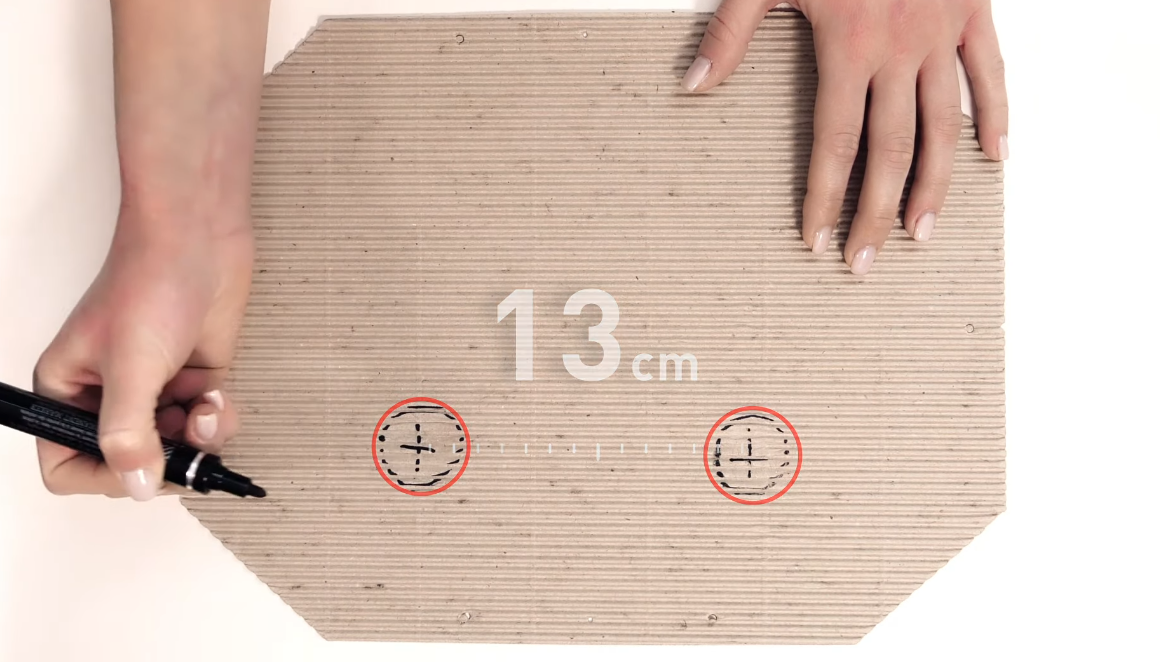
To measure the distance between sit bones, place a piece of cardboard on a stool, sit on the stool and push down. Then measure the distance between the centers of the two deepest indentations on the measuring paper.
This post by SQ lab shows how easy it is to measure the width of your sit bones.
The most straightforward method of measuring your sit bones for bike saddle size selection is as follows:
Step 1. Place a Piece of Cardboard on a Stool
First, you should get a piece of cardboard and place it on a stool or any flat and hard surface you can sit on.
Step 2. Sit on the Stool and Create Some Pressure
To measure your sit bones, you will need to create some pressure when sitting on top of the cardboard so that two deep indentations appear on the measuring paper. To make the sit bone measurement accurate, you should mimic your riding position. As mountain bikers mostly ride the bike while leaning forward, you should mimic that position.

Step 3. Measure the Distance Between the Centers of the Two Deepest Indentations
For the last step, you should measure the distance between the two indentations on the cardboard paper. If the indentations are not visible enough, take chalk and run it over the measuring paper, as shown in this video tutorial by Art’s Cyclery. Finally, take a ruler or a measuring tape and measure the distance between the centers of the indentations, which corresponds to the distance between your sit bones.
You might also find interest in learning more about trekking seats vs. mountain bike seats and how to choose the right one. Be sure to read our related article for more information.
How to Choose an MTB Saddle After the Sit Bone Measurement Has Been Taken
While measuring your sit bones is important, using the measurements correctly for saddle size selection is even more crucial. To fit a mountain bike saddle, first, determine your riding position and then determine what saddle size is best for that position.
For riding on mountain bike drops, choose a saddle that is the same size as the sit bones. For upright mountain bike riding on the tops or hoods of handlebars, choose a mountain bike saddle that is 40 mm wider than the sit bone width.
Below are the steps you should follow to use the sit bone measurements and choose a comfortably-sized saddle for your mountain bike.
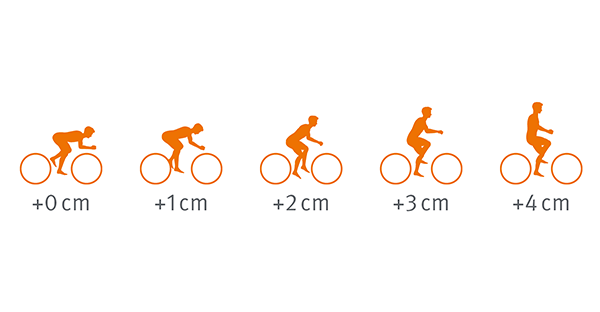
Step 1. Consider Your Riding Position
According to this article by Hincapie, you should take into account your riding position to select the right saddle size. Depending on how straight or bent your upper body is when riding your bike, you should add 0 to 40mm to your sit bone measurement to find the ideal saddle size.
Step 2. Add 0-40mm to Your Sit Bone Width to Find the Right Saddle Size
As most mountain bikers are slightly bent toward the handlebars when riding (moderate position), it is recommended to add 0-40mm to the measured sit bone distance to determine the optimal saddle width. So, if your sit bone measurement is 110mm, you should get a saddle that is 110-150mm wide depending on how far forward you bend.
How to Install a Saddle on a Seat Post
If you ever decide to switch your stock saddle with a new one, you do not necessarily have to visit a local bike shop to install the seat. Instead, you can follow a few quick and easy steps to install a saddle on a seat post.
To install a saddle on a seat post, first, grease the bolt on the seat post and the rails of the saddle with a bike lube. Then, loosen the bolt as much as possible without removing it completely. Next, position the saddle rails between the bottom and top plates. Finally, secure the saddle by tightening the bolt.
This video by Clint Gibbs demonstrates how to easily install or replace a bike saddle in under 5 minutes.
For detailed instructions on installing a saddle on a seat post, check the steps below:
Step 1. Grease the Bolt and the Saddle Rails
Before installing a bike saddle, you should lubricate the parts for improved performance with a lubricant like this. If you are replacing the saddle, consider cleaning the seat post plates and the saddle rails with rubbing alcohol first. This will remove old lubricant, dirt, and debris from the bike parts. Then, use bike lubricant and grease the seat post bolt and the saddle rails. This cleaner and lubricant by Finish Line could be an excellent choice.

Step 2. Loosen the Bolt on the Seatpost
Next, use an Allen wrench from a set like this to loosen the bolt holding the two plates together. You should loosen the bolt as much as you can without the bolt coming out of the hole. The gap between the plates should be wide enough for you to fit the saddle rails in.
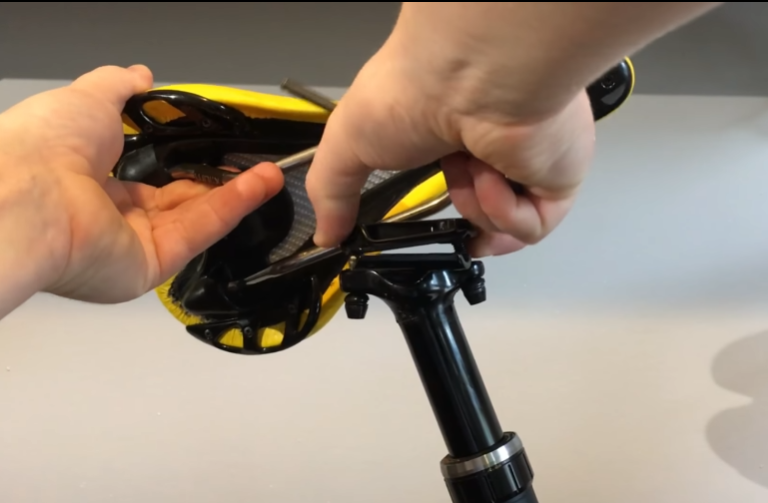
Step 3. Position the Saddle Rails Between the Two Plates
After creating a gap between the top and bottom plates of the seat post, slide the saddle rails in between the plates. Position the saddle correctly while making sure that the seat is aligned with the bike frame.
Step 4. Tighten the Bolts to Secure the Saddle
The last step is to take a hex key and tighten the bolt on the seat post or the bolts of the seat post plates depending on the design of your mountain bike, to hold the saddle in place.

You also want to make sure you know how to fix a mountain bike seat that keeps moving. This alone might help in your riding comfort. Also, you might find interest in mountain bike seat dropper repair. If so, be sure to read our related guide for more information.
Why Is The Mountain Bike Saddle Angle Important?
Adjusting your mountain bike saddle angle is much more important than you might think. Oftentimes, incorrectly angled bike saddles cause pain in different parts of the body, especially in the lower back.
The mountain bike saddle angle greatly affects the comfort of the rider. Adjust the saddle to be flat for a comfortable position in which the spine is supported and there is less stress on the lower back. Alternatively, have a slight downward tilt to make riding uphill easier.
While most mountain bikers find it comfortable to ride sitting on a flat seat, others tilt the nose down so that the saddle angle is between 0 and 4 degrees. Keep in mind that there is no right or wrong bike seat angle as your mountain bike saddle tilt depends on your riding style and position. We also look at the angle of your seat in our article that provides a mountain bike reach calculator as these two factors are connected.
The best way to find the ideal bike saddle angle for you is to ride your bike for 20-30 minutes and slightly change the angle after each round. Whichever angle feels comfortable for you is the right saddle tilt. If you are struggling to find the correct saddle height it could be because your bike is just not the right size for you in which case we suggest you take a look at our mountain bike sizing chart. Should you find that your bike is completely the wrong size or you feel that you are ready for an upgrade then our article that explains what mountain bike you should buy could have some helpful tips.
How to Adjust Saddle Angle on a Mountain Bike
Adjusting your saddle angle or tilt can significantly improve your overall riding experience. Along with making it more comfortable to sit on the saddle, the correct seat angle can reduce lower back and hip pain.
To adjust the saddle angle on a mountain bike, first, loosen the bolt on the seat post. Then, tilt the saddle and check how flat it is using a spirit level. Next, tighten the seat post bolt using an Allen key. Finally, take the mountain bike for a test run to check if the saddle angle feels comfortable.
Follow the steps below to adjust the saddle angle on a mountain bike.
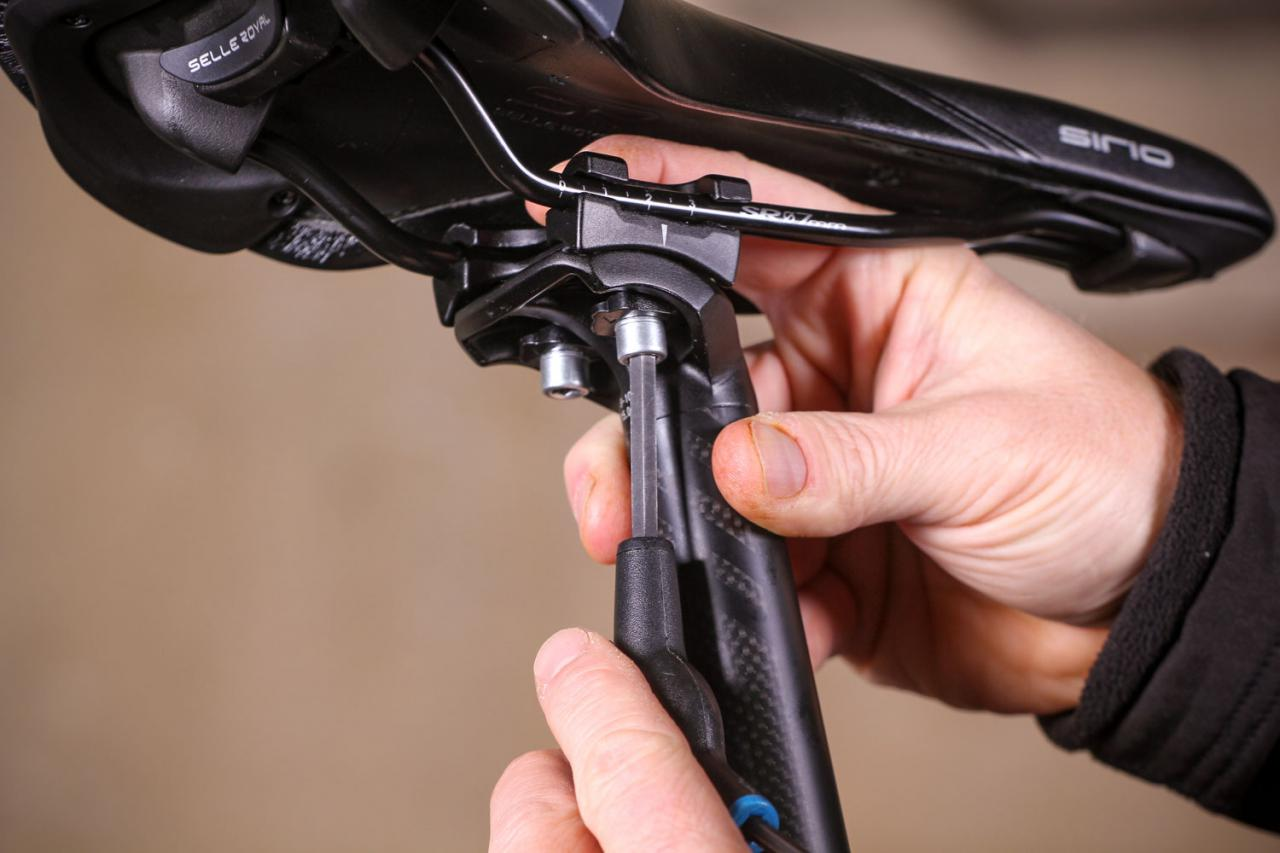
Step 1. Loosen the Bolt on the Seatpost
First, take an Allen wrench from a set like this and loosen the bolt under the saddle. The bolt should be loose enough to tilt the saddle but not too loose for the saddle to move freely.
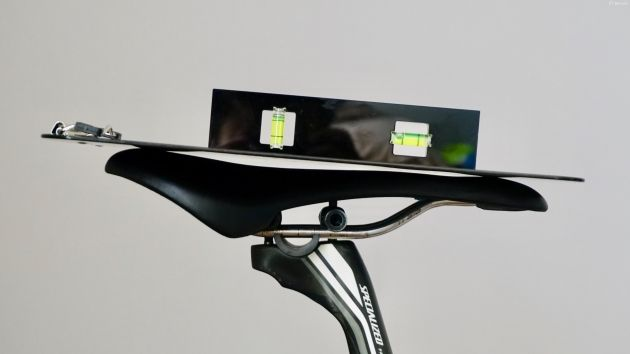
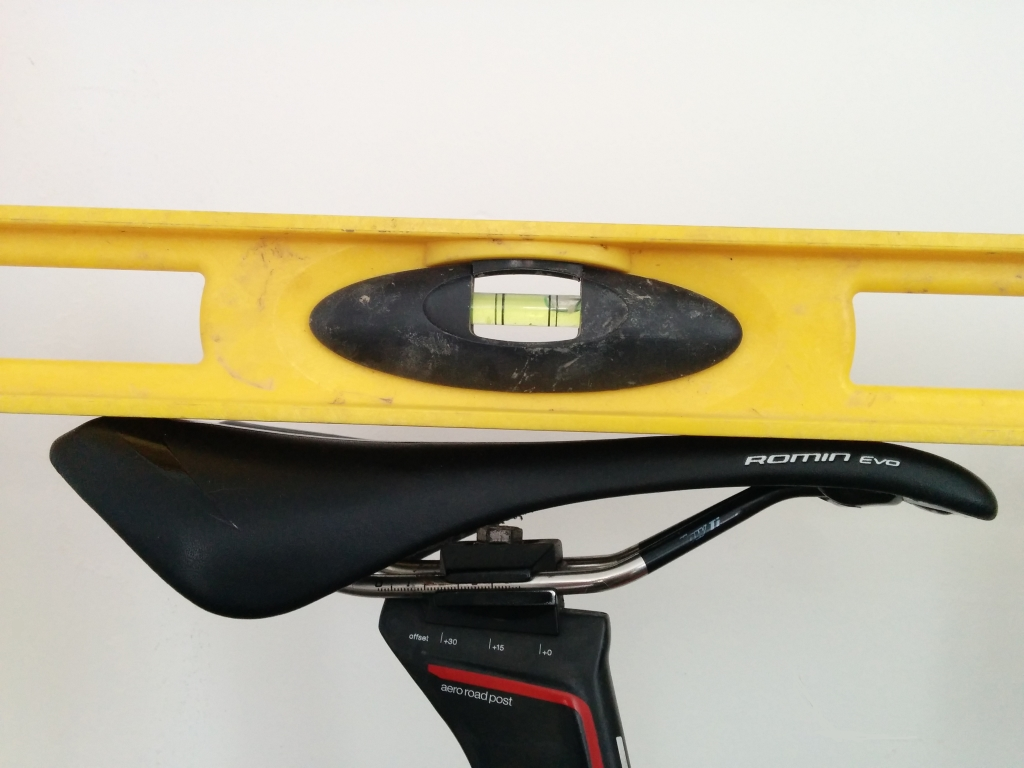
Step 2. Tilt the Saddle and Check How Level it Is
After loosening the bolt, tilt the saddle just a little bit and use a spirit level like this to check whether it is parallel relative to the ground. As most mountain bikers find it comfortable to ride a bike with a flat saddle, consider doing that first.
Step 3. Tighten Up the Bolt on the Seatpost
To secure the saddle, hold it with one hand and tighten up the bolt with the other one. If you can get a helping hand, make sure you do so as it will make adjusting the saddle angle more accurate.
Step 4. Go for a Ride to Test the New Saddle Angle
To check if the adjusted mountain bike saddle angle works for you, go for a 20 to 30-minute ride and test it. Make adjustments until you feel comfortable riding your MTB. For more details, you should read how to adjust a mountain bike seat angle. Similarly, you might be interested in these tips to prevent and manage mountain bike saddle numbness so be sure to check them out. If this position is comfortable for a while but then you find that you are uncomfortable it could mean that you just need to change up your hand position. If this is the case we suggest that you try installing drop bars as we discuss in detail in our article about whether you can put drop bars on a mountain bike.
Mountain Bike Saddle Height Calculator
To fit a mountain bike saddle properly, it’s important to adjust your mountain bike saddle height. On average, the height of the seat should be 109% of a rider’s inseam. While you can use an online calculator to determine the optimal saddle height, you can also use a simple formula and do the calculations all by yourself.
To calculate the best mountain bike saddle height, multiply the inseam measurement (in centimeters) by 1.09. The resulting number is the ideal height (in centimeters) for the saddle.
Below is a table with suggested saddle height values corresponding to different inseams based on the 109% multiplication method.
| Inseam (inches) | Inseam (centimeters) | Suggested Saddle Height (centimeters) |
| 25 | 63.5 | 69.2 |
| 26 | 66 | 71.9 |
| 27 | 68.5 | 74.7 |
| 28 | 71 | 77.4 |
| 29 | 74 | 80.7 |
| 30 | 76 | 82.8 |
| 31 | 79 | 86.1 |
| 32 | 81 | 88.3 |
| 33 | 84 | 91.6 |
| 34 | 86 | 93.7 |
How To Measure Mountain Bike Seat Height
In order to adjust your mountain bike seat height, you should first learn how to measure it.
Measure mountain bike seat height to ensure that the height is optimal for riding. To accurately measure seat height, start with resting the tape measure in the center of the bottom bracket. Then, measure to the middle of the top of the saddle.
This video by Clint Gibbs explains how to measure a bike seat height and use the 109% method to adjust it.
For detailed instructions on measuring your mountain bike saddle height, refer to the steps below.
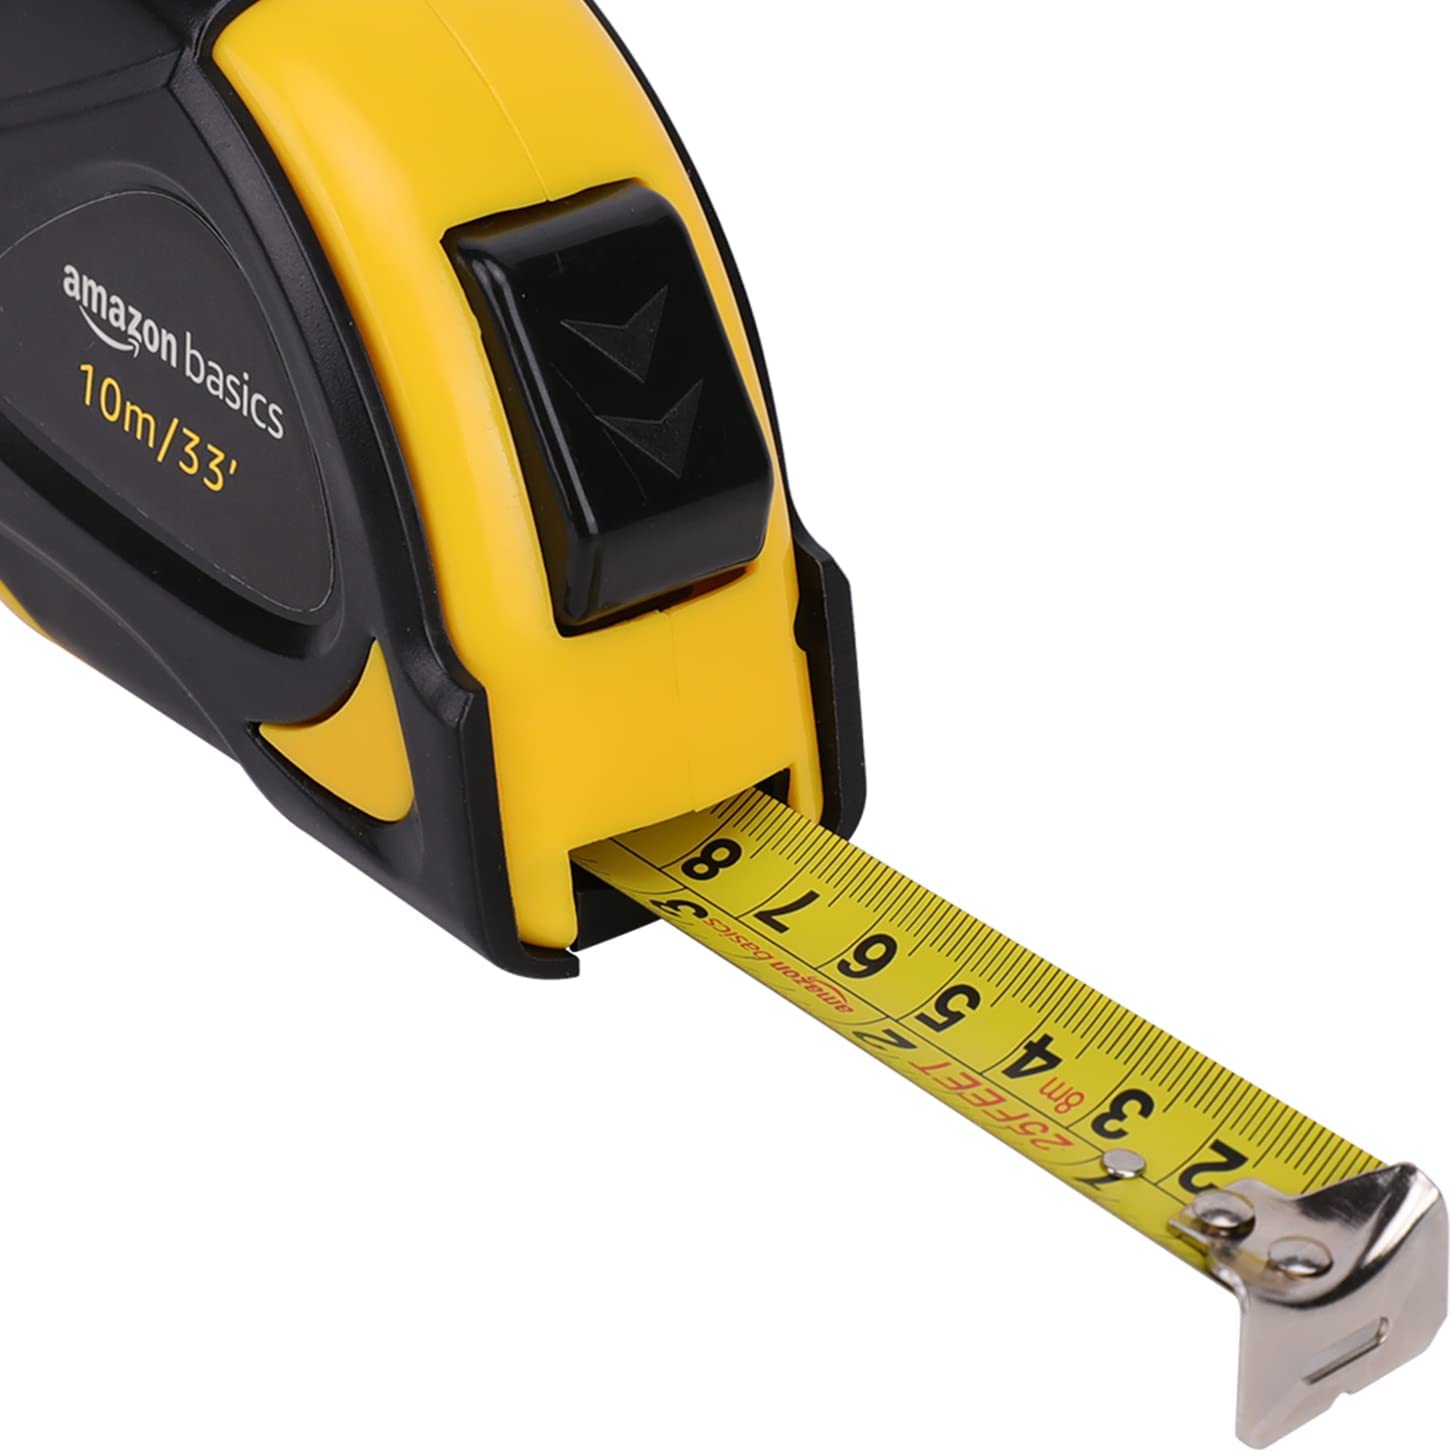
Step 1. Get a Measuring Tape
To measure your MTB saddle height, you will need a regular measuring tape like this.
Step 2. Measure the Distance Between the Bottom Bracket and the Top of the Saddle
Next, rest one end of the measuring tape at the center of the bottom bracket and measure the distance to the top of the bike saddle. The resulting measurement is your mountain bike seat height.

How To Adjust Mountain Bike Seat Height
As you are now familiar with the terminology and know how to measure the saddle height, it is time to adjust it to take your mountain biking to the next level.
To adjust a mountain bike seat height, first, determine the optimal mountain bike seat height using the 109% method, a saddle height calculator, or the heel rule. Then, adjust the mountain bike saddle height accordingly. Finally, go for a test ride to check how comfortable the saddle height is.
Below is a detailed guide to adjusting your mountain bike saddle height.
Step 1. Determine the Optimal Mountain Bike Saddle Height
The first step is to determine the right seat height for you. As all bodies are different, the methods for determining the optimal saddle height are not always accurate. However, you can use this as your starting point.
You can either use the 109% method that we have discussed above or refer to an online saddle height calculator. After measuring the distance from the ground to the top of your crotch, enter your inseam length in this calculator by Bike Faff and you will get the recommended saddle height for you.
Alternatively, you can use the heel rule (the heel-to-pedal method) as shown in this video by Global Cycling Network. You should put your bike on a stationary trainer like this or sit on it while leaning against the wall. Then, place your heel on the pedal and rotate to the 6 o’clock position. Ideally, your knee should be either straight or slightly bent.

Step 2. Adjust the Bike Saddle Height
Based on your measurements or the heel-to-pedal method, you should adjust the saddle height. To do so, you will need to locate the seat post clamp and loosen the bolt using an Allen wrench. Then, you simply increase or decrease the height of your bike seat as needed. When you are done, tighten up the bolt to secure the seat post.

Step 3. Go for a Test Ride
For the last step, you should test your new saddle height and check if it works for you. Although there are multiple rules and methods for determining the right seat height, they are not always 100% accurate. The best way to position the saddle height is to ride your bike for at least 30 minutes after each adjustment you make. Therefore, you should adjust your mountain bike saddle height in small increments until you reach the desired saddle position. We have more great tips on how to improve mountain bike saddle comfort and how to choose a mountain bike saddle cushion for comfort and performance in our related articles.