
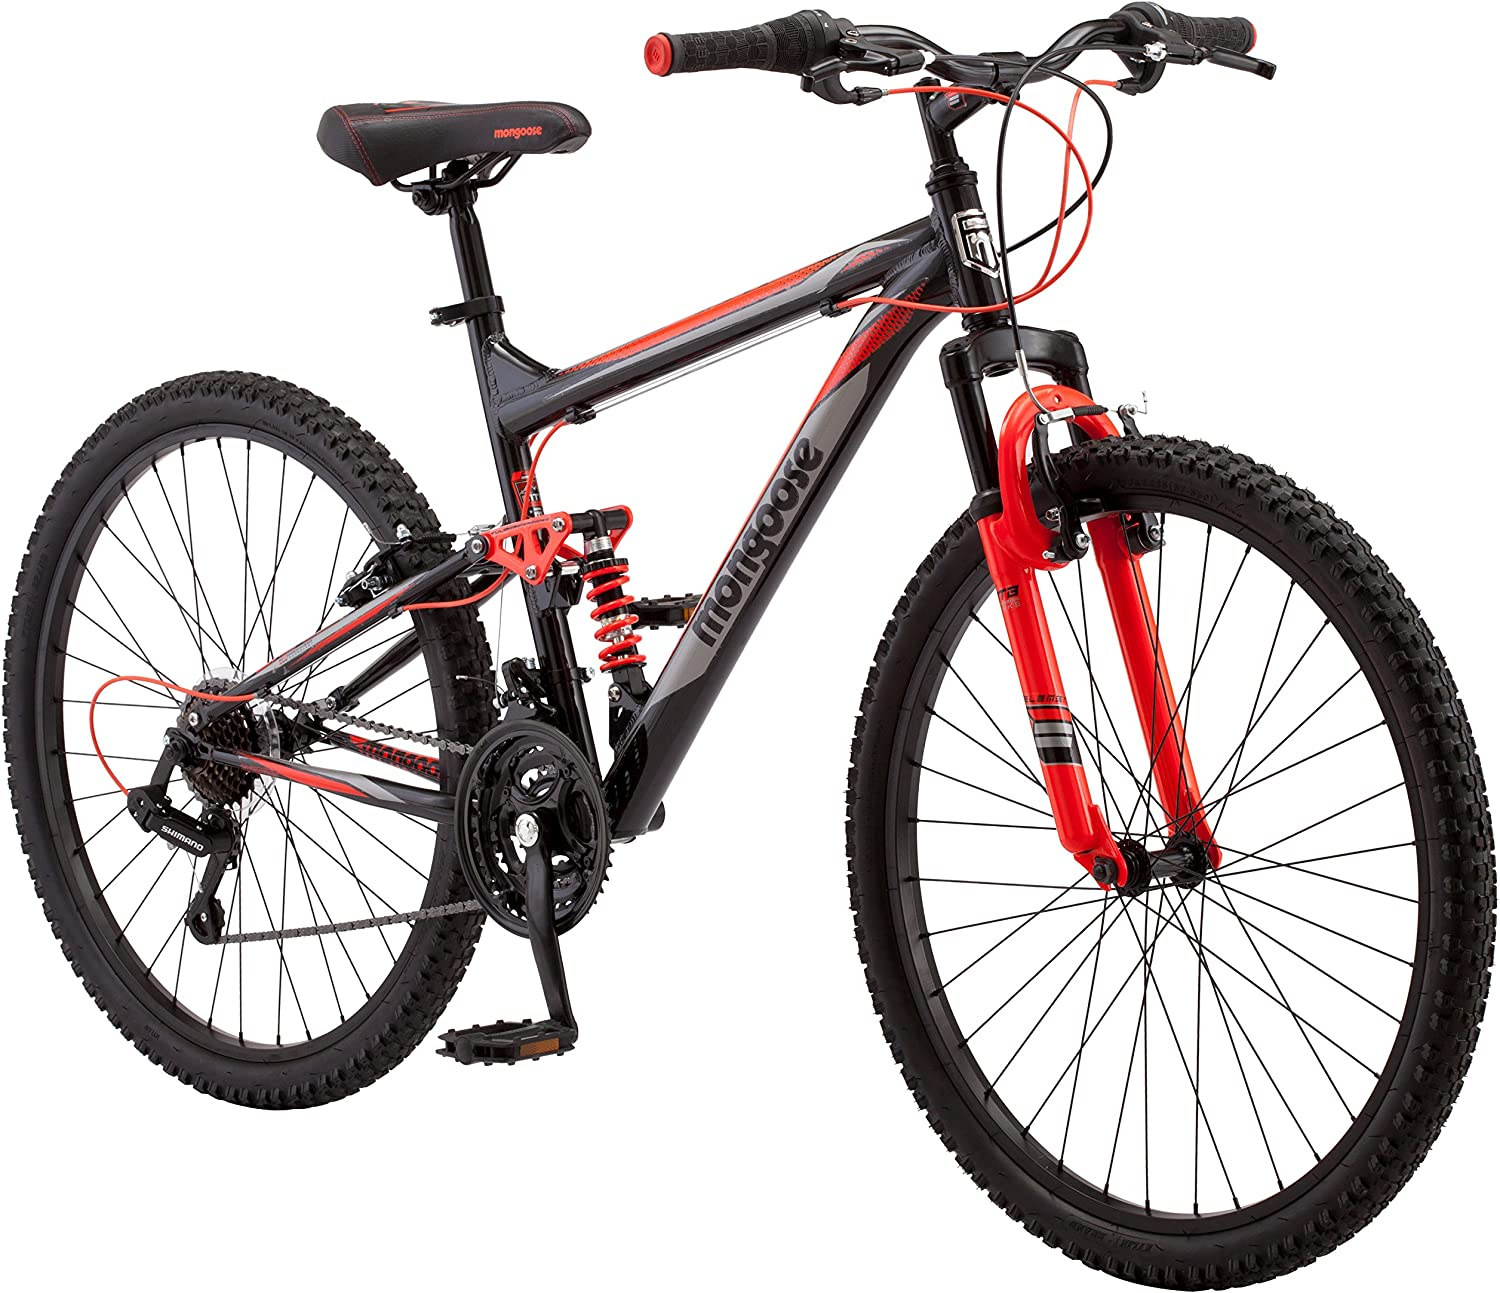
What To Do if Your Mountain Bike Handlebar Keeps Twisting
Loose handlebars can be a major cause of annoyance in addition to increasing your risk of getting injured. A handlebar that keeps twisting or moving during a ride will significantly reduce your handling efficiency and stability. This can cause serious falls, especially when riding difficult mountain bike trails. In this article we discuss what to do if your mountain bike handlebar keeps twisting.
If the mountain bike handlebar keeps twisting, fix it by tightening the handlebars, fixing the headset, wiping off dirt, fixing the stem bolts, or replacing the handlebars.
You should also consider using handlebar alignment tools such as an Allen Wrench or Hex Key. Ensuring your handlebars are stable will allow you to reach the brakes and gears easily. This article will explain in detail how to make handlebars steady and safe so that your ride is enjoyable.
You might also be interested in learning how to choose the right saddle - road versus mountain bike saddle. Be sure to read our related article for more details.
Why Does My Mountain Bike Handlebar Keep Twisting?
There are multiple causes for mountain bike handlebars to twist. Sometimes the handlebars are old or damaged and need to be replaced or modified.
Mountain bike handlebars might twist because the bike’s stem faceplate and handlebars are not properly connected. When a rider lands hard or applies excessive force on the stem faceplate, the handlebars could loosen and slip from their position. Loosening can also be the result of paint shavings building up in the handlebars.
Our article about mountain bike handlebar upgrades explains what you can do to improve or customize your handlebars.
These could be the reasons why your mountain bike handlebar keeps twisting:
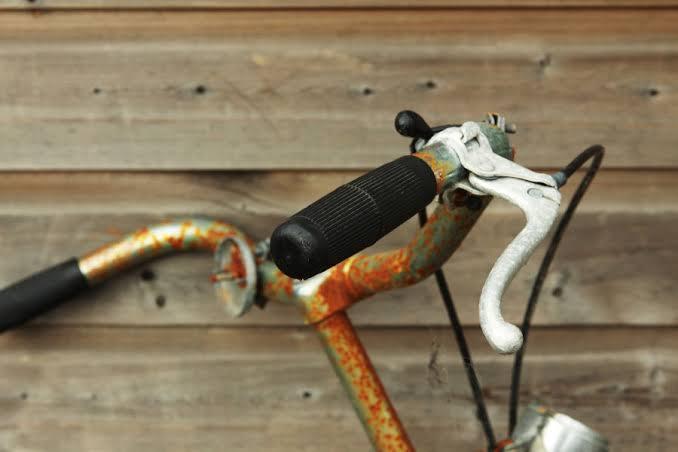
Reason 1. Paint Shavings of Old Bikes
The coatings or paint of the handlebars on old mountain bikes may flake and peel into the stem. Having your bike's paint chip off can foster further corrosion. Corrosion could cause rust and weaken your bicycle's fundamental parts including the frame, resulting in parts becoming filled with paint shavings and reducing grip. However, you can prevent the flaking and peeling of particles by refinishing your bike's frame.
Reason 2. Rust and Dirt
As soon as you notice any rust on your bike, consider drilling a hole in the bottom bracket region with a drill like this. This will expel the water and keep your handlebars rust-free. Although quality bike handlebars should remain intact even when wet, it is wise to avoid excessive moisture that could affect their durability nonetheless.
Also, be wary of dirt getting into the handlebars and grips. Keeping your bike off the ground when storing it and cleaning it regularly should be sufficient.
Read our article about whether you need mudguards on a mountain bike to learn more about how they prevent dirt and debris from clinging to your bike frame and how that can reduce rust.
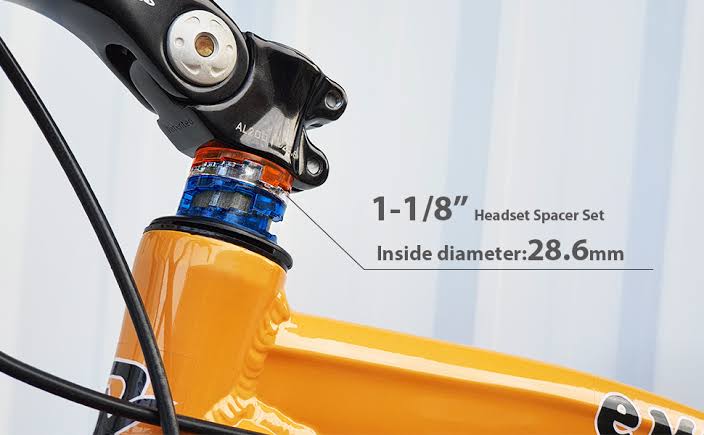
Reason 3. Incompatible Bike Stem
The bike stem may seem like an ordinary component, but it affects the rider's position to a great extent. Using an improper riding style can cause the handlebar to twist. The bike stem should have the correct shape and length for your body. You may need to use the spacers at the headset to tweak the bike's stem to the required position. You can read this article by World Wide Cyclery about things to consider when choosing a stem for your mountain bike. This video tutorial by World Wide Cyclery explains a bit more about MTB stems and what to look for.
Reason 4. Loose or Worn Handlebar
A common issue that causes a handlebar to twist is when riders have pushed the handlebars beyond their limits. In this case, you will most likely have to replace it. Our article about how to choose mountain bike handlebar width explains how to select the right width for your preferred riding stance so that you don’t damage the bar when riding on challenging terrain.
What To Do If Your Handlebar Won’t Stay Tight
Sometimes using a tool to fasten the handlebar is sufficient to prevent further movement. This is why having a least a basic mountain bike tool kit available so that you can do minor repairs yourself.
If bike handlebars won’t stay tight it can often be solved by tightening the handlebars using a torque wrench. It may also be necessary to adjust the stem cap or use sandpaper to wipe off the dirt.
Our mountain bike essential toolkit guide lists the most important tools to have at home or on the trail to perform small adjustments to your bike anytime.
Try these fixes to stop your handlebar from twisting:
Fix 1. Tighten the Handlebars
Sometimes, handlebars wiggle because of loose bolts or screws. Fixing this will require some technical skills and tools including a drill, and a chuck like this to change drill bits, to tighten the screws or bolts that hold the handlebar in position.
Fix 2. Fix the Headset
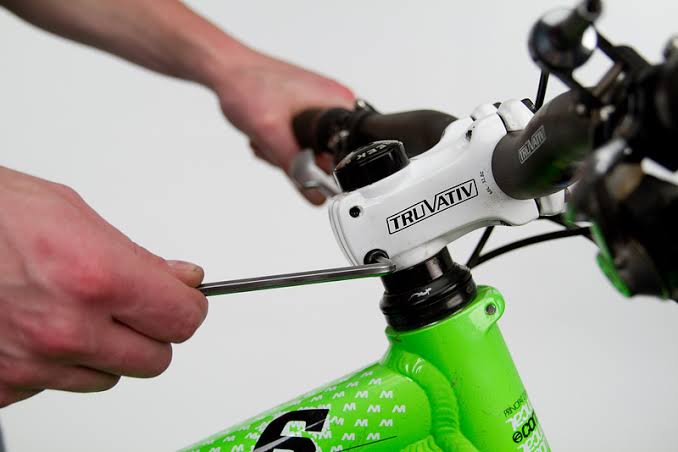
When the headset is not tightly fixed to the bike stem, it may cause the handlebar to move. A loose headset can be fixed using an Allen key from a set like this to loosen the stem bolt, so you can properly attach it to the headset. You may want to check your bike manufacturer's guide on how to tighten your stem and headset.

Fix 3. Remove Dirt
Since encrusted dirt could cause your handlebar to loosen and should be removed using sandpaper. This will also help remove paint shavings from the stem surface. It is also a good idea to regularly clean your mountain bike with a specially formulated bike cleaning solution like this one that has built-in rust-repellant and lubricant to protect your bike.
Fix 4. Fix the Stem Bolts
Loose stem bolts can also cause handlebars to twist. To know whether your stem bolts are in good condition, check if they work with 10-12 Newton Meters by using a torque wrench like this one. You will need to tighten stem bolts that do not fall between these torque metrics. You can do this using an Allen key.

How To Tighten the Handlebar on a Mountain Bike
If your mountain bike handlebar keeps twisting, Allen keys are used to tighten mountain bike handlebars. Make sure to get the right size Allen keys.
To tighten the handlebars on a mountain bike first determine the bike’s design. Using 5mm or 6mm Allen keys as required make sure to position the handlebars properly without over-tightening the screws.
Our ultimate list of tools needed for mountain bike maintenance is a guide that explains what the various tools are and how to use them, including Allen keys.
Summary of Tools Needed to Tighten the Handlebar on a Mountain Bike:
| Tool Needed | Why You Need This Tool | Example on Amazon | Price |
| 5mm Allen Keys | To tighten a single pinch bolt | Uxcell L shaped long arm CR-V | ~$10 |
| 6mm Allen Keys | To tighten double faceplates bolts | Bolt base metric short arm Allen key | ~$10 |
| Spacers | Adjust the height of the headset | Bicycle Headset Handlebar Stem Spacers | ~$10 |
| Mild acid cleaner | To wipe dirt from the handlebars | Shine Armor iron & fall out remover | ~$25 |
Follow these steps to tighten your mountain bike handlebar:
Step 1. Determine the Mountain Bike’s Design
The first step is to determine your mountain bike’s design. Knowing the design will help determine the number of bolts you will be working with and how to remove them. Notice the location of the bolts, so you can fix them back after aligning the handlebar.
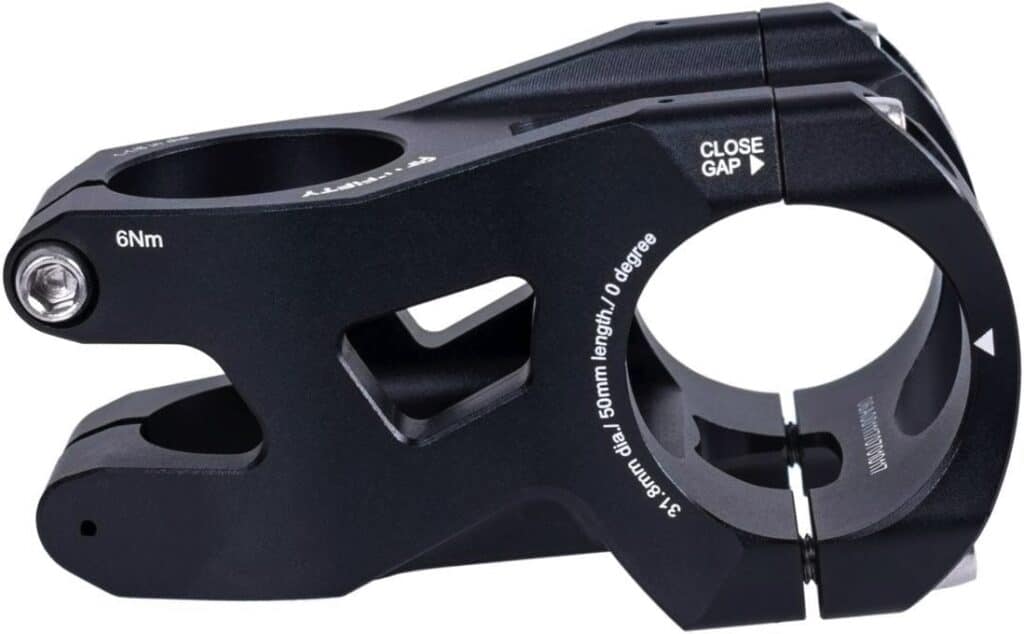
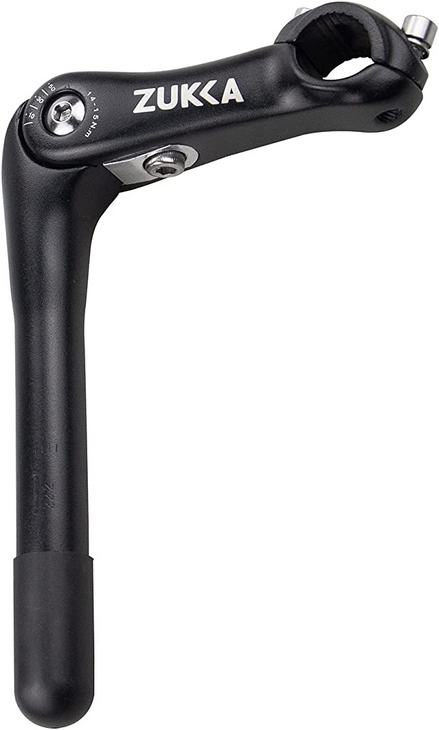
If you have a stem with a quill design like this, it means the stem is adjustable. The stem is usually located between the handlebars and the bike's frame. You simply need to adjust the stem angle after loosening the bolt. This is possibly all you have to do to tighten your handlebar.
Also, some mountain bikes have a flat handlebar like this in which case rotating the bar can quickly help you set it to the desired angle. This will also adjust the gear and brake lever set. Our article comparing flat handlebars to drop bars explains the differences between these two popular handlebar choices and which one to choose.
Step 2. Loosen the Stem
For a threadless design the next step is to loosen the stem. Your stem style will determine whether you will use a 5mm or 6mm Allen key. After removing the stem bolts, keep them with you because you will need them later.

Step 3. Check Whether Cleaning Is Needed
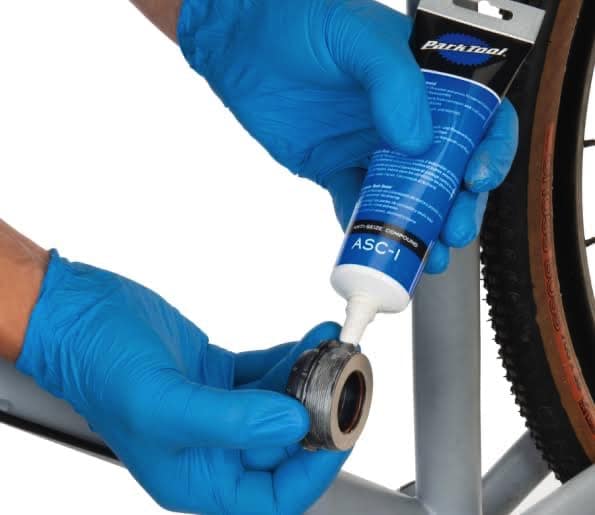
As mentioned before, your handlebar may be loose due to dirt, debris, moisture, or lack of adhesives. You need to determine if any obstructions or rust are present in the stem and whether adhesives are needed, before fastening it again.
You can clean off paint flakes or rust by applying a mild acid cleaner like this. However, first, use it on a small portion of the handlebar to determine if there will be any discoloration. See this article by Canyon on how to clean your mountain bike's handlebars.

Step 4. Find the Correct Angle for the Handlebar
You should confirm that the handlebar is at the correct angle before screwing back the stem. It might be wise to request support from a friend to support you and the bike while trying various positions. Make sure that your back is not bent, and that your elbows are bent at a 150° degree angle.
If you need to bend your arm when engaging the brakes you might want to adjust the angle and you should keep adjusting the handlebar's angle until you can reach the bike's frame. You should read our article that provides a mountain bike reach calculator and tips to adjust mountain bike reach to help you choose the right angles to best fit your body and riding style.

Step 5. Adjust the Handlebar Height if Necessary
You can add or remove circular risers, known as spacers, to lower or raise the handlebar. Handlebar height is a matter of preference. You must be sure that you can comfortably ride at the set height.
Tighten your handlebar slightly to test the bike until you are sure you’ve got the optimal height. You should ride slowly and carefully while testing because the bolts are not tightly fixed yet. See this article by Active on precautions to take while test-riding.
For more information on how to adjust your mountain bike handlebar height, be sure to read our related article.
Step 6. Insert the Stem Cap Bolts and Tighten
Now it is time to use the stem bolts that were set aside earlier. After optimizing the height of your handlebars, insert the stem cap bolt. You can easily do this with your hand, except when dealing with a carbon fiber frame, which is quite delicate and may necessitate the use of an Allen wrench on a multitool like this.
Tighten the handlebars to the stem, but avoid making it too tight. This will allow you to adjust the horizontal position of the handlebars. Keep rotating the handlebars until the bottom of the drop faces the ground horizontally. As you keep turning the Allen keys, the bolt is tightened. Ensure the distance between paired faceplates is small so that wiggling is not possible and the stem remains steady.
Step 7. Align the Handlebars With the Front Wheel
You may need to straddle your front wheel and align it with the handlebars, to test whether everything is installed in the correct position. Allow the frame to stay between your legs, and center the handlebars on the front wheel. If the handlebar is not staying in one place, it means you need to tighten the nuts. Keep adjusting until the front wheel and handlebars are perfectly aligned.
Step 8. Check That the Headset Is Aligned Correctly
This is the final stage, where you check that the headset is aligned correctly. The headset consists of the front wheel, handlebars, fork, and stem. You must confirm that all these are correctly aligned.
With the front wheel on the ground, use your hands to jam on the front brakes while pushing the bike forward from the handlebars. The back wheel should lift off the ground with no hesitation and no play between the handlebars and fork and the rear section of the bike. See this video tutorial by MadeGoodBikes on how to do the final check. Now you should notice that you don’t have the problem that your mountain bike handlebar keeps twisting.
How To Tighten a Bike Handlebar Stem
A handlebars stem should be tightly fixed to the bike, to prevent an accident.
To tighten a bike handlebars stem, first, inspect the stem and confirm its position and condition. If everything looks good, fix it tightly to the bike's body using an Allen wrench.
As this article from the European Journal of Surgery explains, most abdominal injuries related to bicycles occur as a result of impact with unstable handlebars.
Summary of Tools Needed To Tighten the Handlebar Stem on a Mountain Bike:
| Tool You’ll Need | Why You Need This Tool | Example on Amazon | Price |
| Allen wrenches | To tighten the stem bolts | Efficere Allen Wrench Set | ~$15 |
| Bike grease | Grease helps eliminate friction between stems | Park tool PolyLube 1000 bicycle grease | ~$10 |
Determine the Stem Type
Your stem can either be a threadless or quill type. Reading this article by Level Nine Sports will help you to identify the kind of stem installed in your mountain bike. The required torque for a bike varies with the stem type. We discussed earlier how to fasten the quill-type headset. We will now explain how to fasten the threadless type stem.

Tightening a Threadless Stem
You will first need to loosen the handlebar’s clamp bolts to tighten a threadless stem like this. The clamp bolts help to hold the stem firmly to the steering tube. Loosen the clamp bolts and also the ones within the stem. Then, separate the stem from the steering tube. The steering tube is attached to the wheel axle through the bicycle's fork. A bike stem could lose its tightness due to a lack of lubrication, so make sure to apply a generous coating.
Next, re-attach the stem to the steering tube, and use your torque wrench to tighten the bolts. Once you are done, ensure the handlebars are placed towards the center position of the stem. Tighten the bolts within the stem in an x-pattern until it stops rotating. You should also test the handlebars to confirm they did not come loose while trying to fix the stem.
How to Fix a Mountain Bike Handlebar That Is Not Turning the Wheel
It can be very dangerous if your wheel is not reacting when you turn the handlebar and should be fixed as soon as possible.
To fix handlebars that are not turning the wheel, confirm if the handlebars are tightly fixed. If they are loose, tighten them, if they are tightly fixed try straightening the wheel, straightening the handlebar’s stem, fixing the rear brake, and adjusting the brake pads.
Summary of Tools Needed To Fix a Mountain Bike Handlebar That Is Not Turing the Wheel:
| Tool You’ll Need: | Why You Need This Tool | Example on Amazon | Price |
| Meter stick/yardstick | To measure the bike's stem | Wood double-sided meter stick | ~$30 |
| Allen wrench set | To loosen brake pads | Rexbeti hex Allen wrench set | ~$15 |
| Caliper | To determine brake cable state | Neiko electronic digital caliper | ~$25 |
Follow these tips to fix a handlebar that is not turning the wheel of your mountain bike:
Tip 1. Straighten the Front Wheel
Adjust the front wheel and make sure it is centered. If your bike has a quick-release button you should use it to simply center the wheel. If your bike lacks this feature, you can adjust the bolts from any side of the axle.
It is much easier to adjust the wheel when the bike is turned upside down. Use your finger to spin the wheel, and locate points of friction. Make sure to adjust the spikes that seem to be rubbing against the brake pad. Spin the wheel again to confirm if the friction is gone.

Tip 2. Straighten the Handlebar Stem
Start by standing in front of your bicycle and placing the front wheel between your legs while you face the saddle. Grab the handlebars and align them with the front wheel. Next, start loosening the handlebar bolts using an Allen key, and adjust with your hand as you see fit. Once loose, put the handlebars in a straight position.
Use a ruler like this, tape measure, or adjust by sight to the correct placement. Once positioned correctly, tighten the bolts again.

Tip 3. Fix the Rear Brake
Different brake problems may cause the handlebars to not turn the bike's wheel. Most commonly, the cause for malfunction can be found in the rear brake cables. If the cables in your brake do not move, they are probably stuck in the housing system, and sometimes, the cables may even have been broken inside the housing system. You will need a caliper to determine the condition of the brake cables.
If the caliper also fails to move, you will need to replace the whole cable assembly with something like this. You can read this article by Woom on common brake issues and how to solve them.
Our article about how to fix mountain bike grip shifters also explains how to replace gear cables and cable housing if you need to perform this repair while you're busy.

Tip 4. Adjust the Brake Pads
The brake pads should be about three millimeters (1/8-inch) away from the rim of the tire. A worn-out or shifted brake pad will often be further away.
If the brake pads are not correctly spaced, use your Allen wrench to loosen the bolts. When the bolts are out of the way, you can quickly move the pads up or down to be in the best position.
The spaces above and below the brake pads should be equal, or they will hit the spokes.
Use your Allen wrench to fix the bolts back to the brake pads and ensure they are tight. Your brake pads should be centered on the brake pad holder.

Can You Change the Handlebar on a Mountain Bike?
Sometimes the best solution is to replace your old handlebar with a new one.
To change the handlebar of a mountain bike, buy a handlebar of the right size, remove the old handlebar by unscrewing the bolts, apply some aluminum grease to the new handlebar, install it, and tighten it using a torque wrench. Lastly, attach the brakes, shifters, and grips to the new handlebar.
Our article about how to choose the right handlebar sweep explains what to look for when replacing old and uncomfortable handlebars.
Summary of Tools Needed To Replace the Handlebar on a Mountain Bike
| Tool You’ll Need: | Why You Need This Tool | Example on Amazon | Price |
| 4mm and 5mm Allen keys | To attach the handlebar to the grip | Amazon basic Hex key Allen wrench set with ball end | ~$15 |
| Torque wrench | To loosen the handlebar bolts | ¼” drive click bike torque wrench set | ~$45 |
| Aluminum paste | To lubricate the new handlebar | Epoxy aluminum paste | ~$25 |
How to Replace the Handlebar on a Mountain Bike
If your mountain bike handlebar keeps twisting even after the above fixes, you may need to replace it.
To replace the handlebars on a mountain bike, you need a torque wrench, electric tape, and handlebars tape. First, you need to identify the handlebar size appropriate for you, it could be 26.4mm or 31.8mm. Then remove the broken handlebar, add bicycle grease, and tighten the bolts on the new handlebar using a torque wrench.
Our article about choosing handlebar grip diameter is a useful resource to learn more about the various sizes of handlebars and grips.
Follow these steps to replace your mountain bike handlebar:
Step 1. Remove the Broken Handlebar
The first step is removing the broken handlebars using a screwdriver or Allen key to loosen the grips. Then remove the bolts and the shifters. Our article about how to replace handlebar grips explains the step-by-step process to safely remove grips without damaging the handlebar tube.
Step 2. Add Bicycle Grease to the Stem and Tighten the Bolts
Before you fix the new handlebars to the stem, add some bicycle grease like this, which will serve as a lubricant. Then, ensure the handlebars are well attached to the stem, and use your wrench to tighten the bolts at the center of the bar.
Step 3. Tighten the New Handlebar With the Torque Wrench
The next step is to tighten your new handlebar with the torque wrench. You can find the recommended tool size in your manufacturer's manual.

Step 4. Attach the Brakes, Shifters, and Grips to the New Handlebar
Attach the brake to your handlebar, and fix it at a 45° position, with the brake facing downwards. Fix the shifters to the underside of the brake and use the hex bolts to fasten them. Lastly, re-install the grips on your handlebar.