
Mountain Bike Grip Taping Techniques and Different Types of Tapes
Using mountain bike grip tape is a great way to create custom hand grips for your bike because they provide better grip and comfort for longer rides. It is a good idea to keep a roll of grip tape in your backpack on rides in case your hand grips come off, tear, or break. Then you can do a quick repair on the trail, and continue on your ride. In this article, we discuss different mountain bike grip taping techniques that you can utilize.
To wrap mountain bike grip tape around a straight handlebar, first remove the end caps, then remove the old tape, clean the handlebar with alcohol, wrap the new tape around the handlebar and anchor with finishing tape.
What is Mountain Bike Grip Tape and How is it used?
Mountain bike grip tape comes in different widths, colors, and textures. These various types of tape provide different textured surfaces to help improve grip while you are out riding.
Mountain bike grip tape is a soft flexible tape that can be wrapped around the bike’s handlebar to enhance the rider's grip when riding. Grip tape can replace traditional handlebar grips and is customizable in terms of color, thickness, and texture. The bike grips are wrapped with the edges of the tape overlapping so that the surface is completely covered.
If you want to find out about other mountain bike accessories that can help to improve your grip when riding then check out our tips on how to choose mountain bike gloves with grip.
Can You Wrap Bar Tape Over Grips?
Wrapping grip tape over your handlebar grips will make the grips unnecessarily chunky which could interfere with your gear shifting and braking capabilities.
Grip tape can be wrapped overhand grips to repair grips that get damaged on a ride. However, this is not recommended for long-term use because it can hamper gear shifting and braking. Grip tape is designed to be wrapped directly onto handlebars.
The two main types of grip tape are this adhesive tape and this non-adhesive tape. If you wrap non-adhesive tape over your existing hand grips the tape will shift when riding, and if you place adhesive tape over your grips then the sticky residue could affect your hand grips.
Benefits of Using Bar Tape vs. Grips
The various grip tape colors and types that are available mean you can make a unique handlebar grip for your mountain bike and enjoy the benefits of customized comfort for those long and strenuous rides.
The benefits of using grip tape are that it can be used to create specialized hand grips with customized, thickness, length, and ergonomic grip. Traditional mountain bike hand grips come in standard sizes, so grip tape is an ideal choice for creating hand grips for unusually small or large hands.
As this article from Springer explains, riders’ hand sizes vary in size and strength so having the option to create a grip that conforms to your hand can contribute to your safety while riding. You may also find our article that explains how to choose mountain bike grips for large hands quite interesting.
How to Wrap a Straight Handlebar With Tape
The direction you wrap your tape in is a personal choice, but you should consider the force that you will exert on your handlebar while riding. When mountain biking a rider will often roll their hands backward on the handlebar as their weight shifts when riding over rocks and steep declines.
When wrapping grip tape around a straight handlebar first remove the end caps and old tape, clean the bars, tape the cable housing in place with a strip of regular adhesive tape, wrap the left-hand bar with grip tape in a clockwise direction, and the right-hand bar in an anti-clockwise direction to stop the rider’s hands from moving against the tape while riding, replace the end caps to secure the grip tape, continue to wind the tape around the handlebar towards the center, and cut the grip tape and secure it in place with finishing tape.
The most popular way to wrap mountain bike handlebars is to wind the grip tape around the handlebars in a motion that goes under the bar away from the rider and then over the top of the bar toward the rider—so that the tape is going in the same direction as the rider’s momentum when riding. Wrapping in the opposite direction might cause friction from the rider’s hands and lift the tape.
This is not a hard and fast rule so if wrapping in the opposite direction works for you that's okay. You should consider the types of trails you’ll be riding most often and wrap your tape accordingly. Mountain biking is not like road biking because this kind of riding is more strenuous and changeable. For example when mountain biking the rider will often make jumps and perform other actions that require the rider to move their hands around a lot. It is up to the rider to decide which maneuvers they will perform regularly and wrap the grip tape in a suitable direction. This video explains some jumping techniques and will give you a good idea of the momentum of the rider and the bike.
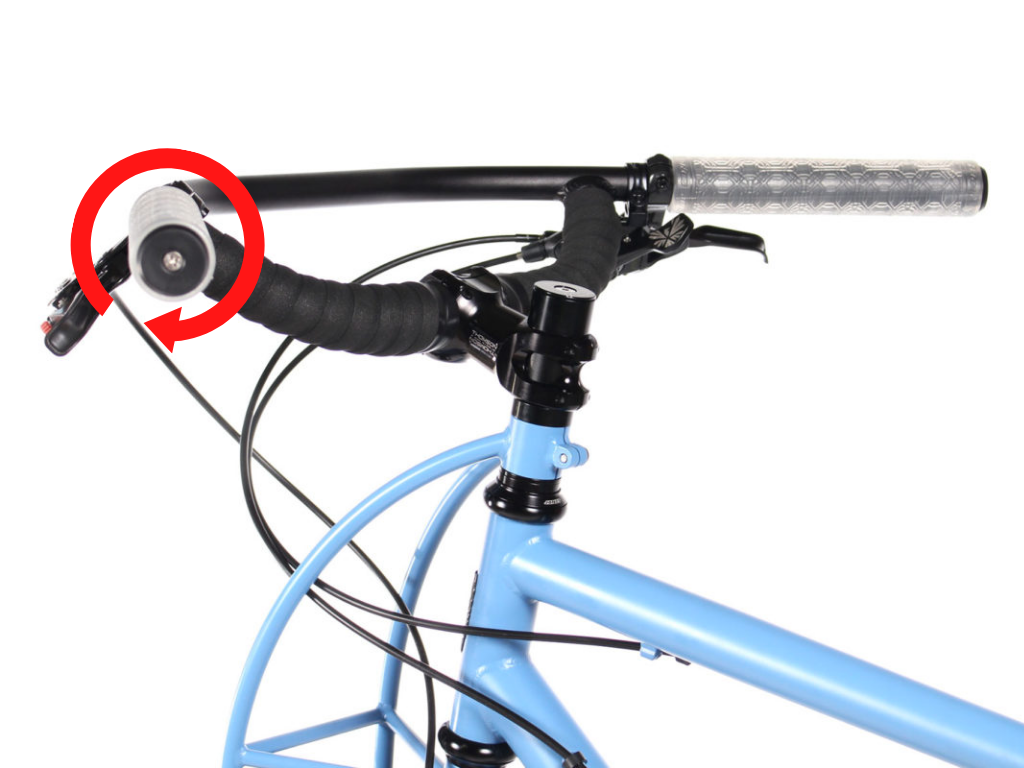
Step 1. Remove the End Caps
Use a thin flat screwdriver like this or an end cap tool like this to ease the end cap off the handlebar, being careful not to scratch the bar or damage the cap.
Step 2. Remove the Old Tape or Hand Grips
Next, unwind the old grip tape, or remove the handgrips by spraying some lubricant inside the grips. Our article that explains how to remove mountain bike grips explains the steps you need to follow.
Step 3. Clean the Handlebars
Clean the handlebar with a good degreaser like this one that will also protect the frame against rust. If your old grip tape has left some adhesive residue on the handlebar then you can use an adhesive removing spray like this, or even a little olive oil dabbed on a soft cloth to remove the sticky mess.
Step 4. Tape the Cable Housing in Place
Once the bar is clean and dry, you can tape the gear and brake cable housing into place using regular adhesive tape or this electrical tape. This will ensure the cables are correctly positioned and out of the way before you start wrapping the grip tape around the handlebar.
Step 5. Start Wrapping the Tape From the End of the Handlebar
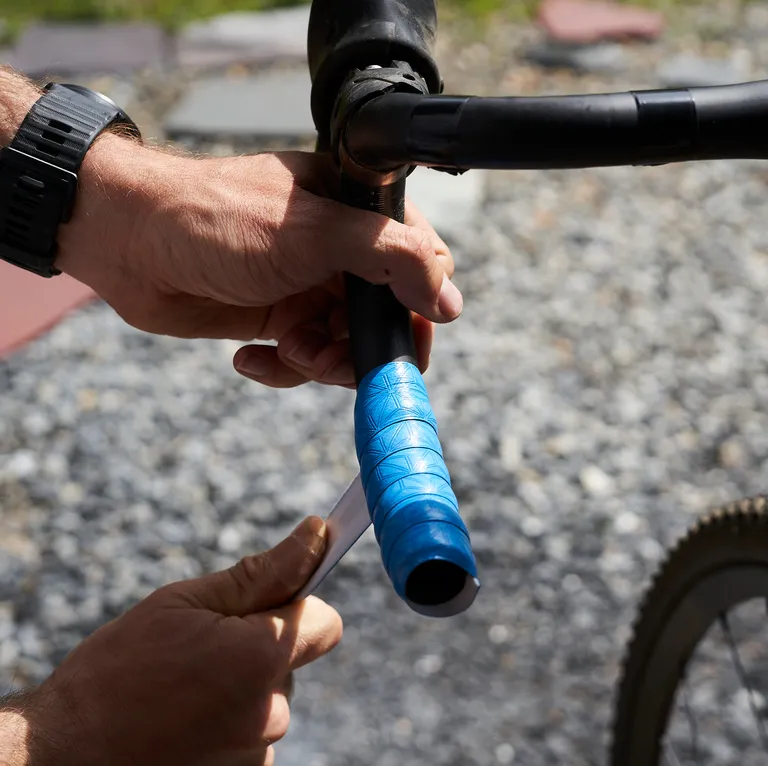
If you are using adhesive-backed grip tape like this then unpeel small sections as you wrap the bar. Start at the end of the left bar and place the tape with half of the width hanging over the edge, and wrap clockwise for two rotations, keeping the tape taut but not too tight.
Step 6. Replace the End Cap
Holding the tape in place, replace the end cap, and lightly tap it with a mallet if necessary to secure it—especially if you are using non-adhesive tape because it might unravel if not secured with the end cap.
Step 7. Wind the Grip Tape Around the Handlebar
Continue wrapping the tape around the handlebar overlapping a third of the tape on each turn so that there aren’t any gaps that expose the bar. If you are using adhesive tape, take care to place the adhesive strip directly on the bar and not on the tape. If using a silicone self-fusing tape or a non-adhesive tape, then an overlap that is a third of the width of the tape will be sufficient. Taping from the bar ends inwards towards the center, and wrapping the left-hand bar in a clockwise direction, and the right-hand bar in an anti-clockwise direction should prevent the tape edges from curling when riding.
Step 8. Cut the Grip Tape
When you have reached your desired length cut the grip tape at a 45-degree angle so that the cut edge lays flush with the wound edge. Make sure the tape ends underneath the handlebar where your fingertips will stop when riding so that the edge doesn’t pull loose because of friction from the hand.
Step 9. Secure the End with Finishing Tape
Use this finishing tape or electrical tape to secure the grip tape. Two rotations should be enough to secure the end of the grip tape to the handlebar. Some bike grip tapes come with finishing tape and end caps included like this pack. Do this on both sides of the handlebar.
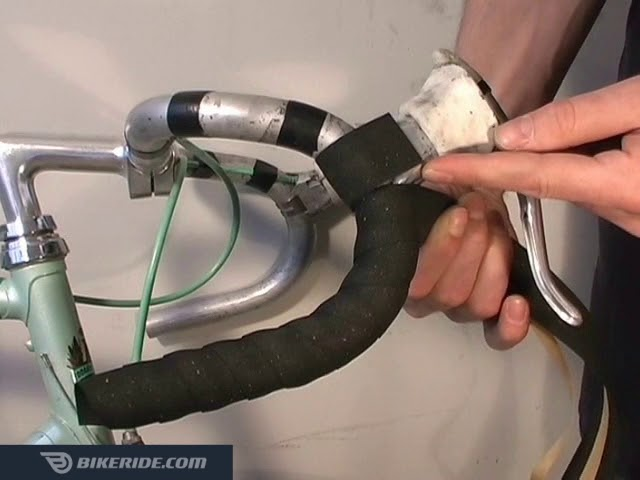
How to Wrap a Curved Handlebar With Tape
Curved handlebars are not typically used on mountain bikes, but many riders are opting for this type of handlebar so the bike can be used on adventure biking routes or gravel tracks. Curved handlebars are well suited to grip tape because of their shape.
Wrapping a curved or drop-handlebar with grip tape is similar to wrapping a straight handlebar except that the right-hand side should be wrapped in a clockwise direction and the left-hand side in a counter-clockwise direction. When close to the gear shifter and brake lever, place a piece of gear tape over the bracket and continue winding the grip tape over the covered bracket and onto the top of the handlebar. From this point, the tape should be wound away from the rider, in the same direction as on a regular straight handlebar.
This video explains how to wrap grip tape on a curved handlebar without the complicated and chunky figure-8 technique.
Step 1. Start Wrapping At the Bar End
Starting on the right side, place the tape on the edge of the handlebar with an overhang of at least half the width of the tape, and start winding the tape clockwise, keeping the tape taut. Once you have completed two rotations, fold the tape edge into the bar and plug the end of the bar with a plug like this, tapping it into place with a rubber mallet like this.
Step 2. Wind the Tape Outwards Along the Bar
Keeping consistent, firm tension on the tape, wind the tape around the curved section of the bar, making sure to overlap the edge by a half to a third of the width of the tape so that none of the bar is exposed.
Step 3. Cover the Bracket For the Gear and Brake Hood
Most bike grip tape comes with two pieces of tape that you can stick over the bracket that holds the gear and brake levers on the bike, like this one. Position this piece of tape on the bracket and wrap the grip tape over it in a V-pattern.
Step 4. Wind the Tape around the Top Bar
Once passed the levers continue to wrap the grip tape onto the top part of the handlebar in a winding motion.
Step 5. Cut the Tape and Finish Wrapping
Continue wrapping the tape, moving towards the center of the handlebar. Stop when the handgrip is the desired length, making sure to cut the tape so that it ends under the bar and at a 45-degree angle that is parallel to the tape edge. Wind a piece of electrical tape onto the finished edge to secure it properly.
At this point, you may be wondering if you can put drop handlebars on a mountain bike and why you should do it. If so, be sure to read our similar article. Also, you might also find interest in our related guide on common mountain bike grip upgrades and how to choose the right one. Be sure to take a look at that article too.
Should You Use Tape With or Without Adhesive Backing?
Grip tape can have an adhesive strip on the back, or it can be a self-fusing tape that has an adhesive that spans the full width of the tape, or it can have no adhesive. The choice of tape depends on the rider’s preference.
Grip tape without adhesive backing can be repositioned but it can also shift during the wrapping process. Maintain consistent tension when wrapping the bar. Grip tape with adhesive backing will enable precise positioning when wrapping the handlebar but may leave a sticky residue when removed.
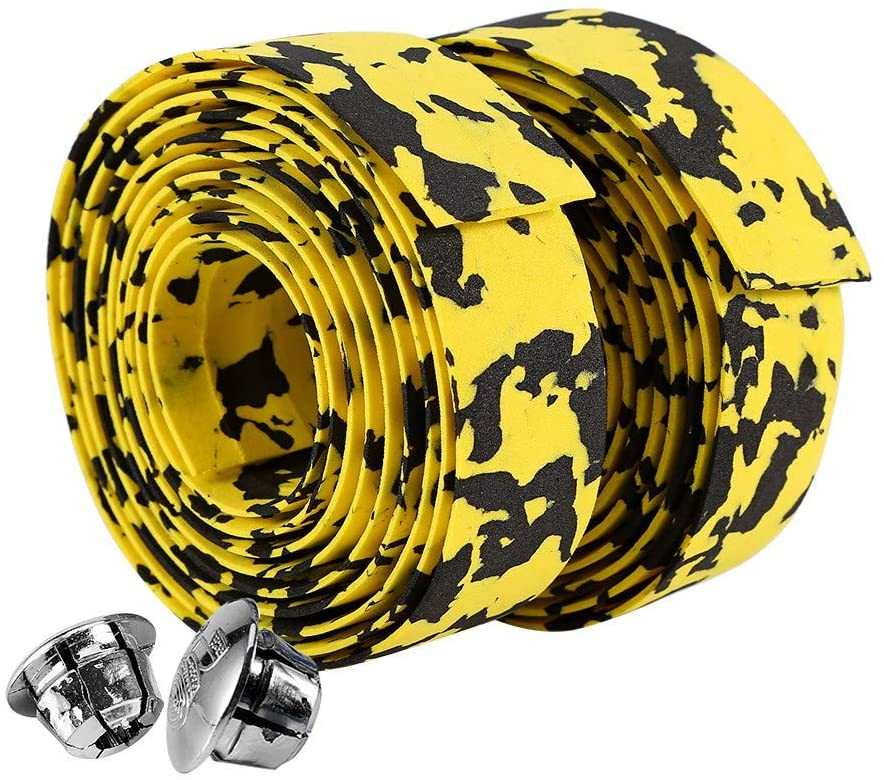
Types of Mountain Bike Grip Tape
Not only do grip tapes come in a variety of colors and finishes, but they also have various thicknesses to enable riders to create comfortable hand grips that can reduce hand numbness.
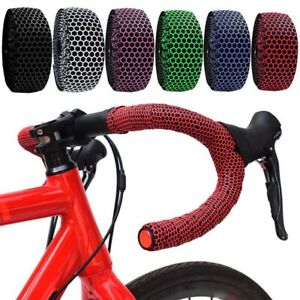
Use foam grip tape on mountain bike handlebars for hand grips that are soft and comfortable. Non-adhesive grip tape is suitable for beginner riders to wrap handlebars, as it can be repositioned if wrapped incorrectly. Adhesive grip tape is suitable for experienced bikers with a perfect wrapping technique. Use textured grip tape for tough, wet, and muddy terrain because the grooves in the tape improve grip. Use reflective tape for night or early morning rides, and silicone waterproof grip tape for riding in wet conditions.
If you want to learn more about using the correct handlebar grips for comfort then read our article about choosing a mountain bike grip for numbness. Numbness can also be caused by riding in extreme weather as explained in our article that provides tips on how to choose heated mountain bike handlebar grips.
Summary of Types of Grip Tape
| Mountain Bike grip Tape Type | When to Use It | Amazon Product | Price |
| Foam Grip Tape | For a softer hand grip for better comfort | Asti Self-Adhesive Silicone Foam Bicycle Tapes | ~$15 |
| Non-Adhesive Grip Tape | To reposition the tape or to avoid a sticky residue | Handlebar Tape Luxury PU Leather Bar Tape | ~$15 |
| Adhesive Grip Tape | For a tape that is easy to wrap onto the handlebars | Boenoea Bike Handlebar Tapes Road Mountain Bike Bar Tapes | ~$15 |
| Textured Grip Tape | For improved grip and better control on tough and wet trails | Skwiki Road Bike Handle Bar Tape, Adherent PU Leather, Gripy, High Rebound | ~$25 |
| Reflective Grip Tape | For increased visibility in the dark | Bike Handlebar Tapes, Reflective Road Bicycle Bar Tape, Handle Wraps | ~$25 |
| Silicone Waterproof Tape | For a tacky tape that will bond well with the bar | Domain Cycling - Bike Handlebar Tape - Self-Fusing Silicone Waterproofing Tape | ~$15 |