
Common Mountain Bike Grip Upgrades & How to Choose the Ones You Need
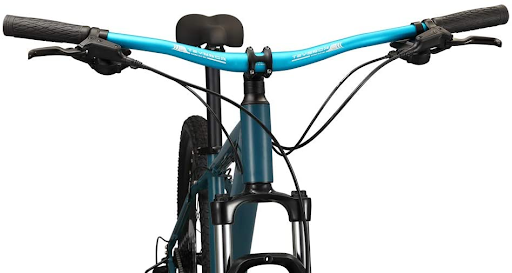
A mountain bike rider has three direct contact points with the bike; the handlebars, the seat, and the pedals. The bike’s wheels are the contact points with the ground. Mountain bikers understand that these contact points are essential for a safe and comfortable riding experience. If you are experiencing discomfort or pain when riding, or you don’t feel like you have proper control of your bike over various terrains, then you probably need mountain bike grip upgrades to upgrade your tires and your mountain bike hand grips.
Upgrading mountain bike hand grips will improve the rider’s control and comfort when mountain biking. Possible reasons for upgrading handgrips include painful wrists, sore palms, hand numbness, or hands slipping when riding. A good tire grip that is suited to the particular terrain is also important because it will prevent accidents and ensure there is steady traction when riding. Possible reasons to upgrade your tire grip include losing control on sandy roads, muddy terrains, and riding on regular roads.

Similarly, you might find interest in learning more about mountain bike fender accessories and how to choose the right ones. Be sure to take a look at our similar article to find out more.
Riding Problems & Mountain Bike Hand Grip Upgrades Which Solve Them
Having a grip on your mountain bike that doesn’t fit your hand size can cause all kinds of problems, like painful wrists, palms, fingers, and forearms. This article by the International Journal of Sports Injuries discusses the most common mountain bike injuries and how to prevent them. Knowing when to upgrade your hand grips will help you choose the right ones for a better riding experience. Our article that provides tips on how to choose mountain bike grips sizes is a handy resource to help you learn more about the various types and sizes of hand grips so that you can choose the right ones for your needs.
Mountain bike hand grip upgrades for hands that keep slipping when riding on bumpy terrain include installing handgrips that are tackier and a bit longer. For numbness caused by vibrations from rocky paths buy thicker grips. For pain or discomfort in the wrist area install softer handgrips, and for palms that are sore get smaller hand grips.
Hands Slip Off the Grips on Bumpy Paths
The variety of mountain bike terrains available to ride means you will encounter some paths that are relatively smooth and some that will cause sudden jolts as your tires connect and move over rocks and exposed tree roots. If your handgrips aren’t tacky enough then you can easily lose grip of the handlebars when the path gets bouncy. You can solve this hand grip problem by installing tacky handgrips like these.
Another reason your hands could keep slipping off the grips when riding is that your handgrips aren’t securely fitted to the handlebars. Use a mountain bike adhesive spray like this one to give your grips a snug fit. Our article about choosing mountain bike grip adhesives discusses the different types of grip adhesives you can try.
A third reason your hands could be slipping or flying off the handgrips on rough rides is that your grips are too short. If your mountain bike has grip shifters then the installed grip will have to be shorter to accommodate the shifter, this reduced surface area can be problematic for a rider who has wider hands. In this instance, it would be better if you changed your shifter type to either a trigger or thumb shifter and install slightly longer handgrips. Our article about choosing mountain bike grip shifters has more information about this upgrade.
Vibrations When Riding are Causing Numb Hands
There are many reasons for hand numbness when mountain biking, and according to this article from Sports Medicine about non-traumatic bike injuries, a common cause is using handgrips that are too small for the rider’s hand size. When the grip diameter is too small the rider’s fingers overlap in a way that causes poor circulation in the hands which then leads to that pins and needles feeling.
Losing sensation in your hands when riding can be dangerous because it affects your control and handling of the bike. Try changing your handgrips to larger or thicker ones like these. Our article about choosing handgrips to prevent numbness has many tips to help you decide what grips are best for you.
Painful Wrists During and After Riding
Mountain biking involves riding over uneven terrain so your bike needs to provide adequate shock absorption to reduce the impact on your joints. If you experience pain in your wrists after a strenuous ride then your handgrips are probably not providing enough cushioning to counteract the intense impact. Try installing softer handgrips with an ergonomic design like these.
Palms Hurt When Riding
When mountain biking you want to hold onto your handlebar grips with a firm yet relaxed grip. White-knuckling it during your ride will cause tension and strain in your hands, arms, and neck, which can lead to long-term injuries. The reason you may be holding on too tight is that the grips are too big and you have to exert more effort to maintain control of your mountain bike on steep inclines and declines. Holding your handlebar grips too tight can cause pain in your palms when riding so you will probably need to change your grips to ones with a narrower diameter like these ones.
You might also consider adding drop bars to your bike for better posture and less pain. Take a look at our simple steps for adding drip bars to a mountain bike for more details.
Summary of Hand Grip Upgrades
| Grip Problem | Suggested Upgrade | Amazon Product | Price |
| Slipping Hands | Tacky Handgrips Longer Handgrips | Renthal Ultra Tacky Lock-On Bicycle Grips Kutrick Handle Bar Grips 145mm Soft Flangeless Longneck Grips | ~$45 ~$15 |
| Hand Numbness | Thicker Handgrips | Wolf Tooth Silicone Mountain Bike Grips: Fat Paw | ~$30 |
| Sore Wrists | Softer Handgrips | Itoda Handlebar Grips for Bike, Soft Sponge Non-Slip Bicycle Handle | ~$15 |
| Painful Palms | Smaller Handgrips | Bike Grips, Lermx Made of TPR Rubber Bicycle Handlebar Grips | ~$15 |
Similarly, you may be interested in learning how to install mudguards on a mountain bike. Be sure to check out our related article for more details.
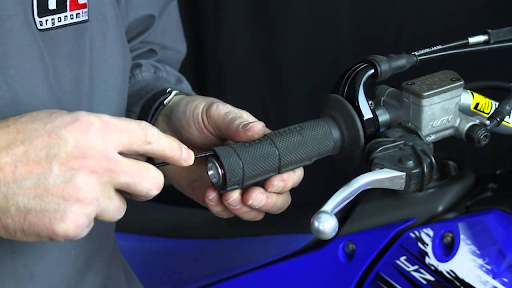
How to Change Hand Grips On a Mountain Bike
Depending on the type of handgrip you gave on your mountain bike the steps may vary slightly. A lock-on handgrip has an outer ring that needs to be loosened with an Allen wrench, while a slip-on grip doesn’t have this type of outer closure.
To change mountain bike hand grips first loosen the outer ring or lock-on grips, if necessary, then slide a thin flat screwdriver under the edge of the grip and prie the grip away from the handlebar so that you create a small gap. Spray lubricant in the gap and remove the screwdriver, then twist and pull the grip off the handlebar. Once the grip is off clean the handlebar, then lubricate the new grip and twist it onto the handlebar. Finally, secure the handgrip by tightening the screw. Let the lubricant dry before going for a ride.
Our article about how to remove mountain bike grips goes into more detail about the different handgrips and how to remove them from a mountain bike.
Step 1. Loosen the Grip from the Handlebar
If your handgrips have a lock ring or a handlebar cap then you will need to unscrew it before removing the cap. Next, you will need a thin flat-end screwdriver like this to maneuver between the grip edge and handlebar without damaging the bar.
Step 2. Spray Lubricant Inside the Grip
The grip will probably not budge because of the tight fit on the handlebars, so you will need to lift the edge of the grip from the bar and spray a little lubricant like this into the gap. Work your way around the entire diameter inside the grip, lifting and spraying sections as you go.
Step 3. Twist the Grip Off the Handlebar
You may need to spray and twist several times before the grip starts to move. When the grip starts to twist more easily on the bar you can pull it off.
Step 4. Clean the Handlebar
There will probably be some gunk and residue left on the handlebars after removing the grips, so give the bike a thorough clean using a specially formulated bike degreaser like this one that will also provide protection against rust.
Step 5. Lubricate the New Handgrip
Next, spray or squirt a small amount of lubricant into the inside of the new handgrip to help slide it on easier. When the lubricant dries it will also cause the grip to stay securely in position.
Step 6. Twist the New Grip Onto the Handlebar
Position the grip opening over the bar and twist and push it until it is in the correct position. A twist grip like this one doesn’t have a lock-on end and will require more force to twist into place, while a lock-on grip like this one is secured in place with a double lock.
Step 7. Tighten the Screws
If the new handgrip has a cap end or a lock-on ring then you will need to tighten the screw to secure the grips.
Step 8. Wait for the Lubricant to Dry
Finally, allow about 24 hours for the lubricant to properly cure to ensure the handgrips have firmly adhered to the handlebars. There are fast drying options that you can choose to secure your grips, read our article about how to install mountain bike hand grips to learn more.
Biking Problems & Mountain Bike Tire Grip Upgrades That Solve Them
Choosing the right tires to match the type of terrain you ride most often can mean the difference between an exhilarating and enjoyable ride, and a stressful and unpleasant ride. Your tires make contact with all types of surfaces from level grassy ground to steep jagged rocks, and they need to be able to provide the correct amount of traction and grip while also contributing to the speed and resilience of the bike. If you find that your control on various terrain is lacking then you will need to upgrade your tires.
Mountain bike tire grip upgrades for tires that slip on rocky trails include buying mountain bike tires that have large side knobs and sipes. For skidding or losing control on sandy roads buy tires with a medium-soft rubber compound and dispersed tread pattern. For tarred road riding change to medium-hard tires with a shallow tread pattern that can withstand the hard surface. For muddy trails buy fat tires with tall spikes for more traction.

Upgrades for Tires that Are Slipping on Rocky Terrain
If your tires are slipping when riding on rocky inclines and steep declines then you will probably need to upgrade your tires to ones that have a softer compound that can stick to the rocks better and mold around sharp objects. A tire with large side knobs and sipes (slits in the tire surface) like this one can help improve grip on rocky paths. Our article about how to choose mountain bike tires for maximum grip goes into great depth about the different types of mountain bike tires.
Upgrades for Tires that Are Losing Control on Sandy Trails
Sandy paths can be tricky to navigate when mountain biking because you need to be able to slice through the sand without sinking into it. We suggest choosing tires that have tall square knobs that are evenly spread across the tire in a wide pattern for best traction and sand dissipation when riding. These tires have a tread pattern that will disperse the sand when rising and provide excellent traction to maintain speed.
Upgrades for Tires When Mud is Affecting My Ride
If you expect to encounter many muddy puddles on your ride then a fat tire might suit your needs. The fatter tire provides more surface area to cross difficult sections of the path where an ordinary tire might sink into the muddy ground. You will need to consider the extra weight that fat tires add to the bike and the extra effort that they require to maintain speed. But many people feel this minor con doesn’t outweigh the comfort and puncture-resistance of fat tires. These fat tires are a good upgrade for riders who enjoy rougher and wetter terrains.
Upgrades for Tires for Using a Mountain Bike on a Road
Mountain bike tires are not suitable for riding on tar roads because the softer rubber compound will wear down quicker on the harder road surface. If you want to use your mountain bike on a regular road then we recommended changing your tires to ones that have a medium-firm rubber surface and a shallow tread pattern like these ones. The smaller knobs will reduce friction and the hard rubber will withstand the firm tarred surface.
Summary of Tire Grip Upgrades
| Tire Grip Problem | Suggested Upgrade | Amazon Product | Price |
| Slipping on Rocks | Tires with large knobs | Elecony Foldable Replacement Bike Tire | ~$25 |
| Skidding on Sand | Tires with deep knobs and dispersed tread | Wtb Vigilante 2.3 Comp Tire | ~$50 |
| Thick Viscous Mud | Fat tires | Hycline Fat Tire,20/26x4.0 Inch Fat Bike Tires | ~$55 |
| Riding on a Tarred Road | Tire with a shallow tread pattern | Catazer 26x1.95/26x2.125/26x1.50 1 Pair Bicycle Tire Fixed Inflation Solid | ~$60 |