
Mountain Bike Rear Mudguard Installation and How to Choose an MTB Mudguard
To get the most out of your rides, you should equip your mountain bike with a top-quality rear mudguard. Protect yourself from debris and mud that is flicked up by the tires of your mountain bike by installing a rear mudguard. In this article, we’ll discuss mountain bike rear mudguard installation and how to choose the best MTB mudguard for your needs.
To install rear mudguards on a mountain bike, remove the rear wheel, disengage the derailleur, attach the mudguard to the seat stay bridge, and then fasten the mudguard stays.
Mountain bike rear mudguards help keep the rider and mountain bike dry and clean. This allows the rider to concentrate on the route and maintain clear visibility. In addition, the guards block grit from getting into the bike's moving parts, making riding safer. When selecting mudguards, there are several factors to consider. This article will show you how to choose and install an MTB mudguard.
While you may notice us referring to mountain bike fender installation, the installation of mudguards is so similar that it’s not worth differentiating between fenders and mudguards.
Why a Rear MTB Mudguard is Important
Choosing the right type of mudguard for your bike and riding style will ensure you enjoy all the benefits and protection that a mudguard could offer but fitting a mudguard that is the wrong size would actually be defeating the point.
A mountain bike rear mudguard keeps the rider and mountain bike dry and clean and allows the rider to concentrate on riding. It helps to maintain clear vision and blocks grit from getting into the bike's moving parts.
Our article that explains how to choose mountain bike fender width will help you choose the right size fender for your particular tires.
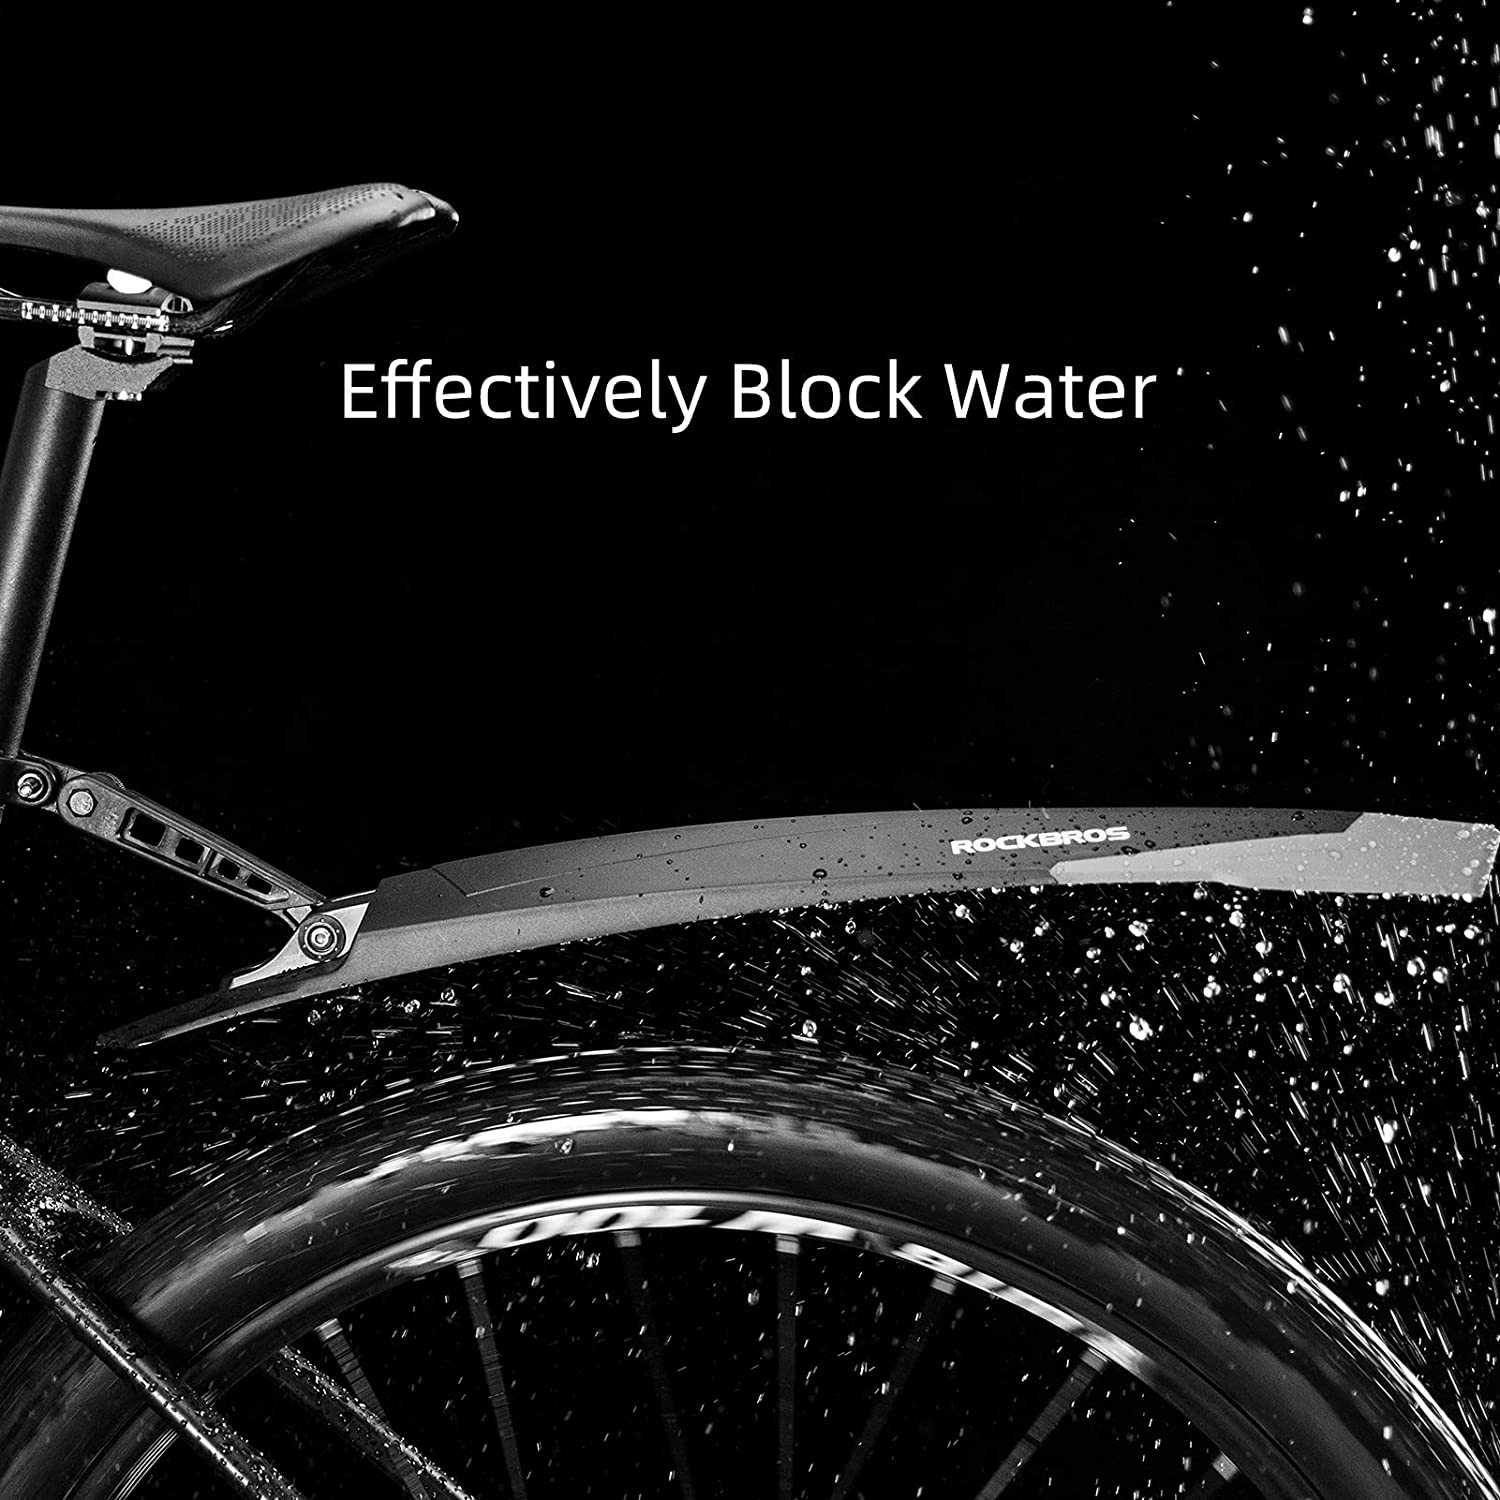
A rear MTB mudguard is essential if you want to keep yourself and your bike clean in all conditions. Mountain bike rear mudguard installation makes it easier to ride down steep inclines and helps save energy on climbs. They also increase stability when cornering at high speed. The following are some of the main reasons why using a rear MTB mudguard is important.

Reason 1. Keep Water Sprays From the Cyclist and Bike
Water and dirt splashing up from behind and drenching you can be a source of frustration. A rear mudguard from a set like this blocks debris before it hits you. In addition to protecting you, the deflection of water and mud away from your back wheel will save you from having to do a deep cleaning session after the ride.
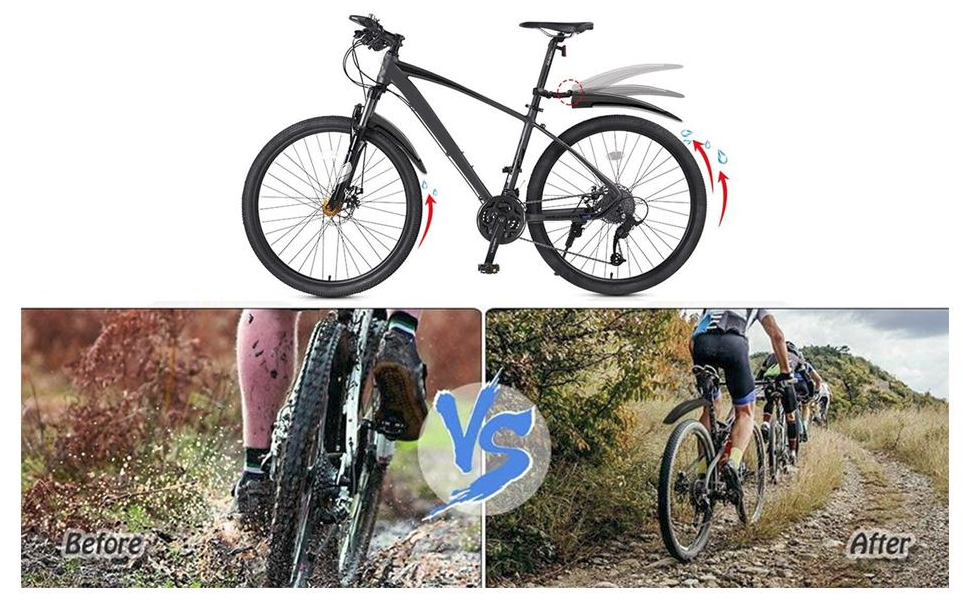
Reason 2. Reduce Vision Impairment Issues
When it's wet outside, it's easy to lose track of how much mud and dirt your tires fling up. This can create vision impairment issues, which means you might not be able to see where you are going and can fail to notice upcoming obstacles. A rear mountain bike mudguard will help mitigate these vision impairment issues by pushing excess mud and dirt away from your bike so you and your fellow cyclists can see where you are going. Check out our tips and tricks for choosing mountain bike armor designs to see our suggestions for eye protection.
Reason 3. Keep Rotating Parts Free from Grit
If you ride in muddy or wet conditions, mud and grime can soon accumulate on the bike's moving parts, making it more difficult to brake and shift. This increases the probability of getting into an accident. Faulty braking and shifting can result in road rash or other bicycle-related injuries according to this article from aapf.org. A rear mudguard helps prevent dirt and grit from causing problems in general.
Reason 4. Make the Mountain Bike Unique
Mountain bikes can be made more unique and personal through some simple modifications. Using a slick mudguard can have a transformative effect on the overall look of your bike. There are many different types of rear guards to choose from. Alternatively, you can design one yourself by having a look at our article that provides the steps to make a mountain bike mudguard.
Reason 5. It’s a Requirement in Many Cycling Clubs
If you participate in organized rides and races, your cycling club may require you to use mudguards. Many races include it in their rules as an absolute necessity. The main reason behind this requirement is that riding without mudguards can spray water and mud on other riders. This article from Mountain Weekly News explains the riding etiquette around mud trails and using mudguards to protect your fellow riders.
If you're looking for more information, be sure to read our related article answering the question, "do you need mudguards on a mountain bike?"
How to Fit Rear Mudguards to a Mountain Bike
The first step in mountain bike rear mudguard installation & attaching mudguards to a bike is determining whether or not the frame is equipped with eyelets. The space between the bike's frame and wheels, known as the clearance, is also important.
To fit a rear mudguard to a mountain bike check if there are eyelets and see if the clearance is sufficient, and then proceed to remove the rear wheel. Then, attach the fender to the bike’s seat stay bridge, and attach the fender stays.
Clip-on mudguards are an easy solution if your bike does not have eyelets. Our article about mountain bike fender parts explains the various methods of attaching mudguards and this video tutorial by Mucky Nutz shows how to install a rear fender.
Now we will show you how to quickly and easily install full-length mudguards on your bike's back wheel. For additional information, read this user guide from FrogBikes, a mudguard manufacturer.
Step 1. Remove the Rear Wheel
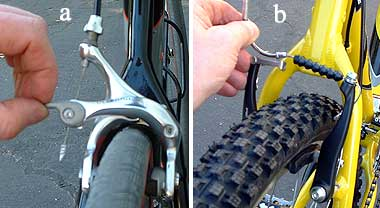
Inspect whether your bike has cantilever brakes (rim brakes) or disc brakes. If your bike has rim brakes, all you need to do is open the breaks. For disc brakes, you need to take extra care so that your bike will not topple over while you are working on it. We recommend using a bike stand like this.
Step 2. Disengage the Derailleur
Next, work on the derailleur. Most bikes have a derailleur gear that you need to disengage when removing a wheel. You should select the gear that moves the chain to the smallest sprocket and rotate the pedals. Once the chain drops, it will reveal the nuts holding your rear bike wheel. You need to loosen these nuts to release your wheel from the bike frame.
Use a wrench from a set like this or a spanner to unscrew the nut, then proceed to do the same for the opposite nut. Having a least a basic toolkit for simple maintenance and modification tasks will make your life a lot easier, so we recommend checking out our mountain bike tool kit essentials guide.
You should gradually release the bike frame from the wheel by grabbing the left side of the bike while your right thumb is securing the end of the nut on the other side. Your left hand should give you stability while you are pulling the derailleur body completely from the wheel.
You will notice that the wheel is already detached from the bike’s frame, yet the chain is not completely removed. You need to completely unhook the chain with your right hand and lift the bike body with your left, this is when a bike stand is especially handy.
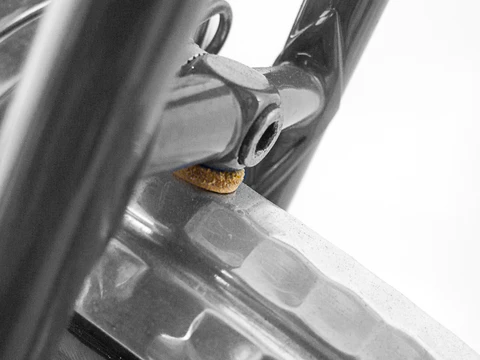
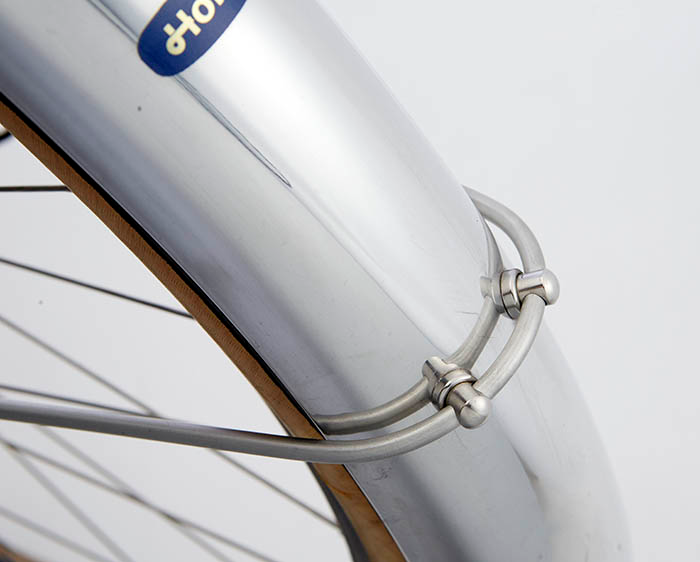
Step 3. Attach the Fender to the Seat Stay Bridge
Now that the rear wheel is released check whether your bike has an attachment hole for the seat stay bridge. If it does, a screw or bolt can be installed to attach the fender to the bridge. Alternatively, some bikes will require a clamp-on bracket or L-bracket like this. Be sure to attach it tightly to prevent friction between the fender and bike from slowing you down.
Step 4. Attach the Stays
Fasten the stays to the mudguard and bolt it into place. Check that all the screws, nuts, and bolts are tight. Put the back wheel back on and make sure it spins smoothly. And if you find that you need stays you can find these ones online.
You may also find interest in learning how to fix mountain bike mudguards that wiggle. If so, be sure to read our related article for more details.
Tips to Choose Mountain Bike Mudguards
When choosing muguards that are suitable for you and your bike there are a few things to keep in mind.
Choose a mudguard that is easy to install with a durable mounting system, is foldable and preformed, covers the tire width fully, has soft parts to withstand scuffing, is made of durable material, is long enough to stop the spray of mud and water, and is light so as not to add extra weight to the bike.
1. Buy a Mudguard That’s Easy to Install and Has a Durable Mounting System
As you’ve seen, mountain bike rear mudguard installation can be cumbersome. Some mudguards have a complicated system of clamps and straps while others require you to use zip ties like these, which wear out and break over time. Try to find mudguards that are made of durable material and are easy to install.
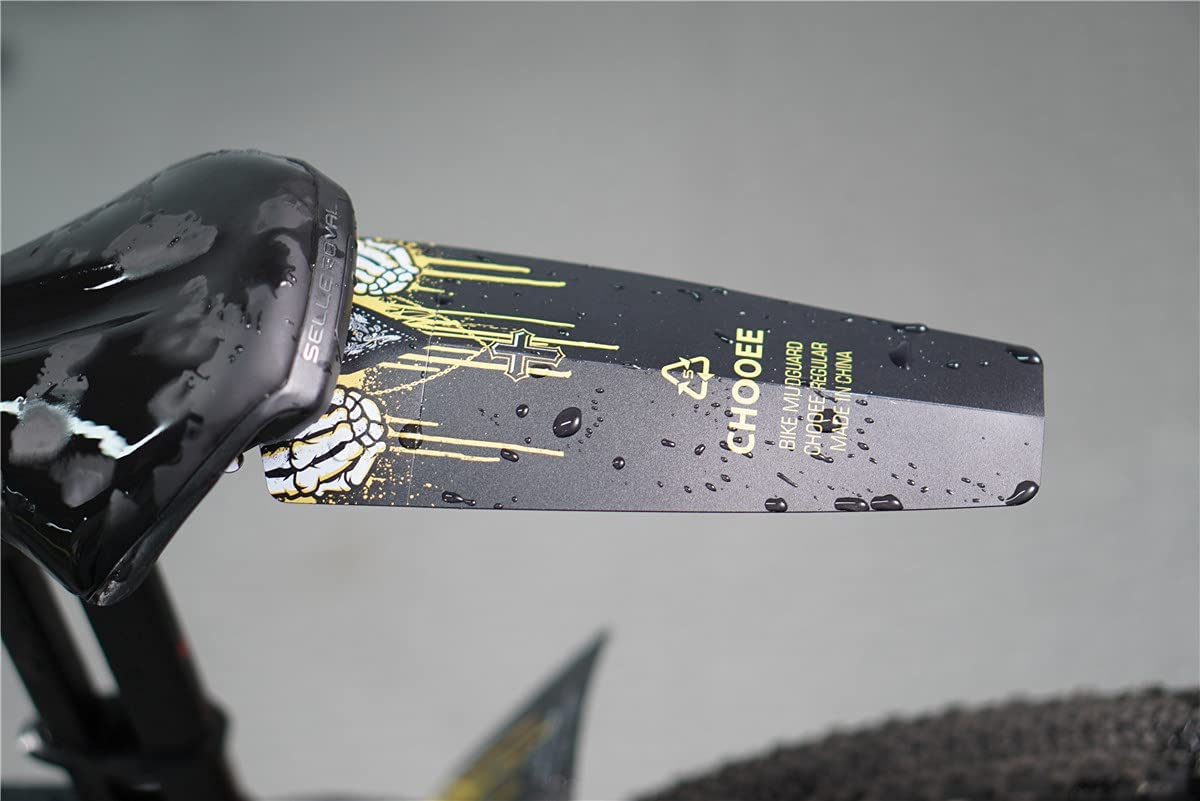
For example, these mudguards are made of anti-pressure PVC material and come with a multifunctional screwdriver for installation. Also, look for guards that are suitable to mount on your bike and do not require too many adjustments to fix and fasten.
2. Choose an MTB Mudguard That’s Foldable and Preformed to Cover the Tire’s Width
Quality mudguards like these that are designed specifically for off-road riding and can accommodate larger tires, ranging from 2 inches wide up to 3 inches or more, are the best for mountain biking. You can opt for foldable mountain bike guards that cover your tires well no matter how wet or muddy the circumstances.
There are two main options for foldable MTB mudguards, these that attach around your tire's circumference and ones that wrap partially or fully around your fork. The benefits of choosing wider mudguards are not limited to just fitting wider tires—they are also better at blocking sand, dust, snow, and other general trail debris. Our article about choosing mountain bike fender extensions is a great resource for tips about improving your mudguard’s protective features.
3. Select a Mudguard with Wider Coverage Than the Tire To Block Water and Mud Sprays
Some mountain bikes have built-in fenders but most do not. If your mountain bike did not come with fenders or if you want to upgrade them, make sure to buy guards that are wider than your tires. This way the mudguards will function as intended and block water and mud.
4. Buy Mudguards With Soft Parts To Prevent Paint Scuffing
There are two main types of mudguards, those that mount on your tires and those that wrap around your fork. Although tire-mounted guards have several advantages, one drawback is that if you have disc brakes or thinner wheels, there is a chance they will rub against your rotors or paint and scuff it. To prevent such damage, invest in a pair of soft guards like these.
5. Go for Mountain Bike Mudguards Made with Durable Materials
Many mudguards are made from plastic. There are certain benefits to riding with plastic fenders as explained in this article by Brainybikers. Plastic fenders tend to be more flexible and are less easily damaged in an accident than those made of metal. In general, they are also lighter and cheaper than metal ones.
If you opt for plastic mudguards consider buying ones made from thicker plastic that will hold up against mud and debris. This way it is less likely that you will need to replace them too soon.
Metal mudguards, such as models made of aluminum like these, are also durable. Over time the surfaces of fenders get scarred due to the little stones that are flung by the tire. Aluminum fenders can be polished to keep the damage from showing. It can also be argued that aluminum fenders look classier and more unique than the often cheaper and more commonly seen plastic ones.
6. Choose a Mudguard Long Enough for the Wheel Size to Prevent Mud From Splashing
For mountain bikes that have large wheels, it is important to choose mudguards with a length at least one inch longer than the wheel size. For example, if your bike has 27-inch wheels like this, you need mudguards that are at least 28 inches long.
7. Buy an Mtb Mudguard That Weighs Less to Avoid Wasting Energy
When choosing a mudguard, ensure that it does not add too much weight to your bike. A heavy mudguard will cause you to exert more energy than necessary, impacting your performance. This extract from Effective Cycling explains how large mudguards can add weight and drag when cycling, and how to avoid this problem.
MTB Mudguard Installation Tips and Tricks
Installing your mudguards carefully and securely will mean that they do what they are supposed to do.
When installing mudguards onto a mountain bike first measure the coverage and clearance. The mudguard should extend slightly beyond the tire and have a minimum of 8-12 mm of space between the tire and the guard.
Tip 1. Ensure the Mudguard Length and Width Offers Enough Coverage
Ensuring your mudguard is an appropriate size is a key aspect of installation. If it is too small, you may miss out on protection, it might not fit correctly, or it could become damaged while being used.
Your tire's width will determine how many inches of mudguard you need on either side of your wheel. A good rule to follow is that your mudguards should be about a centimeter or two wider than your tires.
Tip 2. For Full Coverage Mudguards, Ensure the Tire to Mudguard Clearance is Even
On both front and rear mudguards like these, tire clearance must be the same. You do not want different clearance on either side of your bike, as unevenly suspended tires can cause problems while riding. The only way to avoid an issue is to ensure that your tires are not wider than your mudguard at any point.
The best way to check clearances is by sitting on the saddle while looking over each tire at its widest point, if it's closer than an inch from touching consider it to be too tight.
Tip 3. Match the Mudguard Style with the MTB Design
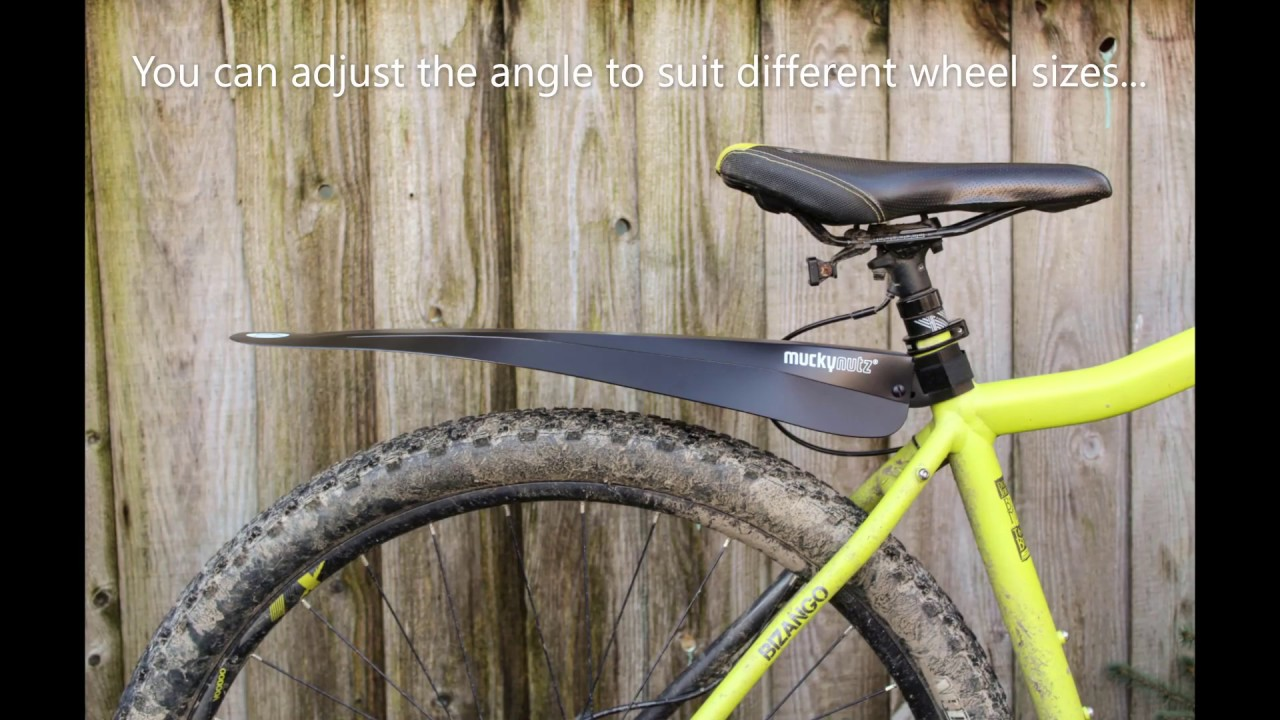
If you want to install mudguards to protect your frame from spray, you must match the mudguard model with what works best on your particular bike and for your riding position. For example, using frame-mounted guards like these is probably better if you ride more upright on a hybrid or cruiser-style bike rather than on a road racing style. If you ride on rough trails and regularly jump over obstacles, opt for flexible plastic guards like these.
Tip 4. Use Mudguards Whith a Mounting System That can Endure Rough Mountain Trails
The main reason riders do not use mudguards is due to their dislike of how they feel when riding or because they fear damaging their bike or brakes. However, using mudguards has many benefits. When riding on mountain trails with rocks and debris your bike is much less likely to get damaged.
Quality fenders will serve you well on rough trails and in adverse circumstances.
In addition, you will not have to spend nearly as much time cleaning your bike after rides, and you can ride in rainy weather without getting drenched. Our guide on whether you need mountain bike mudguards or not will help you decide if fenders are the right choice for you.
Examples of Mountain Bike Mudguards and Their Features
| Fender Example from Amazon | Approx. Weight | Approx. Width | Fender Style/Materials | Attachment Method | Price |
| Sks Mudrocker Rear Quick release Bicycle Fender | 10 ounces | 7.48 inches | Lightweight glass fiber reinforced plastic. Attaches to the fork bridge or seat stays. | Rubberized velcro straps, cable ties, or paint-safe rubber hook-and-loop fasteners. | ~$60 |
| Rockbros Adjustable Mtb Mudguard Rear Fender | 12.7 ounces | 3.15 inches | This polypropylene mudguard is widened and enlarged at the rear. | Attached with a fixing bracket and screws and tightened with a spanner. | ~$30 |
| Bike Mudguard | 8.8 ounces | 6.73 inches | Anti-pressure PVC material that is bendable and durable. | Attached to the seat post with a screwdriver and an anti-slip circle that comes with the mudguards. | ~$25 |