How to Untangle a Mountain Bike Chain – Step by Step
It is not unusual for mountain bike chains to get tangled. A bicycle chain is a roller chain that transfers power from the pedals to the bicycle drivetrain. Bike chains make an array of movements, rotating around the gears of a bike. They get moved from one cassette to another by the derailleur. This movement is what propels the bicycle forward. r the chain gets tangled or bent then it will jam the chainring and the rider So to be able to able to move the pedals when your chain gets stuck it is important to know how to untangle a mountain bike chain.
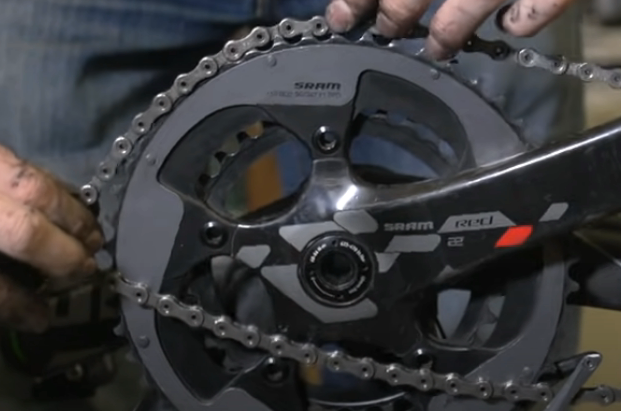
To untangle a mountain bike chain, first, remove the rear wheel of the bike, then turn the bike upside down. Next, spread the chain and place the back knot behind the derailleur and place the front knot on the gear. This will ensure the chain is the right way up.
Before we discuss how to untangle a mountain bike chain, you should also know how to stop a mountain bike chain from it is necessary to know the reasons why your bike chains tangle. Identifying the reasons why your bike chains tangle will assist you in preventing it from happening again.
How Does a Mountain Bike Chain Get Tangled?
There are several reasons why your mountain bike chain gets tangled. Most often, a bike chain getting tangled is determined by how the bike is being used, the maintenance of the chain and entire drive train of the bike, as well as how the bike is stored.
A mountain bike chain gets tangled when a bike is placed upside down and the wheel is off, when the chain is not well lubricated, when a chain is dirty, or when the chain is not well aligned with the sprockets.
When you turn your mountain bike upside down after removing the wheel, your bike chain might get tangled. The wheels of your bike keep your chain taut and in place. However, once removed and the bike is turned upside down, the top half of the chain crosses over the bottom half to form knots.
If your bike chain is not well lubricated it can start to rust which can cause the pins in the chain links to get stuck and twisted. Likewise, if your chain is encrusted with dirt and debris from riding this can also cause your chain to get snagged in strange kinks and loops. Our article about how to fix a mountain bike chain that keeps breaking will explain how to care for your chain so that it doesn’t break or tangle as easily.
Finally, when your chain is not well aligned with the gears, it will get tangled. The chains are supposed to fit securely on the sprockets, while the derailleur shifts it from one cog to another. Once there is improper alignment, the chain becomes loose and soon starts to tangle. Our article about mountain bike chain installation will walk you through the steps to correctly fit and align your chain so that tangles don’t happen.
You might also be interested in learning more about common mountain bike problems. Be sure to take a look at our related article for more information. Similarly, our article explaining whether or not a mountain bike chain guide is worth it will provide you with a lot of extra information.
Summary of Tools Needed For Fixing a Tangled Bike Chain
| Tools Needed | Purpose | Example From Amazon | Price |
| Rehook | Used to unhook chains stuck in the frame of a bike | ReHook Color | ~$20 |
| Bike Stand | Allows easy access to all parts of the bike | Bike Repair Stand | ~$80 |
| Quick Release Rear Axle Skewer | Easily removes rear wheels | Quick Release Rear Wheel Skewer | ~$10 |
You might also find interest in learning some tips and tricks about mountain bike front chainring size options. Be sure to read that related article for more details.
How To Fix A Tangled Bike Chain on a Mountain Bike
Fixing a bike chain that is tangled up or twisted doesn't have to be a complex issue. You can easily untangle a mountain bike chain that’s twisted.
To fix a twisted bike chain, take the rear wheel off and turn the bike upside down. Next, spread the knot out, placing the back knot over the derailleur and the front knot over the pedal. This will cause the chain to flip the correct way. Finally, re-attach the wheel and the chain.
Here are the steps to untangle a tangled mountain bike chain. We also recommend reading our article about mountain bike tool kit essentials that are needed for basic repairs and maintenance.
Step 1. Shift to the Lowest Gear
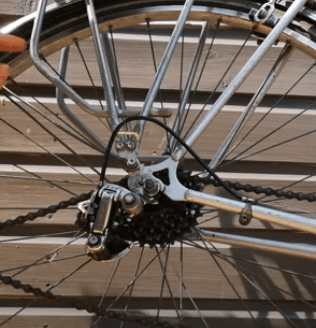
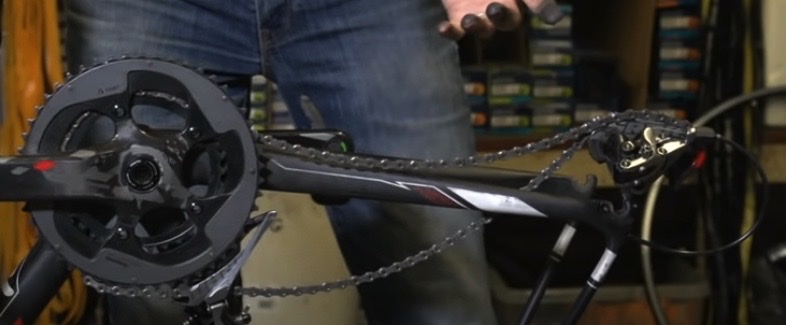
To untangle a mountain bike chain, the first thing to do is to remove the back wheel off the bike, as this will provide easy access to the chains and the gears. To remove the back wheel, shift your chain to the smallest cog on the front and rare gears, as this gives you enough chain slack.
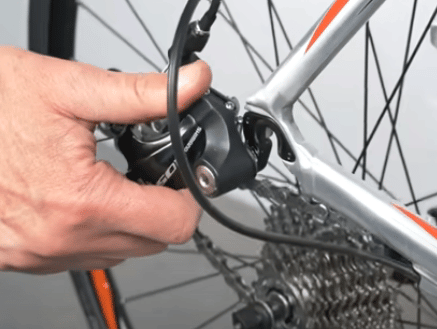
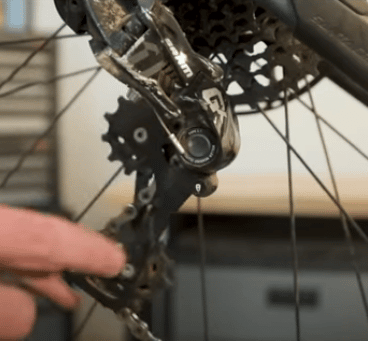
Step 2. Clear the Derailleur
Clearing your derailleur means detaching it from the frame of the bike, as well as removing the chain that has been routed through it. Once this is done, you can remove your wheel. We recommend reading our article about how to fix a mountain bike chain that is jumping gears or skipping for more tips on adjusting chains correctly on the chainring.
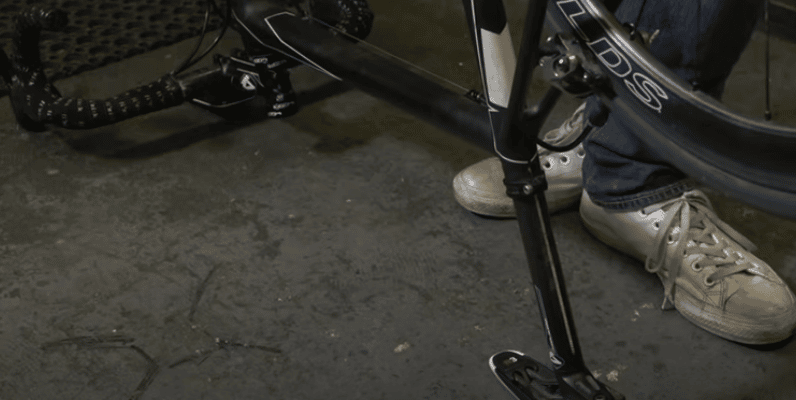
Step 3. Turn the Bike Upside Down
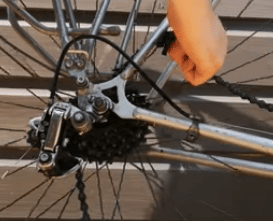
Turn your back upside down. Note that it is not advisable to turn your bike upside down since it is a major cause of bike chains getting tangled. However, in this case, it is necessary to turn your bike upside down. Simply lift your bike and rest it on its seat and handlebars so that the underside of the bike is easily accessible. You could also use a bike stand like this which will provide all-around access to the bike.
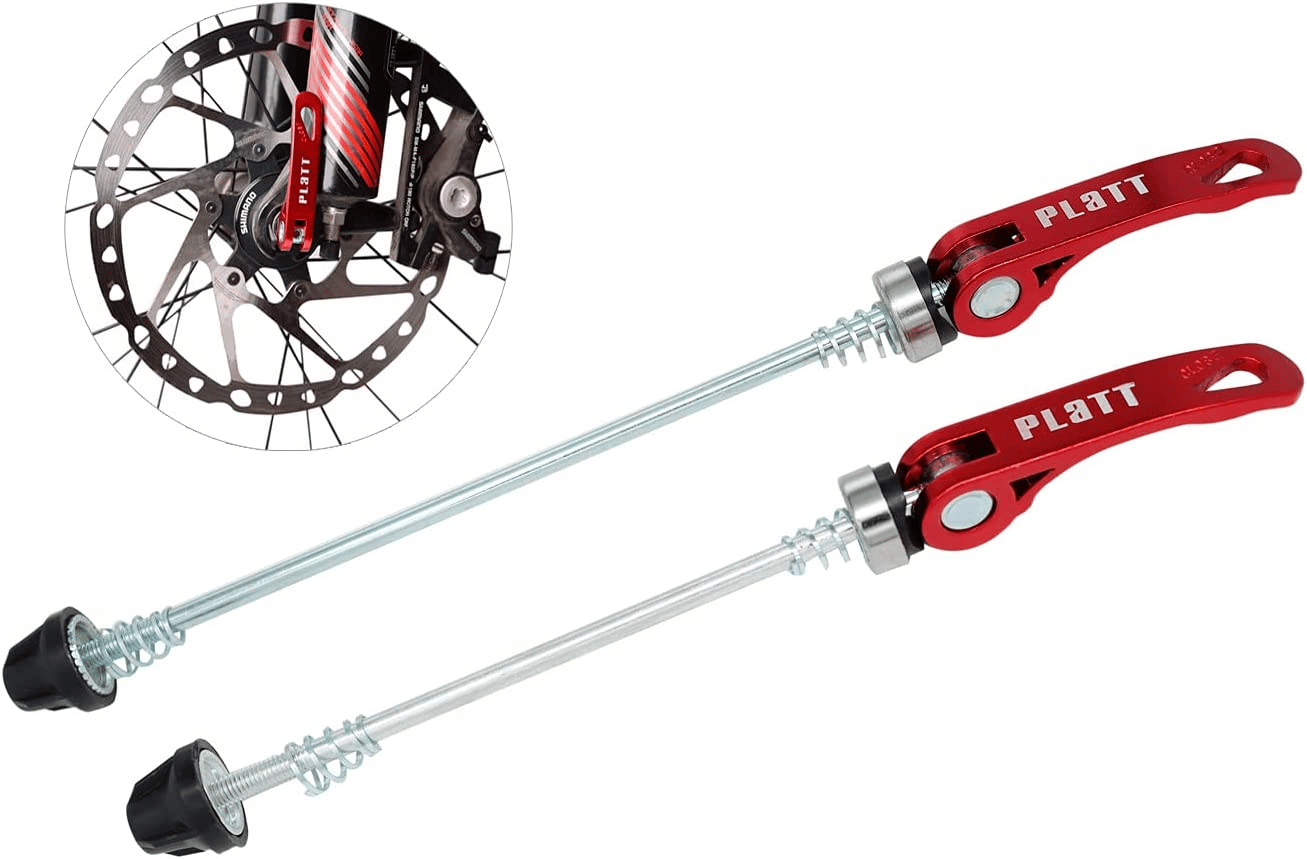
Step 4. Remove the Wheel
Remove the rear wheel by loosening the quick-release mechanism on the wheel hub. This quick-release skewer is easy to fit onto mountain bikes that don't already have them and can be a welcome feature when you have to repair your chain on the trail.
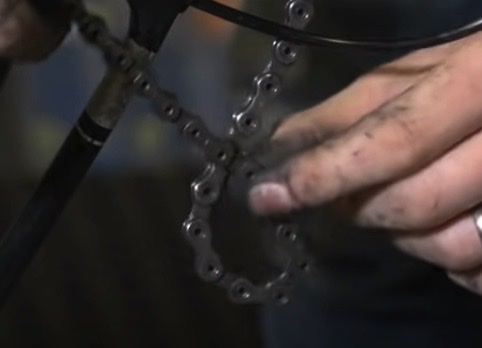
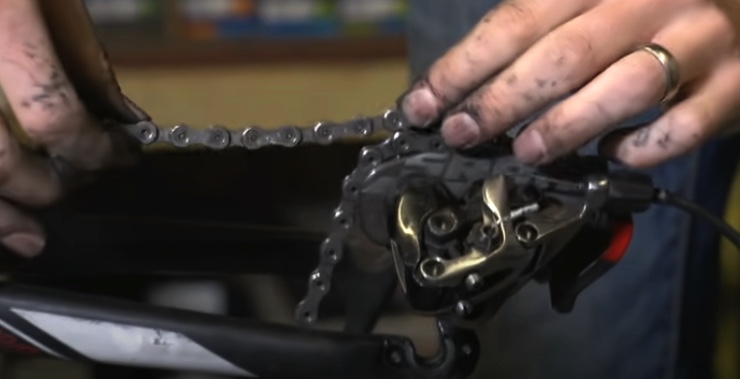
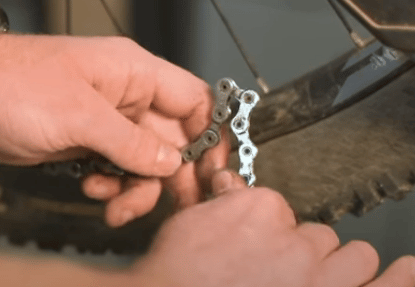
Step 5. Place the Front and Back Knots Over the Gears and Derailleur Respectively
The knots formed by the tangled bike chain need to be spread out. A bike chain gets tangled when its top half crosses over the bottom half. Spreading out the chain would help you in determining what part of the tangled chain goes over the derailleur and what part goes over the pedal.
Spread the back knot and put it over the derailleur. Then, spread the front loop and place it over the pedal. You have successfully untangled your bike chain.

Be sure to check out our similar article explaining how to fix a mountain bike chain for more details and a step-by-step guide. Similarly, our tips to choosing the number of links in a mountain bike chain may also provide you with useful information.
How To Fix A Twisted Bike Chain Link on a Mountain Bike
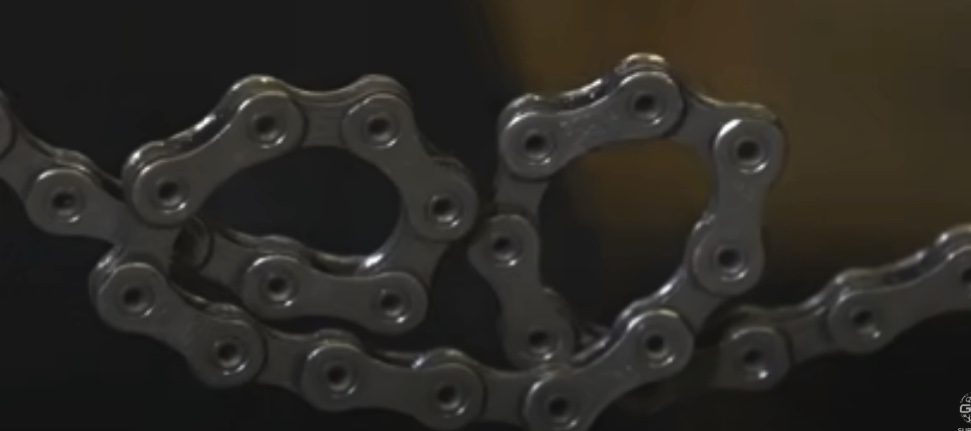
It is common for MTB chain links to get twisted and even break because they are under constant strain as the bike gets ridden.
To fix a twisted bike chain link, first examine the chain closely from the top to identify the damaged link. Hold the chain adjacent to the twisted link and fold it with the twisted link at the apex. Apply light but firm pressure on each side of the chain to bend the link into its original shape.
This article from the Journal of Advanced Mechanical Design, Systems, and Manufacturing, analyzed the stress a bike chain undergoes and how improved pin design can reduce this pressure while also assisting with cycling efficiency. This is also why a rider should use chain lube to thoroughly coat each link and pin to prevent tangles.
Chains undergo a lot of force during rides because they maintain a constant tension and withstand significant impact as the rider covers rocky and uneven terrain. This tension often affects the chain links which might lead to a twist or bend. To learn about how to correct the tension on a bike chain that is too loose read our step-by-step instructions.
Step 1. Locate the Twisted Link
Twisted links are hard to see from the side. You will know your chain link is twisted by the noise it makes when pedaling. To identify the twisted link, simply look length-wise down the chain and you will see the damaged chain link.

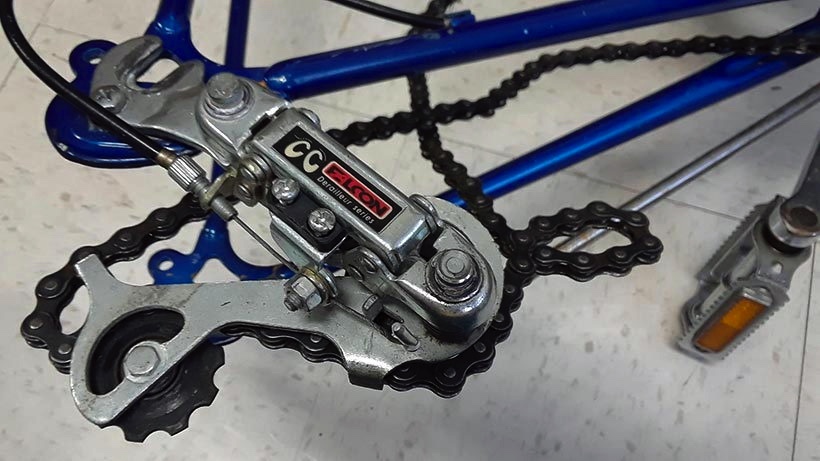
Step 2. Drop the Derailleur
The derailleur helps shift chain links from a small cog to a large cog. It also shifts the chain from a large cog to a small cog, however, in this case, it holds the excess chain to keep the chains firm across the drivetrain. To access the chain more easily you will need to drop the derailleur. Doing this will release the full length of the chain so you can handle the chain.
Step 3. Straighten the Twisted Link
Fold the chain at an angle so that the twisted link is at the apex of the fold. Next, use a chainlink tool to straighten the twisted link by applying slight pressure so that the bent link is pushed into its correct shape.
You may also find interest in learning how to stop a mountain bike chain from rubbing the front derailleur. If so, be sure to read our related article.
How to Fix Bike Chain That’s on the Wrong Side of the Frame
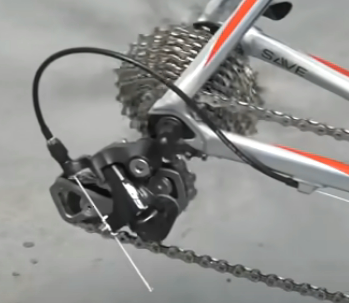
Sometimes, your chain gets stuck on the wrong side of a frame, probably between the cogs, the wheel, or the derailleur. The reason for this is usually because the derailleur is poorly aligned, the small sprocket or teeth are bent, and the chain has a stuck or bent link. Irrespective of what part of a frame your chain is stuck on, you won’t be able to ride your bike. We will be discussing how to fix a bike chain when it gets stuck on the wrong side of the frame.
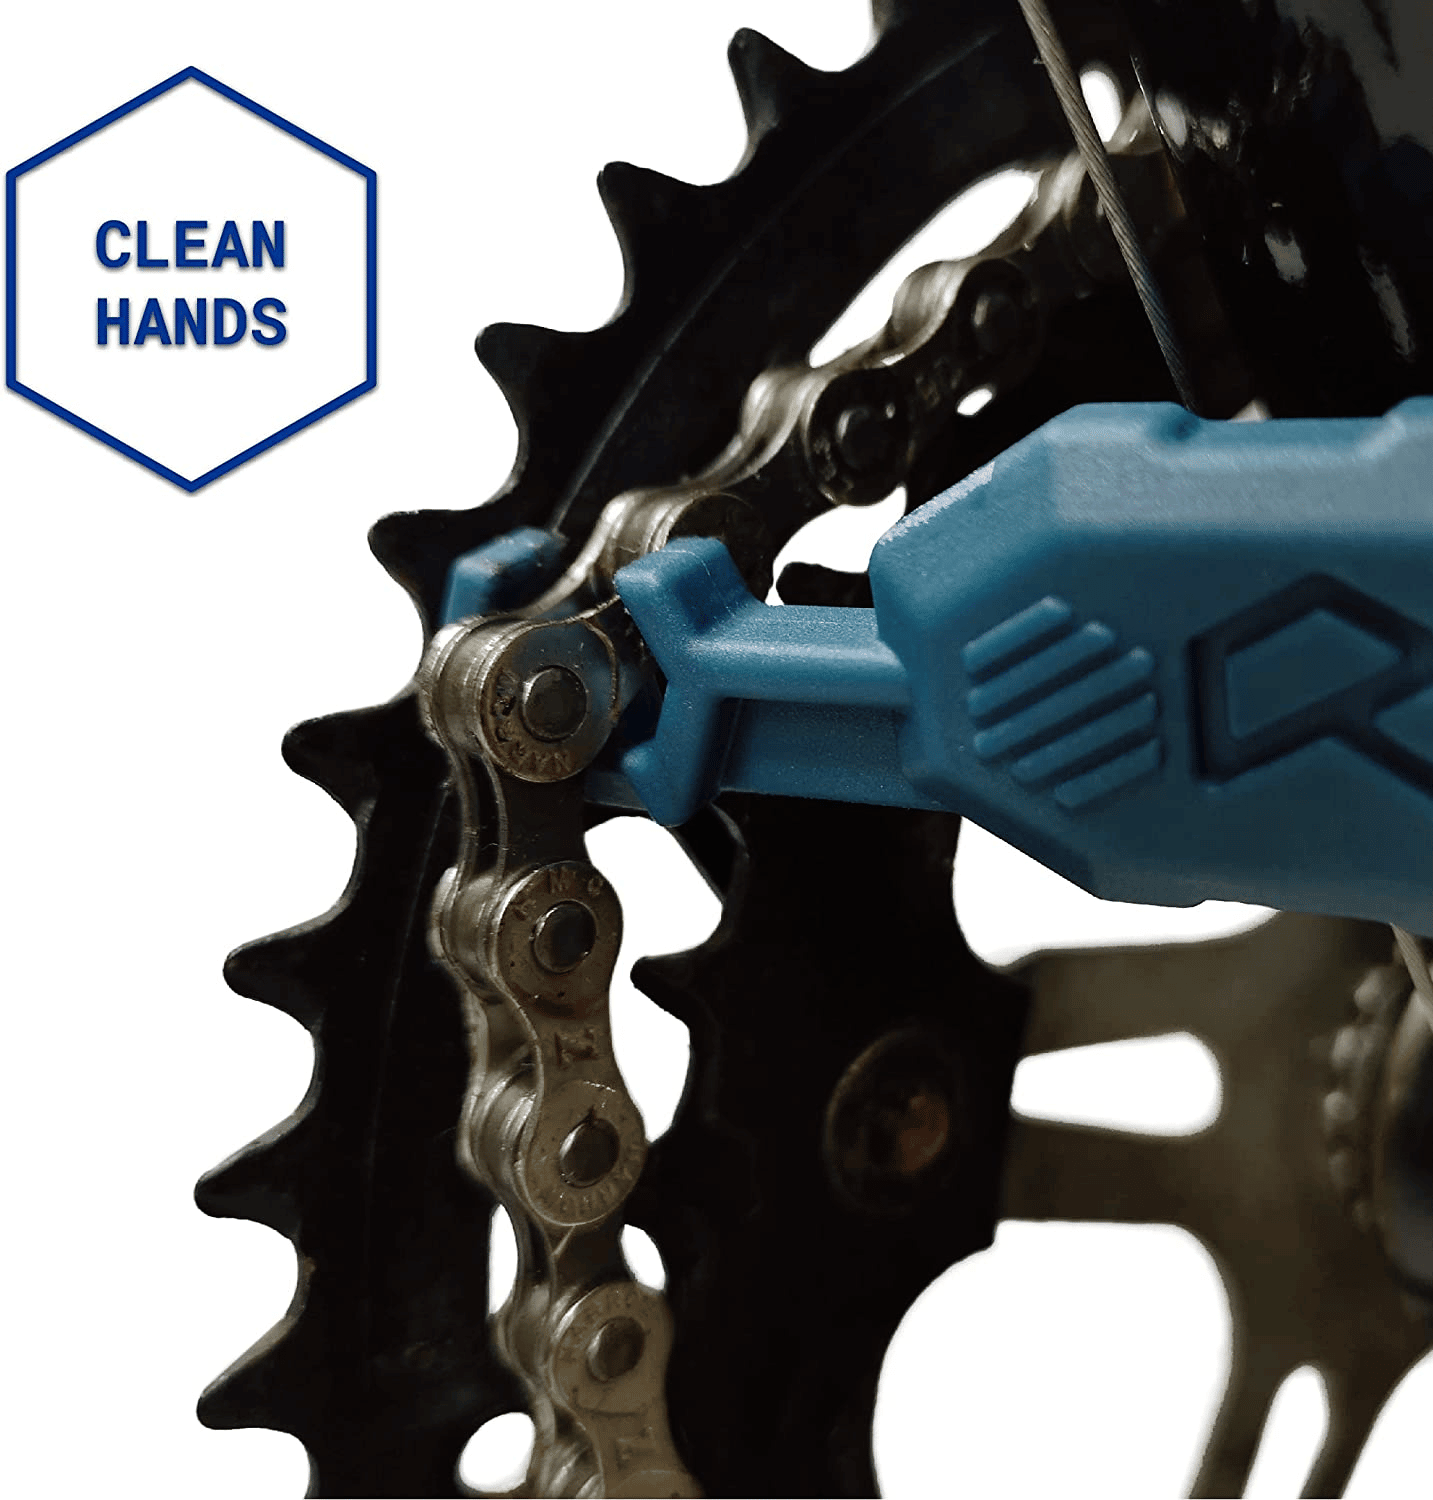
To fix a bike chain that’s on the wrong side of the frame, slowly untangle the stuck chain and remove it from between the derailleur, gear, and spokes using a rehook tool. Once the chain is free, reattach it to the front and back gears of the bike, and adjust the tension.
The best tool to easily fix a stray chain is this rehook tool because it is uniquely designed to keep oil and dirt away from your hands and clothes and it has a hook that perfectly fits around a chain link. It can get into small gaps that fingers can’t reach and makes a multitude of chain-related tasks and jams much simpler to resolve.
Step 1. Gradually Work Out the Chain
The first step is to gradually work the chain free from between the derailleur and gear. Using the rehook, pull the chain from where it is stuck. Do this, alternating between the back and the front of the chain, easing it out, until the chain is free. The idea is to do this bit by bit. Any attempt to yank the whole chain out at once can cause damage to the chain or gear.
Step 2. Attach the Chain Back onto Both Gears
Once your chain has been removed from where it was stuck, you must reposition it. Place your chain on the gear and then line it up behind the derailleur.
Pull your derailleur down and fit your chain around it. Ensure the chain is correctly positioned and connected to the derailleur. Remember that one of the causes your chain is getting jammed in between the bike gears is probably because it was poorly routed through the derailleur. Once done, you can return the derailleur to its normal position.
The final step is to use the rehook to pull the chain from the bottom of the front wheel. Do this carefully as you do not want it to get stuck again. Pull the chain with the rehook from the bottom of the chainring and place it around the cog.