
How to Fix a Mountain Bike Chain That Keeps Breaking
It is common for MTB chains to break because they are under constant strain when riding. Chains are one of the essential parts of a mountain bike as they connect the wheels of a mountain bike and are responsible for their simultaneous movement. They are made of multiple pairs of steel outer and inner plates held together by rivets. Chains experience a lot of exerted force during rides because they maintain a constant tension and withstand significant impact as the rider covers rocky and uneven terrain. This is why chains are one of the components that need repairing and replacing most often. In this article, we’ll discuss how to fix a mountain bike chain that keeps breaking, by starting with symptoms and ending with solutions.
To fix a mountain bike chain that keeps breaking, first remove the broken link in the chain. Then reconnect the chain using a master link or a pin. Tools needed for fixing a broken bike chain include a chain tool, a chain link, a replacement chain, and chain lube.
Repairing a bike chain can be an easy task if equipped with the right tools and knowledge of the parts of a bike chain. But if a repair is not possible, then our guide on how to replace a chain on a mountain bike could be a useful resource. Either way you look at it, you'll definitely want to take a look at our tips to quick and proper mountain bike chain maintenance to prevent any damage from happening in the first place.
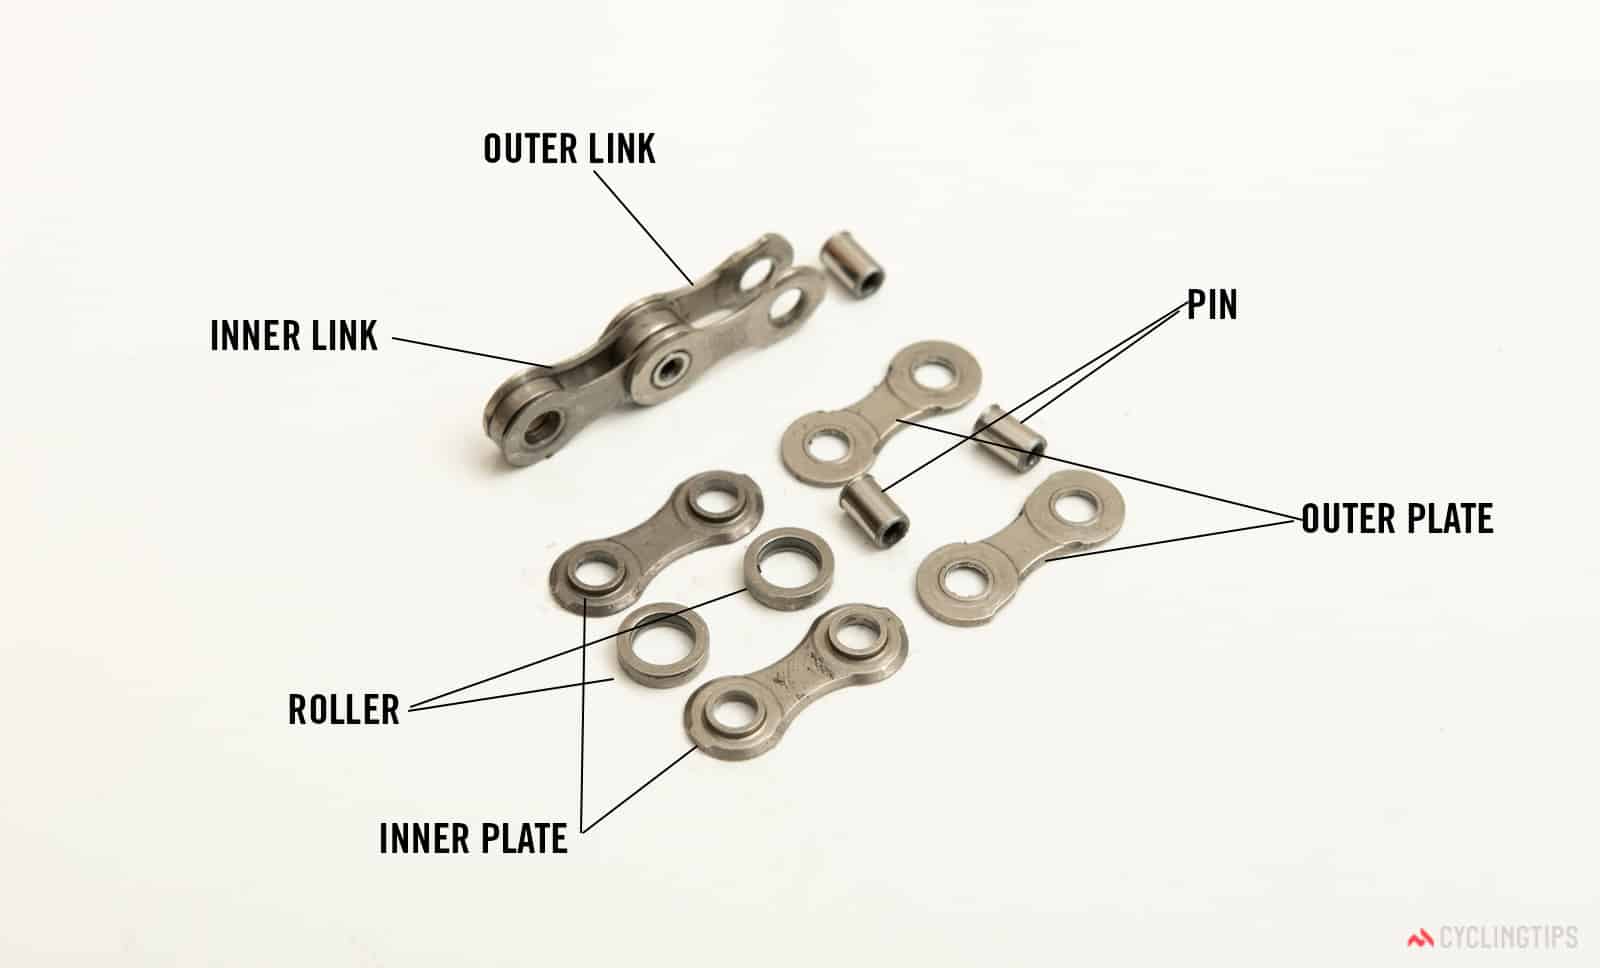
A bike chain is made of links. Each link consists of the outer and the inner link; the outer and the inner plate; the roller and pins. The tools needed to repair a damaged chain depend on the type of chain repair that needs to be done. Some other popular tools used include a chain tool pin, master link pliers, chain checkers, and chain cleaners.
Why Does an MTB Chain Keep Breaking?
There are several reasons why an MTB chain will keep breaking. These reasons could be related to the quality of the chain, the rider’s particular riding style, or improper bike maintenance and lubrication.
Some reasons why a mountain bike chain keeps breaking could be a worn-out cassette, a worn-out chain, a chain that is too short and tight, or the chain that is shifting under an extreme load.
Our ultimate toolkit for mountain bike maintenance provides information about handy bike tools and how to use them to ensure your bike is in perfect riding condition.
Here we list some reasons why an MTB chain could keep breaking:
1. Bent or Worn Out Cassette or Chainring Teeth
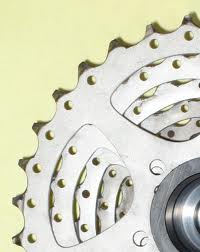
The cassette and the chainring on a bike provide gearing options for the chain. The cassette and chainring are at the rear and front gear, respectively. According to this article by Citybikes, a mountain bike with bent or worn-out cogs or chainrings will have consistent chain breaks. The chain links, which are unable to connect properly with the cogs, will get caught between the gears which often leads to the chain breaking. This thread on StackExchange discusses when you should change your bike’s cassette.
2. Hard Shifting Under Load
Hard shifting is when a chain cannot be shifted from one gear to another when riding uphill. Shifting under load puts enormous strain on the chain. When the chain exceeds the pressure it is designed to carry, it breaks. Assuming you have selected the correct type of chain for your mountain bike, your chain should last several riding hours before needing replacing. This chain compatibility article from ParkTool.com explains how to select the right chain for your bike.
3. Worn Out or Stretched Chain
Worn-out chains are common according to this extract from Sloane’s Bike Maintenance Manual. Once a bike chain wears out, it eventually snaps. The bike chain is usually the first component to be affected when a bike is used beyond its mileage and service intervals. Our article about how to fix a chain that is too long offers step-by-step instructions on how to check the chain length and adjust it. And our similar article will explain how to tighten a mountain bike chain that's too long too.
4. A Chain That’s Too Short
The chain moves between cogs in a cassette like this and the chainrings like this. Cogs come in several sizes. It is, therefore, important that a chain is long enough to wrap around the largest cogs. According to YellowJersey.co.uk, the derailleur at the back gear is responsible for maintaining chain tension and taking up the slack when the chain moves from larger gears to smaller ones. A short chain doesn't provide accommodation for transferring the chain from a small gear to a larger one, and according to Wickwerks, chain breakage is one of the results of short chains.
Similarly, you might be interested in learning how to fix a mountain bike chain that's jumping gears or these easy fixes for a mountain bike chain hitting the frame. If so, be sure to read our related articles for more information.
How to Prevent Bike Chains from Breaking
Bike chains are an essential part of a bike. While breakage is common, you can do certain things to avoid this and to fix a mountain bike chain that keeps breaking.
To prevent the bike chain from breaking clean the chain regularly with chain cleaning tools and lubricate it with chain lubricant. Don’t reuse old pin links, keep the derailleur aligned, avoid placing a load on the pedals when shifting gears, and regularly check the joining pins for wear.
Performing regular maintenance tasks like lubricating the bike components and checking tension are important practices when caring for your bike. So having a basic tool kit and bike maintenance knowledge will help. Read our article about the essential tools needed to maintain a mountain bike.
1. Clean and Lubricate the Chain with the Right Bike Chain Lubricant
Bike chains are made from metal and mounted on metallic gears, so they are prone to wear and tear from friction. Something that causes this friction is the build-up of dirt, grit, and mud on your mountain bike so take a look at our article that explains how to install a mountain bike fender if you would like to protect the moving parts of your bike.
One of the best ways to avoid breakage is to apply the proper bike chain lubricant on them. There are several chain lubricants like this. Lubricants also include wet, dry, wax-based, ceramic, lubes infused with nanoparticles, and others. The best lubricant for your bike is determined by weather, the elements, and the paths you ride along.
Additionally, make sure you learn some quick steps to clean a mountain bike chain properly and how to lube it. Our related article will give you more detailed information.
2. Don’t Reuse Pin Links
Pin links hold the chain links together firmly. When a bike chain gets damaged, it is common to reuse pins to join them back. However, you should avoid this because used pin links already have some wear on them. It would be best if you replaced old pins as soon as possible with new pins like these.
3. Keep the Derailleurs Aligned
Heavy shifting damages bike chains. Derailleurs can get bent due to blunt force in an accident or due to poor alignment from the manufacturer. They must be fixed and kept aligned. Keeping the derailleur aligned prevents shifting problems and reduces the chances of the chain breaking.
4. Avoid Applying Load on the Pedals when Shifting
It is not advisable to apply load to pedals when shifting from one gear to another on a bike. The chains are under constant pressure when loads are applied to the pedals, and the same thing occurs during a gear shift. Doing both at once places a cumulative strain on the chain, which can snap it.
5. Regularly Check the Joining Pins
The joining pins in a chain play an important role in keeping the chain intact. A dislodged pin can occur on a chain when the bike is ridden often without regular maintenance intervals or when blunt force is applied to a chain during a fall. It can also be a fault of the manufacturer, so you should check the bike pins to ensure they are all well secured.
Essential Tools and Products Needed to Prevent Chain Breaks
| Tool or Product | Example from Amazon | Price |
| Dry lubricant | Muc Off Dry Lube | ~$10 |
| Wet lubricant | Wet Lube | ~$10 |
| Bicycle Chain Gear Roller for Lubricant | 2 Pack Bike Chain Oiler Lubricator, Bicycle Chain Gear Roller Lubricant Maintenance Care Tool | ~$15 |
| Chain links | Bicycle Missing Links for 6, 7, 8, 9, 10 Speed Chain | ~$10 |
| Chain cleaner kit | Chain Oil Lubricant and Cleaner Set with Bicycle Degreaser | ~$35 |
Joining a Mountain Bike Chain That Has Broken Using Powerlinks
It is possible to repair a mountain bike chain that has broken using special joining links so that you don’t have to replace the whole thing.
To join a broken mountain bike chain with a Powerlink first remove the damaged link which will probably be bent or broken and have a dislodged rivet pin. Next, insert the Powerlink onto the chain, taking care to place it in the correct direction of travel as indicated on the Powerlink.
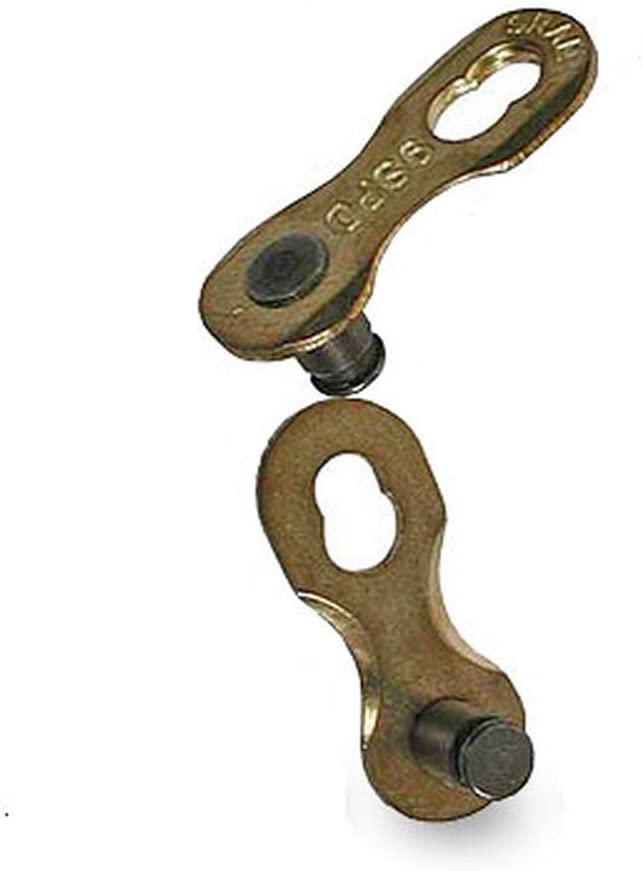
Powerlinks like these are bike links that are used to join damaged bike chains without the use of tools. Powerlinks are similar to the external plate of a chain, the only difference is that they are attached to bike chains without pins or tools. Refer to this guide by SRAM for general steps on how to join a broken mountain bike chain using Powerlinks.
If it turns out that you have to replace the whole chain check out our article that explains all the steps for mountain bike chain installation.
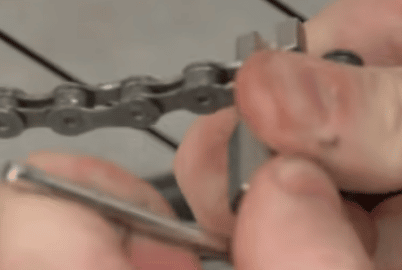
Step 1. Identify the Damaged Link
The first step is to locate the damaged link. A damaged link is easily recognized by its dislodged pin, and a bent or broken outer plate. The damaged link will look compressed on either one or both sides, which will mean that the opening in the chain is too narrow to allow the sprocket to fit correctly into the space, this then results in the side of the chain making contact with the sprocket edge and snapping.
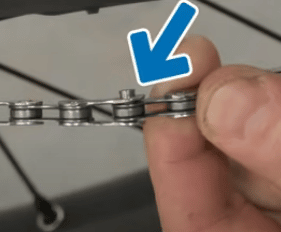
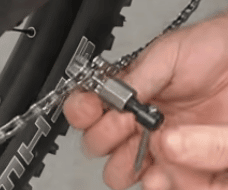
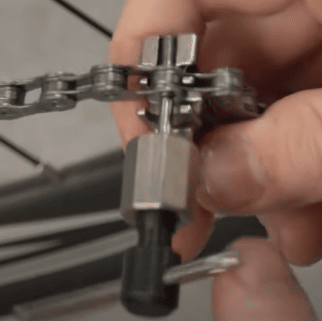
Step 2. Remove the Damaged Link Using a Chain Tool
Once the damaged link has been located, the next step is to remove it using a chain tool like this. Slide the pin area of the broken link into the chain tool. Then push out the pin by rotating the spindle of the chain tool. This pushes the connecting pin out, freeing that end of the link from the chain. Follow the same process for the other end of the broken link to remove the pin, releasing it from that end of the chain.
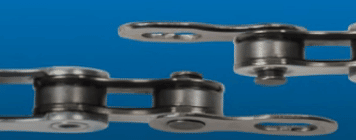
Once the damaged link is removed from the chain, the two ends of the chain will be left with inner plates pointing toward each other.

Step 3. Insert the Powerlink
The Powerlink comes as a pair. Each pair is designed so that one end has a connecting pin and the other end has a pinhole. This ensures that the pair can be coupled together to form one link. Before connecting the two ends of the chain, inspect your master link for the arrows indicating the direction of travel.
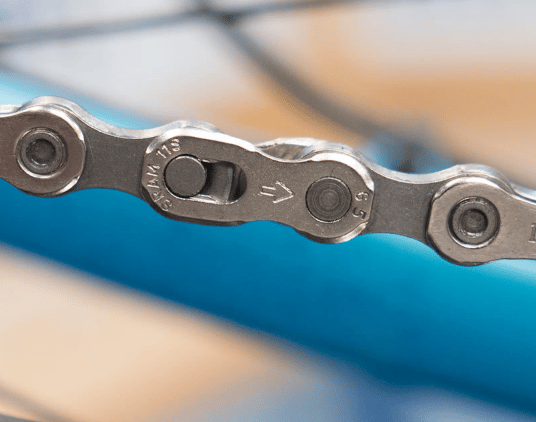
To insert the Powerlink, simply place the link between the two exposed inner links. The link should fit perfectly into the pinholes of the inner plates. Ensure the Powerlink is placed as the outer linking layer on the chain.
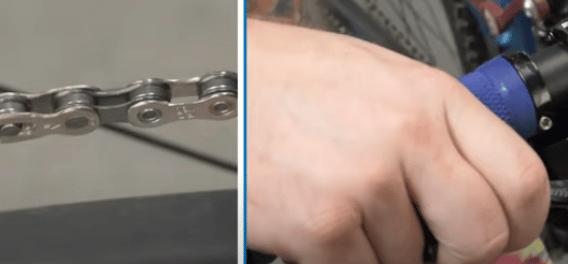
Step 4. Move the Masterlink Into Place
Once the master link is firmly in place, hold one end of the chain and pull the other end in the direction of the arrow inscribed on the master link. Another option is to use the bike pedal. Apply the rear brakes and slowly rotate the pedals to lengthen the chain.
Make sure you also take a look at our mountain bike chain guide installation for a step-by-step process you can follow when you're ready.
How to Fix a Broken MTB Chain by Joining the Broken Chain Using a Link Pin
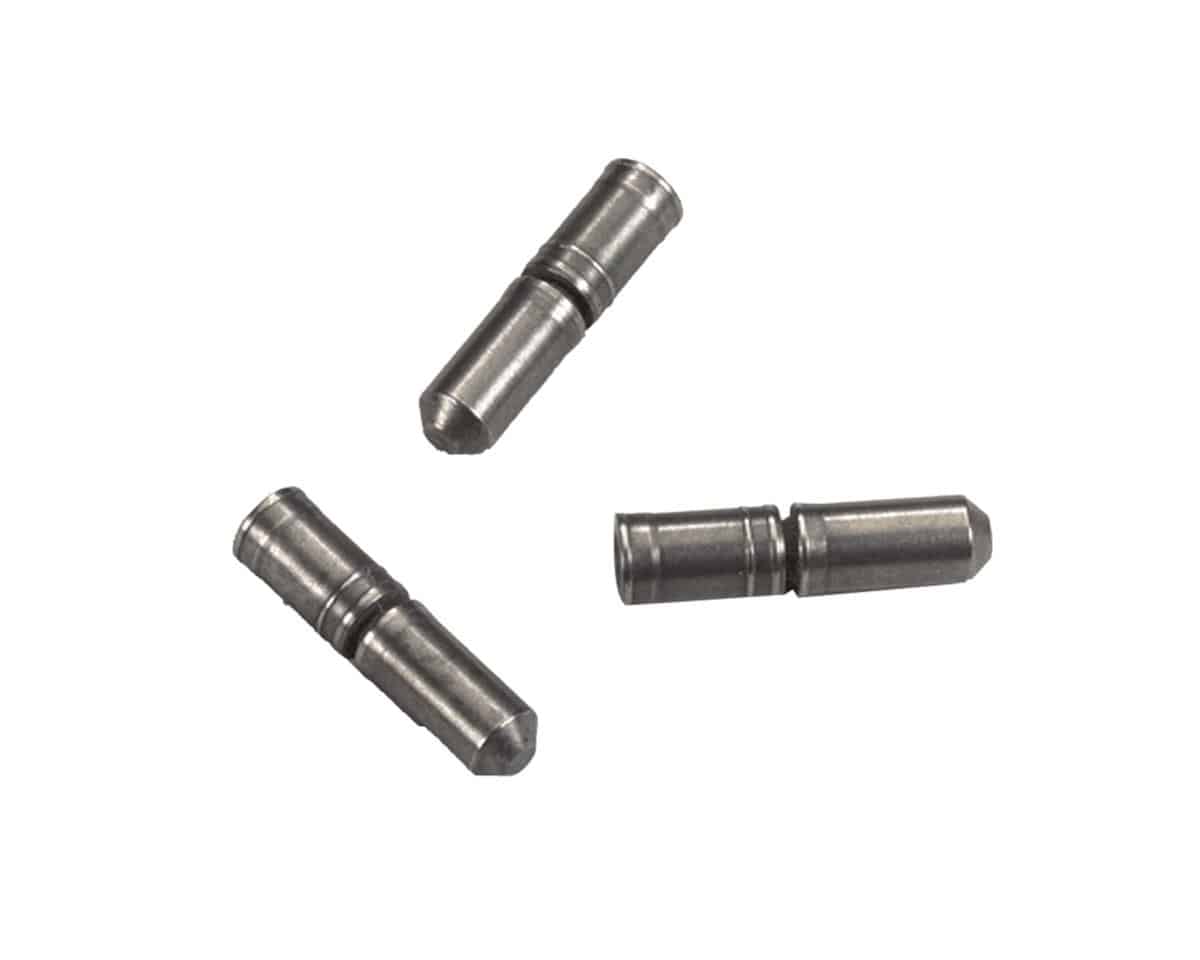
A second method of fixing a broken MTB chain is using a link pin. Link pins like these are not the same for all bikes and come in different sizes. However, they all perform the same function. Link pins have two parts: their base, which is useful for driving them through pinholes, and the pointed end or the pilot tip. Make sure you follow these safety instructions from Shimano when fixing a mountain bike chain that keeps breaking.
To fix a broken MTB chain using a link pin, first remove the damaged link by using a chain tool, then connect both ends of the chain using the link pin, and finally use a chain tool to push the link pin through until it is secure.
Step 1. Remove the Damaged Link
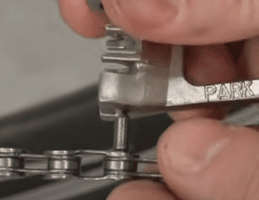
Remove the damaged link with its adjacent inner plate. This exposes the outer plate and the inner plate each on either side of the chain. Break off the pilot tip of the pin using the chain tool. Place the chain into the cradle section of the chain tool, ensuring the chain is correctly positioned with the link that you want to split. Slowly rotate the handle of the tool so that the pin pushes against the chain rivet. When the pin makes contact with the rivet, you are ready to break the chain. With slow but firm pressure, continue to turn the tool handle, there will be resistance and the turn will feel tight, maintain pressure and turn slowly until the rivet is pushed out of the chain.
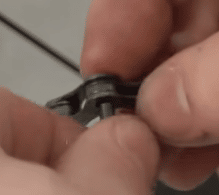
Step 2. Connect Both Ends of the Chain Using a Pin
Next, join the two ends of the chain so that a pin can run through their pinholes. First, align the holes of the two ends of the chain, make sure the male end and the female end are properly oriented, and insert the pin through the pin holes.
Step 3. Use a Chain Tool to Drive the Pin Through the Pin Holes
Then, use a chain tool to drive the pin from its base through the pin holes, forming a new link.
Once the pin has been inserted, the pilot tip is left sticking out.
The broken chain has been successfully connected.