How to Thread a Pedal Strap – Step by Step
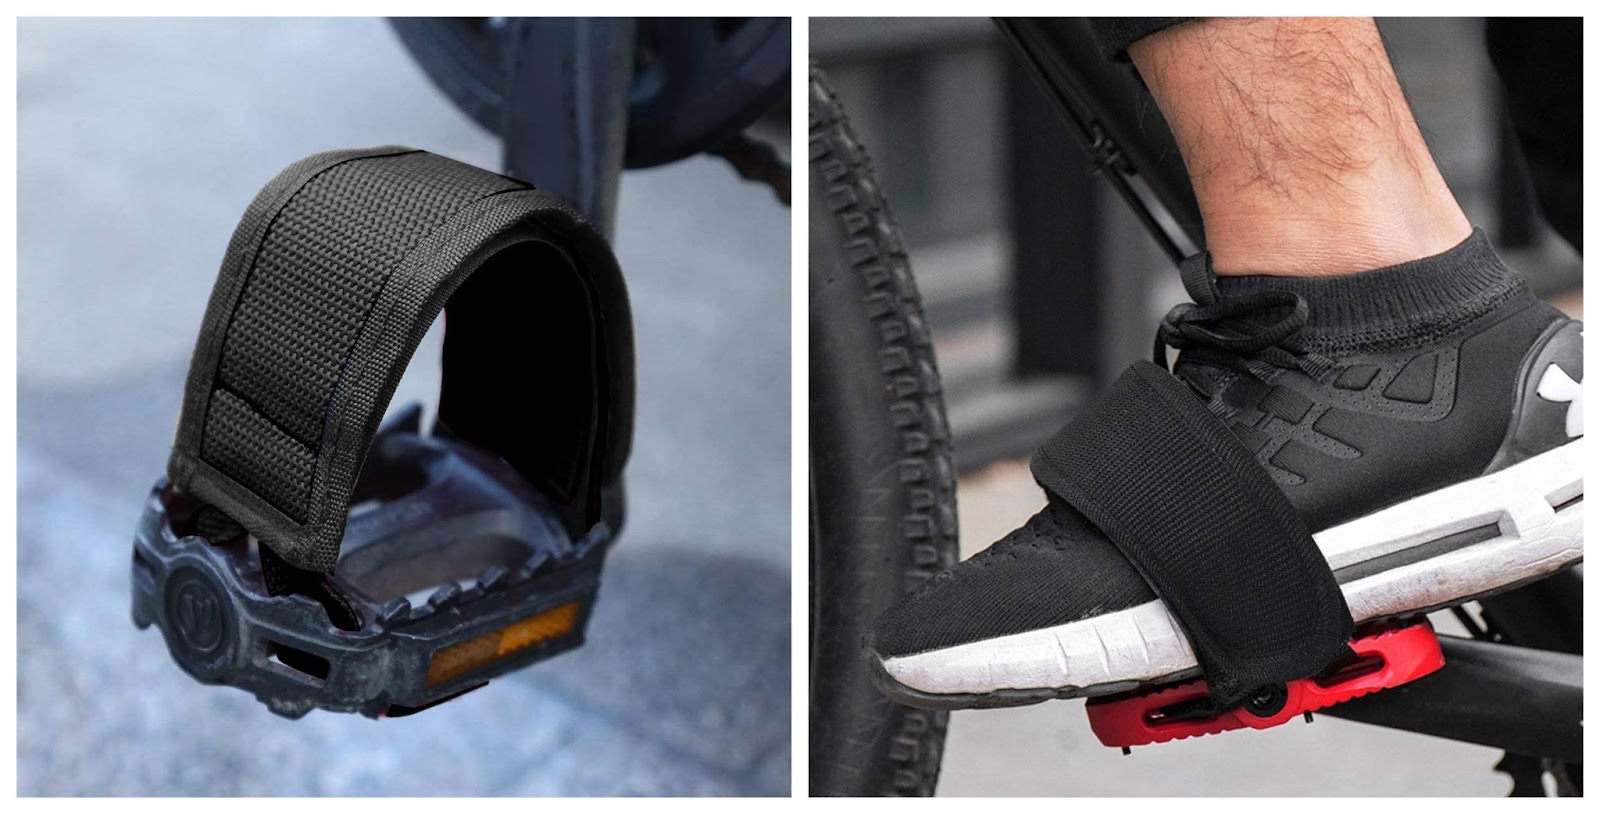
Pedal straps are optional bike accessories that secure a rider’s feet to the pedals. Along with keeping the feet in the correct position, pedal straps allow bikers to cycle faster, with more power and increased efficiency. The key to enhancing your overall biking experience is to thread and tighten pedal straps properly. In this article, we’ll discuss how to thread a pedal strap for maximizing pedaling efficiency.
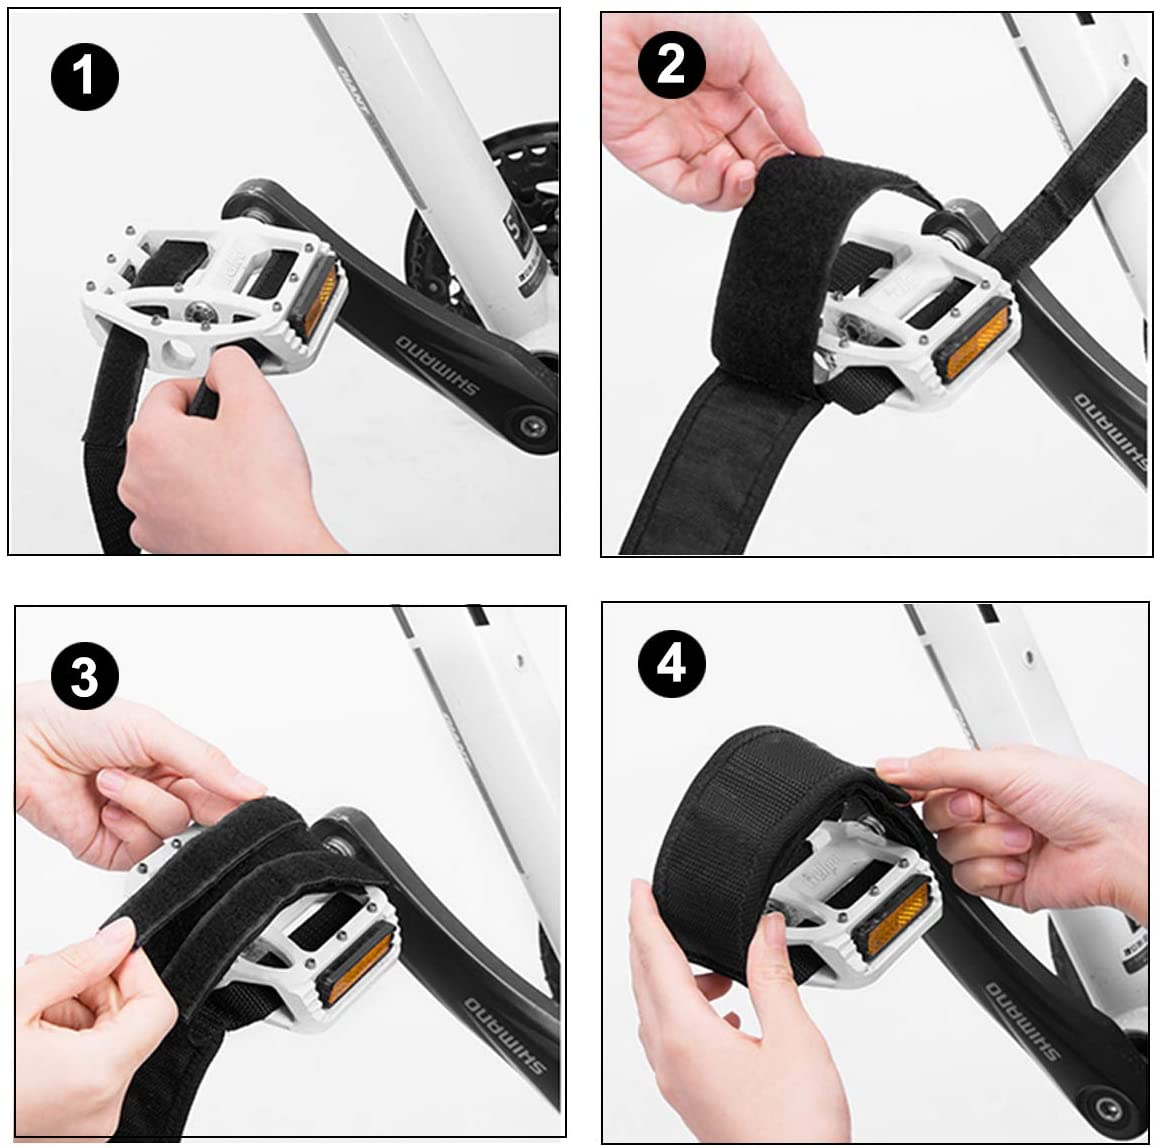
To thread a pedal strap, get suitable straps based on the foot measurements, identify left and right pedal straps, insert the lower 1-inch webbings, align the wider webbing with the pedal surface, attach the 1-inch straps to the wider webbing, and fasten the upper strap to secure the overall pedal strap system.
Below you’ll find general instructions for threading a pedal strap based on the guide from Fyxation Bicycle Company.
Materials Needed
| What do you need? | Why do you need it? | Example | Price |
| A soft measuring tape (optional) | To measure your feet while wearing shoes before purchasing pedal straps. | Soft Measuring Tape with Double Scale | ~$5 |
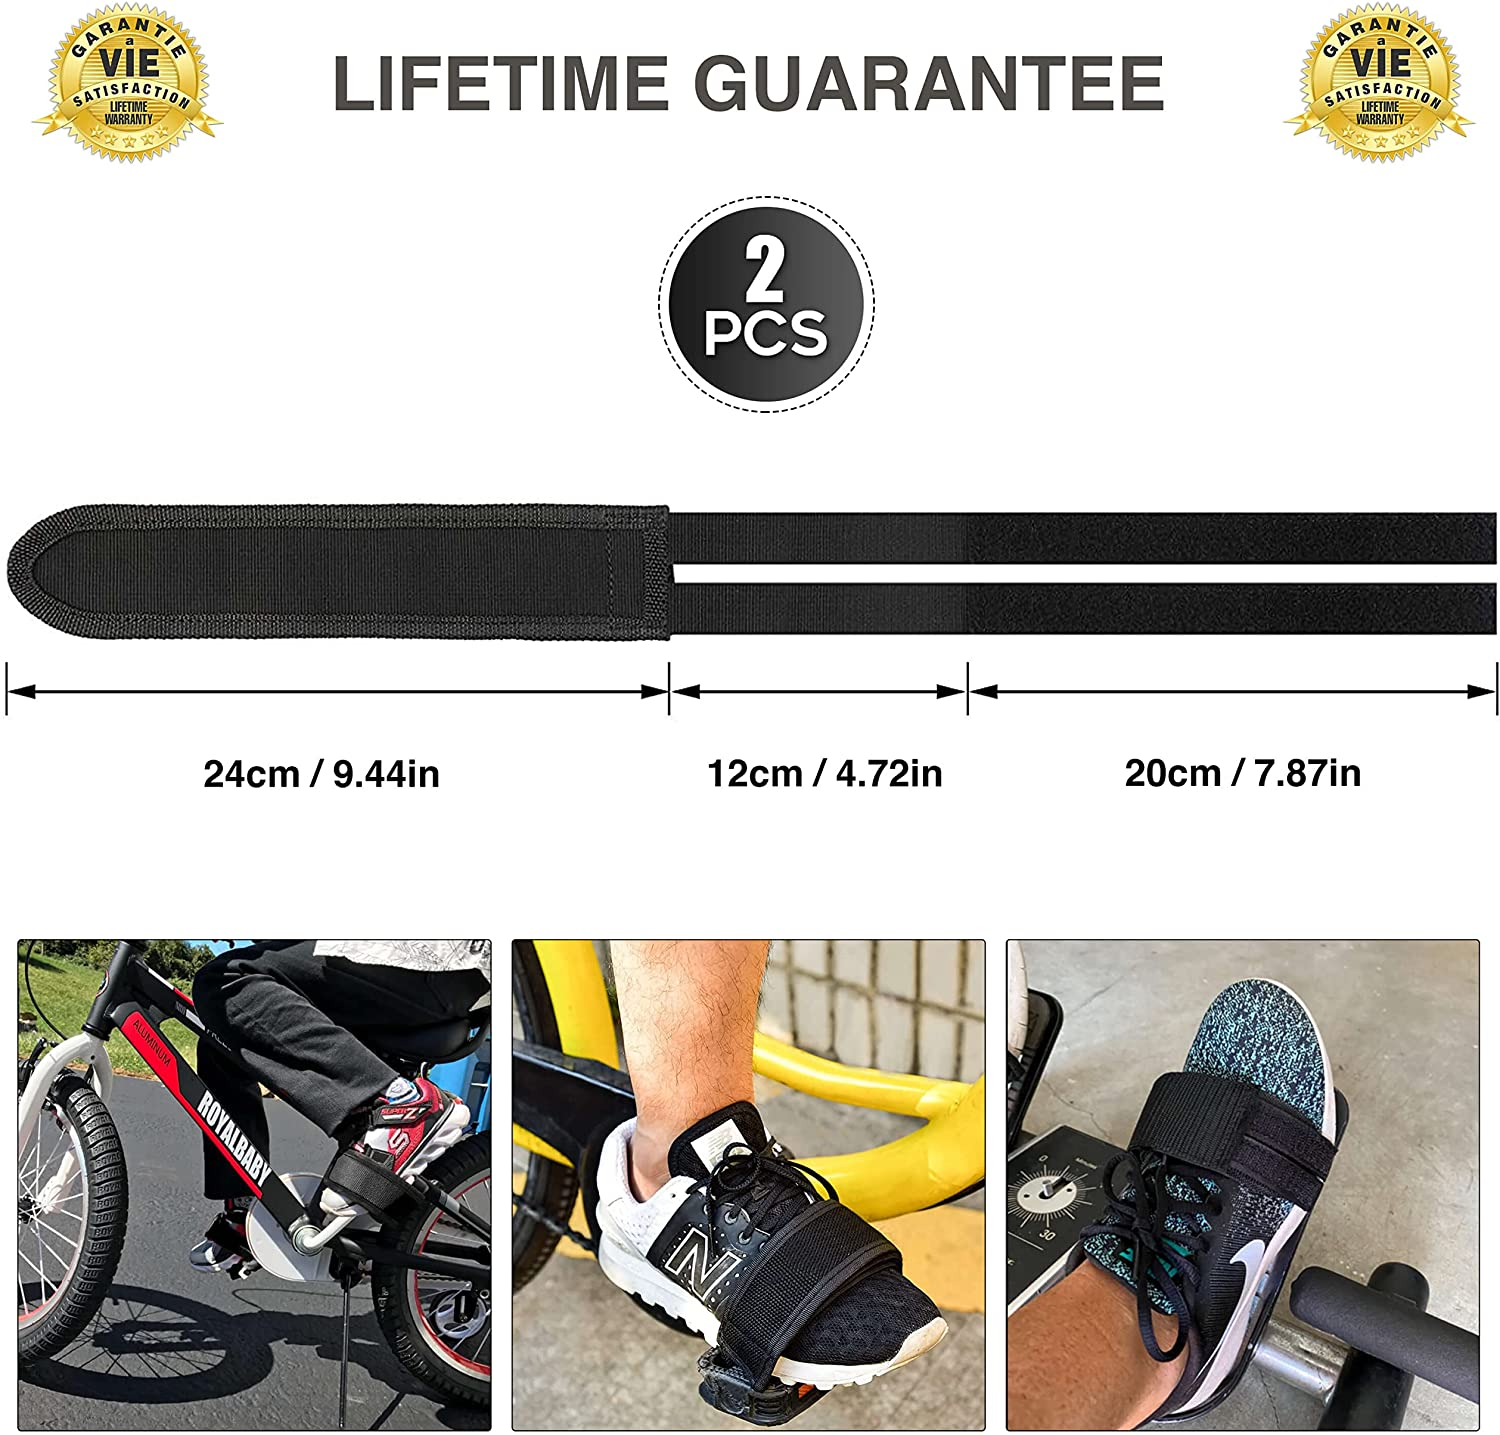
| A pair of pedal straps | To improve grip and keep your feet in the correct position while riding a bike. | Outgeek Bike Pedal Straps | ~$15 |
| The right bike pedals | To be able to thread pedal straps through the pedals. | RockBros MTB Lightweight Bike Pedals | ~$25 |
Step 1. Take the Measurements of Your Feet Using a Measuring Tape
Consider measuring your feet while wearing the shoes you typically use for cycling. This will help you determine the suitable pedal strap width and you can avoid further modifications. The majority of pedal straps are universal and can be adjusted to most biker’s feet.
To measure the width, take a soft measuring tape and wrap it around your shoe just like you would wrap a pedal strap.
Step 2. Buy Suitable Pedal Straps Based On the Measurements
Most pedal straps, like these, can be adjusted to your desired width. So, it is unlikely that you would face any issues with a pedal strap being either too loose or too tight.
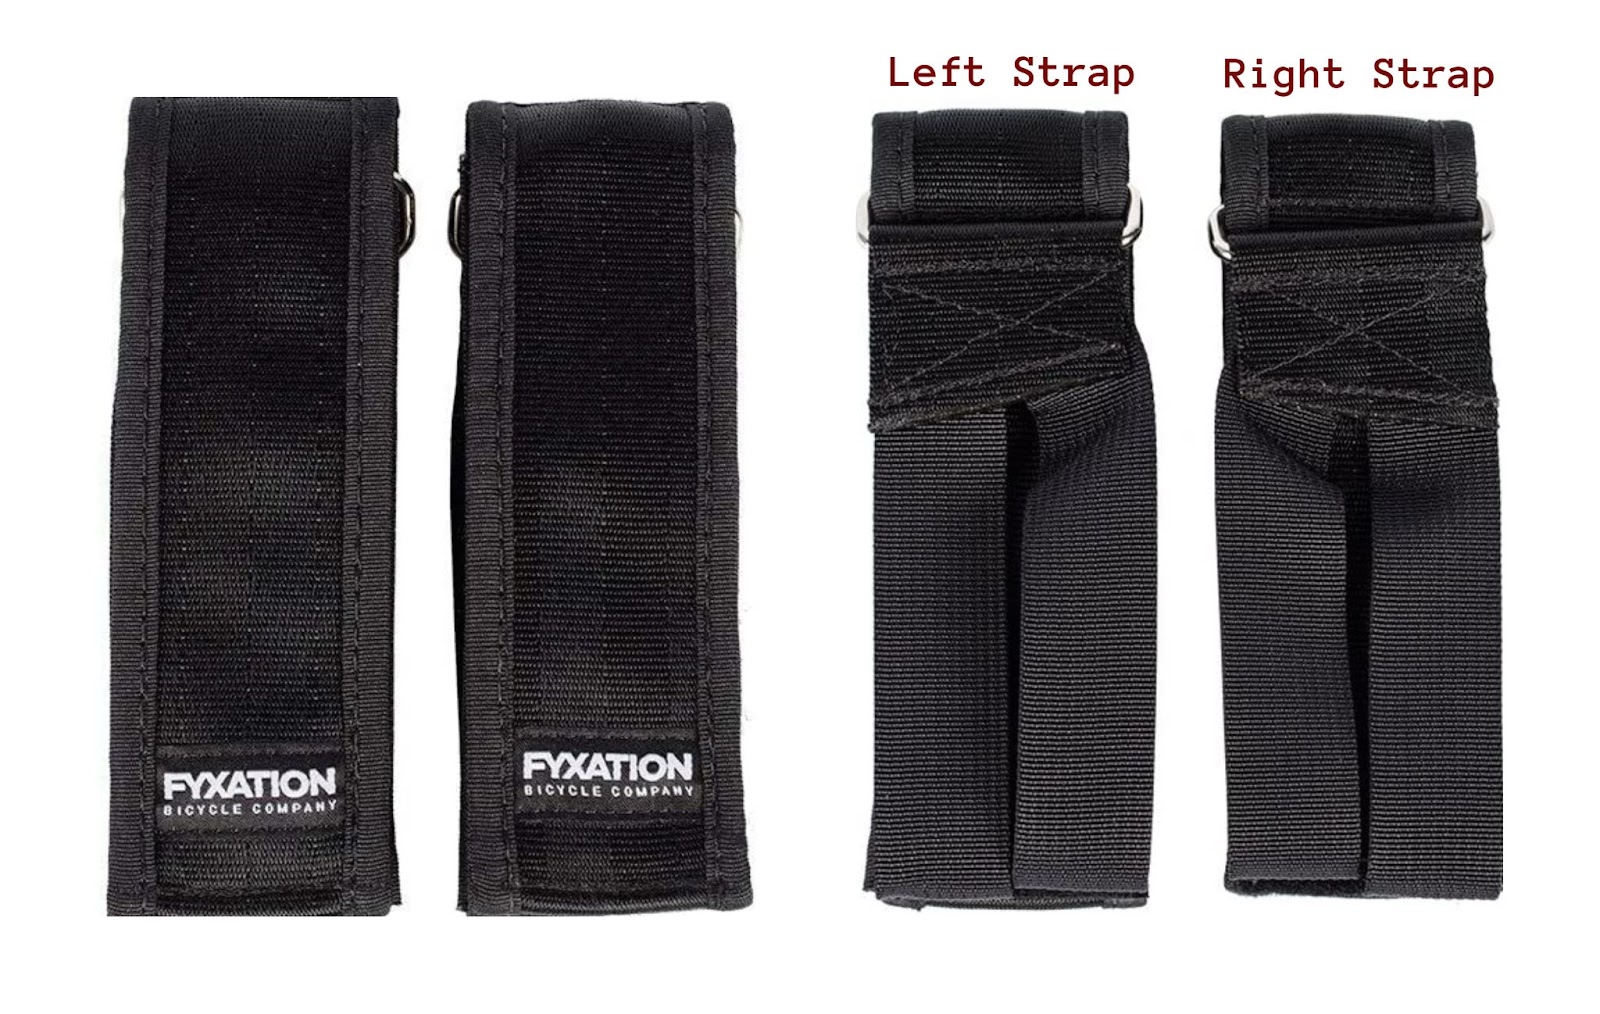
Step 3. Identify the Left and Right Pedal Straps
Before you actually thread the straps, you should determine which is the left and which is the right one. Oftentimes, the straps are labeled with an “L” or an “R”.
Sometimes, the straps come with stickers that designate the left and right sides. If you have lost the stickers, consider looking at the logo. It should face you while cycling and the straps should close away from the bike. You can also look at the edges on the back of the straps. On the left strap, the longest edge will be on the left, while on the right strap, the right edge will be the longest.
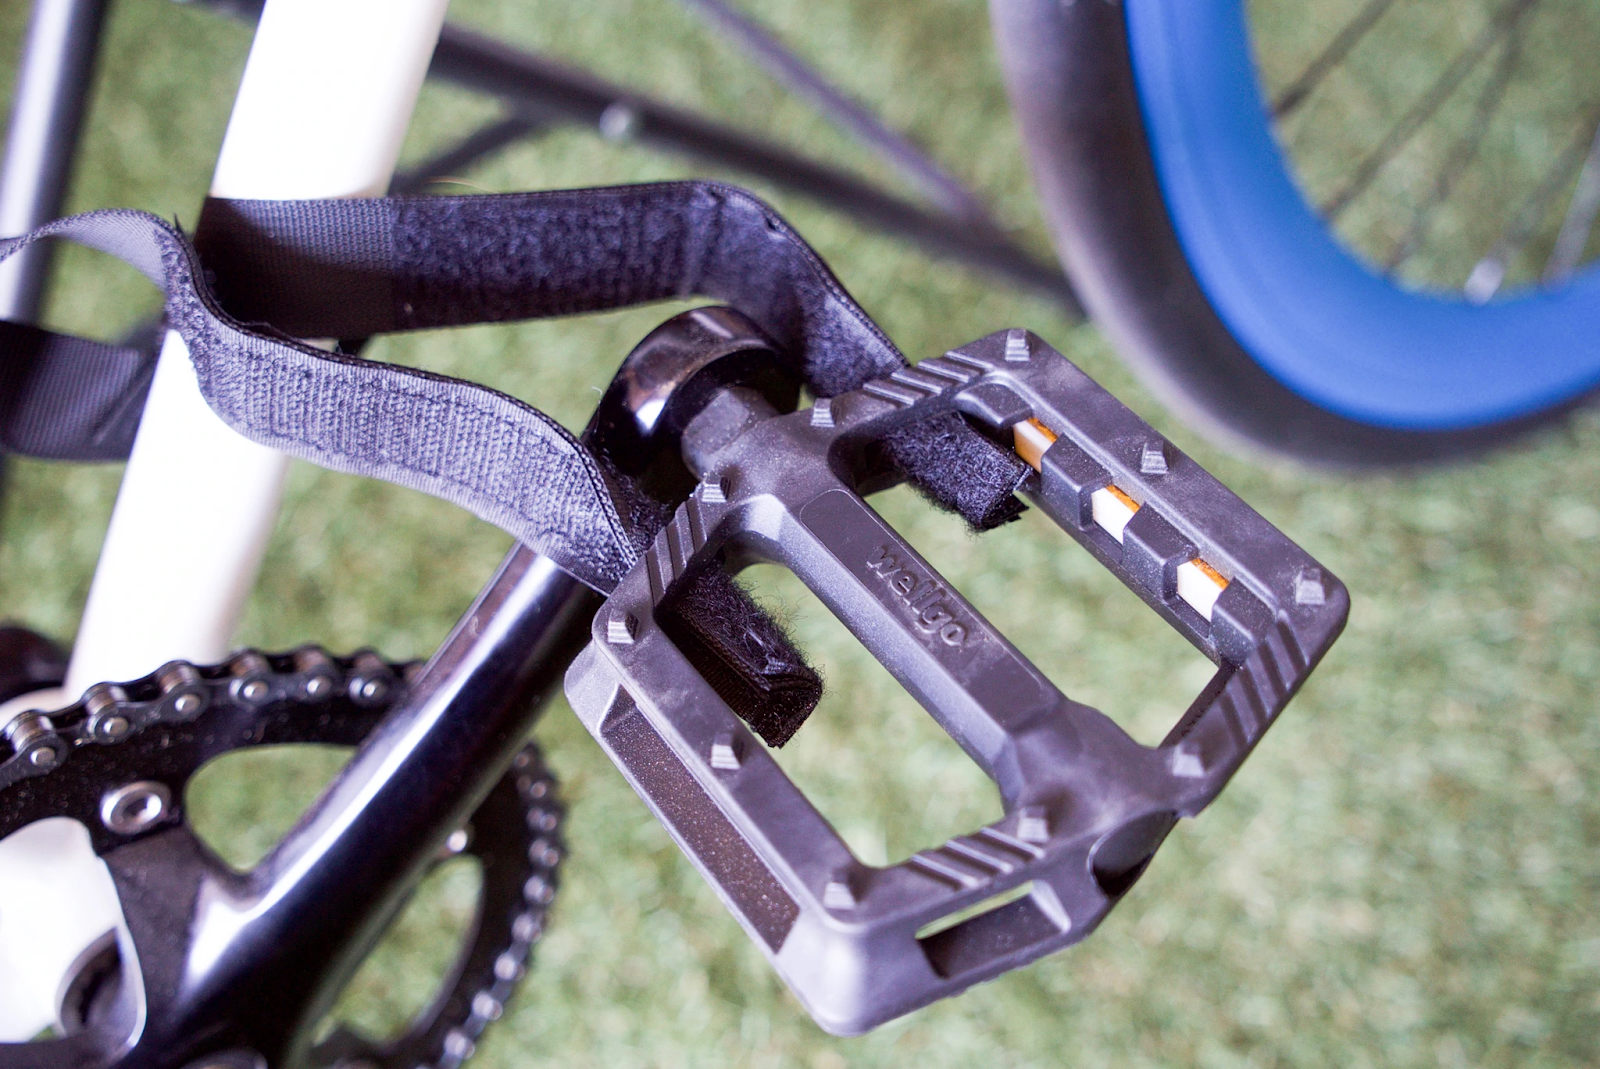
Step 4. Insert the Lower 1-Inch Webbings
To thread your pedal straps properly, start with the lower webbings that are about 1-inch wide. Insert both webbings through the pedal openings. While some pedal openings are large enough to fit the 1-inch webbings, others feature narrower slots and you might need to pinch and fold the strap before pushing it through.
Make sure the straps are not twisted and the soft side is facing up. While twisting the webbings can also be an option, most straps do not require this. We will talk more about twisting vs. not twisting the lower pedal straps later in this article.
Note that you can install the webbings while the pedals are attached to the bike. If removing the pedals would make the installation process easier for you, go ahead and detach the pedals first.
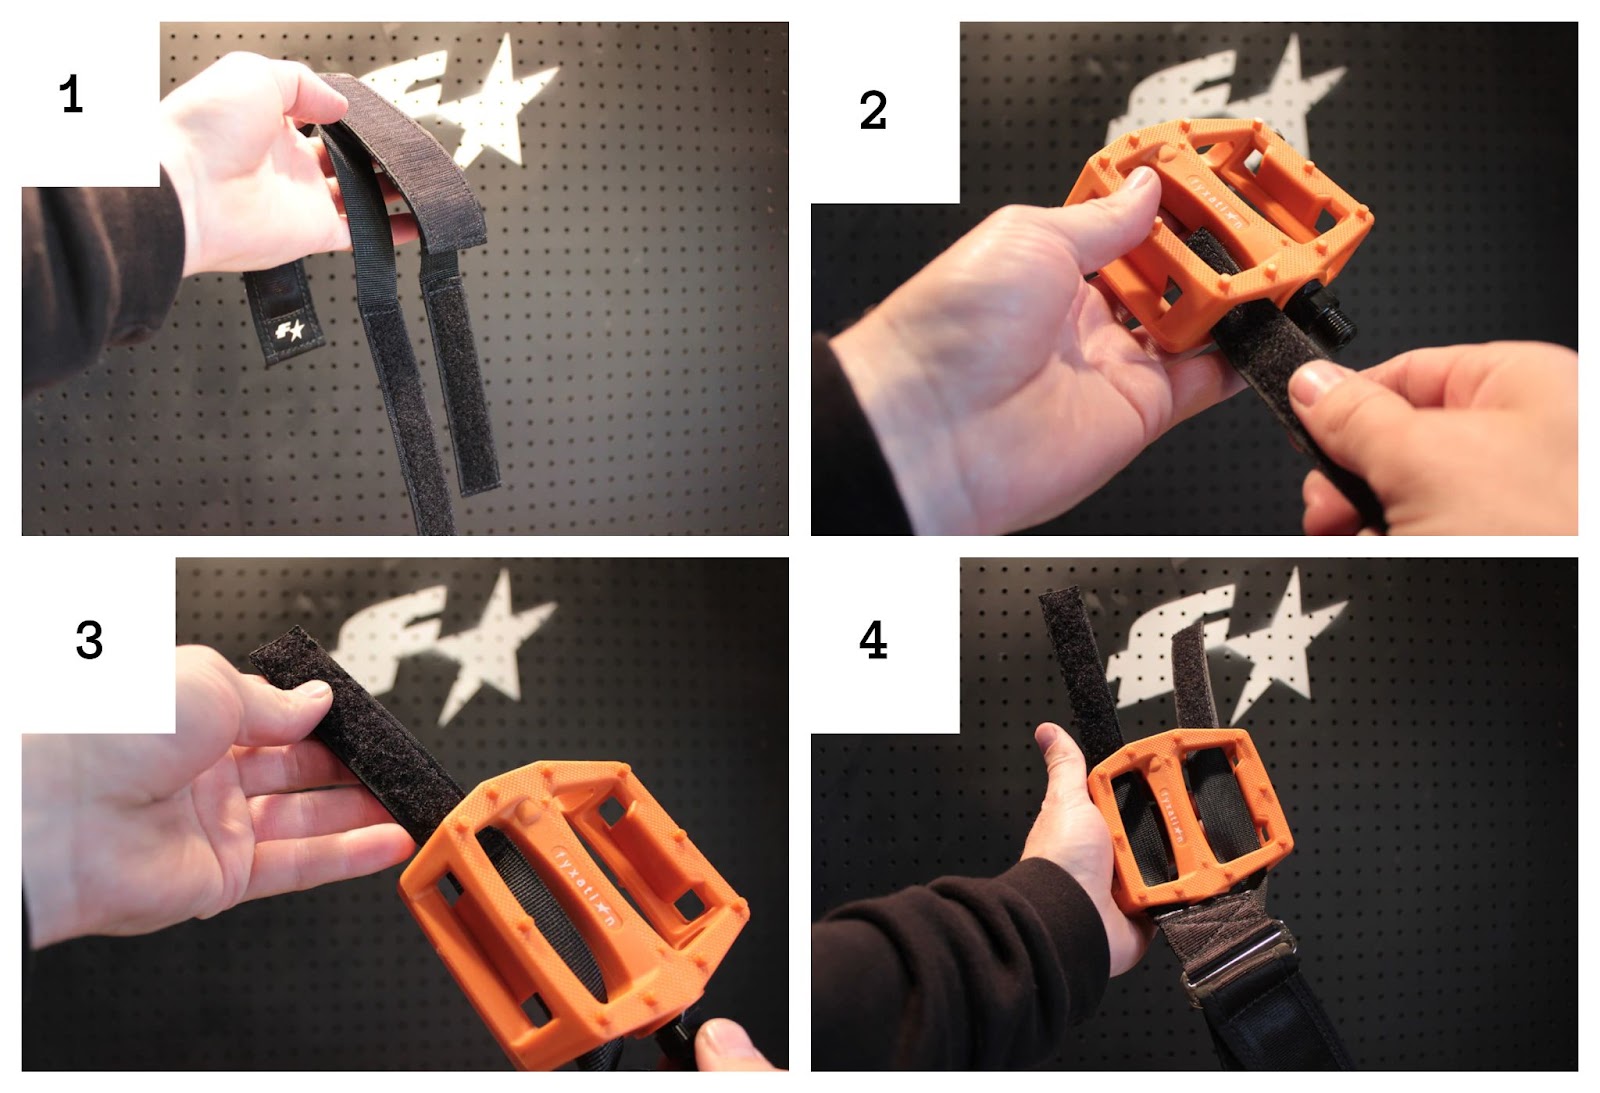
Step 5. Align the Middle Layer With the Top of the Pedal Surface
While some newbies ignore this step, aligning the middle layer with the top of the pedal surface makes a huge difference. It only takes a couple of seconds to ensure that the wider strap is aligned with the pedal and it’s definitely worth doing.
Lining up the middle webbing will offer an enhanced grip for your feet when fastening the straps. Your feet will also stay in the proper position, allowing you to feel comfortable when riding.
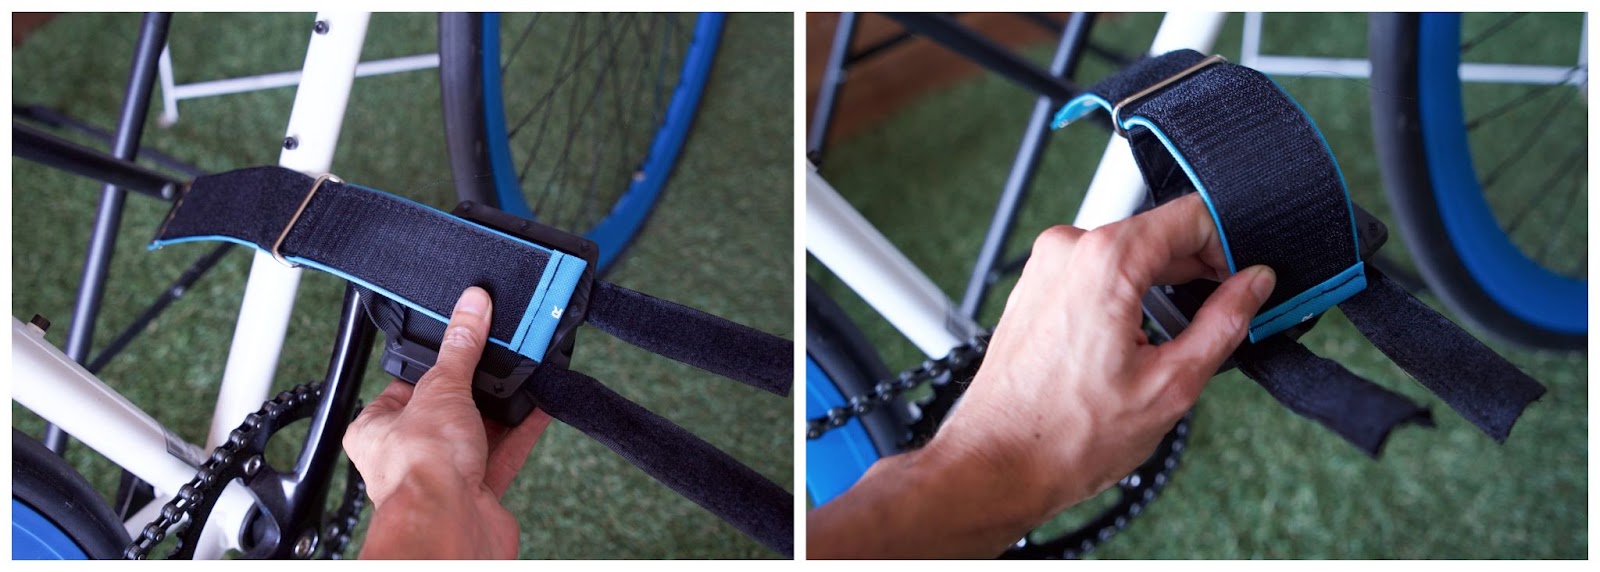
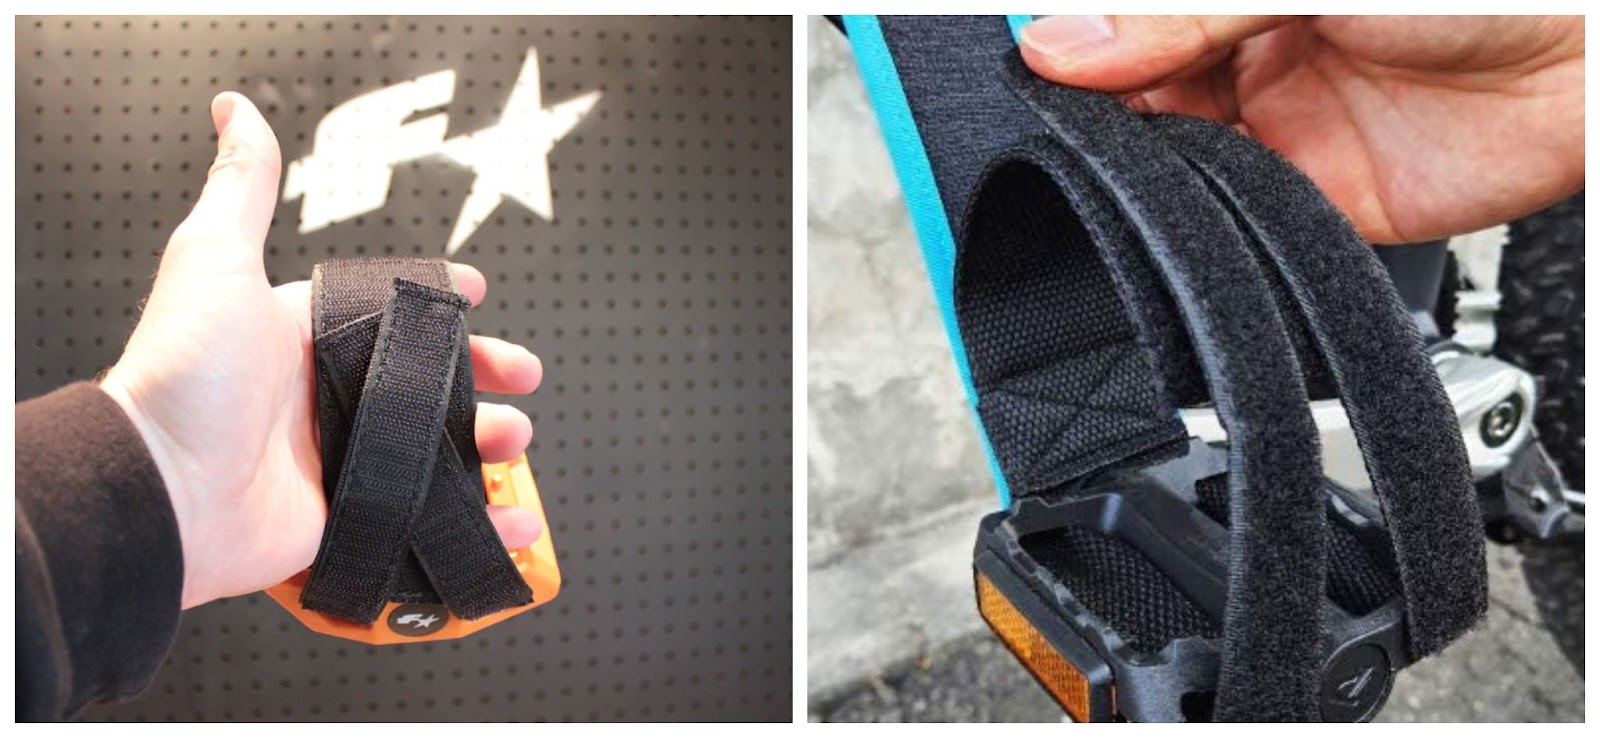
Step 6. Attach the Lower Straps To the Middle Velcro Webbing
When it comes to attaching the lower 1-inch webbings to the middle Velcro strap, there are two ways you can do it. Firstly, you can criss-cross the lower straps and form an X shape. This will give you extra protection and minimize the risks of the straps unfastening on their own while riding.
The second option is to create a slight wedge shape by making the front strap a bit tighter than the back one. This YouTube video by Ynot demonstrates creating a wedge shape and adjusting the straps to get an enhanced cycling experience.
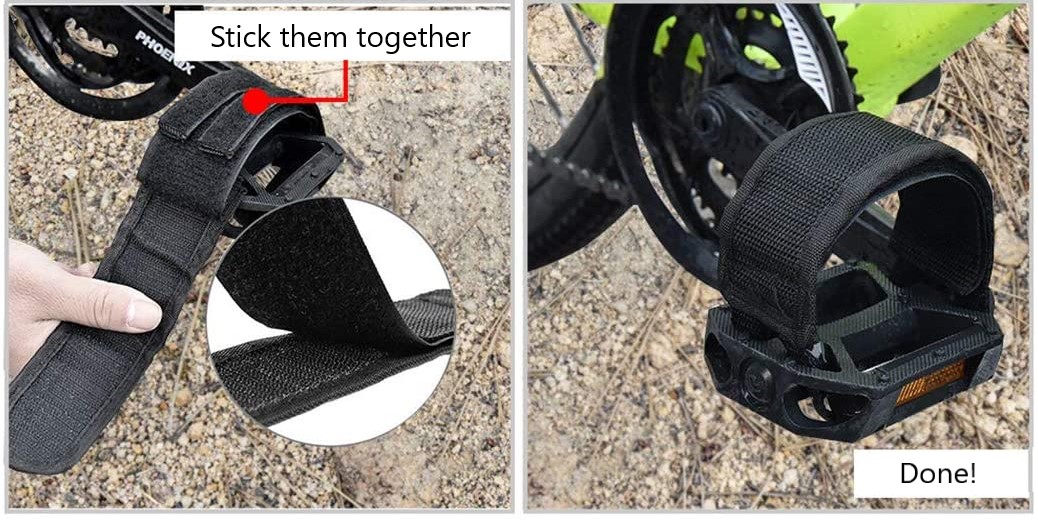
Step 7. Attach the Upper Strap and You’re Ready To Go
The final step is to secure everything by fastening the uppermost strap. Simply take the upper webbing strap and attach it to the lower and middle straps while pressing the velcro tight enough to hold your feet on the pedals.
You might also be interested in learning how to choose mountain bike tires for maximum grip. If so, make sure you take a look at our related article to find out more. Similarly, you might find more useful information in our guide to mountain bike pedal thread sizes so be sure to check that one out too.
How to Use Pedal Straps
While pedal straps offer plenty of benefits, using them correctly is key to avoiding severe injuries.
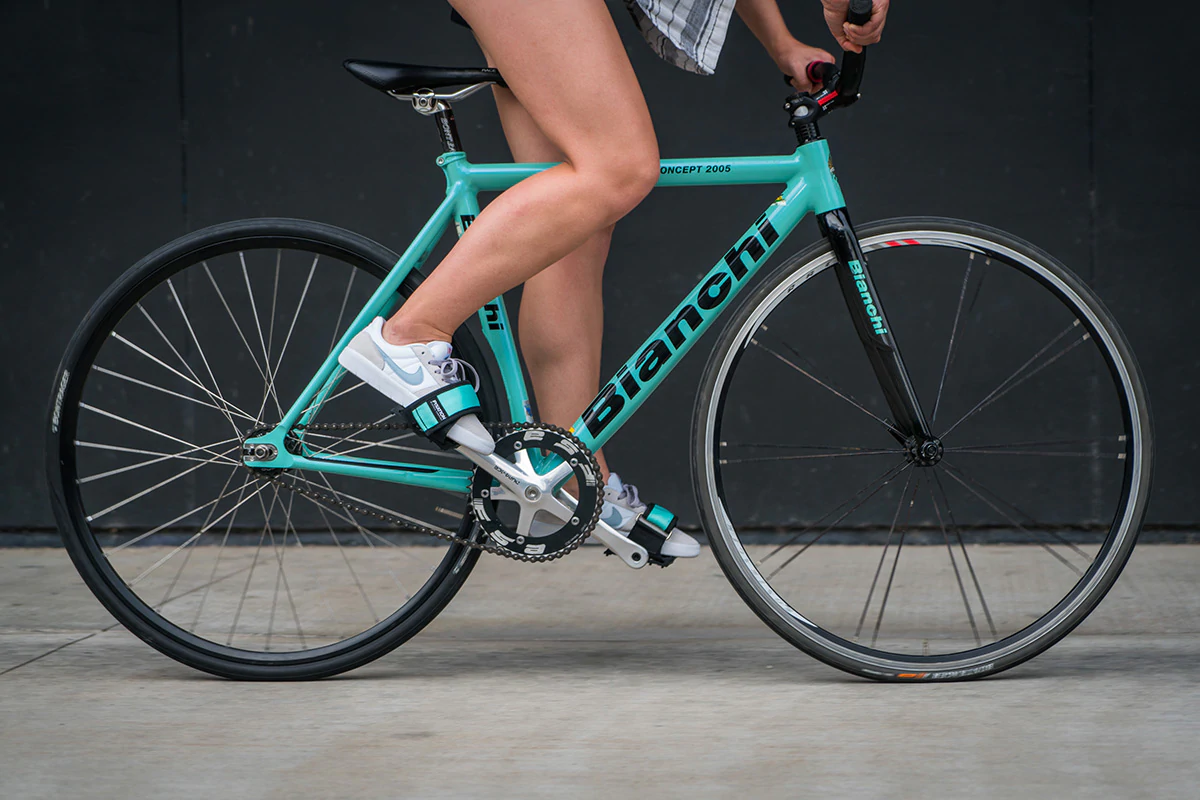
To use pedal straps first, unfasten the webbings, place feet on the pedals, and fasten the straps. Next, practice pedaling to get used to riding a bike with pedal straps. After mastering the cycling technique using pedal straps, try cycling in open areas with relatively little traffic. Finally, start cycling with pedal straps in busy areas with traffic.
If you have just bought your first pair of pedal straps, you should learn how to use them and master the technique of pedaling while having the straps on. Otherwise, you can potentially harm yourself and others. Our article about bike pedal strap safety discusses how to get started with pedal straps.
This article from the Journal of Biomechanics explains the biomechanics of pedaling in detail.
Materials Needed
| What do you need? | Why do you need it? | Example | Price |
| A pair of pedal straps | To secure your feed to the pedals and improve your pedaling efficiency. | Qeedy Bike Pedal Straps for Fixed Gear Bikes | ~$10 |
| Suitable bike pedals | The pedal straps need to be installed onto the pedals of your bike. | Schwinn Adult Replacement Bike Pedals, 9/16 Inch Compatible | ~$15 |
Step 1. Unfasten the Straps and Fasten them Around Your Feet
The first step is to unfasten the pedal straps and fasten them around your feet. To do so, simply place your foot onto the pedal and tighten the straps just like we discussed in the previous section.
Properly adjusting your pedal straps prior to riding your bike ensures your safety and significantly improves your cycling efficiency as well as the overall experience.
Step 2. Practice Pedaling to Get Used To Riding With Pedal Straps
Riding a bike with pedal straps in busy areas right away is a common mistake new riders make. This could lead to severe and sometimes fatal injuries. To keep this from happening, practice pedaling with pedal straps in a quiet place, first.
Ideally, you should first practice riding in your backyard or driveway. Simply push down and pull up the pedals to get a better idea of how the pedal straps feel. Also, practice sliding your feet in and out of the pedal straps. This is important for ensuring your safety.
If you have just started mountain biking as a hobby why not check out our article about what mountain bike to buy, and our mountain bike sizing chart could also be a handy resource.
Step 3. Continue Riding Your Bike In Open Areas With Minimal Traffic
After getting used to the pedal straps, you can continue with riding your bicycle in relatively open areas and streets with little to no traffic. As you start pedaling and gain speed, you should also practice pulling the pedals up as well as pushing them down. This will allow you to generate more power and increase your pedaling efficiency. Yellow Jersey, a bicycle repair company, shares some basic tips on how to use bicycle pedals with straps in this article.
Step 4. Start riding your bike with pedal straps in busy areas
After ensuring that you have learned how to ride a bike with pedal straps, you can start riding in busy areas. Still, you should be extremely cautious initially and avoid speeding as you are not yet used to riding with pedal straps in traffic.
As a matter of interest, If you feel that pedaling your bike is difficult or that your gears are not working well, have a read through our tips and tricks to deal with a mountain bike gear shifter that is stuck.
At this point, you might be wondering if pedal straps are dangerous or if pedal straps are good. Be sure to read our related articles to find out more. Additionally, you may want to learn how to make bike pedal straps of your own. If so, make sure to take a look at our step-by-step guide.
How to Tighten Bike Pedal Straps
Attaching pedal straps and making them tight enough will keep your feet from slipping off the pedals as you ride. While this makes your cycling experience even more enjoyable, it also ensures your safety.
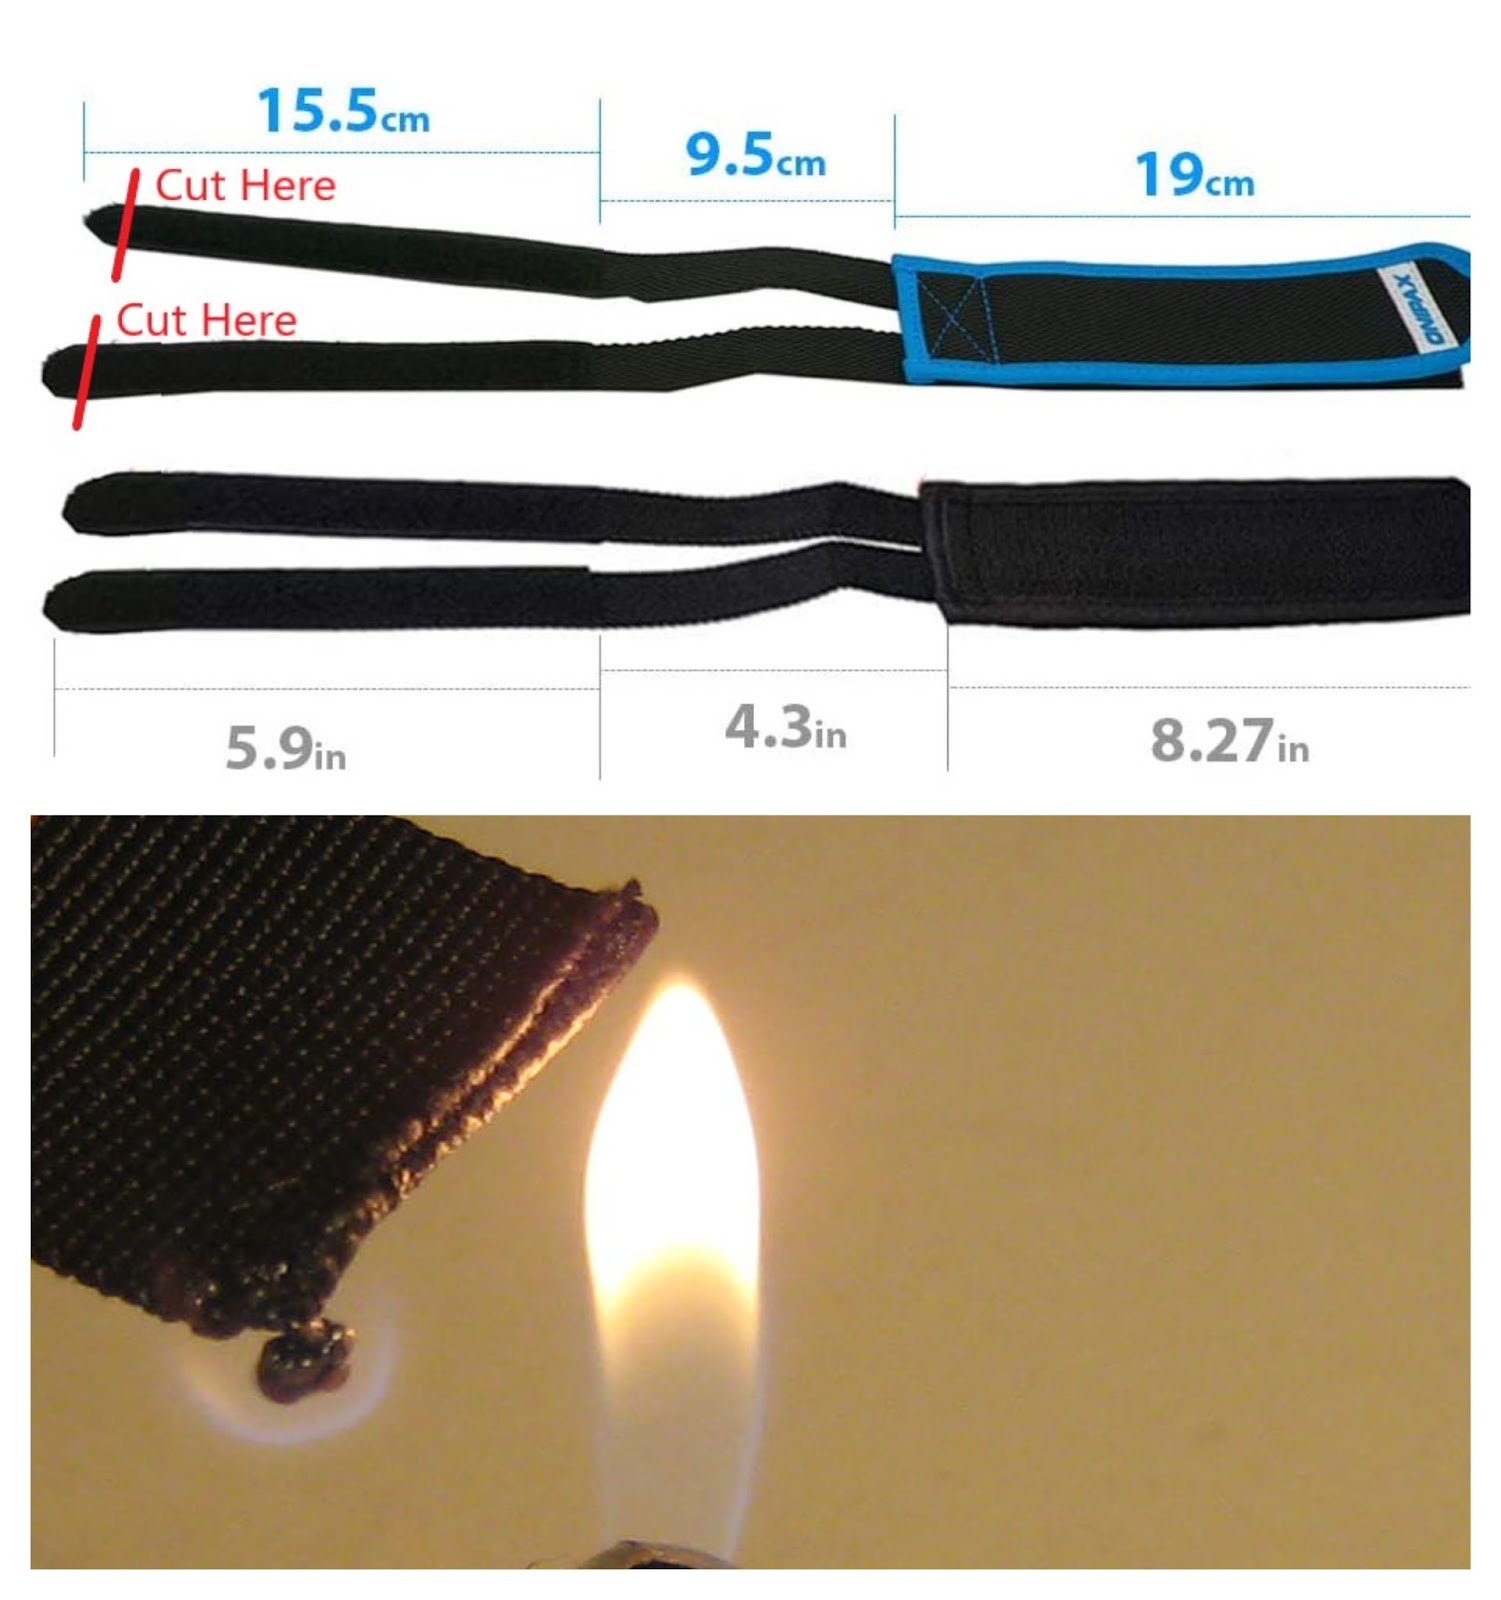
To tighten pedal straps, measure the length of the lower 1-inch straps and determine how short you need them to be. Next, use heavy-duty scissors to cut them. Finally, take a lighter and melt the edges of the straps to prevent them from fraying.
If adjusting pedal straps seems like a hassle then consider other types of pedals as we explain in our article about the benefits of clipless pedals on mountain bikes. We also share tips and tricks on other types of pedal straps in our article that explains how to choose pedal straps with heel support.
If pedal straps are what you have or what you would like to use then we explain what you will need and how to use them:
Materials Needed
| What do you need? | Why do you need it? | Example | Price |
| A soft measuring tape | To measure the initial length of the strap and determine how short you want it to be. | Measuring Tape | ~$5 |
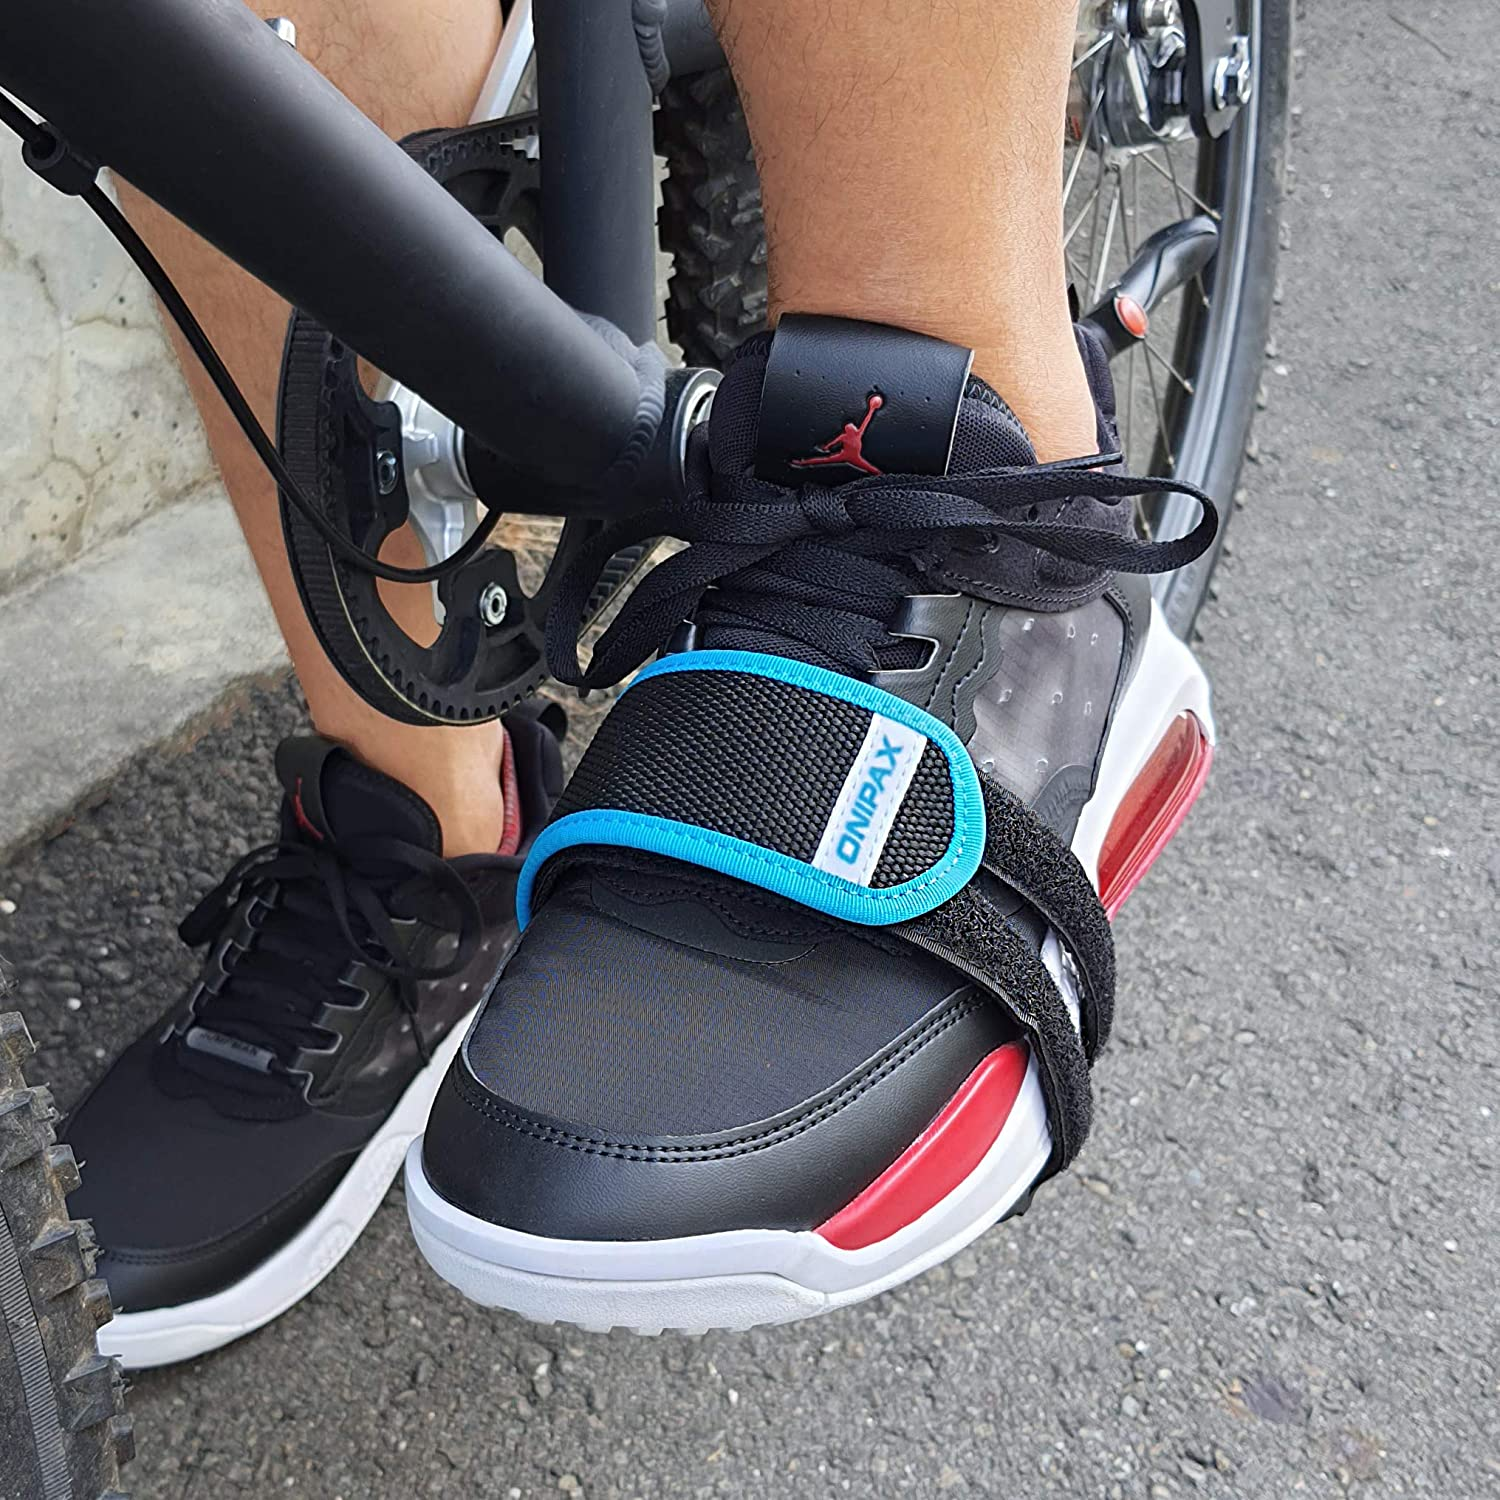
| A pair of pedal straps | To secure your feet snuggly to the pedals and keep them in the right place while riding. | ONIPAX Outdoor Bike Pedal Straps | ~$10 |
| A pair of heavy-duty scissors | To cut the strap. | Premium Heavy-Duty Multi-Purpose Stainless Steel Scissors | ~$15 |
| A lighter | To melt the edge of the strap after cutting. | Bic Classic Lighters in Different Colors, 10-Pack | ~$10 |
Step 1. Unfasten the Straps, Align the Webbing, and Put Your Feet On The Pedals In the Correct Position
Before you attach your pedal straps, you should unfasten and align the webbing straps. Then, place your feet on the pedals in the correct position.

Step 2. Attach the Lower 1-Inch Straps To the Wider Webbing and Fasten the Upper Strap To Secure the Lower Webbings
To attach the pedal straps, you should attach the lower straps to the middle webbing first and then finish up the process by fastening the top strap. When doing so, ensure that the pedal straps are tight enough to prevent your feet from accidentally slipping off the pedals and loose enough to be able to remove your feet from the pedals when needed. If your pedal straps feature buckles, this YouTube video by 63fixed will help you connect them properly.
Step 3. Tighten the Straps by Cutting the Lower Straps if They are Too Long
If you feel like your pedal straps are not tight enough and your feet keep slipping off the pedals, there’s a quick and easy way to solve the issue. You can just use a pair of heavy-duty scissors and cut the lower 1-inch webbings to the desired length. Make sure you cut just a bit of the velcro strap at a time, as you can always cut more if needed.
To prevent the lower straps from fraying, use a regular lighter and melt the edges of the webbings. This will also make it much easier for you to push the straps through the pedal holes when setting up the pedal straps.
Filing Down Burrs and Holes In Pedal Straps
Filing down burrs can help to thread pedal straps because the holes get smoother, making it much easier and smoother to push the webbings through them.
If the slots in the pedals are not wide enough to fit the pedal straps or they have rough edges, you should consider filing them down. Smoothing out the burrs will make it much easier to install the straps while protecting the webbing straps from pulling apart.
Keep in mind that excessive filing will make things even worse as the lower webbings may no longer stay in place after installing the pedal straps. Besides, this may also damage the pedals and make riding the bike quite dangerous.
Twisted vs. Flat Threaded Pedal Straps
Pedal straps can be twisted in order to keep the lower straps in place or make the pedal straps tighter. Twisting might also be necessary if your non-laminated pedal straps move around. Generally speaking, you should not have any issues with laminated straps as they provide enough traction to stay in place.
Twisting pedal straps inside the pedals can prevent the lower webbings from moving around. This is especially useful when pedal holes are too wide. If this is the case, twist the straps inside the opening of the pedal with the soft side of the webbing facing up so that they can be fastened properly.
Twisting your pedal straps can also be an alternative to cutting the lower webbings when you want to make the straps tighter. Your pedal straps should either make a full rotation inside the pedal or form an X shape by crisscrossing the lower webbings. The only issue with this technique is that you cannot adjust the length the lower straps.