
Simple Steps for Adding Drop Bars to a Mountain Bike
Mountain biking is a fun and exciting outdoor recreational activity that continues to grow in popularity today. You may be riding to experience a thrill, explore amazing landscapes, connect with friends, or enjoy the many health benefits of mountain biking. To improve your biking experience, you need to take note of the handlebars on your bike. Drop bars provide multiple hand positions, faster acceleration, increased comfort and style, and better energy efficiency on your ride. So, how do you go about adding drop bars to a mountain bike?.
When adding drop bars to a mountain bike, buy drop bars that fit the stem and bike frame, remove the bike shifters, detach the already installed handlebars from the MTB and then attach the new drop bars.
Installing drop bars on your mountain bike can be quite challenging on your first try. However, with the right knowledge, tools, and skills, you should easily be able to add drop bars on your own and avoid common mistakes. If you are interested in getting extra accessories to make your drop handlebar more comfortable, you will find our articles about choosing a mountain bike grip to purchase for numbness and how to choose mountain bike grip heaters, quite useful.
Below is our comprehensive guide to adding drop bars to a mountain bike. You’ll find everything you need to know about fitting drop bars, from the advantages and materials needed to step-by-step instructions for installing drop bars on your mountain bike.
What are Drop Bars?
Drop bars are steering controls for bikes that typically attach to the bike stem via a straight central bar with each end curving forward, downward, and then back towards the biker. Apart from steering, they support the rider’s weight and provide a framework for attaching various accessories needed for cycling.
Drop bars are specifically designed to provide more stability and palm comfort by allowing multiple hand positions. Use drop bars for the placement of brake levers, gearbox shifters, bells, and bike-packing bags.
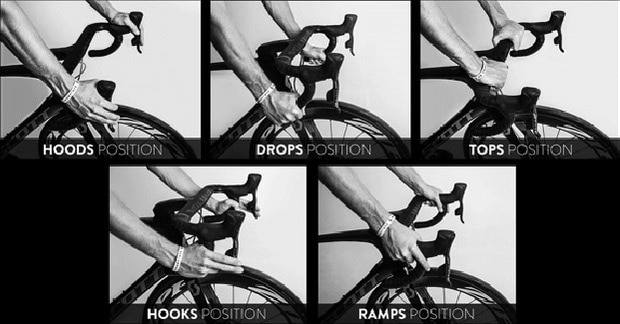
The positions available on the drop bars include the tops, shoulders, hoods, hooks, and drops. In addition, by helping you put your body in a more aerodynamic shape, drop bars also allow for higher speeds on rides.
Drop bars are not only great for urban environments where you need the narrower width to squeeze tight spaces, but they are also excellent for long-distance and fast rides on off-roads and rough terrain. In the following sections, we’ll look at the materials you need to set up your drop bar, as well as the steps involved.

You might find interest in learning more about the mountain bike reach calculator while you're discovering more about drop bars. Be sure to take a look at that article as well before making any additional decisions.
Advantages of Putting Drop Bars on a Mountain Bike
The drop bar was a novel innovation that enabled riders to control their bicycles better and cycle with reduced air resistance, reaching never-before-attained speeds.
Putting drop bars on a mountain bike enables the rider to apply less propulsion force as his gravitational force is low, makes it easy for riders to go up mountains as their weight shifts forward and makes the rider crouch low, thus reducing drag force and air resistance and the drop bars offer better positions for a firm grip to exert extra pedal force.
According to this book on the history of bicycles, back in the 1880s, most cyclists abandoned the straight handlebar in favor of the drop bar because the drop bar made such a difference to cycling performance.
Let’s go into detail on the multiple benefits of adding drop bars to your mountain bike:
1. Provides Multiple Handling Positions Making it Easy to Change Hand Positions
One of the major advantages of the drop bar is the multiple hand positions it allows riders. With recent drop bars, which are taped and feature additional grips, you can use up to five different hand positions. The first-hand positions are the “tops”, which allow you to relax your back. The shoulders or ramps come next, with a 90-degree rotating grip. Then the common hood position offers wider control and quick brake access. The hooks are great for fast descents, where you need more accurate control and braking. The last and original drop bar position is the drop position which minimizes air resistance or drag.
The multiple handling options allow for more flexibility and versatility when riding and help optimize comfort by relieving pressure on your hands.
2. Makes the Rider Lean Forward Resulting in Better Aerodynamics
According to this article by the International Society of Biomechanics in Sports, when cycling at a speed greater than 50kph (30mph), aerodynamic drag is the most crucial resistive force which can be improved by adjusting body position. This is where drop bars come in by providing the freedom for riders to tuck their elbows in and lean forward, allowing the body to assume a more aerodynamic shape. This, in turn, allows riders to travel further and faster with the same effort. When you’re considering adding drop bars to a mountain bike, think about whether you will be going at this speed often.
3. Improves Maneuverability at High Speeds
Drop bars allow you to lower your center of gravity while riding at high speeds. This energy-efficient position allows for easier maneuverability and steering when riding fast downhill or into a headwind. To improve steering leverage and control, you can add bike grips as our guides on mountain bike grips for small hands and mountain bike grip installation explain in depth.
4. Provides More Stability when Crouching Low Over the Handlebars
These drop bars are designed to offer more rider stability by allowing you to crouch low over the handlebars. This gives you confidence and helps you control your bike better over rough terrain. In addition, by allowing you to shift your body weight as far forward as possible, drop bars make climbing hills much easier.
5. Enables Riders to Ride on Narrow Trails
Drop bars are up to 6 inches narrower in width compared to flat bars. They’re great for navigating through narrow trails. This advantage also works for commuters who frequently squeeze through traffic and crowded pedestrian areas. As a result, drop bars help to save your energy and valuable time.
6. Makes Riders use Less Propulsive Force on the Pedals
Lastly, drop bars provide better leverage for pedaling, which reduces the force required to propel the bike. However, don’t expect your drop bars to make biking any easier. In this master's thesis, the author determined that heart rate, blood pressure, and ratings of perceived exertion were unchanged between flat bars and drop bars when students completed the same set of physical tasks.
For more information, be sure to check out our related article explaining what mountain bike drop bars are and why you need them, in addition to our guide to learning if you can put drop handlebars on a mountain bike and why you should have them. Similarly, you will find interest in learning how to choose between mountain bike drop bars vs. flat bars. If so, be sure to take a look at our related article for more details.
Can You Install Drop Bars on Any Bike?
Yes, you can add drop bars on any bike as long as you have compatible parts for the bike. Although finding the right fit can be challenging, you can adjust the setup to allow for compatibility.
Drop bars can be put on any bike, provided there is a compatible drop bar mountain bike conversion kit. Even though buying the entire handlebar system may cost about $160 -$200, the advantages outweigh the costs.
If you’re a rider who loves to push the limits of your speed and crouch low when riding, then drop bars are for you. Although the installation process is quite detailed, this article provides everything you need to know to add drop bars to your bike. With the right tools on hand, you should be able to pull it off quite quickly, and have fun while you’re doing it.
Examples of Drop Bar Conversion Kits to Put Drop Bars on Any Bike
| Conversion Kit | Weight | Material | Example from Amazon | Average Price |
| Adapter handlebar | 200g | Carbon fiber | Carbon Drop Handlebars | ~$55 |
| Hydraulic Disc Brake Set | 410g | Aluminum, Resin | MTB Hydraulic Disc Brakes | ~$40 - ~$70 |
| Bicycle Handlebar Stand | 281g | Aluminum Alloy | Bicycle Extender Handlebar Stem | ~$20 |
| Brake Cable Housing Kit | 120g | Stainless steel | Fat-Cat Brake Cable Housing Kit | ~$10 |
| Gear Cable Kit | 113g | Stainless steel | Jagwire Hyper Gear Cable Kit | ~$20 |
Materials Needed to Add a Drop Bar to a Mountain Bike
| Material | Why You Need It | Example Product | Average Price |
| 44 cm Bullhorn Bars | To serve as the drop bars | Redshift Kitchen Sink Bike Drop Bark | ~$140 |
| Bike stem | To provide a larger clamp for the drop bar | Fomtor Handlebar Bike Stem | ~$20 |
| Bar-end shifters | To provide shift controls | Microshift MTB Bike Bicycle Twist Grip Gear Shifters | ~$15 |
| Brake levers | To operate the braking mechanism | Shimano BL-R400 Road Drop Brake Levers | ~$45 |
| Gear Shift Lever | To provide shift controls for drop bars | Right Thumb Gear Shift Lever | ~$15 |
| Brake calipers | To provide the braking function for the bike | Bucklos Bike Brake Caliper | ~$35 |
| Bar tape | To provide better grip and comfort for your hands | Eva Road Bike Handlebar Tapes | ~$15 |
| Brake cable and housing | To provide longer connection to the brake levers | Shimano Universal Standard Brake Cable Set | ~$20 |
| Gear cable and housing | To provide longer connection to the shifters | Universal Bike Gear Shifter Cable with Housing Cable | ~$10 |
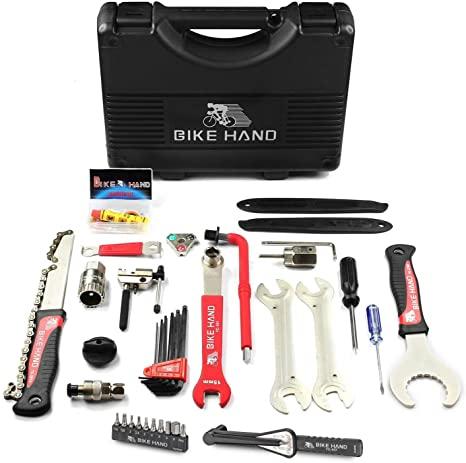
Before attempting to install your drop bars, you need to get your tool kit. If you need help putting together a tool kit for your bike, check out our ultimate list of tools needed for mountain bike maintenance.
Steps to Add a Drop Bar to a Mountain Bike
Step 1. Familiarize Yourself with the Materials and Tools You Need
Before starting, you must get all the parts and tools you might need during the process. For this and other projects, you may need some basic tools in which case you may find our article that discusses mountain bike tool bag ideas useful.
You also need to note that drop bars are quite different from other types of handlebars like flat bars. And so they require different bike specifications.
First, you need to get drop-bar compatible brakes and gear shifters – either as an integrated unit like this (called a brifter) or as separated units. Other parts to consider are your bike’s brake calipers, derailleurs, and stem. Matching incompatible components will lead to problems later on. Other parts include your bar tape, gear cable and housing, and brake cable and housing.
Additionally, you need to get a bike tool kit like this. The tools you need for removing and adding the drop bars include a knife or scissors for removing tape, ruler and angle gauge like this for measuring, compatible wrenches, torque wrench or driver, grease or thread locker for bolts, and assembly compound for carbon bars.
Step 2. Remove the Old Bar Tape
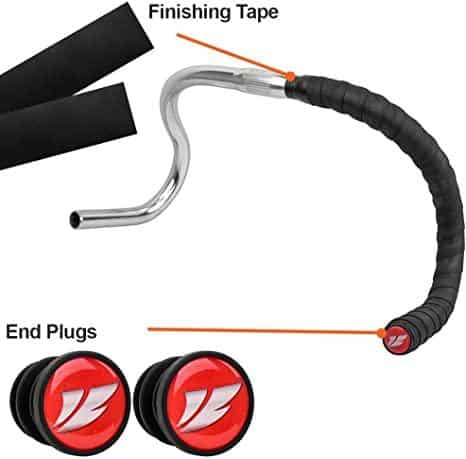
Before you install your drop bars, you need to remove the present handlebar on the bike. The first step is to remove any bar tape wrapped around the bar. Push the lever hoods forward and pop out the end bar caps or plugs. Then unwrap the bar on both sides of the bike. In addition, use the scissors or knife to cut off any other tape holding the brake cable and housing in place. Be careful not to cut into your bars if they’re made of carbon fibers.
Step 3. Remove the Brake Levers, Brake Cables, Gear Shifters and Gear Cables
The next step is to take off the brake levers. Locate the mounting bolts – the location differs based on your model. The bolts are usually under the lever hood, but some might be in the middle of the lever body. Use a long wrench like this to reach in and loosen the bolts. Then remove the brake levers. Also, using an appropriate-sized wrench like this, unbolt the shifters from the handlebars.
Next, disconnect the brake and gear cables. Take your pliers like these and squeeze the end caps, so it opens up. Then pull the cables through the housings and remove them.
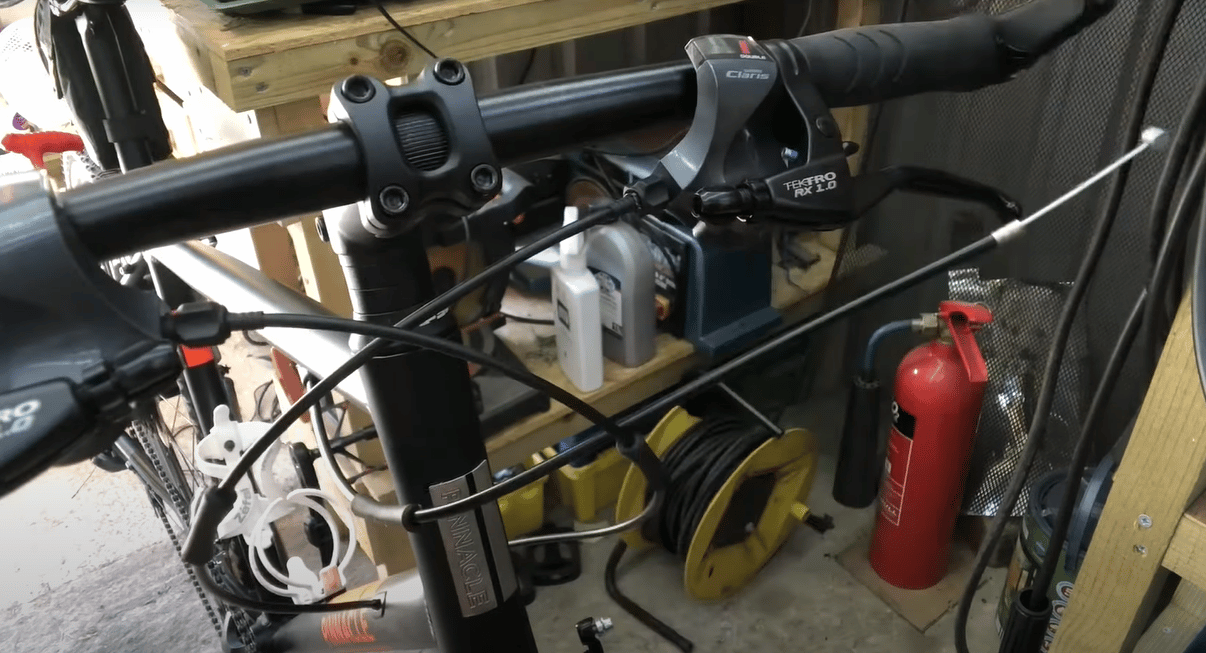
Step 4. Remove the Old Handlebar
To remove the handlebar, you need first to loosen the stem bolts. If your bike stem uses removable faceplates, unbolt the faceplate and take it off to expose the central part of the handlebar. Then, simply remove the bar and set it aside. If your bike has a compression slot stem, loosen the bolt and slide the handlebar out.
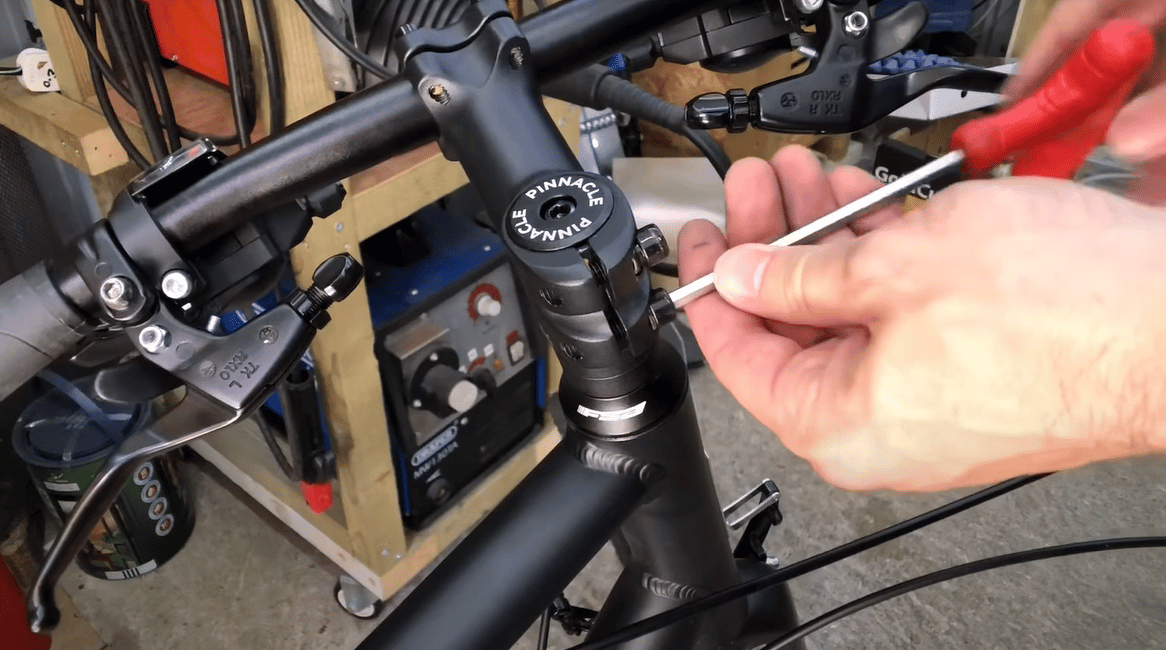
Step 5. Replace the Bike Stem, Brake Calipers, and Derailleurs
In the event that you have other components incompatible with the drop bars, like the stem, brake calipers, and derailleurs, then you also need to replace them. To remove the stem, screw off the pinch bolts and top cap. Remember to use a toe clip strap like this or zip tie to keep the fork from falling off. Next, use your wrench to screw off the old brakes. Finally, to remove the old derailleurs, disconnect the bike chain and pull it through the derailleurs. Then release the clamp holding the derailleurs.
To add the new stems, set the bike on the ground and ensure that there are no gaps between the components. Next, configure the stem and spacers to your desired stem height. Then apply this grease to the bolts and screw on the top cap, and pinch bolts.
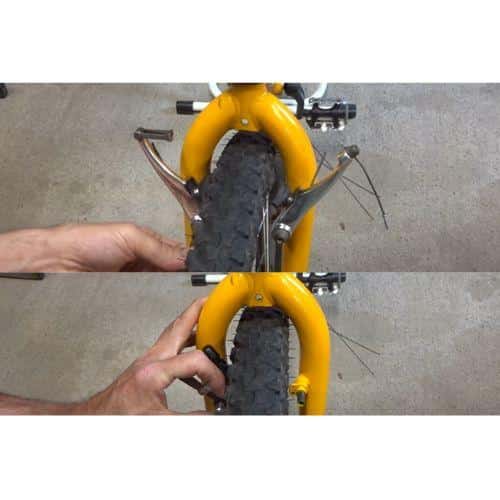
Install the front and rear brakes, ensuring they’re in the right position to allow enough spring tension. Get the brake pad to align with the bike rim, so it isn’t hitting the tires. Also, attach the new derailleur and run and reconnect the bike chain.
Test all the components to ensure they’re moving easily and properly.
Step 6. Attach the New Brake Levers to the Drop Bar
Now that you’ve removed and replaced all the old bike components, it is time to get started on installing the new drop bars. The first thing to do is add the new compatible brake levers to the drop bar. The mounting position for the brake levers is such that the bottom must line up with the bottom flat part of the drop bar.
Set the bar and brake levers on a table and make sure they are both sitting flat against it. You can also use a ruler like this to confirm the alignment. Next, slide on the levers and screw the mounting bolts on. However, do not fully tighten them, so you have room for adjustment later.
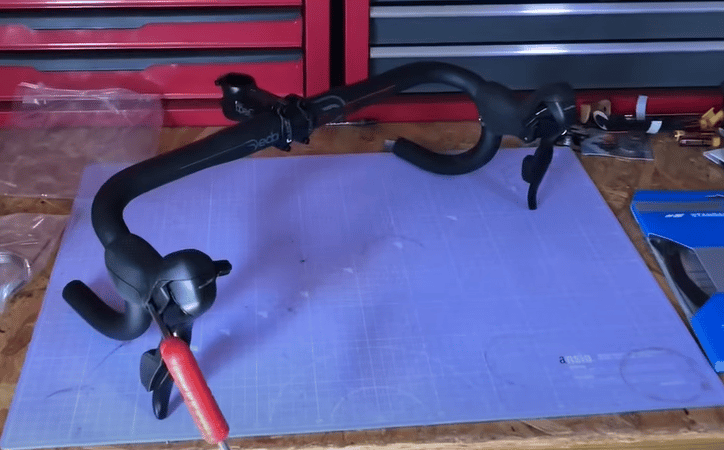
Step 7. Fit the New Drop Bars
Set the bike on the ground and fit the new handlebar into the stem. Ensure the bar is properly aligned and centered on the stem. For carbon bars, apply an assembly compound like this to where the bar connects with the stem. The compound helps to resist rotation by creating friction. It also serves as a barrier between the bar and stem. Wipe the bar with a dry towel after.
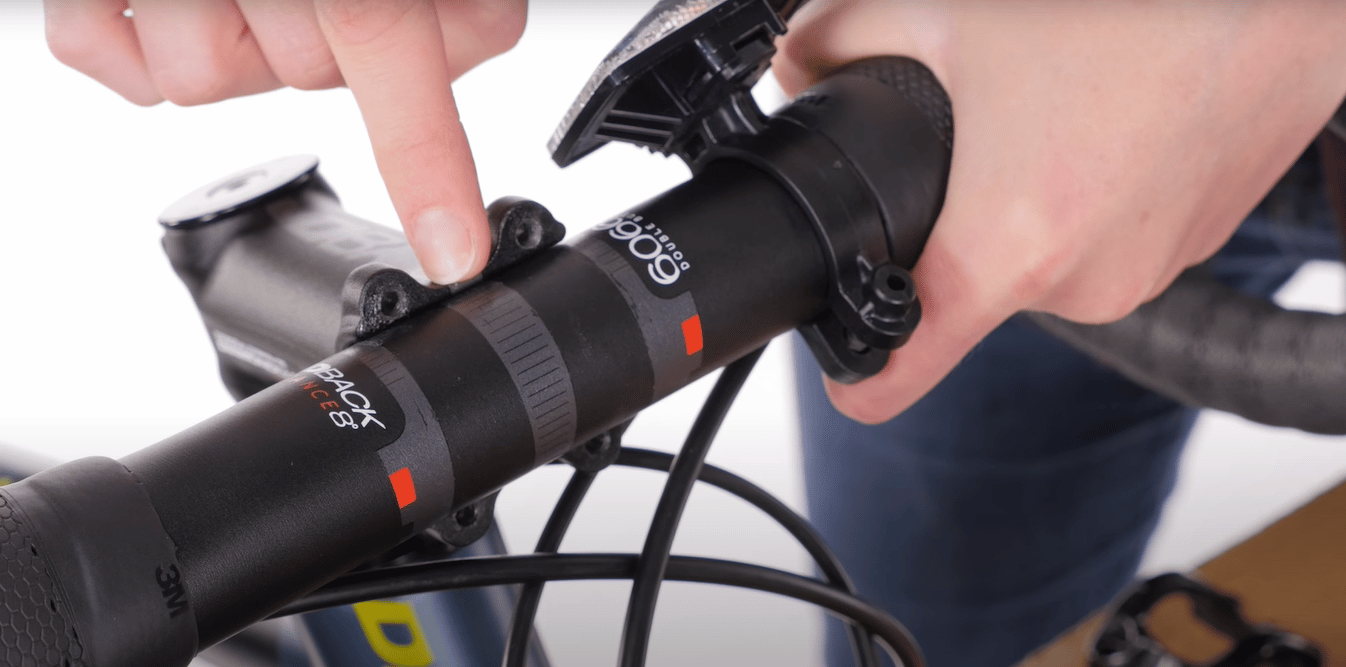
Before attaching the stem faceplate, apply grease or thread locker like this to the bolts. Next, hand tighten each bolt for a few turns. Check for an equal gap between the stem and faceplates at the top and bottom. The gaps help to reduce stress on the bolt heads. If you use compression slot stems, apply grease to the bolt and install the drop bar but do not tighten it fully yet.
Step 8. Make Any Necessary Adjustments
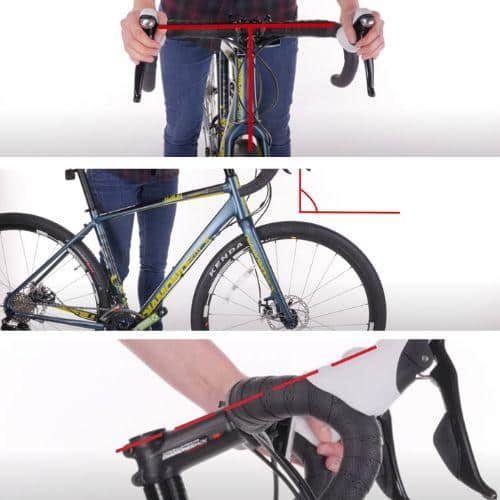
Stand over the bike and get a feel for the new setup. You can adjust the angle of the drop bars to make reaching the brake levers more comfortable. You can also adjust and fine-tune the bar roll, lever position, and rotation as necessary. A good baseline is aligning the top of the stem with the flat part of the hoods and the top of the drop bars. In addition, ensure that your brake levers are at a 90-degree angle to the ground.
For additional information, check out this article by Shimano for tips on setting up your handlebar position to improve your ride.
Step 9. Tighten all the Bolts
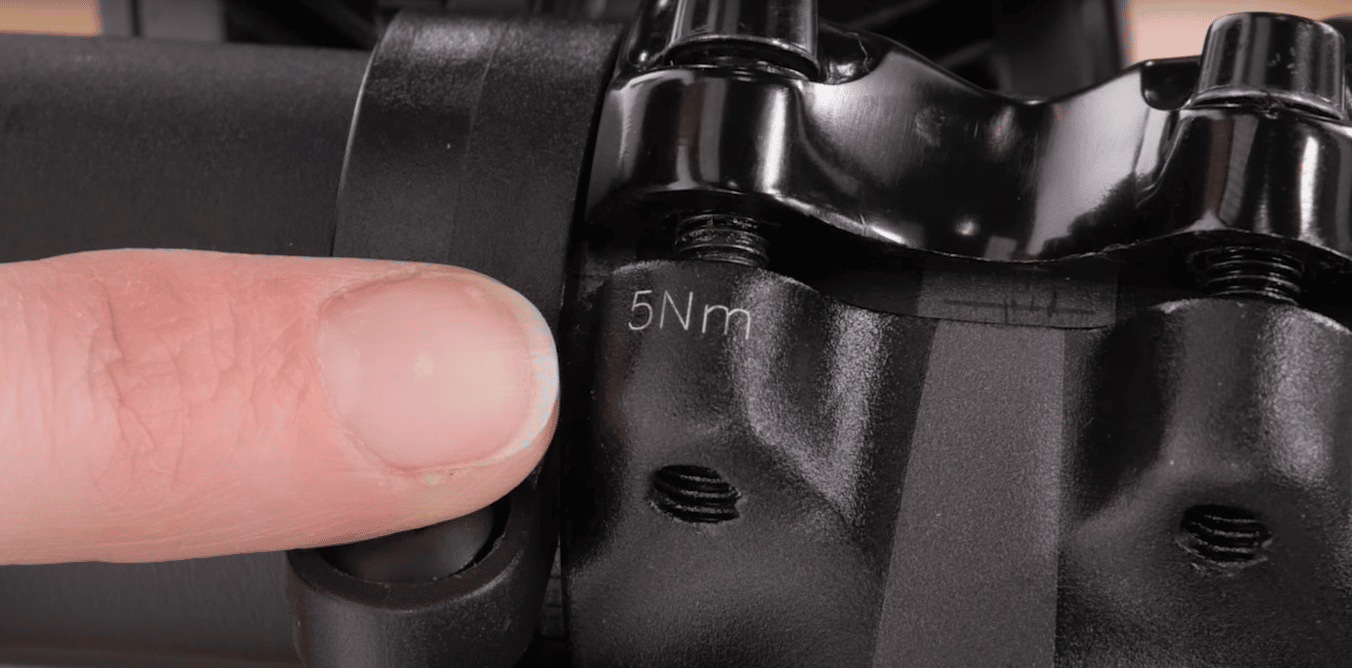
For stems with faceplates, tighten each bolt one at a time in a cross pattern, ensuring equal tightness and pressure on each. For stems with a compression slot, simply fit and torque the bolt. If you use a torque wrench, tighten the bolts according to the Newton meter labeled on the stem. Also, tighten the brake levers to the appropriate specification.
Step 10. Set up the Brake and Gear Cables
Connect the cables and pass them underneath the handlebar. Try to lay the cable housing in the channels molded into the bars to reduce the bulkiness of the drop bars. Then use self-fusing tape like this to secure the brake and gear cable housing to the bars. The tape helps provide some extra comfort to the grips and holds the cables in place. Ensure the cables cross cleanly at the center and are not overly crossed or twisted.
You can also use an inline barrel adjuster like this to tune cable tension adjustment for the derailleurs and brakes.
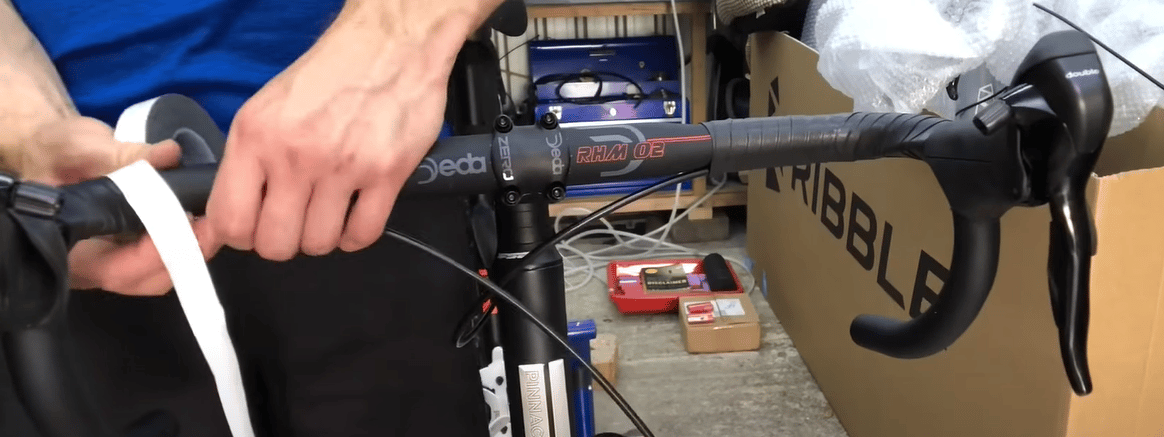
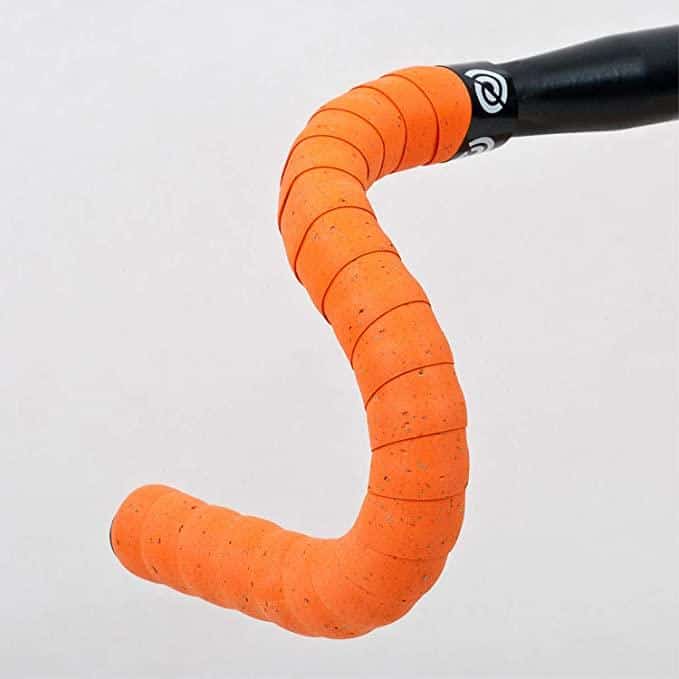
Step 11. Wrap the Drop Bar in Bar Tape
Finally, we recommend wrapping the drop bars with bar tape like this. It is a detail-oriented process that requires a bit of focus and patience. Check out our exhaustive guide on mountain bike grip taping techniques to learn more. The bar tape helps to improve grip and comfort when you’re riding. It also adds a bit of color and freshness to your bike aesthetics.
And that’s it! Do a final check for bolt tightness and proper alignment of the components before heading out on your next ride.
How to Fit a Drop Bar When Converting a Mountain Bike Handlebar to Drop Bars
To convert a mountain bike from flat bars to drop bars, you’ll need to factor in compatibility and the costs of new components, which can add up to quite an expense.
When converting a mountain bike handlebar to drop bars, ensure that the new drop bars are compatible with the brake levers, brake cables, brake calipers, derailleurs, bike stem, chain-stay, and suit the rider.
This video tutorial by Park Tool provides some invaluable tips for converting mountain bike handlebars to drop bars.
Compatibility
The most important factor to consider when adding drop bars to a mountain bike is the compatibility of the bike components. Drop-bars usually use an integrated gear shifter and brake (brifter) like this, while flat-bars are good with separate brakes and shifters. Additionally, drop-bar compatible brakes and shifters are designed to be mounted vertically, which is completely different to that on a flat-bar bike. Drop bars also require stems with a larger clamp.
And that’s not all. Different brake levers and calipers have different leverage ratios and cable pull, meaning they may not always work with each other. Also, drop bars and flat bars are constructed quite differently as drop bars are longer and so work with shorter bike frames. Therefore, swapping drop bars on a flat bar mountain bike might make it feel long and unwielding.
To sum up, if you want to convert your mountain bike to drop bars, you’ll have to budget for more than just a new set of handlebars. To ensure your new stem is compatible with your drop bar, you must ensure the bar diameter and stem clamp diameter are the same. In addition, you need to get bar-end shifters that are compatible with the cassette for older bikes. For more information, check out this bike forum on Stack Exchange.
Putting drops on a flat bar bike can require new shifters, brake levers, cables, and fitting stem, which seems like an awful lot of trouble. A good alternative is to add bar ends like these to add extra hand positions.
Finding the Right Bike Parts
Finding the right parts that are compatible with drop bars is quite a challenge. It may even mess with the fit of your bike. This is because you need to consider that drop bars are longer, and compatibility issues make the interface between your MTB drive train and brifters harder. You could easily find yourself in a rabbit hole, forever tinkering and buying new components. At which point buying a new bike like this that is already set up the way you want may be preferable, as this bike forum on Mountain Bike Reviews discusses.
Drop Bar Weight
Drop bars have a narrower width, and a more stretched-out position than flat bars, meaning some additional weight rests on your hands. As such, it is trickier to maneuver and steer the bike when going slowly. Flat bars, on the other hand, offer more steering leverage which is important when you have heavy front luggage. In such cases, you have an easier time steering the bike with flat bars.
You also might find interest in our comprehensive guide to mountain bike drop weight and how it affects steering and handling. So be sure to check that article out too.
Drop Bar Design
There are different types of drop bar designs based on the shape, which you can check out in this manual. There are traditional classic-bend bars, semi-ergonomic bars and more complete ergonomic bars. The type of drop bar design you use depends on your preference. The more ergonomic bars have a gradual curve that allows for more freedom and hand positions while sustaining long-term comfort. In contrast, the more traditionally shaped bars have a consistent radius, longer reach, and drop.
In addition, the drop bar design also affects the position of your forearm and body. If you favor longer body positions that are good for aerodynamics, then the classic bars are for you. Pro riders often prefer this type. However, the more recent ergonomic bars will suit you better if you prefer level forearms and flexibility in your hand and hip positions.
Drop Bar Size
Drop bars come in different diameters, with the common sizes including 25.4mm, 26mm, 26.4mm, 31.8 mm, and 35mm. They also come in different widths ranging from 35cm to 50cm. You can measure your bar size using a metric caliper like this. For the stem, the clamp diameter is usually engraved on the stem.
It is best to choose a bar that roughly matches your shoulder width so that your arms can be more or less parallel. Also, the wider the drop bar is, the easier it is to control your bike at slow speeds. You can check this article from Bicycling Magazine for more information on finding the right-sized bar. However, at the end of the day, the decision is up to whichever feels better for you.
Posture and Bike Fit
Converting your mountain bike to drop bars will mess with your posture and bike fit. This is because using drop bars leads to a more forward-leaning posture which might be uncomfortable for some. You can adjust the setup to improve the fit, but the costs will make buying a new bike a better option. We provide some handy tips in our article that explains where to hold mountain bike grips to maintain proper posture.