
How to Size a Mountain Bike Chain – 3 Simple Ways
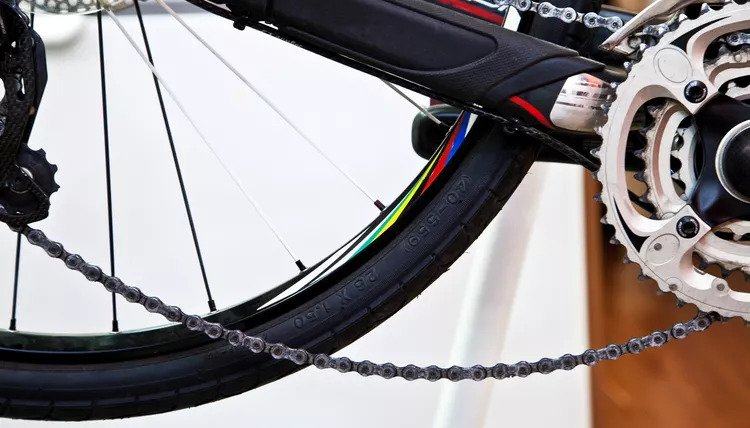
A bike chain is the power behind your mountain bike, it transfers the power from your pedals to the drive wheel, which literally makes your bike move. But for your mountain bike chain to transmit power properly, the holes between the links of the chain must pass over the teeth of the sprocket gear. So to get the most out of your ride, you have to know how to size a mountain bike chain properly.
To size a mountain bike chain, first, feed the chain around the largest cog and pass it through the front derailleur cage, then around the largest chainring to a 5 o’clock position. Now pull the chain at the lower side to engage with the other chain end at the chainring, and lastly, cut the chain.
To get a general sense of how to change your mountain bike chain, take a look at this article from the experts at REI.
And keep reading for detailed information about different mountain bike chain sizes and a step-by-step guide to sizing and installing your mountain bike chain via three quick and easy methods.
Are All Mountain Bike Chain Sizes the Same?
Since mountain bike drivetrain parts are different based on the size of your bike, they need different types of bike chains, to work. There are many different lengths and widths, so you’ll need to figure out which one works for your mountain bike.
No, mountain bike chain sizes differ in pitch size, outer width, and inner width. Mountain bikes with a 12 rear cog set require a chain with a 5.3mm outer width and a mountain bike with a 6-speed requires a chain with 7.3 mm outer width. Choose a chain that is the correct size for the number of chainring and sprocket teeth and the length of the chainstay of a mountain bike.
Bike chains are not universal and you should select the correct size based on the drivetrain components of your mountain bike. You should pay attention to chain pitch, inner chain width, and outer chain width.
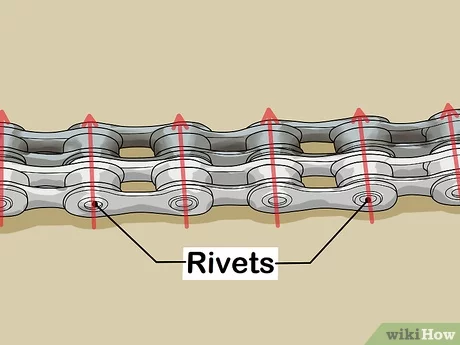
Chain pitch is the distance between the pins and is calculated by measuring the distance between three links and dividing the number by two. On the other hand, internal chain width is the distance between a pair of inner plates, while external chain width refers to the spacing between a pair of outer plates.
To learn more about different bike chain sizes, check out this article from Park Tool.
Differences Between Various Sizes of Mountain Bike Chains
When shopping for a mountain bike chain, you need to consider a few factors to help you get the right one for your bike.
To find a suitable mountain bike chain size, take into account the number of mountain bike rear cog sets, the length of the mountain bike chainstay, and whether you are riding a full-suspension mountain bike or not.
To learn more about chain length sizing, check out this article from Park Tool.
Mountain Bike Rear Cog Sets Differ in Numbers
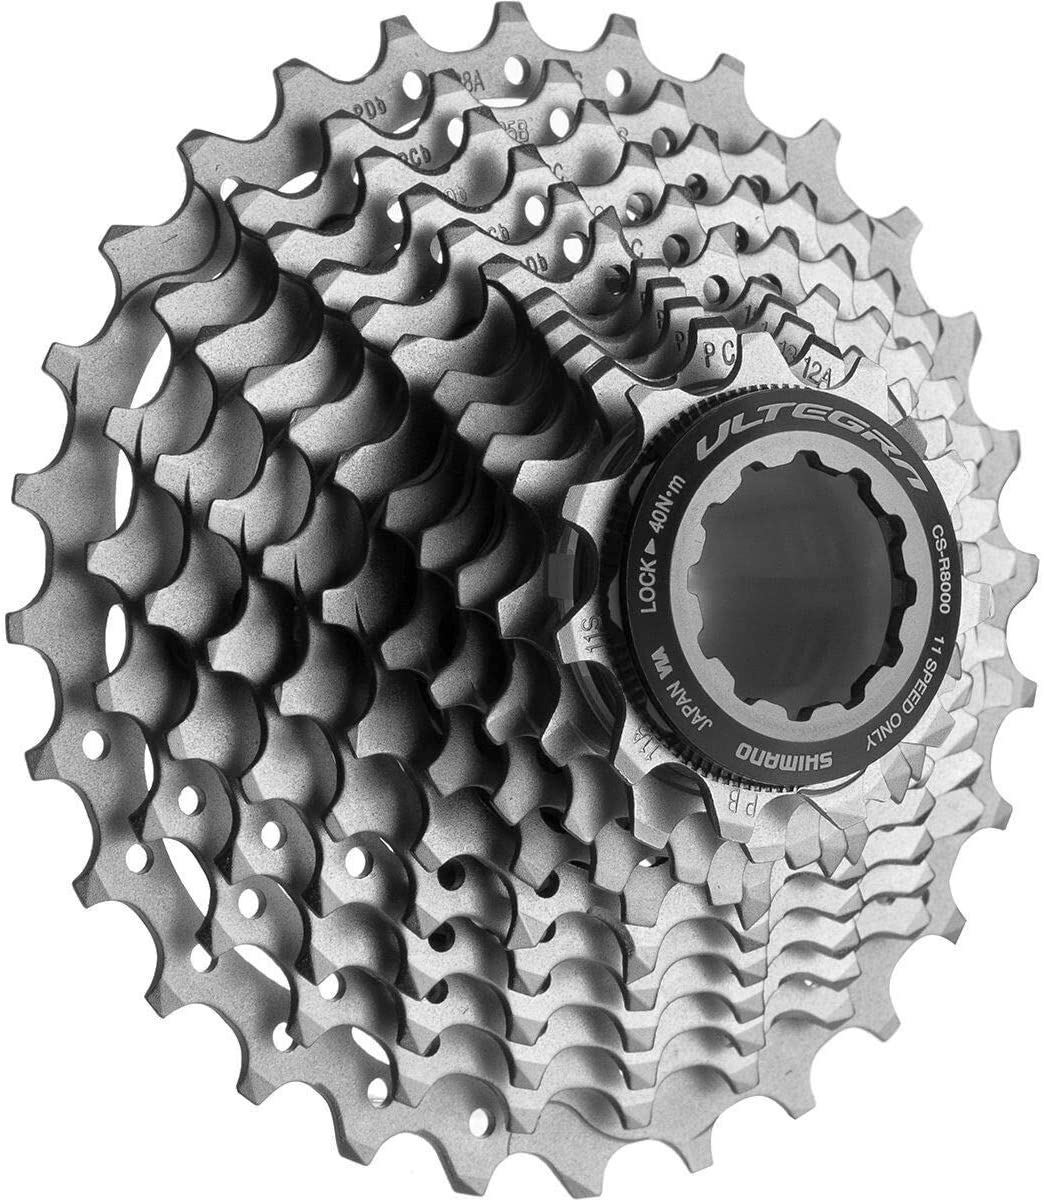
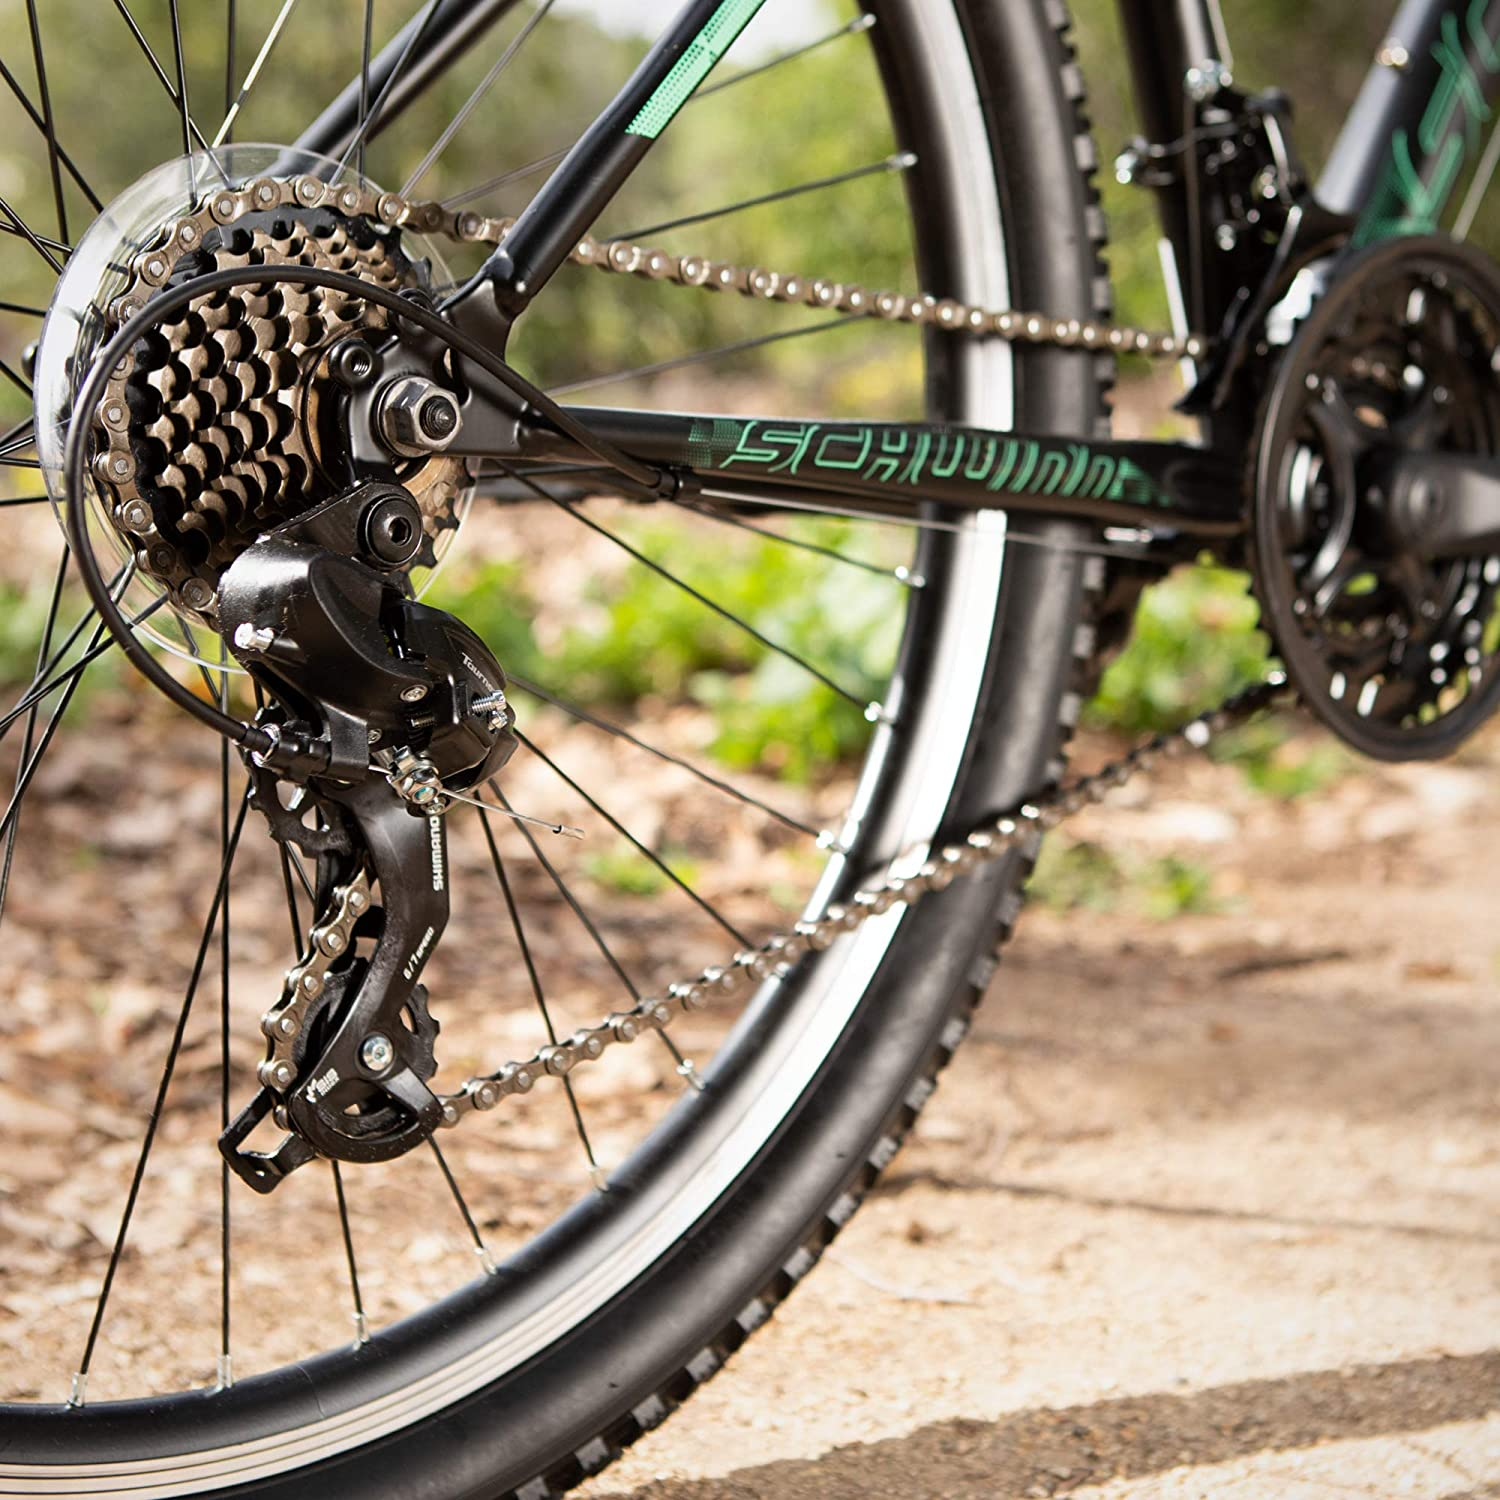
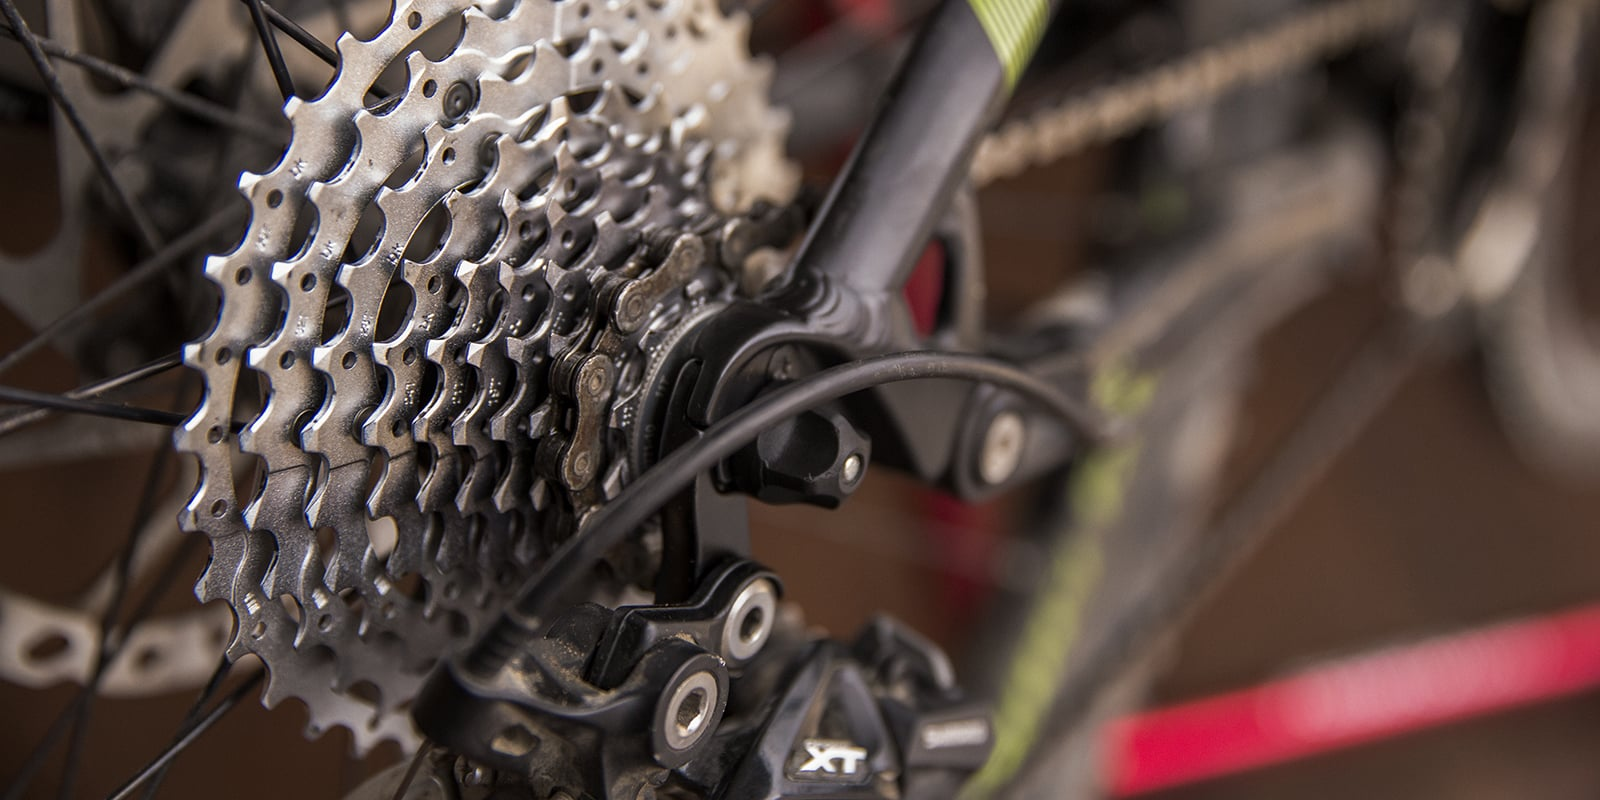
Cogs are the gears on the rear wheel. When you put a few cogs together, you get a cogset, which is more commonly referred to as a cassette. As the chain rolls over the teeth of the sprocket when pedaling, the number of sprockets in a cassette determines the size of a suitable bike chain.
Generally speaking, the more sprockets your mountain bike hub has the longer the bike chain should be. While most mountain bikes use 9- to 12-speed cassettes like these, some models feature 7- or 8-speed cassettes like these. So, do not forget to check the number of cogs on your mountain bike cassette or its speed when searching for a new bike chain.
You Need to Purchase the Right Chainstay Length
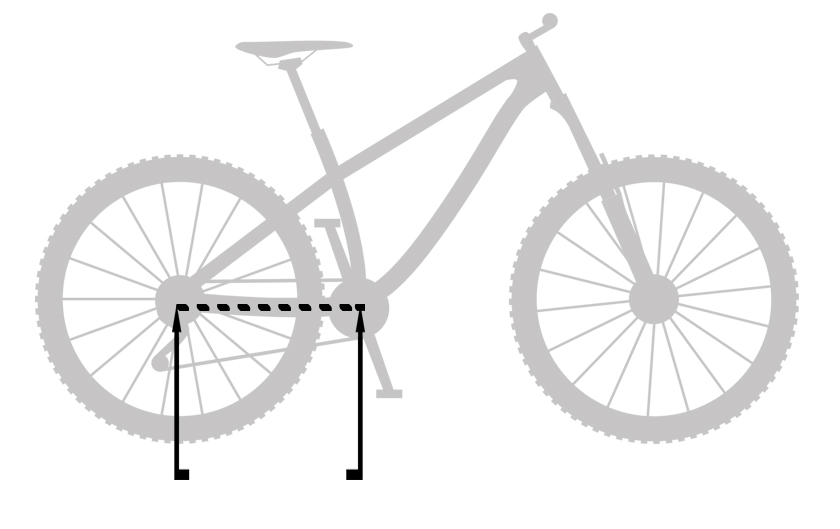
Chainstay length refers to the distance from the center of the rear wheel axle to the center of the bottom bracket. You need to know the length of your chainstay when shopping for your mountain bike chain. If you're not certain, it’s always better to go with a longer chain because you can always remove links from the chain, but it’s more of a nuisance to find links to add onto a chain that’s too short. Our related article, however, will show you what to do if a mountain bike chain is too short. Be sure to check that one out too.
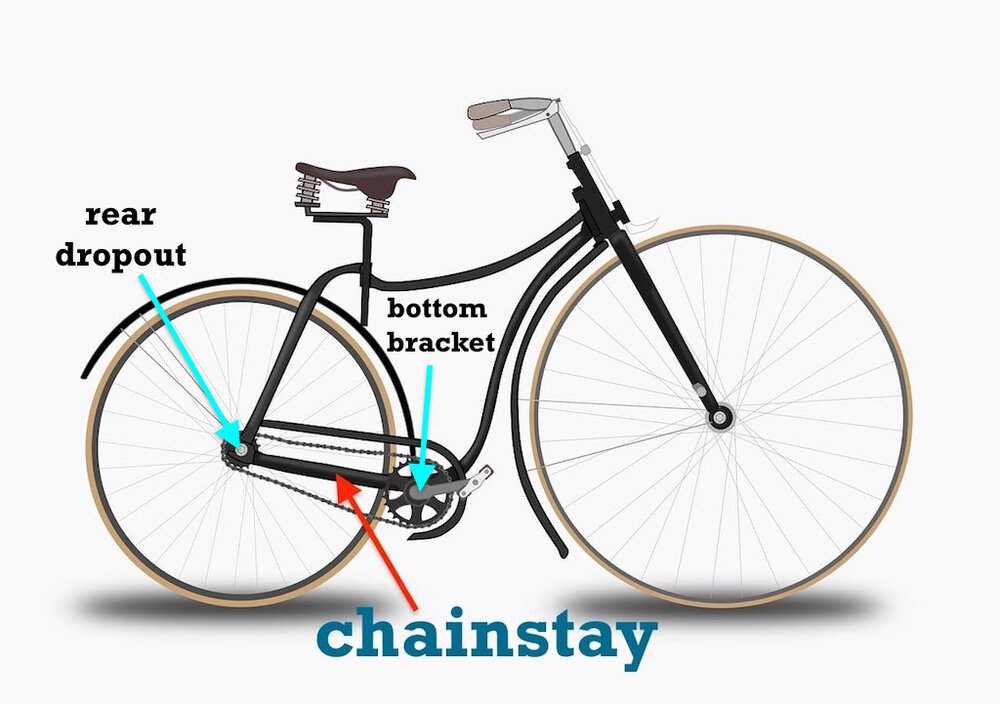
Figure Out if Your Mountain Bike is Full-Suspension or Not
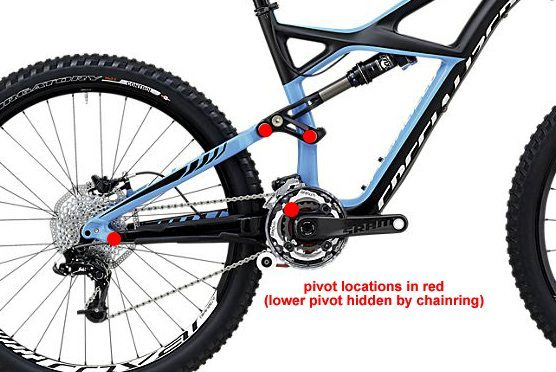
In a full-suspension mountain bike, the front and rear triangles of the bike frame are joined by pivots, allowing them to move independently. If your bike is full-suspension, you need to take into account the suspension movement when choosing the length of a bike chain.
Most of the time, full-suspension bikes require longer chains to compensate for the independent movement of the front and rear triangles.
How to Size a Mountain Bike Chain Using the Largest Chainring to Largest Cog Method
If this is your first time changing your bike chain and you do not have a reference chain to check its length, then the largest chainring to the largest cog method is the best option for you.
To properly size a mountain bike chain, first remove the old chain and make sure the new chain’s width fits the mountain bike drivetrain system. Then, shift the front derailleur to the largest chainring and shift the back derailleur to the smallest cog. Next, wrap the chain around the largest cog and pass it through the front derailleur cage onto the chainring. After that, mark the chain right where you want to split it and use pliers or a chain tool to undo it. Finally, join the chain.
Here are some quick and easy steps to size and install a mountain bike chain using the largest chainring and the largest cog method.
Step 1. Check How the Chain Links are Connected to Get the Right Tools
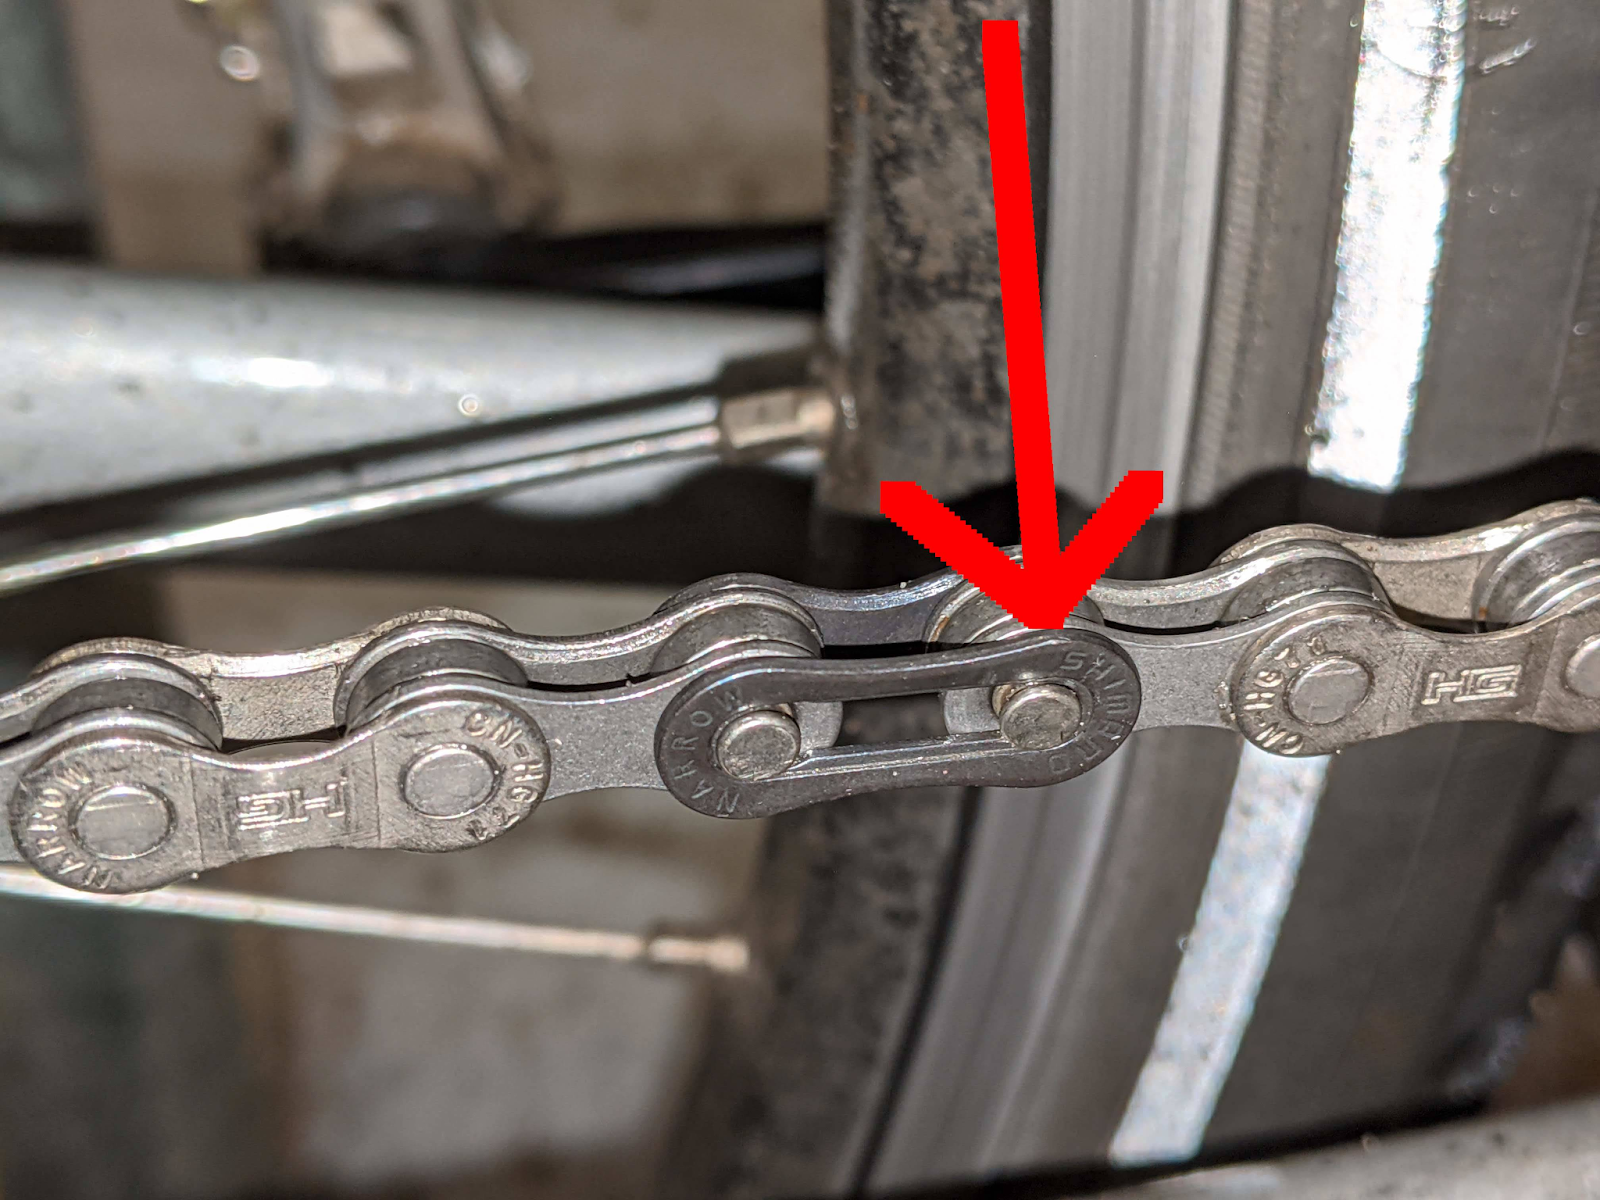
On most modern mountain bikes, you will find a master link like this that joins two ends of the chain. However, some older and more traditional bike chains either come with regular pins or special replacement pins like these provided by the manufacturers.
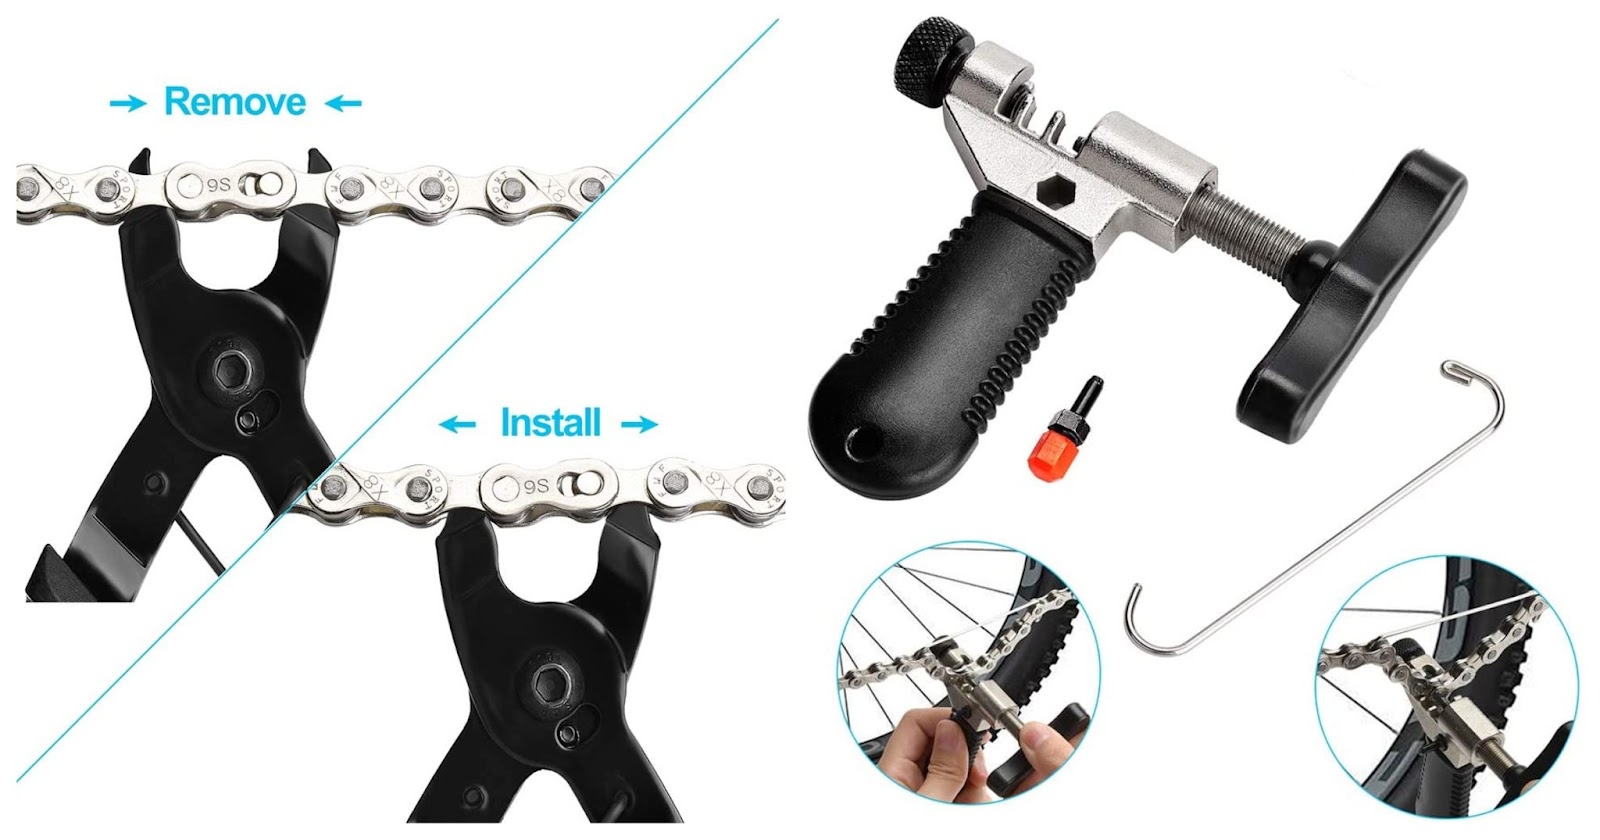
You need to check how the individual chain links are connected to purchase the right tools to size and install a mountain bike chain. Ideally, you should get a chain tool and a pair of bike chain pliers to complete the task. This bike chain repair kit includes all the tools you might need to size and install a new chain on your mountain bike.
And if you have any doubts about what tools you may find handy check out our ultimate list of tools needed for mountain bike maintenance.
Step 2. Ensure that the New Chain’s Width Fits the Mountain Bike Drivetrain Components
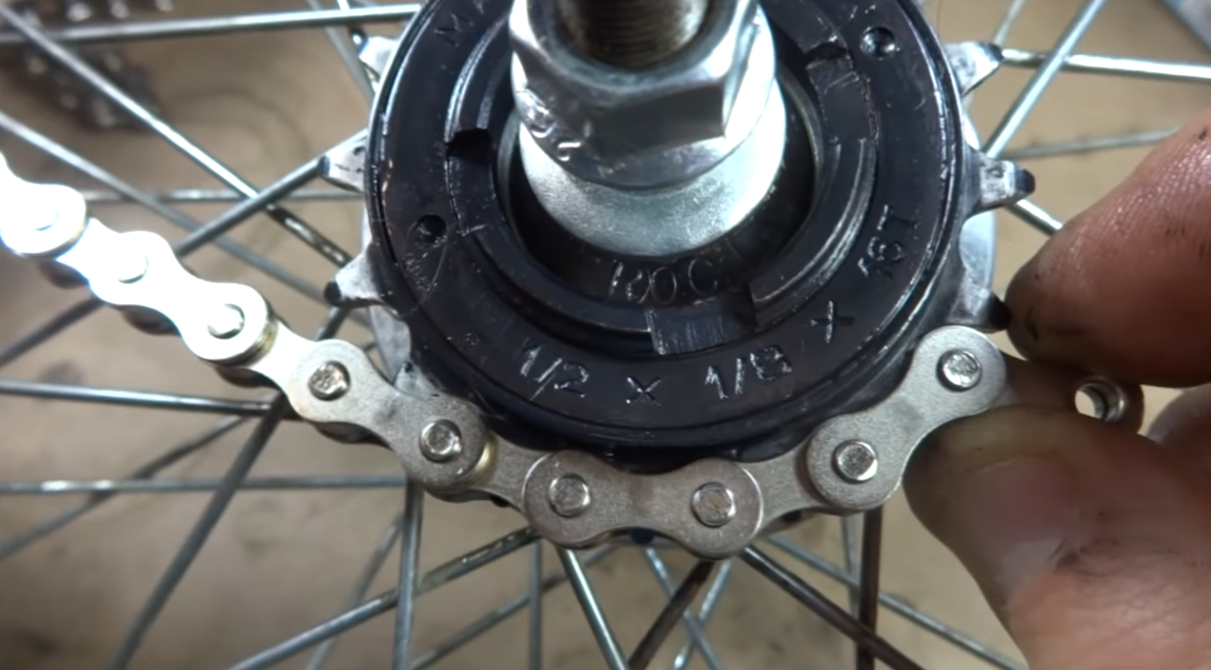
For your bike to function properly, you need to double-check that the internal and external width of the bike chain is suitable for your mountain bike drivetrain components. To do so, you should check the freewheel of your bike. It should actually tell you the exact size of the chain that you should use.
If the size of a suitable chain is not indicated on the freewheel, use a caliper like this and measure the thickness of the cog teeth. This will tell you if the new chain will fit over the sprocket teeth. The gap between the inner plates of the chain should be wide enough for the chain to rotate smoothly.
This quick YouTube video tutorial by RJ The Bike Guy demonstrates how to check if the chain is suitable for your mountain bike drivetrain components.
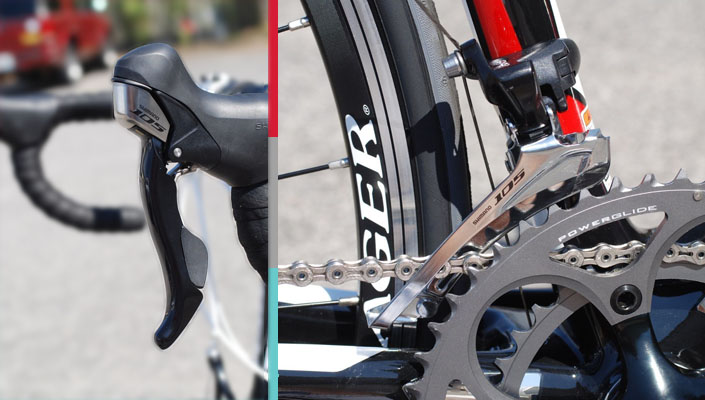
Step 3. Shift the Front Derailleur to the Largest Chainring and the Rear Derailleur to the Smallest Cog
The next step is to simply shift the derailleur to the largest chainring on the front and the smallest cog on the back. This will help you size your new bike chain correctly because this is the longest length that your bike chain will ever need to be.
And if you’re having any issues switching gears, there’s a chance your mountain bike grip shifter is stuck as we explain in our article. Additionally, our related article also explains how to easily fix a mountain bike chain that won't shift to low gears. Be sure to read that one too.
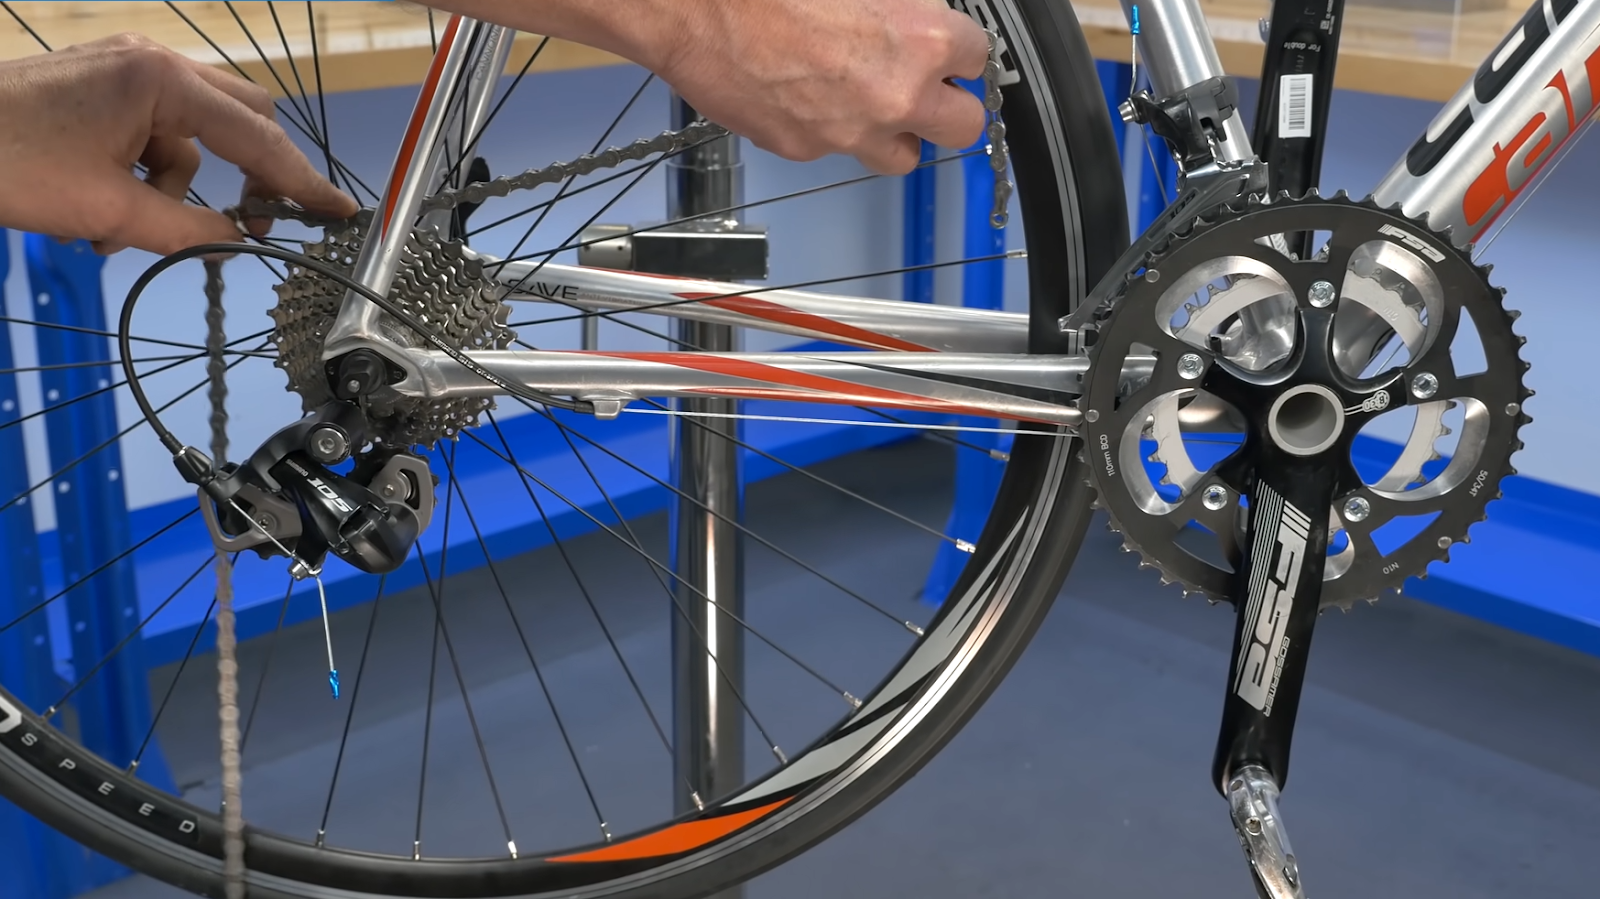
Step 4. Position the Bike Chain by Wrapping it Around the Largest Rear Sprocket
After shifting the front and rear derailleurs, you should position the bike chain by wrapping it around the largest rear sprocket. Then, pass the chain through the front derailleur cage and onto the largest front chainring so that the end with outer plates is facing toward the front of the bike.
Step 5. Mark the Bike Chain Link to Cut it and Install the Chain Link
While holding the bike chain at about a 5 o’clock position, use half of the master link to determine the length of the new chain. Take the other end of the chain and attach it onto the chainring.
Next, you should find the closest rivet to the master link and consider it a reference rivet. Make sure it is an inner plate since you won’t be able to connect an outer plate with the master link. Finally, add another two rivets from the reference rivet and mark the second one as the cutting point.
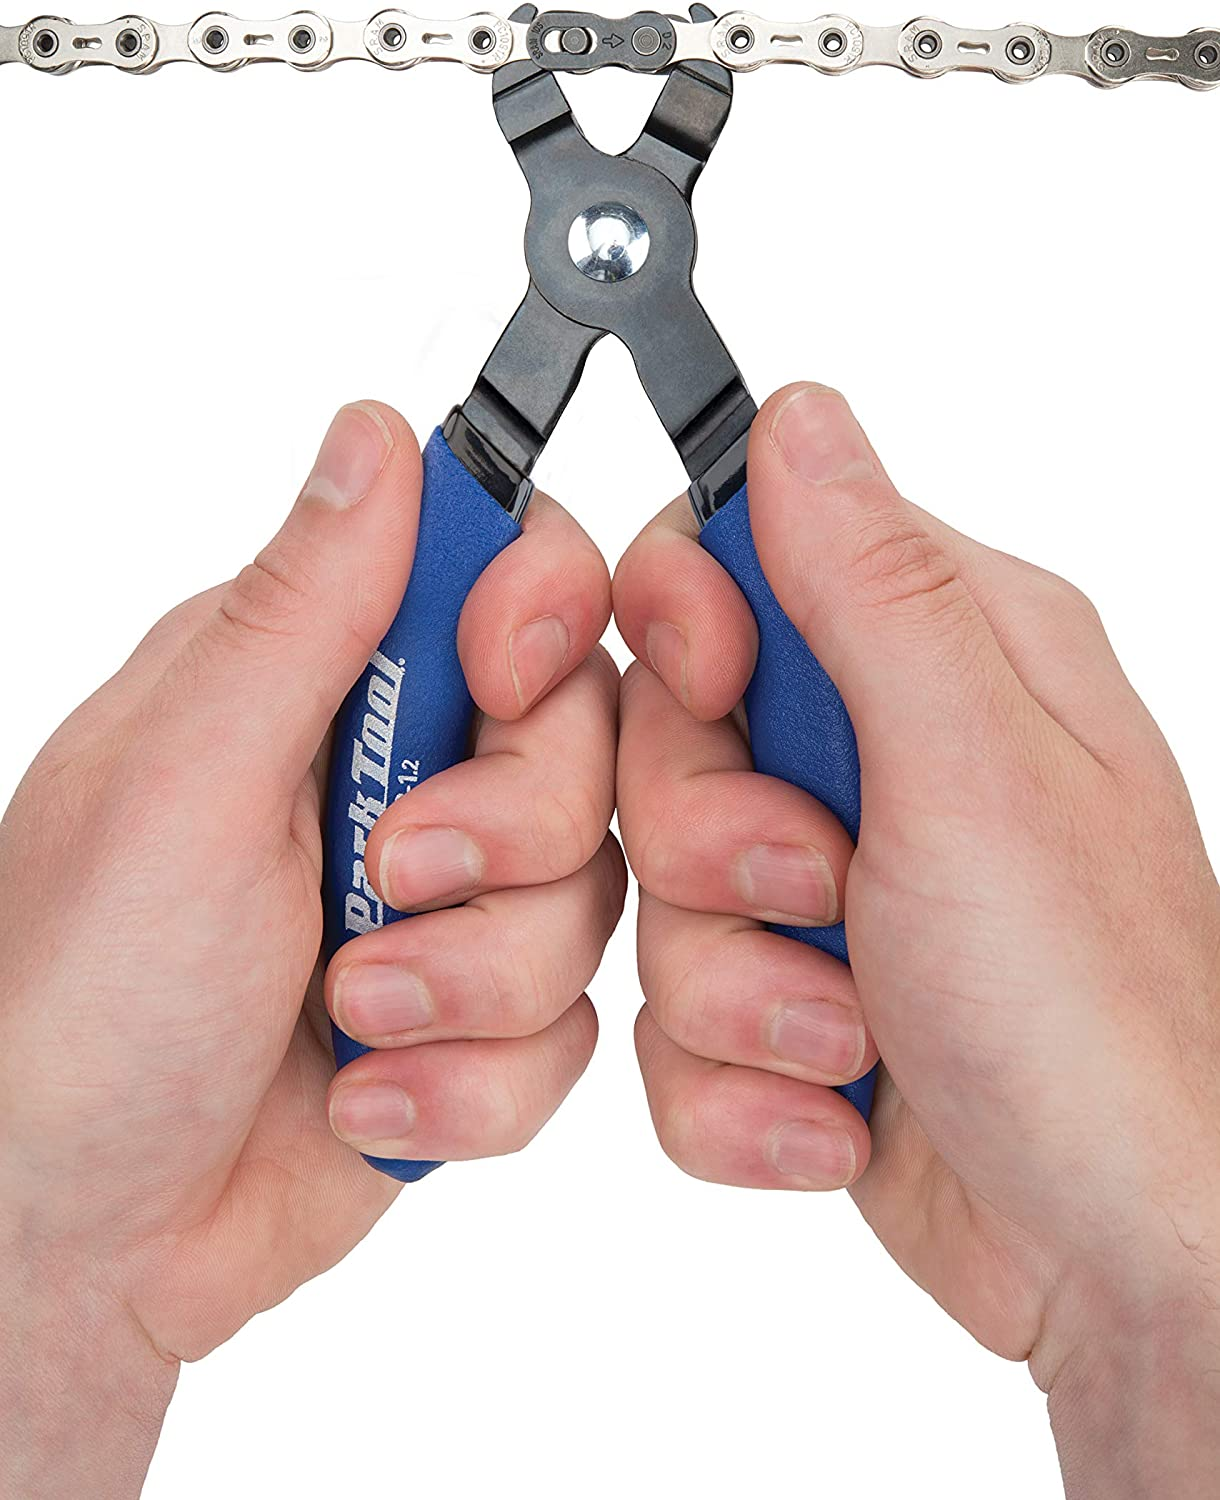
Now, you can use a pair of bike chain pliers or a special chain tool to break the chain at the marked rivet. And don’t worry, you can repair your chain if you accidentally cut it too short as this article from Liv Cycling explains.
At this point, you can take your master link and install it to join the ends of the bike chain. Again, you can either use a pair of bike chain pliers or a chain tool like this to install the master link.
If you want some more details on mountain bike chain installation, be sure to check out our article.
At this point you might be wondering, "how much does this cost?" If so, be sure to read our related article explaining how much a mountain bike chain is with price comparisons for more information. Similarly, you might find interest in learning how to tighten a mountain bike chain derailleur. If so, be sure to check out that step-by-step guide for more information.
How to Size a New Mountain Bike Chain Using the Original Chain
If you have not thrown your old bike chain away, you can easily size your new mountain bike chain using the original one.
To size a new mountain bike chain using the old bike chain, check if the original chain is sized correctly and remove it. Then, measure the new chain against the old chain and use mountain bike chain pliers or a chain tool to break the chain. Finally, install the new chain on your mountain bike.
Follow these four easy steps to size a new mountain bike chain using the old one.
Step 1. Check if the Original Chain is Sized Correctly and Remove it
Before you size your new mountain bike chain using the original one, double-check that the old chain is sized correctly and can be used as a reference chain.
To do so, check if the chain runs smoothly when shifting gears. Also, make sure that the old chain is tight enough, but it can still move up and down about one inch. If you notice sagging, it means that the chain is too loose and cannot be used as a reference chain to size the new one. You can read up on this by checking out our articles that explain symptoms and fixes if your mountain bike chain is too long and how to tighten a mountain bike chain.
If your old bike chain is sized correctly, you should remove it using a pair of chain pliers or a chain tool.
Step 2. Measure the New Chain Against the Old Chain
After removing the original chain, lay it next to the new chain. Check that both ends of the chain feature either an inner plate or an outer plate. If your reference chain ends with an inner plate, the new chain must also end with an inner plate (and an outer plate must be matched with an outer plate).
To size your new bike chain correctly, you should align the two chains by matching them rivet by rivet because bike chains lengthen as they wear, so just laying two chains next to each other is not enough.
You may also find interest in learning how to stop a mountain bike chain rubbing the front derailleur. If so, check out our related article for more information.
Step 3. Use Mountain Bike Chain Pliers or a Chain Tool to Cut the Chain
After determining the desired length of your new bike chain, mark the rivet and use pliers or a chain tool like this to cut the chain.
Step 4. Install the New Chain on Your MTB
The final step is to install the new chain on your mountain bike and test it. To ensure that the new chain is sized correctly, shift gears and check for sagging. The chain should not be too tight or too loose for your bike to pedal properly.
For instructions on how to replace a chain on a mountain bike check out our article and this YouTube video tutorial from Park Tool, for some great tips.
You might also find interest in learning how to easily fix a mountain bike chain that keeps coming off. Be sure to read our related article to find out more.
How to Properly Size a Mountain Bike Chain Using an Equation
Because bike chains are composed of identical inner and outer plates and the distance between the links is the same, you can use an equation to calculate the right length of the bike chain.
To size a mountain bike chain using an equation, first measure the chainstay length. Then, count the number of teeth on the biggest front chainring and the largest rear cog. Finally, use the equation L = 2(C) + (F/4 + R/4 + 1). L = Chain length (inches), C = Chainstay length (inches), F = Number of the largest front chainring teeth, and R = Number of the largest rear cog teeth.
Follow this step-by-step guide on how to properly size a mountain bike chain using an equation.
Step 1. Measure the Chainstay Length
First, measure the length of the chainstay in inches. Get a measuring tape like this and measure the distance between your mountain bike's rear dropout and the bottom bracket.
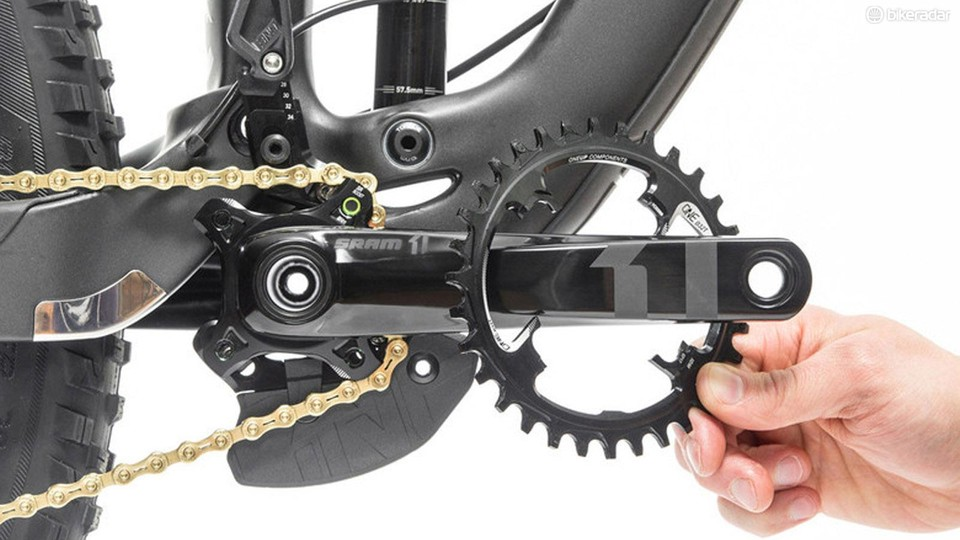
Step 2. Count the Number of Teeth on the Biggest Front Chainring
The next step is to count how many teeth the largest front chainring of your mountain bike has. Count twice to ensure the accuracy of the number.
Step 3. Count the Number of Teeth on the Largest Rear Cog
To calculate the chain length using an equation, you will also need to count the number of the largest rear cog teeth. Count the teeth twice for more accurate results.
Step 4. Use the Equation to Calculate the Chain Length
Once you have all your variables, use the equation to determine the chain length that’s right for your mountain bike.
Here’s the simple equation for calculating bike chain length:
L = 2(C) + (F/4 + R/4 + 1), where:
- L = Chain length (inches)
- C = Chainstay length (inches)
- F = Number of the largest front chainring teeth
- R = Number of the largest rear cog teeth
Alternatively, you can use a complex equation to calculate the mountain bike chain length:
L = 1 + (F+R)/4 + 2√(C*C) + (0.0796*(F-R))²
The latter equation is used when the chain is too complex for the simple equation to work.
Mountain Bike Chain Dimensions Chart
Knowing the recommended chain width for your bike is key to finding the right one. Below is a chain dimensions chart that will help you easily figure out the correct inner chain width for your mountain bike.
| Mountain Bike Speed | Recommended Chain Width | Chain Inner Width | Chain Example From Amazon | Example Cost |
| 12 Speed | 2.2mm | 2.2mm | SRAM Chain | ~$30 |
| 11 Speed | 2.2mm | 2.2mm | 11-Speed Bike Chain with 116 Links | ~$20 |
| 10 Speed | 2.2mm | 2.2mm | BW USA 10-Speed Bike Chain | ~$20 |
| 9 Speed | 2.2mm | 2.2mm | KMC 9-Speed Bike Chain | ~$35 |
| 5/6/7/8 Speed | 2.4mm | 2.4mm | 5/6/7/8 Speed Bike Chain | ~$20 |
What Determines the Mountain Bike Chain Width?
There’s no universal chain that fits all types of mountain bikes because chains come in different sizes and widths. To find the right width chain for your bike, you should always consider the number of your bike’s rear sprockets.
Mountain bike chain internal and external width is determined by the number of bike’s rear sprockets and derailleurs. While internal bike chain width varies from 1/8″, 3/32″, and 11/128″, external bike chain width can be 1/2″, 1/4″, 9/32″, 7/32″, and 13/64″.
Below is a table summarizing mountain bike chain internal and external width based on the number of rear sprockets an MTB has.
| No. of Rear Sprockets | MTB Chain Internal Width (in) | MTB Chain Internal Width (mm) | MTB Chain External Width (in) | MTB Chain External Width (mm) |
| Single Rear Sprocket | 1/8″ | 3.2mm | 1/2″ | 12.7mm |
| 5-8 Rear Sprockets + Derailleurs | 3/32″ | 2.4mm | 9/32″ | 7.1mm |
| 9-10 Rear Sprockets + Derailleurs | 11/128″ | 2.2mm | 1/4″ - 9/32″ | 6.4 - 7.1mm |
| 10 Narrow Rear Sprockets + Derailleurs | 11/128″ | 2.2mm | 7/32″ | 5.6mm |
| 11 Rear Sprockets + Derailleurs | 11/128″ | 2.2mm | 7/32″ | 5.6mm |
| 12 Rear Sprockets + Derailleurs | 11/128″ | 2.2mm | 13/64″ | 5.2mm |
How Does a Mountain Bike Chain Length Calculator Work?
While you can use a simple equation to calculate the bike chain length, you can also use a bike chain length calculator to make the process even more straightforward.
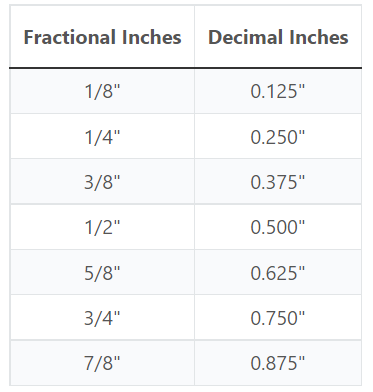
To use a mountain bike chain length calculator, start converting fractional measurements into decimal inches and then enter them into the calculator’s blank spaces.
Here’s how to calculate the right chain length using the Omni Chain Length Calculator.
Step 1. Measure the Chainstay Length
First, measure the chainstay length. If your bike frame indicates the chainstay length in fractional inches, be sure to convert it to decimal inches. Refer to these fractional to decimal inch conversions to make the process more straightforward.
Step 2. Count the Number of Teeth on the Largest Front Chainring and the Largest Rear Cog
Next, you should consider the largest front chainwheel and the largest rear cog to count the number of teeth.
Step 3. Use the Omni Calculator to Determine the Optimal Mountain Bike Chain Length
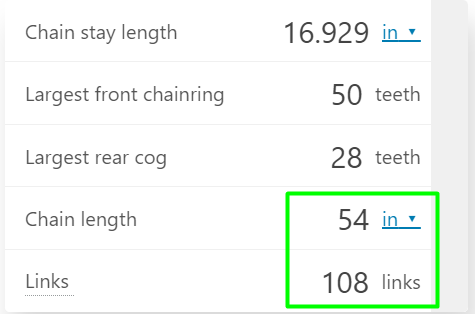
Let’s suppose these are our mountain bike drivetrain part parameters:
- Chainstay length, C = 16.929inch
- The number of the largest chainwheel teeth, F = 50
- The number of the largest sprocket teeth, R = 28
To determine our mountain bike chain length, we should enter these parameters into the Omni Calculator. As a result, we calculate that the recommended chain length for our MTB is 54 inches and the number of links in the chain should be 108.
How to Measure Mountain Bike Chain Length
There are various ways to calculate your mountain bike chain length.
To correctly measure mountain bike chain length, first, look for a good online MTB chain calculator, measure the chain stay length, read the indicated number of teeth on the largest chain ring and also on the largest sprocket, and enter the details into the calculator to get the resulting number of chain links needed.
Another way to measure the optimal chain length for your mountain bike is to use the bike chain length calculator by Berg Freunde.
Follow these steps to determine the length and the number of chain links for your mountain bike chain.
Step 1. Measure the Chainstay Length
To calculate the chain length using the calculator by Berg Freunde, measure the chainstay length in millimeters using a soft tape measure like this. Alternatively, you can measure the length in inches and then convert the number to millimeters.
Step 2. Check the Number of Teeth of the Largest Chainring and the Largest Sprocket
Next, determine the number of teeth on the largest front chainwheel and the largest rear sprocket. Check if your drivetrain components say how many teeth there are. If not, count them twice to make sure the number is accurate.
Step 3. Enter the Numbers into the Calculator
Finally, enter the details into the calculator by Berg Freunde to determine the recommended chain length for your mountain bike.
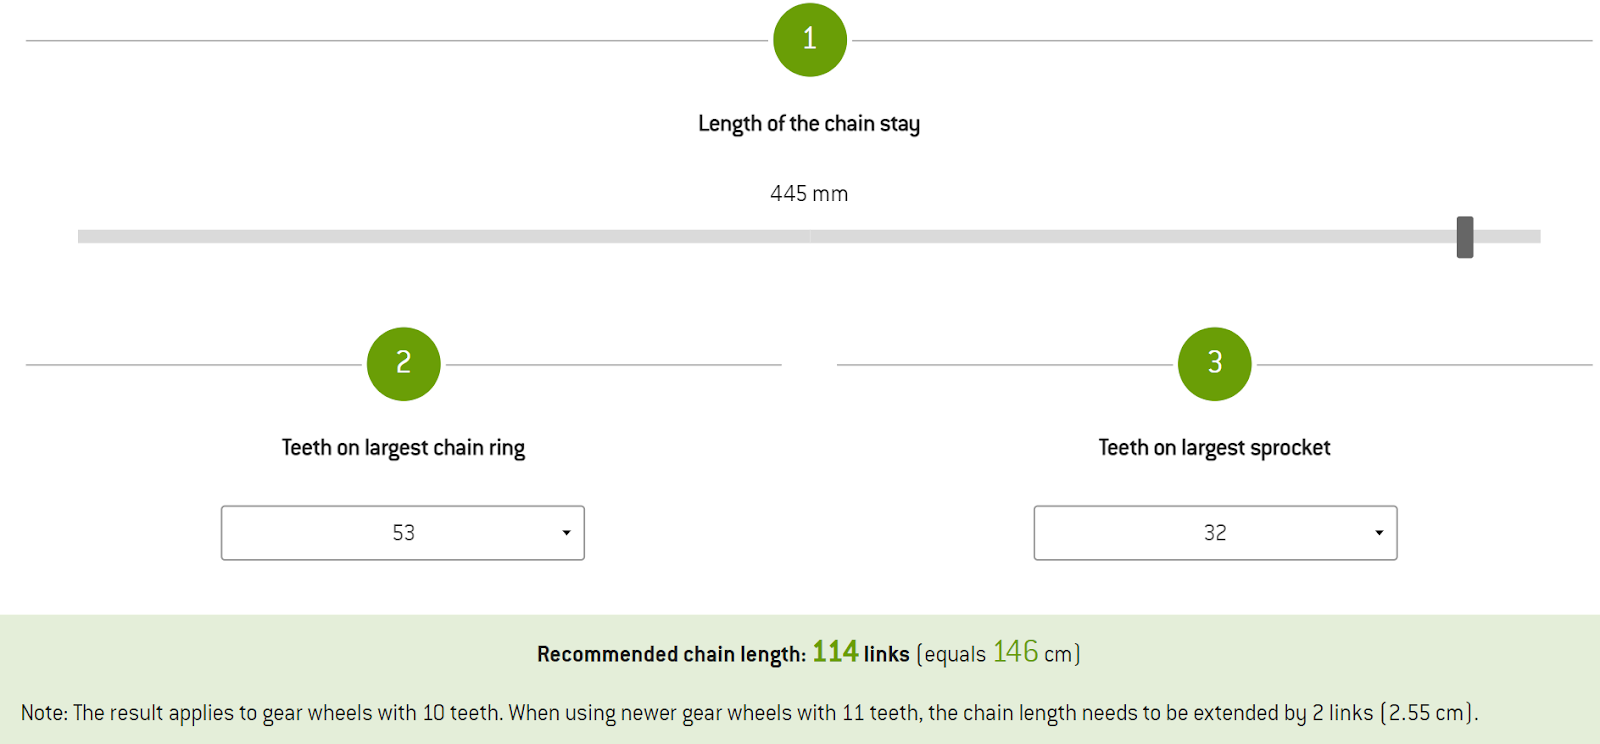
Let’s suppose your MTB drivetrain component parameters are as follows:
- Chainstay length, C = 17.520inch or 445mm
- The number of teeth on the largest front chainwheel, F = 53
- The number of teeth on the largest rear sprocket, R = 32
After entering the details into the calculator, we will get that the recommended chain length is 146cm (57.5inch) or 114 chain links.
How Long Should a Mountain Bike Chain Be?
Selecting the right length of a mountain bike chain is key to enjoying your ride because the tightness or looseness of the chain affects your bike’s overall performance.
A mountain bike chain should be long enough to go round the largest chainring, through the rear derailleur and again around the largest sprocket plus one inch, and then joined (inner plate and outer plate) without pulling the chain too tight.
After sizing your MTB chain, ensure that it moves about ½ to 1inch, both up and down. If it does not move, then the chain is too short. If it moves more than that, then the chain is too long.
What Size Chain do You Need for a 21 Speed Mountain Bike?
A 21-speed mountain bike has 7 rear sprockets and 3 front chainwheels, making 21 speeds in total. When replacing the chain on your 21-speed mountain bike, you should get a chain, with links that are ½ inch long and 3/32 inch wide.
A 21-speed mountain bike chain should have at least 116 links which is equivalent to 58 inches. With the rear wheel having 7 sprockets and chainring in the front, the chain size is almost equal to the size of a 7-speed mountain bike.
You can find chains like this that have 116 links and are compatible with 21-speed mountain bikes.