
How to Install Mountain Bike Pedal Straps and Toe Clips – Step by Step
Mountain bikes have many parts and accessories that could be useful for you or that could need replacing at some time and pedal straps are one of them. Due to the intense and harsh terrain on which mountain bikes are ridden, the straps can break or come undone after a while. The good thing about these straps is that they are readily available and you can install them yourself. In this article, we describe how to install mountain bike pedal straps and toe clips so you can easily replace them.
To install mountain bike pedal straps first feed the top part of the strap through the metal link. Next, feed the two ends of the bottom part through the platform of the pedal. Next, put a foot on the pedal, place the top part of the strap over the foot with the velcro facing up and attach the two bottom straps over it. Lastly, fold the remaining top section over the two bottom straps and tighten.
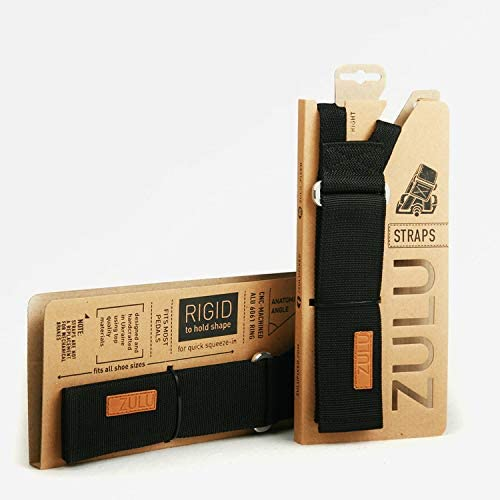
Mountain bike pedal straps are made of two parts: a top and a bottom. The top half is usually made out of 1000d Cordura and velcro, while the bottom half is made out of 3 layers of heavy-duty nylon, which increases the stiffness along with velcro.
If you are considering starting mountain biking as a hobby why not check out our article about what mountain bike to buy and our mountain bike sizing chart could also be a handy tool.
What are Pedal Straps and What are Their Benefits?
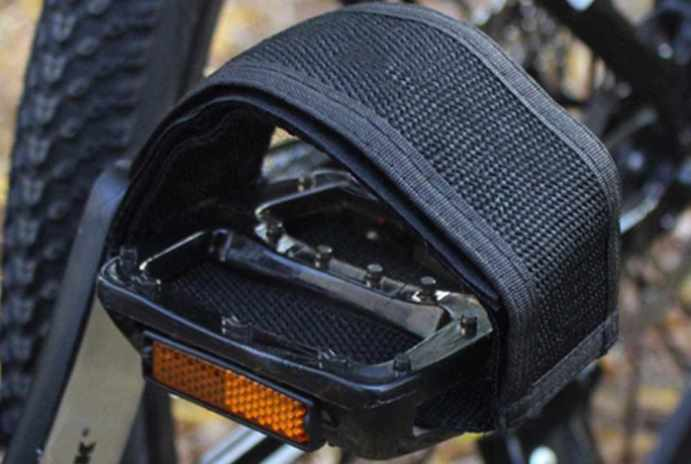
Pedal straps are bicycle accessories attached to pedals that go over a foot and secure the foot with velcro from the sides. Pedal straps increase pedaling efficiency by allowing a rider to push on downstrokes as well as pull with upstrokes. Additional benefits of using mountain bike pedal straps include better control of the bike, more comfort, and injury prevention.
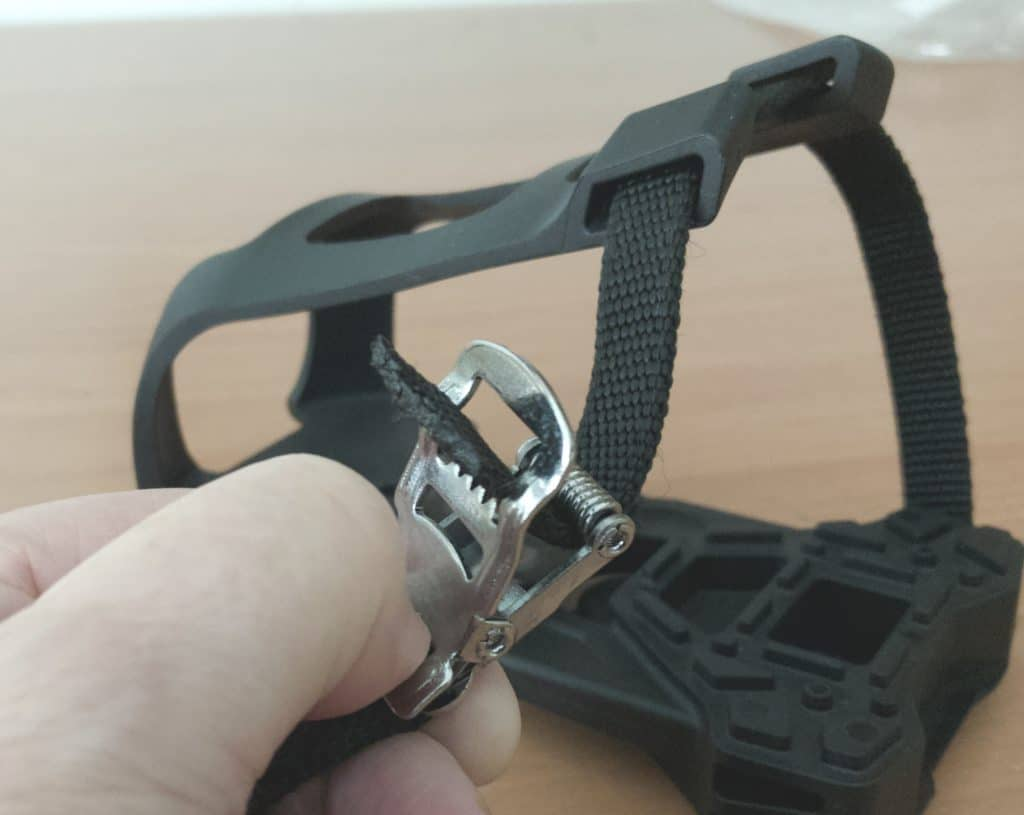
Like toe clips, pedal straps like these keep your feet secured to the pedals while you are riding, but instead of having a little cage-like structure that holds the front part of your shoe, it is just a strap that goes over the middle of your foot. We explain a little bit more about this in our article about the benefits of clipless pedals on mountain bikes. We share tips and tricks on other types of pedal straps in our article that explains how to choose pedal straps with heel support.
For additional information, be sure to read our related guide titled, "Are Pedal Straps Good." Additionally, if you're more of a hands-on kind of person, you might be interested in learning how to make bike pedal straps of your own. If so, be sure to check out our step-by-step guide.
Steps to Install Mountain Bike Pedal Straps
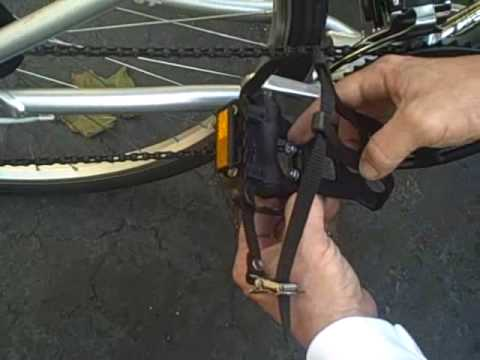
Installing mountain bike pedal straps is really easy and can be done anywhere as long as your pedals and pedal straps are compatible. This strapping system is basically a clever design where three layers are attached over each other to keep your feet on the pedals in a secure way. Below we summarize the steps needed for installing mountain bike pedal straps. For more information refer to this handy video tutorial.
To install mountain bike pedal straps first feed the top part of the strap through the metal link of the bottom part. Next, feed the two ends of the bottom part through the platform of your pedal. Next, put your foot on the pedal, place the top part of the strap over your foot with the velcro facing up and attach the two bottom straps over it. Lastly, fold the remaining top section over the two bottom straps and secure the velcro with the appropriate tightness.
Step 1. Connect the Top Part of the Strap to the Bottom Part of the Strap
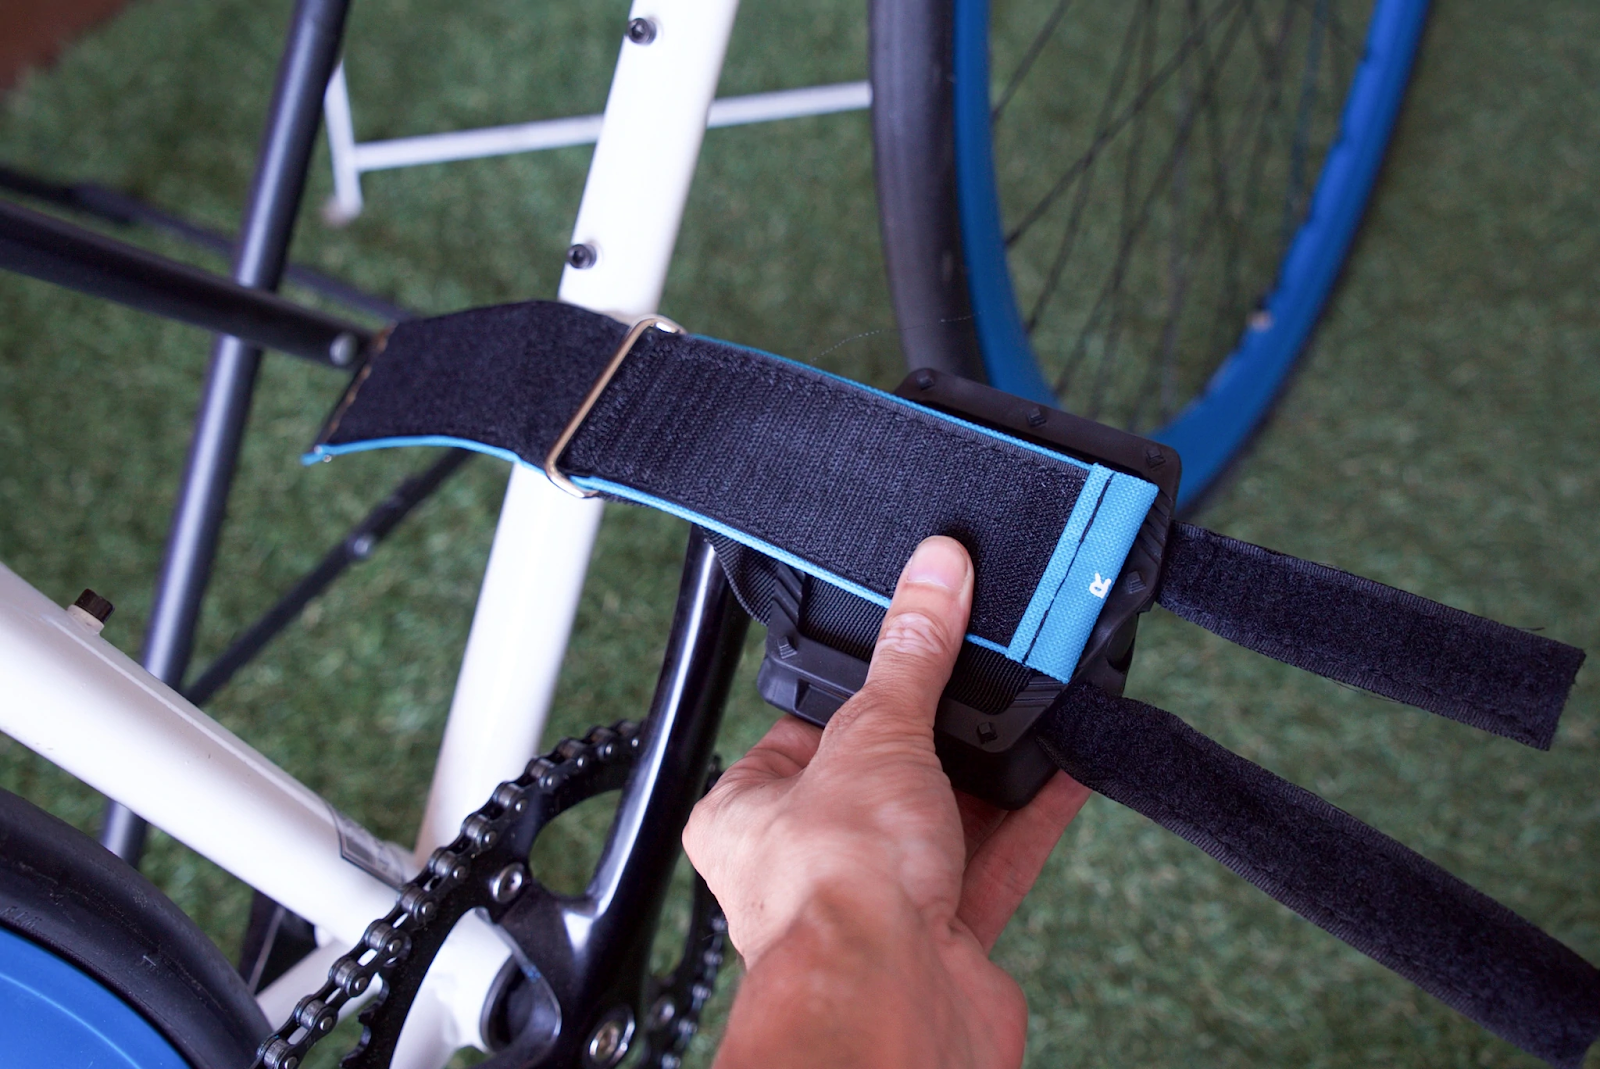
The first thing to do when installing your mountain bike pedal straps is to feed the top part of the strap through the metal link of the bottom part so that the velcro is on the inside.
Step 2. Feed the Two Ends of the Bottom Part Through the Pedal
Next, feed the two ends of the bottom part through the platform of your pedal that is compatible with your mountain bike pedal straps. Make sure that the metal link is on the side of the pedal that is closest to the bicycle frame and that the velcro on the top part of the pedal strap is on the inside when folded double.
Step 3. Attach the Two Bottom Straps onto the Bottom Half of the Top Part
Place the bottom half of the top section over your foot and then attach the two straps of the bottom section over it. If necessary make the front strap a bit tighter to hold your foot in place.
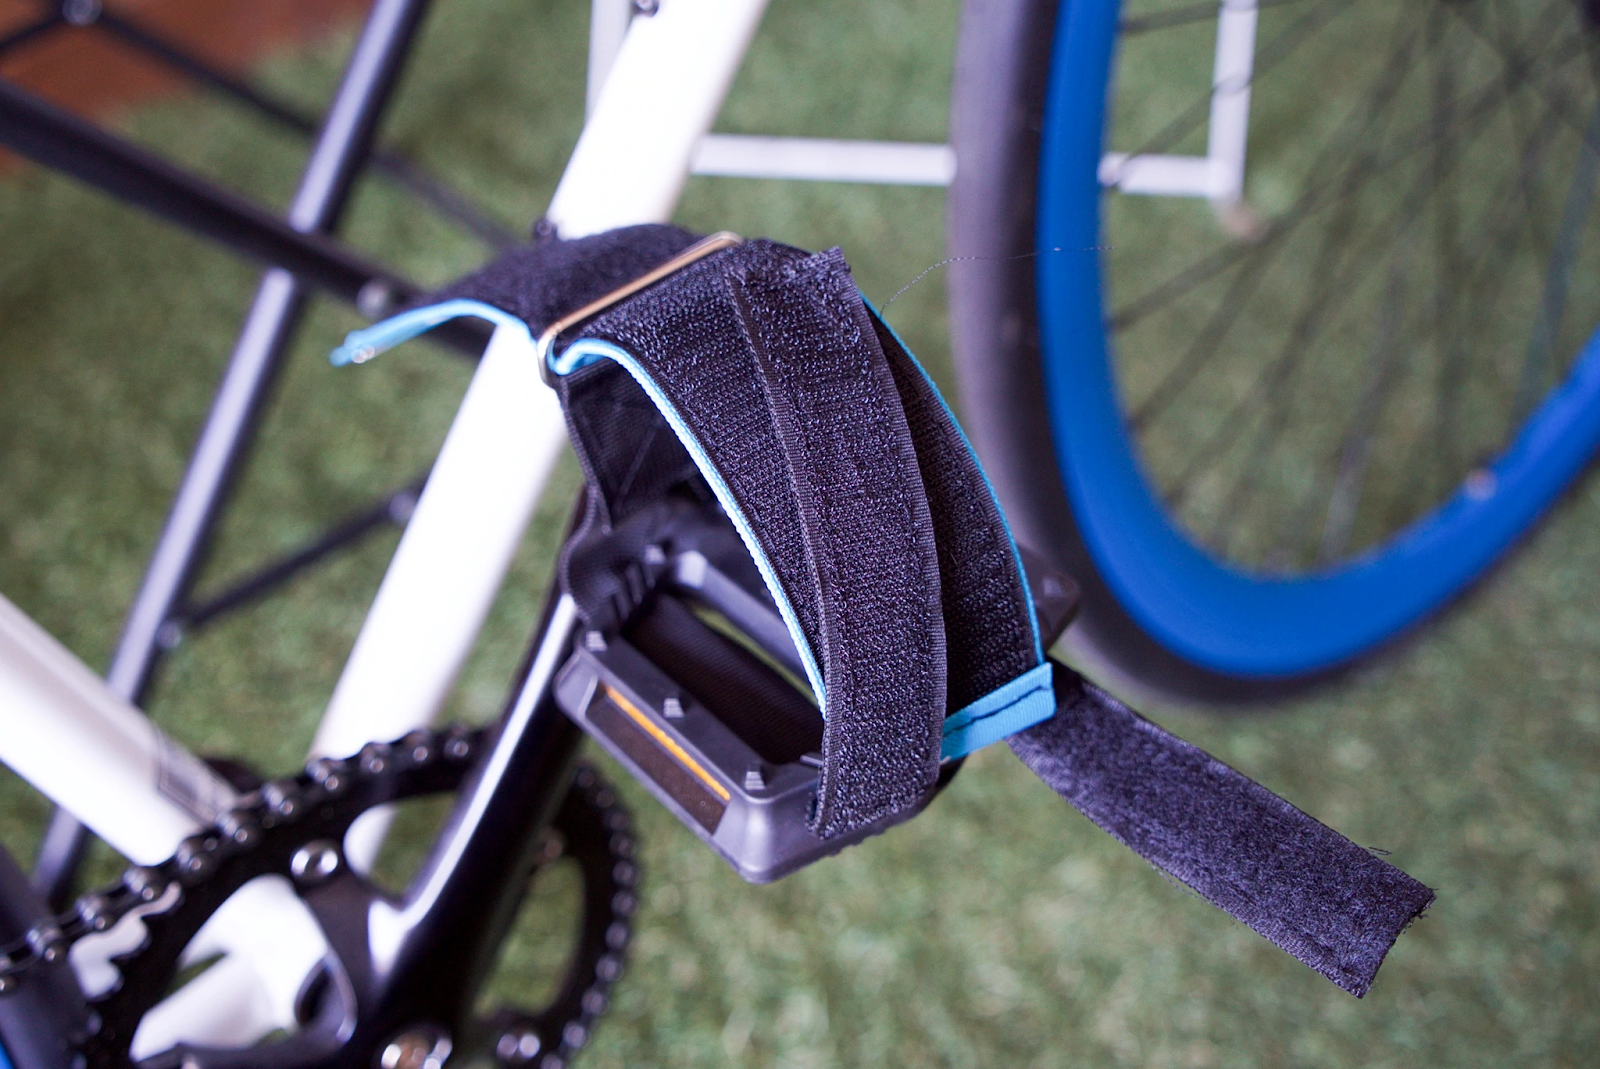
Step 4. Fold and Attach the Remaining Part of the Top Section Over the Bottom Straps
Lastly, fold the remaining top section over the two bottom straps and secure the velcro with the appropriate tightness.
This clever strapping system basically sandwiches the bottom straps between the two halves of the top strap in a secure grip that shouldn’t come loose very easily.

For more detailed instructions, make sure you read our step-by-step guide on how to thread a pedal strap. Similarly, our complete guide to mountain bike pedal thread sizes may also offer some useful information. Be sure to check that one out too. Additionally, if you're looking to keep all of your tools handy, be sure to read our related article on how to fix a mountain bike tool bag that's heavy.
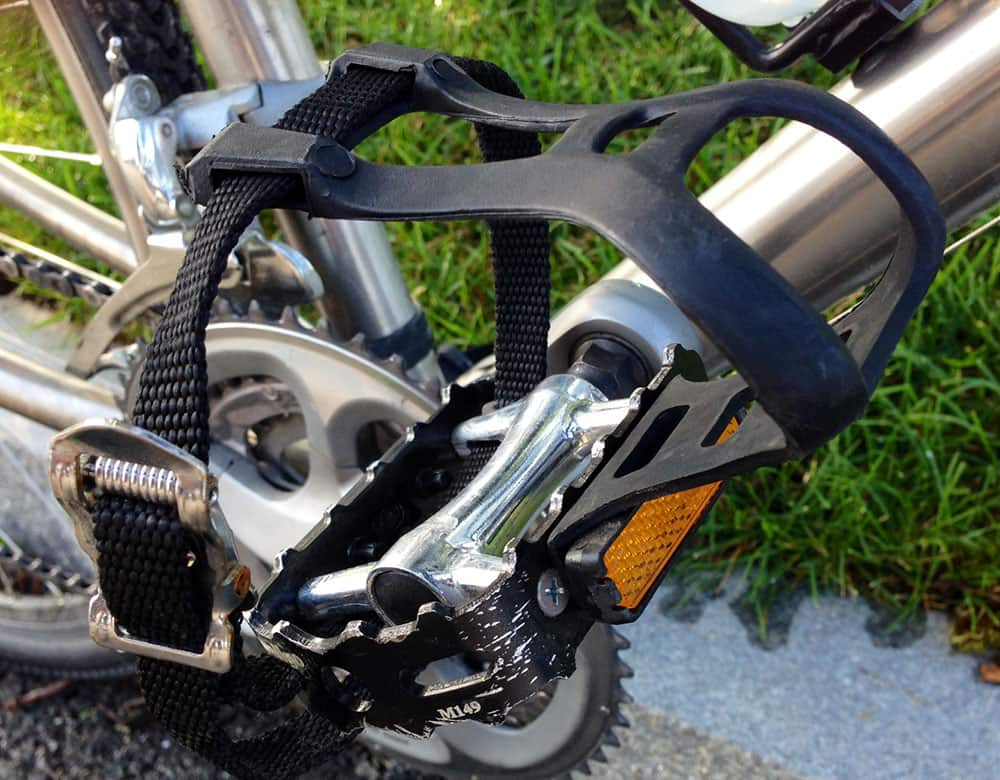
What are Mountain Bike Toe Clips and What Are Their Benefits?
Mountain bike toe clips are similar to mountain bike pedal straps in that they secure your feet to the pedals of your bike when riding.
Mountain bike toe clips are cages attached to the front parts of the pedals that are used to secure the front part of the foot to the pedal. The benefits of using mountain bike toe clips include better control of the bike, more comfort, more pedaling efficiency, and injury prevention while holding the front part of the rider’s feet.
The main difference between pedal straps and toe clips like these is that toe clips have a type of cage attached to the front of the pedal that secures the front part of your foot to the pedal rather than having a strap that goes over the whole of your foot. This article from the Journal of Procedia Engineering discusses the effects of attaching bicycle pedals to the feet on joint torque using 2-D biomechanical models.
Be sure to also take a look at our pros and cons list for using toe clips on a bicycle. This article will give you a lot more information on toe clips.
Steps to Install Mountain Bike Toe Clips
Mountain bike toe clips are a great way to keep your feet secured to the pedals if clipless pedals are not suitable for you. The harness-type structure really helps to keep your feet secured to the pedal so that you can pedal with more speed and power without the risk of injury due to your feet slipping from the pedals. This is especially useful on rough terrain and in wet conditions.
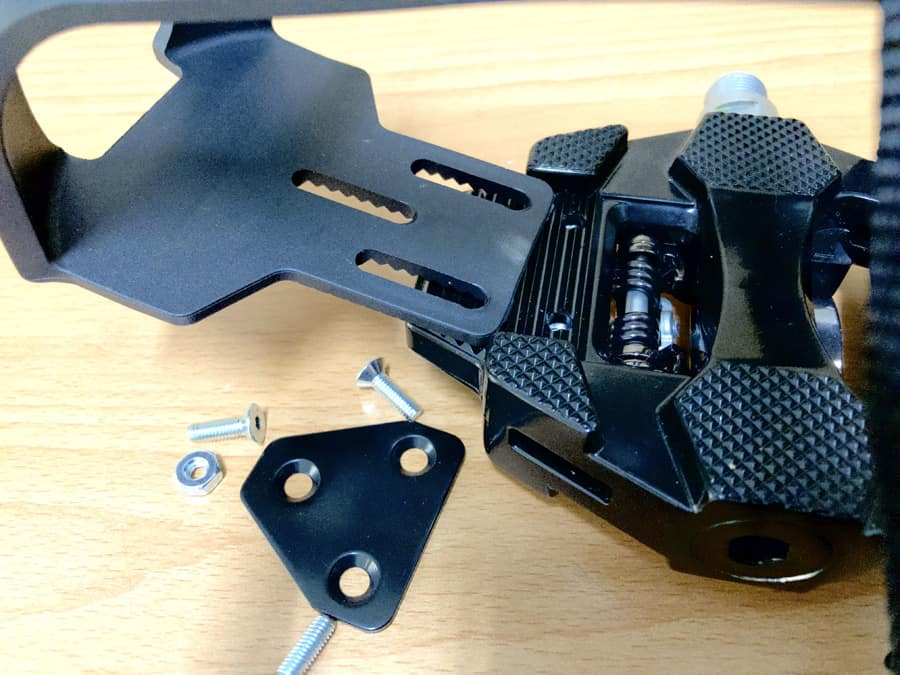
To install mountain bike toe clips remove the old pedals, thread the straps through the bottom and top of each toe clip making sure that the buckles are on the side furthest from the bicycle frame, secure the toe clips to the front ends of the pedals, lubricate the thread of the pedals, and attach the pedals to the mountain bike
Below we explain exactly how to install mountain bike toe clips but you can also watch this video tutorial to see exactly how it is done.
Step 1. Remove the Existing Pedals
Remove the right-hand side pedal by loosening it using a spanner or wrench like these in an anti-clockwise direction. Do the same on the left-hand side but in a clockwise direction.
Step 2. Thread the Straps Through the Bottoms of the Pedals
Thread the straps of the toe clips through the bottom of each of the pedals making sure that the buckles are on the right side of the right pedal and the left side of the left pedal with the tops of the buckles facing down.
Step 3. Thread the Straps Through the Tops of the Toe Clips
Thread the straps through the tops of the toe clips - each toe clip will have two loops that the straps need to be threaded through - and thread the end of the strap through the buckle.
Step 4. Secure the Toe Clips to the Frond Ends of the Pedals
Use the bolts and nuts that come with the toe clips, to secure the front part of the toe clips to the front part of their respective pedals. Tighten the bolts, which will be on the outside of the pedals, using a suitable screwdriver from this set. To tighten the bolts properly use a pair of pliers to hold the bolts on the inside of the pedals, still. The pedals are now ready to attach to the mountain bike.
Step 5. Lubricate the Thread of the Pedal
Spray this graphite powder or other lubricant over the threads of the pedals to keep them well lubricated. Science Direct has published this interesting article about what graphite lubricant actually is.
Step 6. Attach the Pedals to the Mountain Bike
Attach the pedals with the toe clips to the bicycle and tighten the bolts of the right-hand side pedal in a clockwise direction and the left-hand side pedal in an anticlockwise direction, using a wrench or spanner.
Once your pedals are attached you can adjust the straps until they fit snugly over your feet without being too tight.
For more detailed information, make sure to check out our guide to mountain bike toe clip installation and use. This article will tell you everything you need to know about toe clips!