
How to Make a DIY Mountain Bike Rear Fender
Although some mountain bikes do not come with fenders, having a fender can help a biker a great deal. Whether you plan to ride in the rain or not, a bike fender can make your biking experience more enjoyable. Even if you have no intention of riding in the rain, you will still need a bike fender. Water remains on the trail after the rain has stopped and this may pose a problem to a biker without a rear fender. A DIY mountain bike rear fender can be made in the comfort of your home if you have the necessary materials.
To make a DIY mountain bike rear fender, first, select a pliable material such as plastic or aluminum and print out a template or trace out the template on the material. Once the template is printed, attach it to the material. Next, cut out the fender, and drill mounting holes. Finally, attach the custom fender to the bike with zip ties.
A bike fender is an excellent investment that will protect you from getting soaked and splattered with the mud. It's even considered a greater investment because it protects your bicycle from mud and grime. With your brakes, drivetrain, and cables protected, you'll experience less wear and tear in the long run. This will considerably decrease the amount of maintenance your bike needs and lengthen the lifespan of the different parts. If you are keen on working on your own mountain bike then you may find our ultimate list of tools for mountain bike maintenance very informative. Also, for doing simple repairs while you are out on your rides our article that provides mountain bike tool bag ideas could be a useful resource.
Additionally, you might want to take a look and see if you need mountain bike mudguards or not. You might be surprised at the answer!
Benefits of Homemade Mountain Bike Fenders
DIY mountain bike rear fenders are important accessories that are not only incredibly functional but are also great investments. They are available in stores, but making your own fender has its benefits. With the right materials and the necessary tools, you can easily and quickly make a mountain bike fender in your home.
The benefits of homemade mountain bike fenders include being cost-efficient, being fun to build, being more environmentally friendly, and they allow a rider to test multiple designs.
Homemade Mountain Bike Fenders Cost Less
Making your own fender requires a few materials you can easily find around you. Consequently, you spend less money making your fender at home than buying a brand new one. The price range of most fenders is between 15 and 50 dollars. You can make a fender for much less, or even free if you have all the necessary materials.
DIY Fenders are More Environmentally Friendly
Many homemade fenders are made with plastic obtained from other products. According to this study by the Journal of Cleaner Production, reusing plastic is beneficial for the environment which means that homemade fenders are environmentally friendly.
It’s Fun to Build DIY MTB Fenders
Making a homemade fender is a great and productive way to eliminate boredom. When making a fender, you get to select a suitable material and a template. There are many templates you can choose from, and you can have fun selecting one that suits you. Styling your fender is also something you should look forward to. You may come up with any design and style for your fender, using a marker or any other item you like. Using stickers is also a fun option. This video tutorial by Taich Abyck explains a bit more about how to make your own DIY rear fender.
Multiple Fender Designs Can Be Tested
There are many available templates for homemade fenders. You may test several templates to find the perfect fit for your bike. Make sure to also check out these tips for choosing mountain bike fender extensions too. Making your own fenders may just help your mountain bike fenders work better. Be sure to check out our related article for more details.
Similarly, you might be interested in learning how to make a mountain bike mudguard and how to choose mountain bike fender width properly. If so, be sure to read our related articles to find more tips and tricks.
Differences When Building Rear Fenders for Unsuspended Versus Full Suspension Mountain Bikes
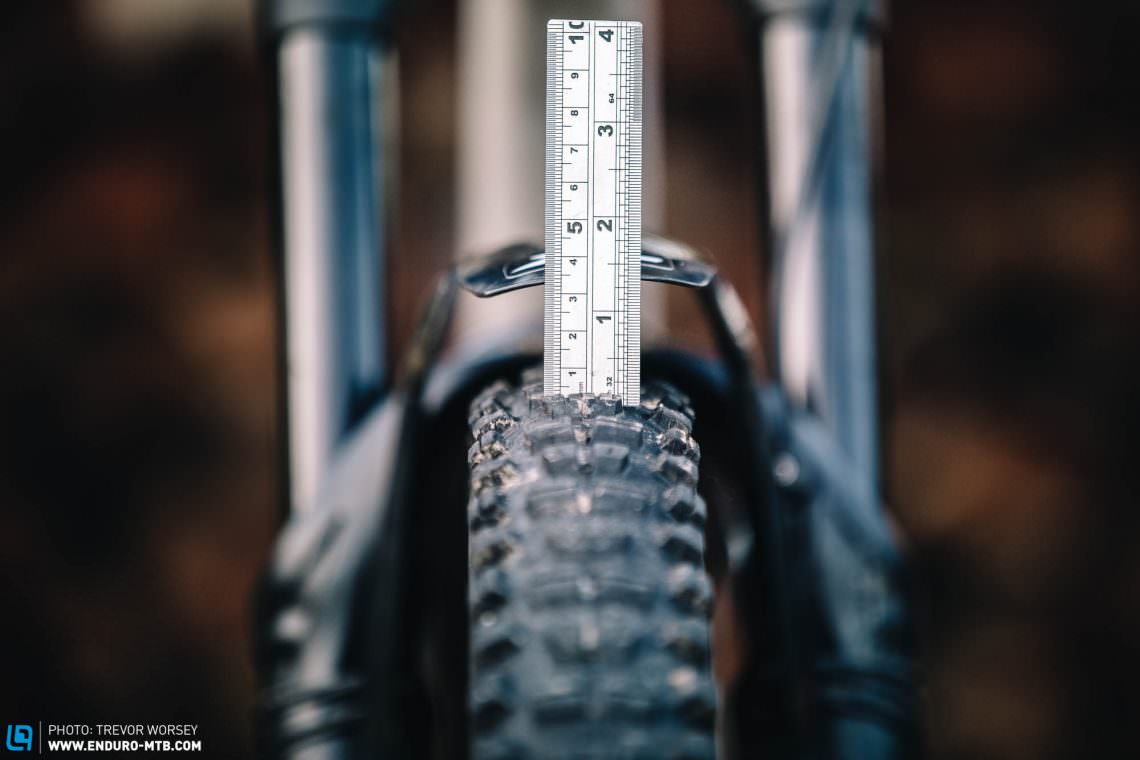
Although all fenders have the same function, there are differences between fenders for unsuspended mountain bikes and those for full suspension ones. When making a DIY rear fender for your mountain bike, it's essential to factor in the type of mountain bike you have.
The main thing to consider when building DIY rear fenders for unsuspended and full-suspension mountain bikes is to ensure that the rear fender does not come in contact with the seat when shocks are compressed on the full-suspension bike frame.
The ideal template for your DIY fender is one that complements the width of your wheels, and won’t disturb their general mobility or that of your seat. It is also vital to ensure your fender doesn't rub against your wheel. Check out our article that explains exactly how to install a mountain bike fender.
Similarly, these tips to choose clip-on bike fenders for mountain bikes might be interesting. Be sure to check them out too.
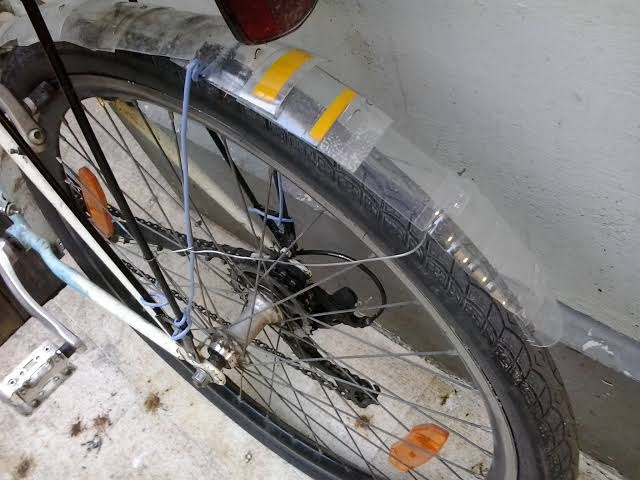
How to Make a DIY Mountain Bike Rear Fender Using the Zip Tie Method
Making a homemade fender for your mountain bike isn't as daunting as it may seem. These fenders can be made using various methods and materials such as plastic, aluminum, and wood. The steps are easy and quite straightforward.
To make a DIY mountain bike rear fender using the zip tie method, first, find a suitable material such as plastic or aluminum, and choose a template. Next, print the template and cut the fender out of your chosen material, using the template. When that is done, drill the mounting holes, and style your fender to suit your taste. Finally, thread the zip ties through the fender and mount them to the bike.
Below, we discuss the steps to take when making a mountain bike rear fender using the zip tie method. This method is best for full-suspension mountain bikes. You can get more details from this article posted by Stratton.com.
| What You Need | Why You Need It | Example from Amazon |
| Thin and Flexible Plastic Sheet (A4) | Making the fender | Flexible Translucent Pe Plastic Sheet |
| Tape | Attaching the plastic to the template | Colored Painters Tape |
| Scissors | Cutting the plastic and snipping off extra zip ties | Stainless Steel Office Scissors |
| Zip ties | Mounting the fender | Cable Zip Ties Heavy Duty 8 Inch |
| Drill with 5/32nd drill bit | Making holes in the intended fender | Cordless Drill |
| Printer | Printing the template | Wireless Color All-in-One Printer |
| Hole Punch | Making mounting holes | Single Hole Puncher |
| Stickers | Adding aesthetics | Cool Random Stickers Pack |
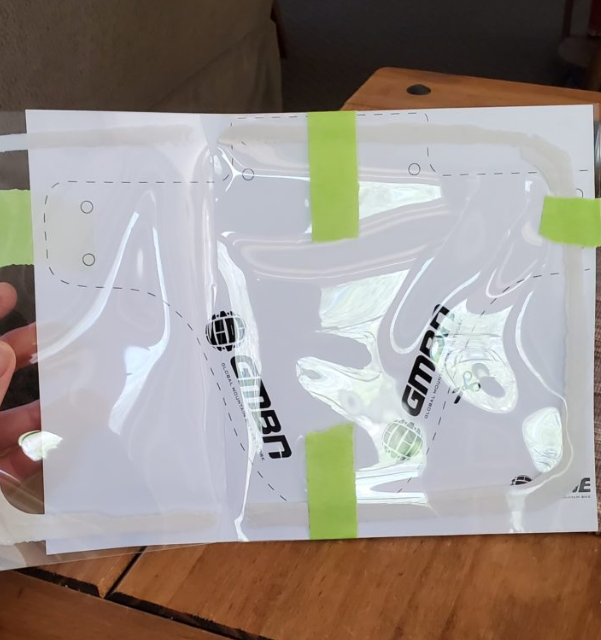
Step 1. Print Rear Fender Template
You can find various templates for mountain bike fenders like this on websites like GrabCAD.com. Go through the available templates and choose a suitable one. When printing, ensure you're using standard 8.5″ x 11″ computer paper. In the absence of a printer, you may trace the screen on the plastic sheet, ensuring it fits on a piece of computer paper.

Step 2. Combine the Material and the Template
Using tape, attach the template to the fender material. Any type of tape will work for this purpose, but it's recommended that you use one that can be removed easily. After the fender material has been successfully attached to the template, carefully cut out the pattern. There's no pressure for the cutting to be 100% accurate.
However, it's important to keep the template and fender material aligned while punching the mounting holes. You may choose to make the mounting holes prior to cutting. Do whatever is most comfortable for you, as it will have no effect on your end result.
Step 3. Make Mounting Holes
Once your template is attached and aligned, make the holes for mounting it using a hand drill like this. A paper hole punch like this will also work for making holes, depending on the fender material.
When drilling, ensure you don't end up damaging the surface your fender is placed on. To be safe, you may spread out a discarded box, place the fender on it, and drill. It's essential to apply light pressure when drilling to avoid ripping the fender.

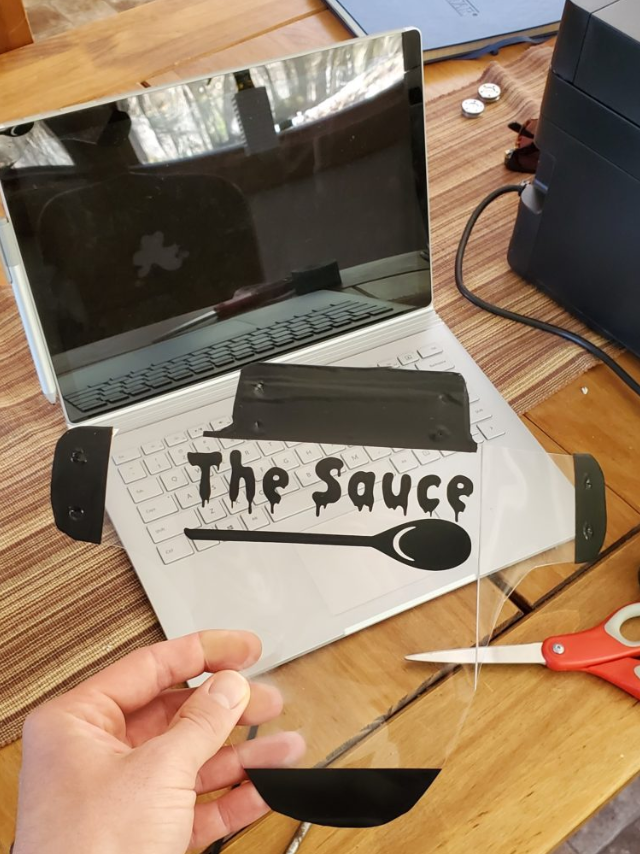
Step 4. Style the DIY Rear Fender
Styling your fender is up to you and completely depends on your tastes. For more artistic bikers, this may be a form of creative expression. Stickers are a great way to dress up your fender as we discuss in our article about mountain bike fender accessories, and the simplicity or ornateness depends on you.
Step 5. Mount the Rear Fender with Zip Ties
Zip ties are excellent for tying the fender onto your bike, as they make it easy to remove the fender. If you want to take off the fender for any reason, all you have to do is snip off the zip ties and remount the fender using new ones so make sure that you always have a few in your backpack or your tool bag. If you would like to know more about what else you may need in your tool bag check out our comprehensive mountain bike tool kit essentials guide.
Carefully thread the zip ties in a way that will ensure the fender touches the bike at all mounting points. Mount the fender on the bike's fork, tighten the ties, and snip off the excess length using scissors or wire cutters. Before mounting, you may want to read our related article on how to install a mountain bike fender for more tips and tricks.
Alternative Materials You Can Use For a Homemade Mountain Bike Rear Fender
Making your own mountain bike rear fender is quite easy. And so is getting the necessary materials stated above. However, in the absence of some of those materials, it's possible to source alternatives.
The alternative materials you can use for a homemade bike rear fender include reused plastic, a hole punch instead of a drill, and tracing the template directly from the computer screen instead of using a printer.
Tip 1. Repurpose Plastic
You don't have to get brand new plastic sheets to make a rear fender. You may use a plastic bucket and cut it to your specifications. There are also plastic product packages you can use. Reusing plastic is environmentally friendly and you get to save money. This guide from Plastics Make It Possible explains a bit more about recycling plastics.
Tip 2. Use a Hole Punch Instead Of a Drill
In the absence of a power tool, a paper hole punch like this is a viable alternative. However, you may want to stick to a drill like this if you're using a hard plastic bucket as your fender material.
Tip 3. Trace the Template Directly From the Computer Screen
Not having a printer should not stop you from making a homemade fender. Hold the plastic sheet to the computer screen and carefully trace out the template. However, it's essential to ensure it fits on a standard piece of computer paper. You may use a sharpie like this to do the tracing. If you're using a plastic bucket as your fender material, you may draw out the template on the material using your sharpie pen, and cut.