How to Replace a Mountain Bike Chainring – Step by Step
The key to having a smooth riding experience is having properly functioning drivetrain components. The chainrings are vital to your bike’s efficiency and performance, but no matter how well maintained, the chainrings wear out eventually. n this guide, we’ll cover everything you need to know to choose a new chainring that’s right for your drivetrain and bike and how to replace a mountain bike chainring.
To replace a mountain bike chainring, begin by securing the bike to a stand, release the chain tension, disconnect and remove the chain, loosen the pinch bolts, and remove the crank bolts. Then remove the left and right crankarms and loosen the chainring bolts and chainrings. Then clean and lubricate the crank and other components, install the outer and inner chainrings, reinstall the crank and chain, and test the new chainrings.
The chainring is part of the power center of the bike, responsible for pulling the chain and transmitting force from the rider’s pedaling action to the rear wheel. You can check out this article from the Journal of Sports Science on Exploratorium to learn how your muscles work to create the pedaling action. Turning the pedals rotates the chainrings and chain, which in turn rotates the cassette and rear wheel, pushing the bike onwards. Several bike accessories like pedals help improve pedal efficiency for every level of rider. To help you choose, we provide detailed comparisons in our articles on pedal straps vs. toe clips, pedal straps vs. cages, and toe clips vs. clipless pedals.
When Should I Replace the Chainring on My MTB?
Your chainring is an important part of your mountain bike’s drivetrain and affects many other components of your bike.
Replace the chainring on an MTB when problems like chain suck, chain slipping, and faulty gear shifting start to happen often. These problems occur when the teeth of the chainring get worn down and do not hook into the chain as well as they should.
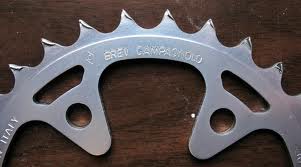
As this book The Complete Bike Owner’s Manual by DK Publishing explains, mountain bike chainrings are made of carbon or a solid piece of aluminum to make them strong enough to transfer your pedaling force without flexing. However, they tend to get worn with time and can cause damage that is expensive to repair. Aside from seriously affecting the drivetrain performance, worn chainrings can also ruin other components. As a result, it is important to inspect your MTB regularly and know when it’s time to replace them. The good news is the signs of wear are usually plain to see.
Here are the symptoms that your mountain bike needs to be replaced:
1. Chain Suck
One of the signs of extreme wear is your chain getting jammed and failing to disengage from the chainring teeth when you shift gears. This situation is referred to as ‘chain suck.’ In this case, the chain binds to the teeth as the chainring turns, wrapping back up and around the chainring towards the front derailleur and may even slam into the derailleur cage. The chain could also get jammed between the inner chainring and chainstay. It usually occurs when force is applied to the chain during a downshift and is worse on muddy terrains. As a result, you could find yourself having to push your bike to make it up steep hills. This YouTube video tutorial by RJ The Bike Guy goes into further detail on this issue.
Chain suck is usually caused by wear on the chainring teeth pressure faces. Rather than being straight and uniform in size and shape, worn chainring teeth will be hook-shaped. As a result, the chain links and rollers get hooked and do not release properly at the final stages of shifting. In addition, the bottom teeth of the chainring get overloaded by the chain pedaling tension, greatly increasing friction at this point between the chain and chainring.
Chain suck can be quite frustrating when it occurs. Pedaling action stops suddenly, causing you and your bike to fall over. In addition, the wedged chain can get permanently twisted and damage the chainring teeth, chainstay, and even the rear derailleur. This can also lead to chain breaking. Check out our article on how to fix a mountain bike chain that keeps breaking for alternative causes and solutions to this problem. The best course of action when it occurs is to take off the drive-side crank arm and chainrings. You can then free the chain wedged between the crank and chainstay.
Another common cause of this issue is fitting a new chain on an old but not worn-out chainring. This occurs because the previous chain would have stretched the chainring teeth, causing excessive friction between the new chain and the old chainring. Other causes include a dirty and gritty chain, dry or rusty chain, low rear derailleur spring tension, worn or damaged chain, or a chain that’s too long. Check out our article that provides fixes for if your mountain bike chain is too long.

2. Chain Slipping
Another indication that you might need to replace your chainring is when your chain keeps slipping off your chainring. Bent and deformed chainring teeth can cause your MTB chain to drop off when changing gears. This is because the chain will not fit properly over the teeth. The wear can either occur naturally from use over time or be caused by poor bike maintenance or a worn chain.
Just as a worn chain can wear out the chainring, a worn chainring can also wear out your chain in the first place. The chainring teeth start to look like shark teeth, and the spacing between the teeth gets wider, accelerating wear on the chain. A worn chain will also get stretched out, exacerbating the problem. As a result, you must address this issue as soon as possible.
It is best to replace your chain and chainring once you notice the signs of wear, to prevent further damage to your drivetrain. If only a few teeth are bent, you can try carefully bending them back into shape. If the teeth break off or are too chewed up, this is your cue to get a new chainring like this one. We’ll discuss how to find a chainring that suits your bike later on in this article.
Other causes of chain drop include a loose chain, loose bolts, dirty chain, poor quality shifters, bent derailleur hangers, and faulty or misaligned derailleurs. Our article on how to fix a mountain bike chain that keeps coming off will prove useful if you’re experiencing this problem.
3. Faulty Gear Shifting
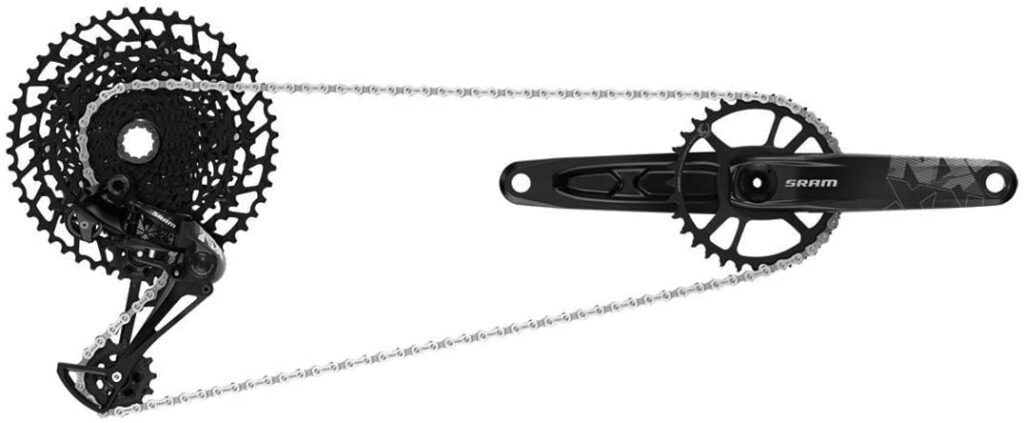
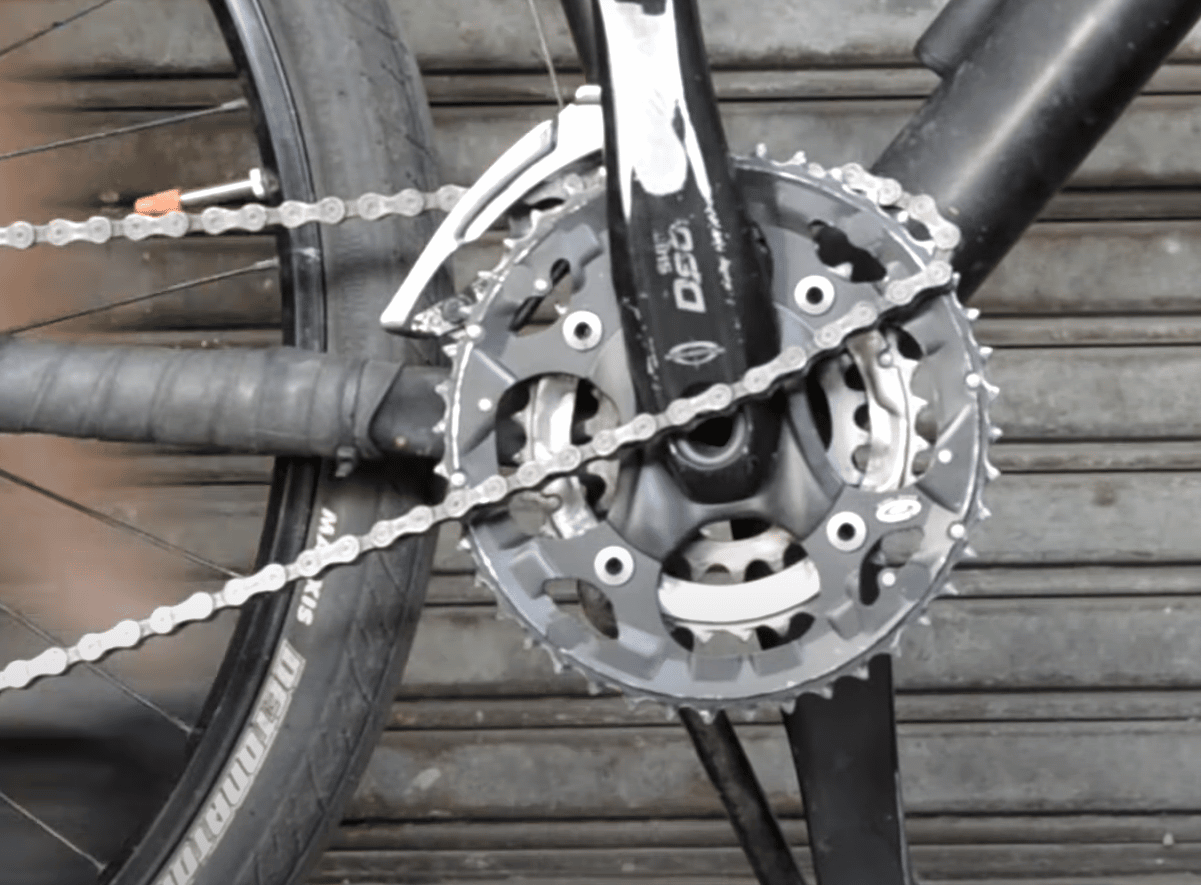
Deteriorating shifting performance is another indication that you need to change a mountain bike chainring. MTB chainrings are directly involved in the bike’s gearing system as they represent the front gears. Some mountain bikes make use of a “1x” single chainring, some have two chainrings, and others have three chainrings like this. The more chainrings the bike uses, the wider the range of gears available.
Bigger rings like these have more teeth indicating a higher gear ratio that is harder to push, while smaller rings give a lower gear ratio (easier to push). As a result, shifting your chain to the smallest front chainring makes pedaling in the lowest gear easier, and moving your chain to the largest chainring makes it harder. You can switch between the two depending on the terrain and the level of control you need.
The left-hand shifters usually control the front gears by moving the chain up and down the different front chainrings. As such, chainrings are essential to gear shifting on your bike and will affect the mechanism if worn or faulty. With a worn chainring, the chain will skip and jump gears when you try shifting through the front gears.
Another common cause of difficult shifting is a chain that’s too short. If this is the case for you, our article that explains what to do if a mountain bike chain is too short will come in handy.
You could also have a gear shifter that is stiff or stuck which is covered in our article on how to fix a mountain bike grip shifter that is stuck, in detail.
Be sure to also read up on these mountain bike front chainring size options as well for more tips and tricks.
How to Change a Chainring on a Mountain Bike
Cycling is a sport enjoyed by many people on a professional and recreational level and there are many reasons why this sport is practiced and followed by so many of us.
To change a chainring on a mountain bike first remove the chain and crankarms. Then, remove the old chainrings and get a good quality compatible chainring. Next, fit the new chainring properly and reinstall the crankarms and chain. Finally, test the new installation, checking that the bolts are properly tightened, and the crankset runs smoothly.
According to this article by Better Health, cycling is a great way to improve overall fitness. It has numerous health benefits, including decreased stress levels, improved posture, and coordination, increased muscle strength and flexibility, strengthened bones, and protection from diseases such as heart attack, obesity, stroke, diabetes, depression, and arthritis. However, to ensure your cycling experience is as safe as possible, it is essential you carry out regular maintenance on your mountain bike as outlined in our ultimate list of tools needed for mountain bike maintenance. To get maximum mileage and satisfaction from your bike, you must ensure you regularly examine and change your chainring when necessary.
Once you begin to notice the shape of your chainring teeth having flattened edges, round tips, or hooked edges, then it might be time to replace the chainring. Another check is to lift the chain from the top of the chainrings. If the chain lifts more than one tooth, the chain and maybe the chainring must be replaced with a chain like this and a chainring like this. If only an individual tooth or a few teeth are affected, you can attempt to fix them. You can try to remove minor gouges and burrs in the teeth with a file. You can also try bending the affected tooth back in shape with a pair of pliers like this or a crescent wrench like this. If it cannot be improved or most of the teeth are affected, then you need to replace the chainrings.
Apart from replacing faulty or worn chainrings, you may also want to change the size of your chainrings, upgrade them or experiment with some new models. Regardless of your reason, we’ll take you through all the steps of the process. Before getting started, you’ll have to get the necessary tools. If you’re interested in putting together a bike maintenance kit, check out our mountain bike tool kit essentials guide.
Here is a summary of the tools needed to replace the chainring on your mountain bike:
| Tools | Purpose of Tool | Example from Amazon |
| Bike Stand | To secure the bike in place. | Cyclespeed Bike Repair Stand |
| Set of Allen Wrenches | To loosen appropriate bolts. | Allen Wrench Hex Key Set |
| Crank Puller tool | To remove crankarms for non-self-extracting cranks. | Park Tool Compact Crank Puller |
| Socket Wrench | To unscrew and screw on crank bolts. | Uxcell 14mm Socket Wrench |
| Flat blade Screwdriver | To engage and disengage the safety tab. | Phillips Flat-blade Screwdriver |
| Rubber Mallet | To ease out the crankarm by tapping the end of the spindle. | Coleman Rubber Mallet |
| Chainring nut tool | To hold the nut on the backside while unscrewing the chainring bolts. | ParkTool Chainring Nut Wrench |
| Cleaning Kit | To clean and lubricate the chain and crankset. | Bike Cleaning Kit |
| Brake Cleaner | To remove oil, dirt, and debris from components. | Brakleen Brake Parts Cleaner |
| Bicycle degreaser | To clean the bike components of residual grease. | BioDegreaser |
| ThreadLocker | To lock bolts and nuts in place and prevent loosening due to stress or vibration. | Loctite Heavy Duty Threadlocker |
| Anti-seize | To prevent chainring bolts from seizing up and drying out. | Permatex Anti-Seize Lubricant |
| Chain Lube | To lubricate bolts, nuts, and moving parts of the chain and crankset for smooth and efficient performance. | C3 Ceramic Dry Chain Lube |
| Chain Tool | To split and reconnect the chain using connector pins. | Universal Bike Chain Tool |
| Master Link Pliers | To split and reconnect the chain using quick links. | Park Tool Master Link Pliers |
| New Chainrings | To replace old chainrings for optimum bike energy efficiency | Shimano M8000 1x Chainring |
Mountain bikes typically have 1 to 3 chainrings. The chainrings have evenly spaced teeth, usually between 22 and 53 teeth, for the chain links to slot onto. Together with the crankarms, the chainrings make up the crankset which rotates around the bottom bracket as you turn the pedals. Because several crankset systems exist, the removal and installation process may vary slightly.
Some systems do not accept separate chainrings – they come as a set, while some have chainrings integrated with the crankset. Some setups do not need you to remove the entire crank to remove the chainrings. Here is a step-by-step guide to changing your mountain bike chainring. You can also check this Shimano manual for the manufacturer’s instructions on installing and maintaining chainrings.
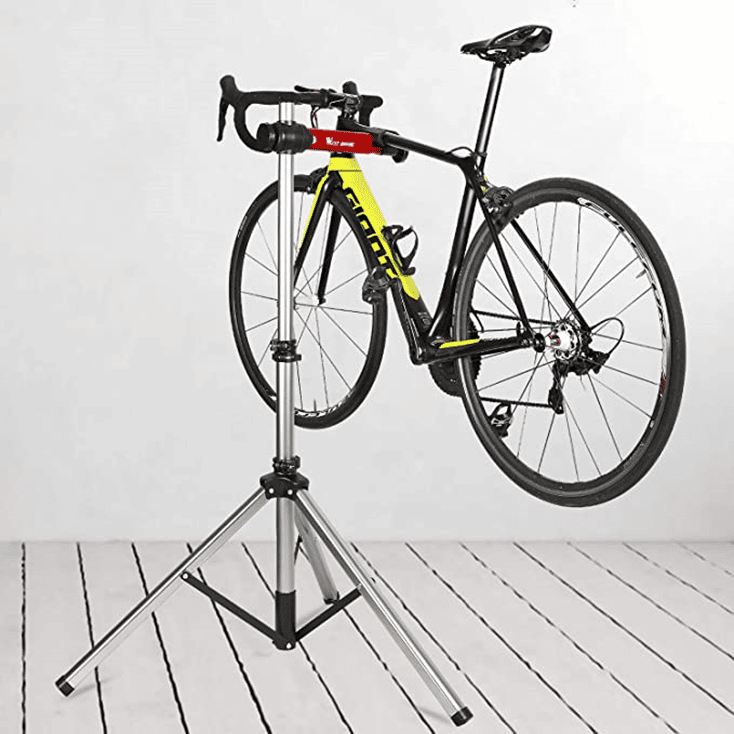
Step 1. Set Up Your Bike
To replace a mountain bike chain ring, you’ll have to first position your bike properly. It is best to secure your bike on a stand like this. This makes it easier to work on the bike. You can also prepare a clear spot where you can lay out the parts as you remove them. In addition, you can place a drop cloth underneath to catch any grease during the process.
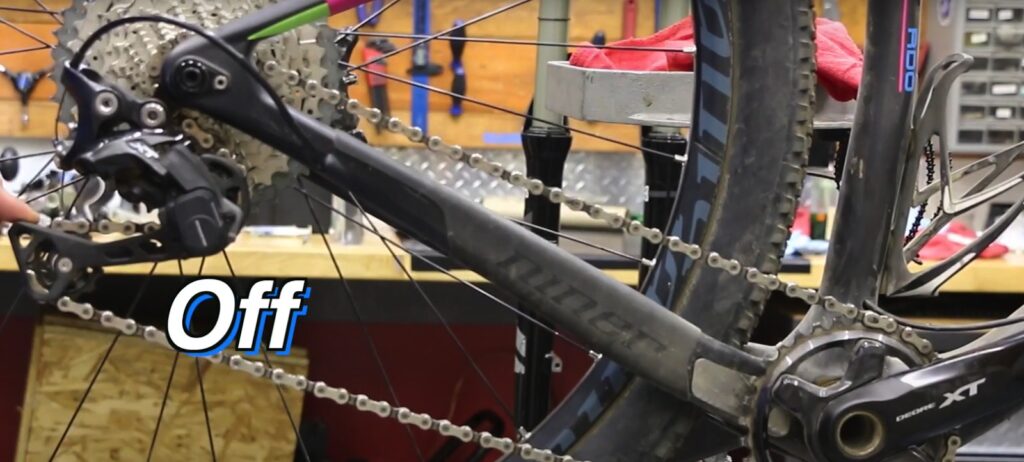
Step 2. Release Chain Tension
The next step is to remove your chain for easy access to the cranks. First, shift the chain down to the small/small gear combination – smallest front chainring and smallest rear cog. Next, check if the derailleur uses a clutch mechanism or cage lock feature. As this YouTube video tutorial by Bike Teacher demonstrates, turn off the clutch mechanism to free up the chain if your derailleur has the feature. Alternatively, if you use an SRAM derailleur with a cage lock, engage the lock to loosen the chain, as demonstrated in this infomercial from SRAM.

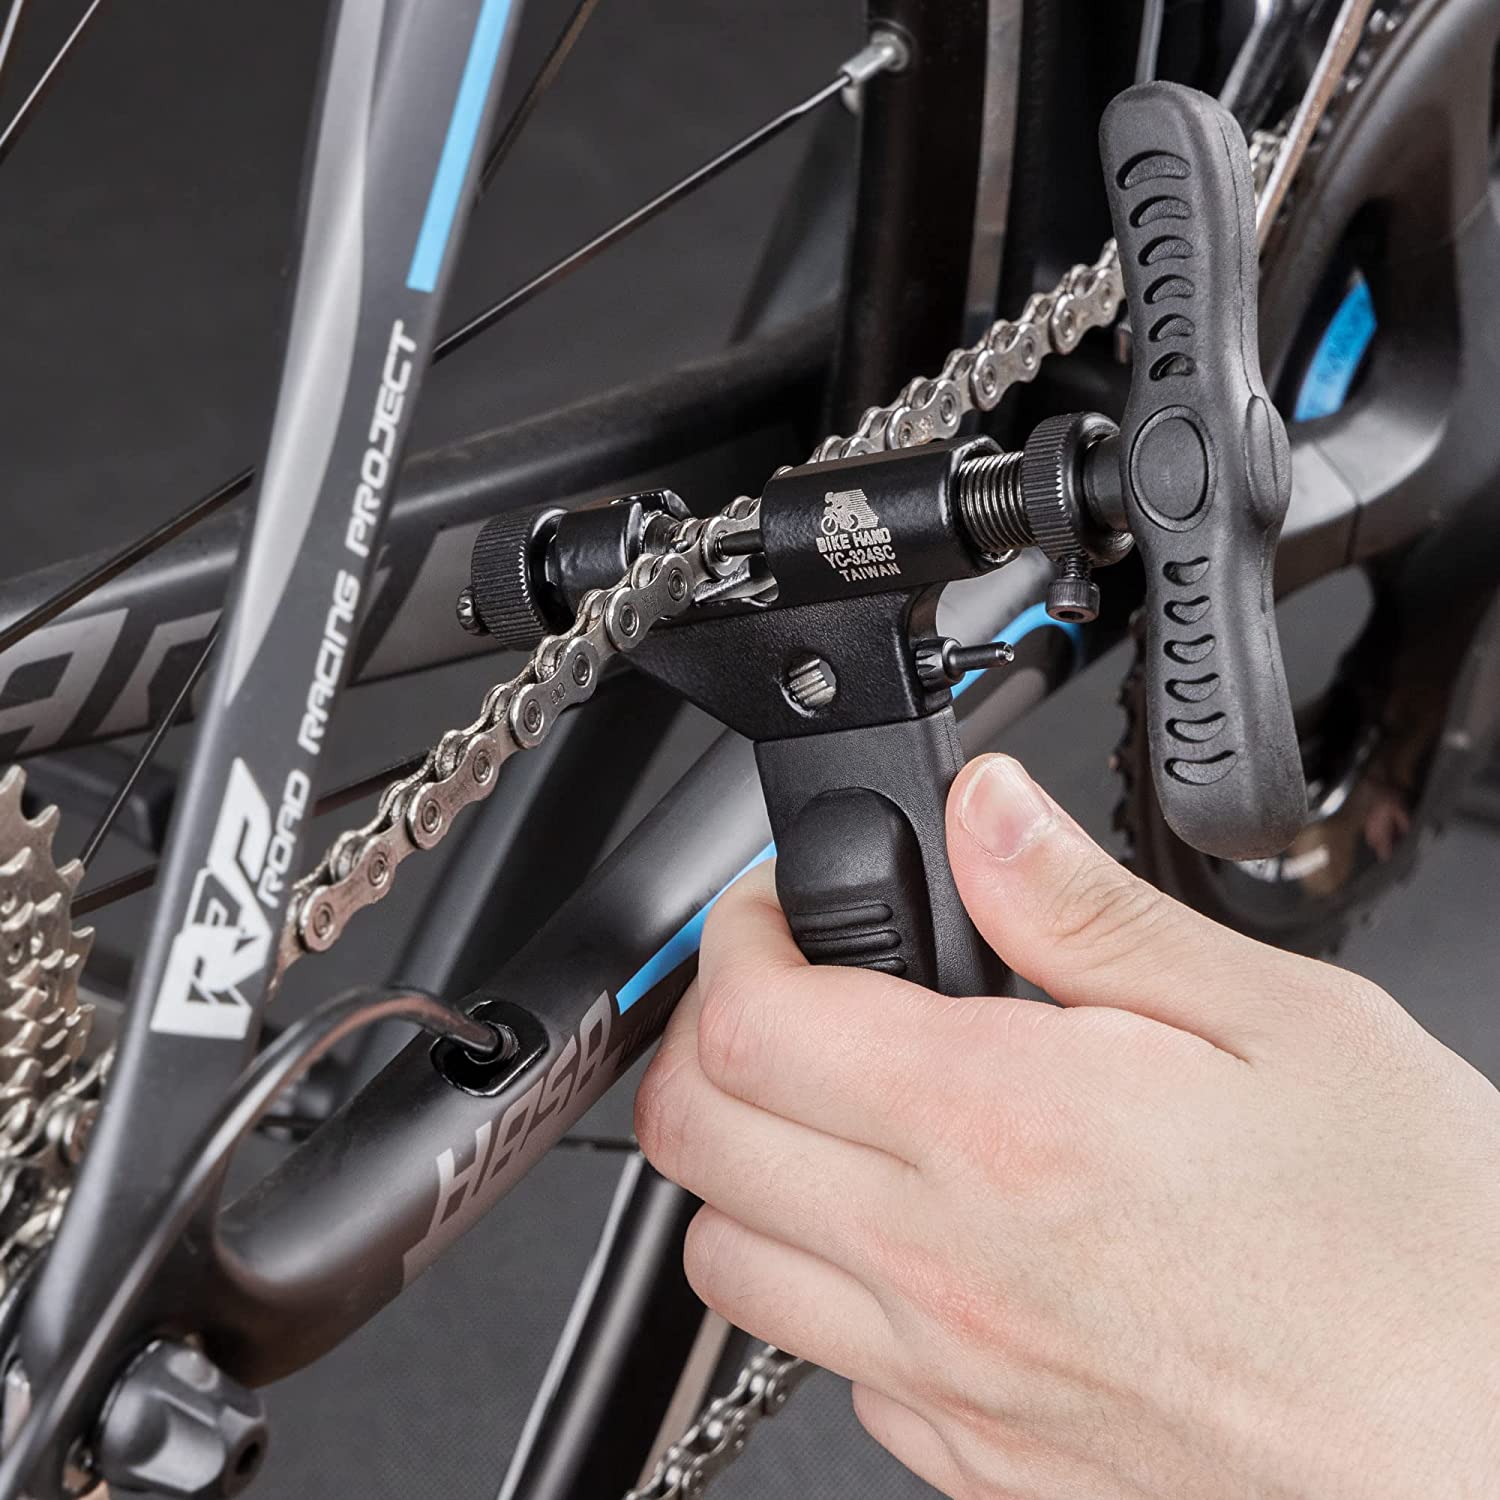
Step 3. Disconnect the Chain
Now that the chain is slack and loosened, you can easily locate and disconnect the chain. Your method for disconnecting the chain will vary depending on its connection system. Check out our article on how to replace a chain on a mountain bike for more information.
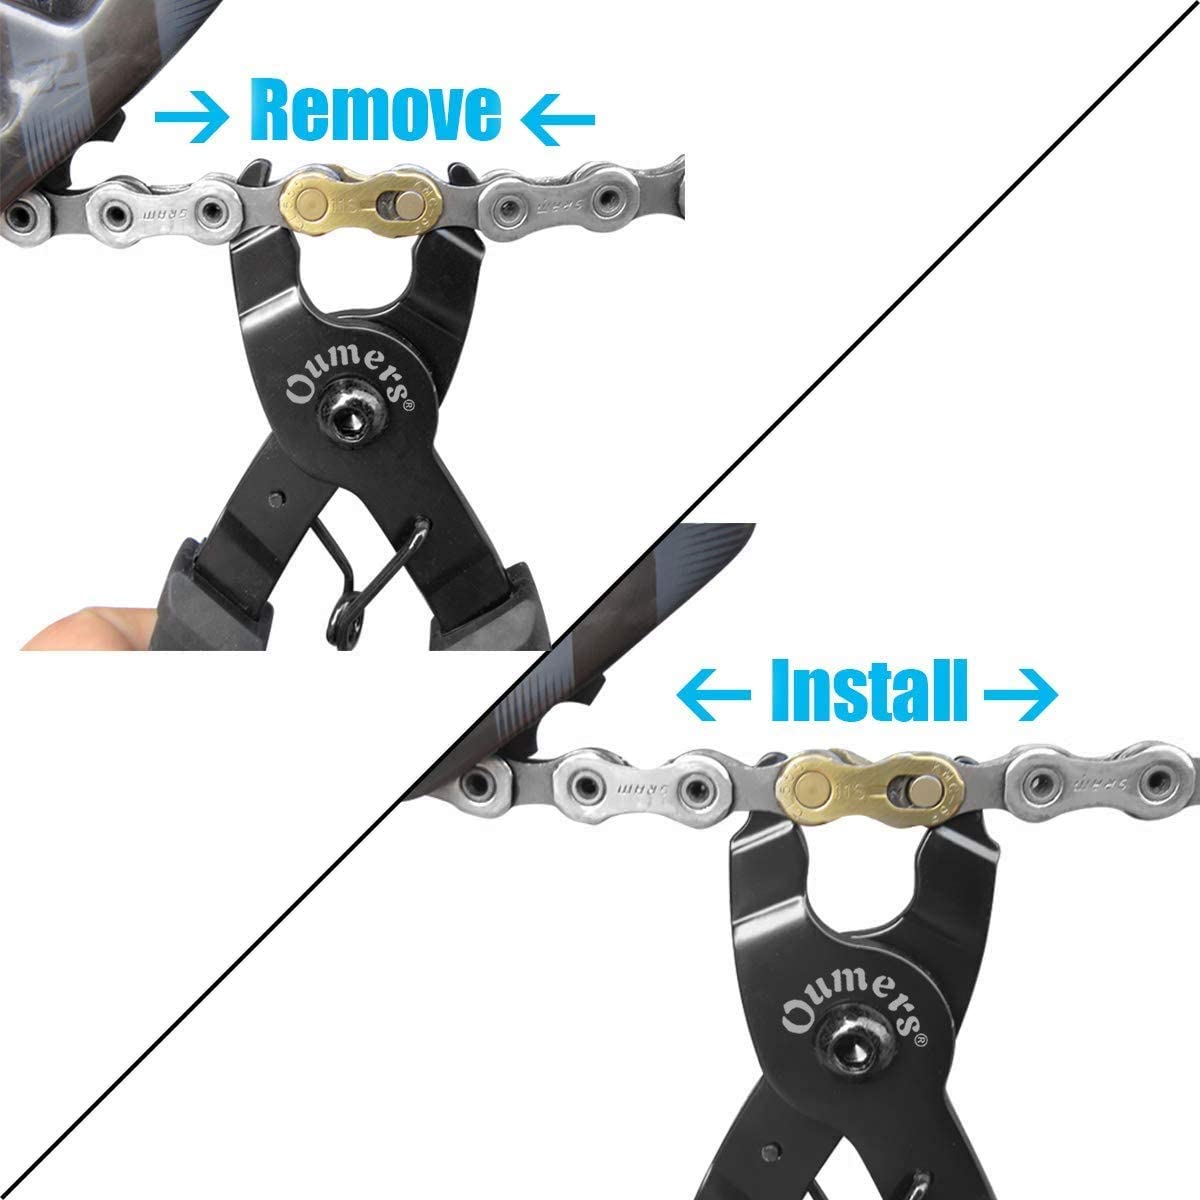
For Chains With Quick Links
The quick link usually has a different color and design than the other chain links. Once you locate the link, squeeze the center and push the ends towards each other. If the link does not disengage easily, use a master link plier like this. Place the teeth of the pliers between the ends of the link and apply a bit of force to pop off the links.
For Chains With Connector Pins
Some chains make use of specially reinforced pins like this. The connecting link with the pins is usually darker than the other links. You can use a chain tool like this to disconnect these chains. Position the chain link in the outer slot of the tool and align the chain tool pin with the chain pin. Tighten the chain tool clockwise to drive out the pin. If the chain uses a simple chain pin, ensure you do not drive out the pin completely, as you won’t be able to get it back in the link. Just push the pin far enough to disconnect the chains.
Step 4. Remove the Chain
Once you’ve disconnected the chain, carefully unthread the chain from the chainrings, cassette, and derailleurs.
Step 5. Loosen the Pinch Bolts
The next step is to loosen the crank bolts. Use a 5mm Allen key like this to loosen, without removing, the two pinch bolts on the crankarm on the non-drive side of the bike. This is usually the left-hand crankarm.
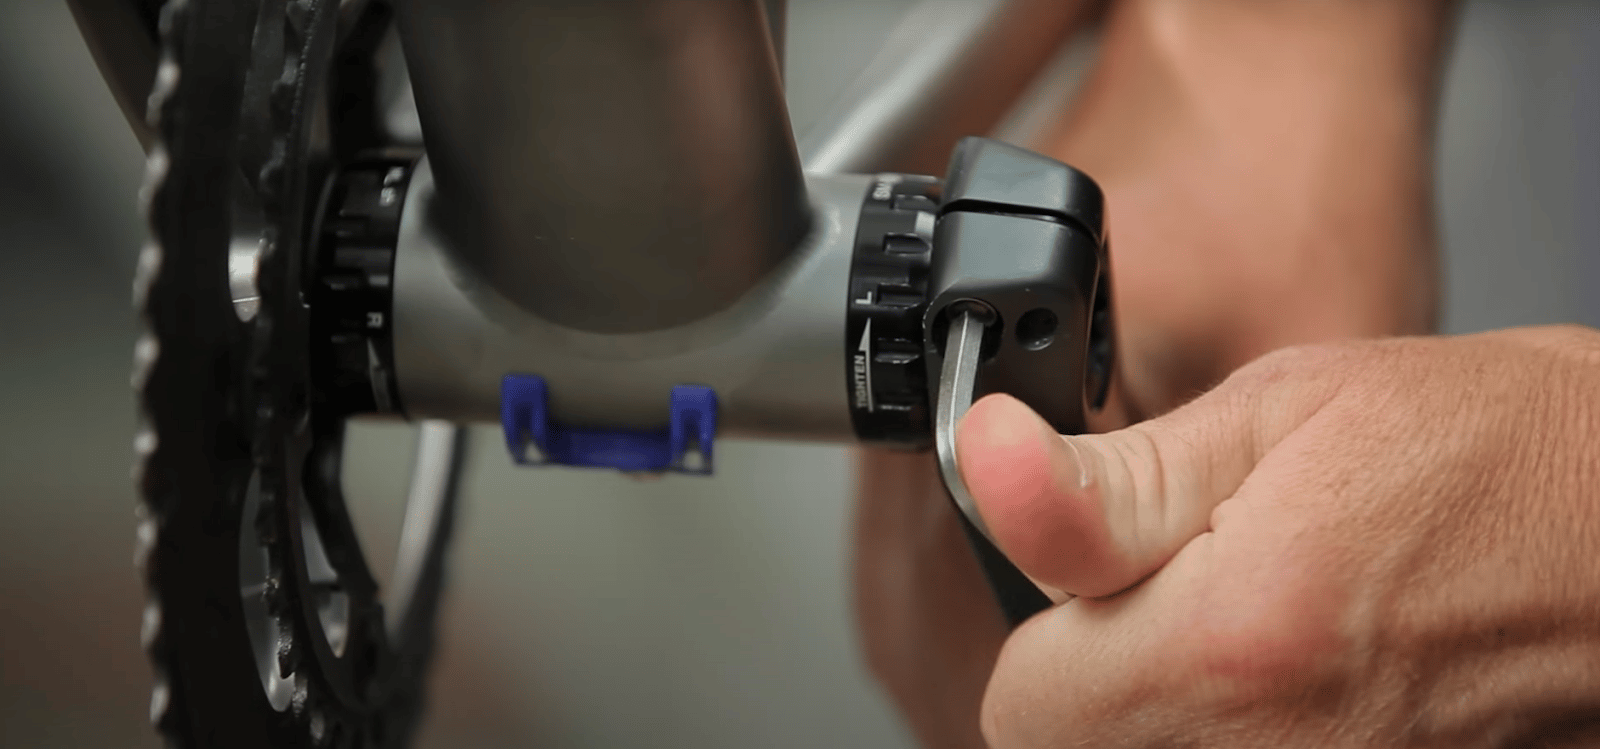
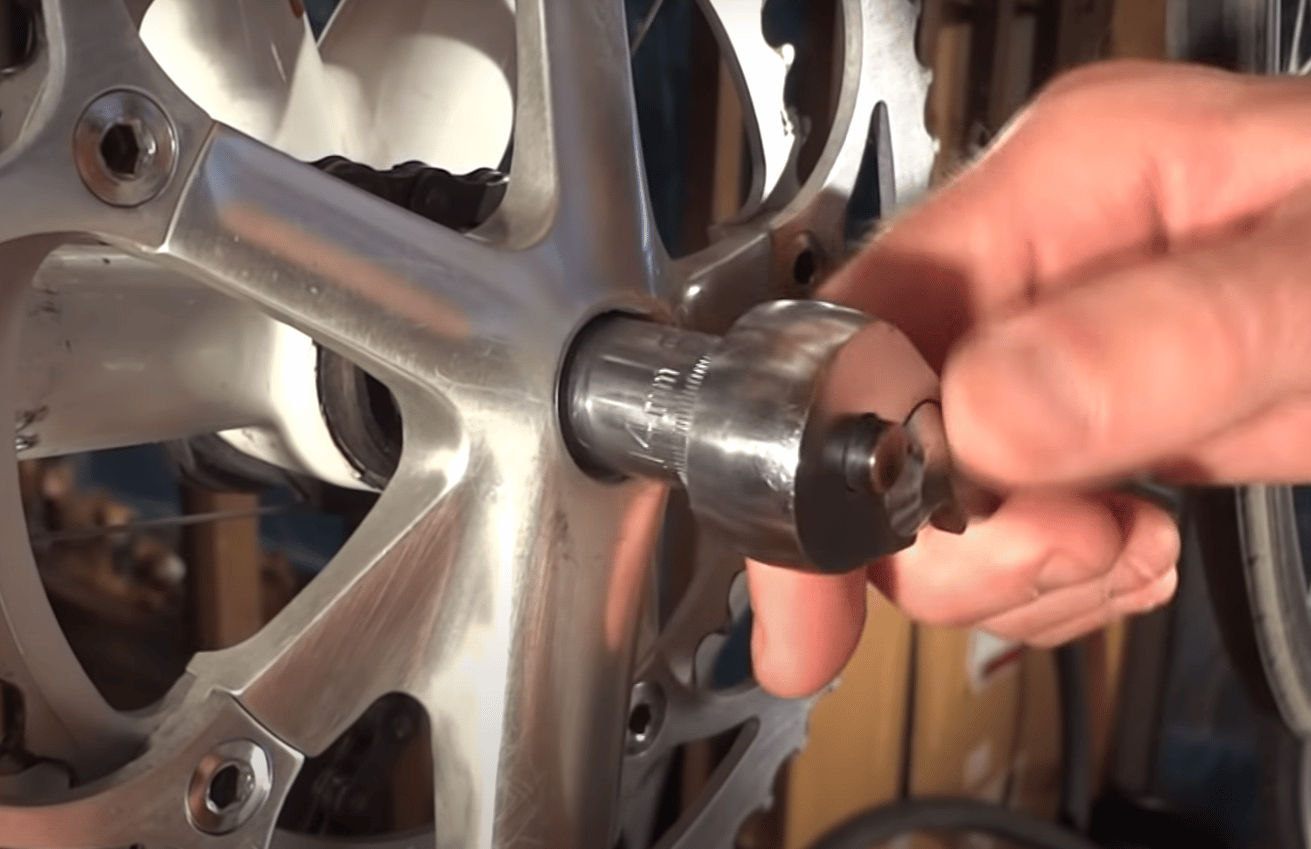
Step 6. Remove the Crank Bolt
Next, remove the crank bolt counterclockwise using this 8mm Allen wrench or this 14mm socket wrench. If there is a retaining ring over the crank bolt, hold it in place with an adjustable pin tool like this and fit the hex wrench past the ring to loosen the bolt. If, instead, there is an adjustment (dust) cap over the bolt, remove it using a 5mm Allen wrench, two-pin dust cap tool, or a screwdriver to access the bolt.
If there is a washer, ensure you extract it with the bolt. Otherwise, you will not be able to pull the crank out. For Shimano cranks with safety tabs, use a flat-head screwdriver to disengage the safety tab by pushing it upward.
Step 7. Remove the Crankarms
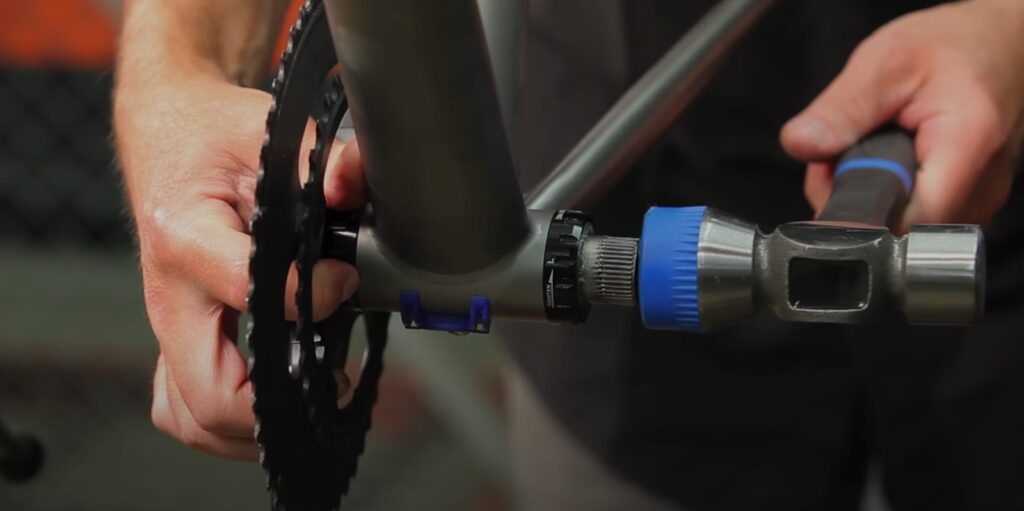
With the safety tab disengaged and the crank bolt removed, the left-hand crank should slide freely from the spindle/axle. However, you may have to wiggle the crank side to side to dislodge it. Once you’ve removed it, you can now pull out the right-hand (drive) side crank, which is attached to the axle that fits through the bottom bracket.
If you find it hard to budge the right crank, use a rubber mallet like this to tap the axle and crank out carefully. Gently pull the crankset and put it aside.
Step 8. Make Use of the Crank Puller
If the right or left crank does not move freely on removing the crank bolt, you may need a crank puller or crank remover tool like this. Screw the threaded end of the crank puller clockwise into the hole in the left crankarm by hand. Then, insert a wrench or a hex key into the crank puller and turn the end to push the crank off the frame and away from the axle. Unscrew the puller from the crankarm and repeat for the right crank.
Step 9. Loosen the Chainring Bolts
Once you remove the crankset, find the chainring bolts on the crank. Using a 5mm Allen key or this Torx T30 wrench, unscrew the bolts counterclockwise. You’ll have to use a bit of force and leverage to turn them. You can also use a penetrating spray to loosen them up.
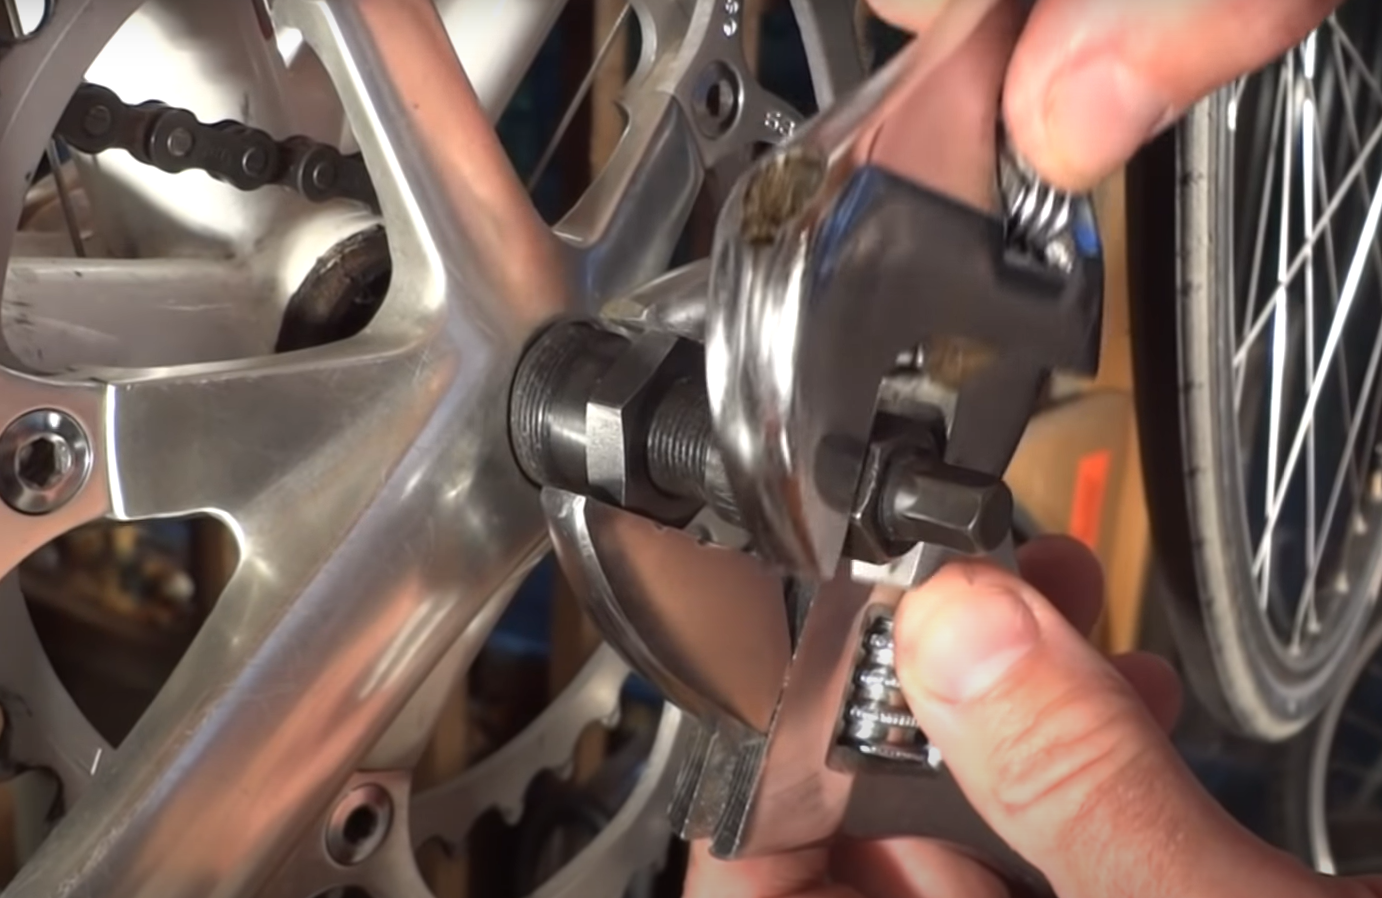
The nut on the backside may turn as you unscrew the bolt, so you’ll have to hold it in place. You can use a two-pronged chainring-nut tool like this or a 6mm hex key like this to achieve that. After loosening the bolts, you should be able to take them off by hand and put the bolts safely aside.
Step 10. Remove the Chainrings
As you take the last bolt off, the chainring should come away from the cranks. You can make a note or take a picture of which way the chainring was mounted.
Step 11. Inspect the Bottom Bracket
Inspect the BB shell for loose bits and check how smoothly the bearings roll. If the bearings feel gritty or you note any irregular resistance or metallic noise, you may need to replace the bottom bracket.
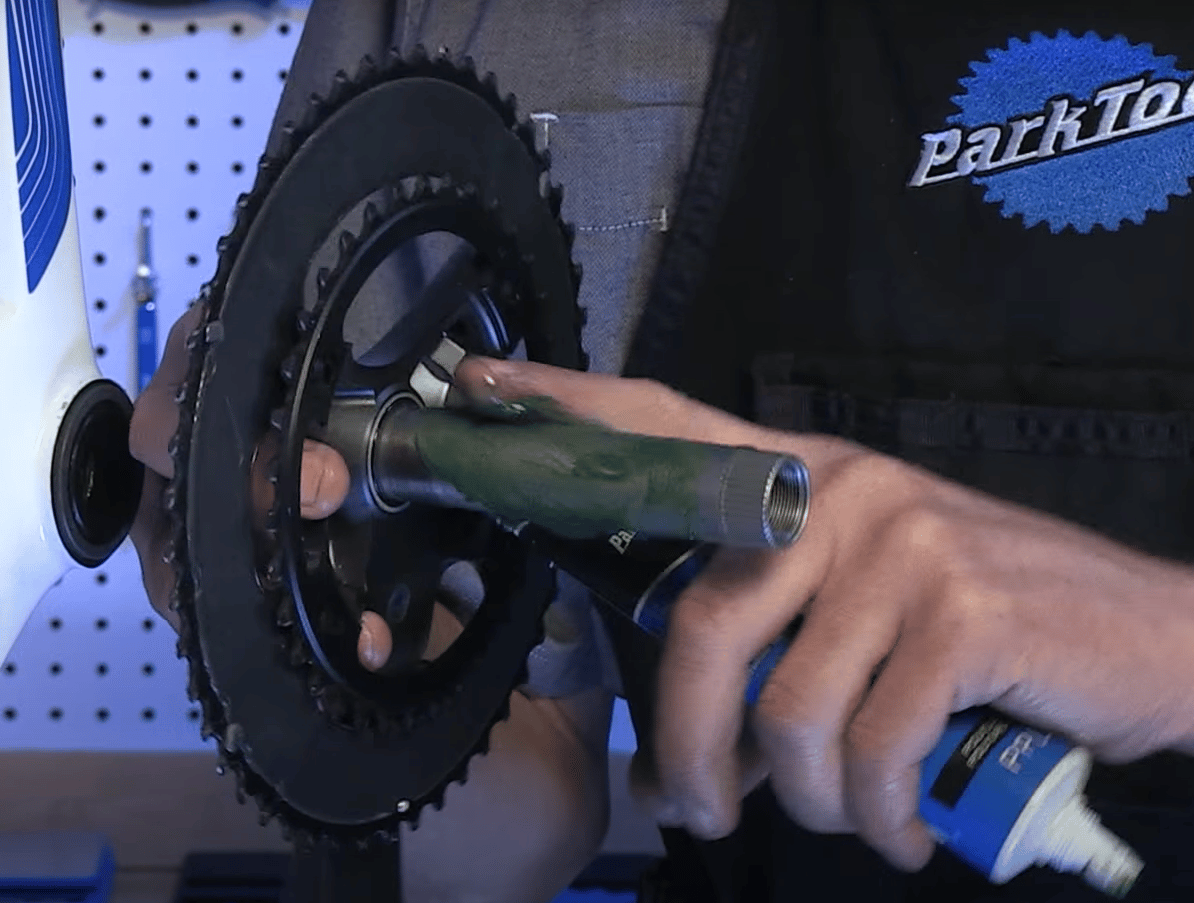
Step 12. Clean and Lubricate the Cranks
Use a clean rag to wipe away any dirt or grime inside the bottom bracket. This manual by Shimano advises against the use of high-pressure jets of water to wash the bottom bracket. Instead, use a neutral detergent. Clean the inner surfaces of the plastic bearing covers on the bottom bracket where the spindle sits. Also, grease the internal face of the bearing cover. Use brake cleaner like this to clean off the bolts, washers, axles, and cranks, and dry off with a clean rag. Just be sure to use this product with caution as it is toxic to the environment.
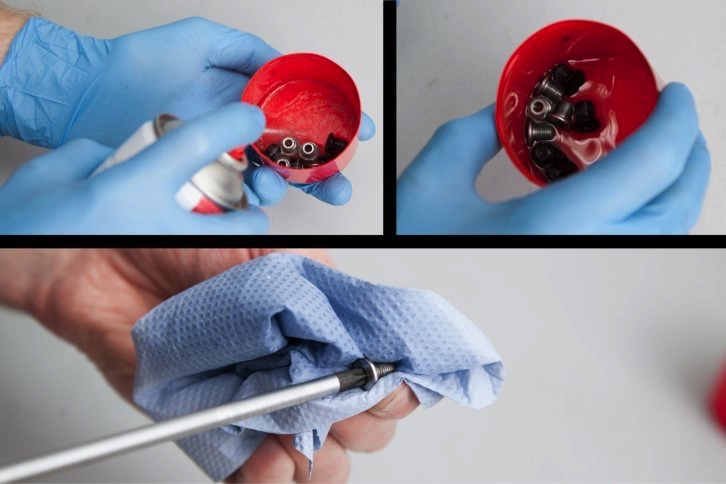
Step 13. Clean and Lubricate the Chainring Bolts
Use a degreaser like this to clean the bolts. Then lubricate the bolts and bolt holes/recesses using ceramic lube like this. In addition, apply some anti-seize paste to prevent them from seizing up or drying out. It will also make the bolts easier to remove next time.

Step 14. Get New Compatible Chainrings
As different brands of products are often incompatible, ensure the chainrings you purchase are compatible with the crankset and drivetrain. In addition, the chainrings you get will depend on the number of chainring teeth you need, the number of bolts attaching the chainring to your bike, and the bolt circle diameter.
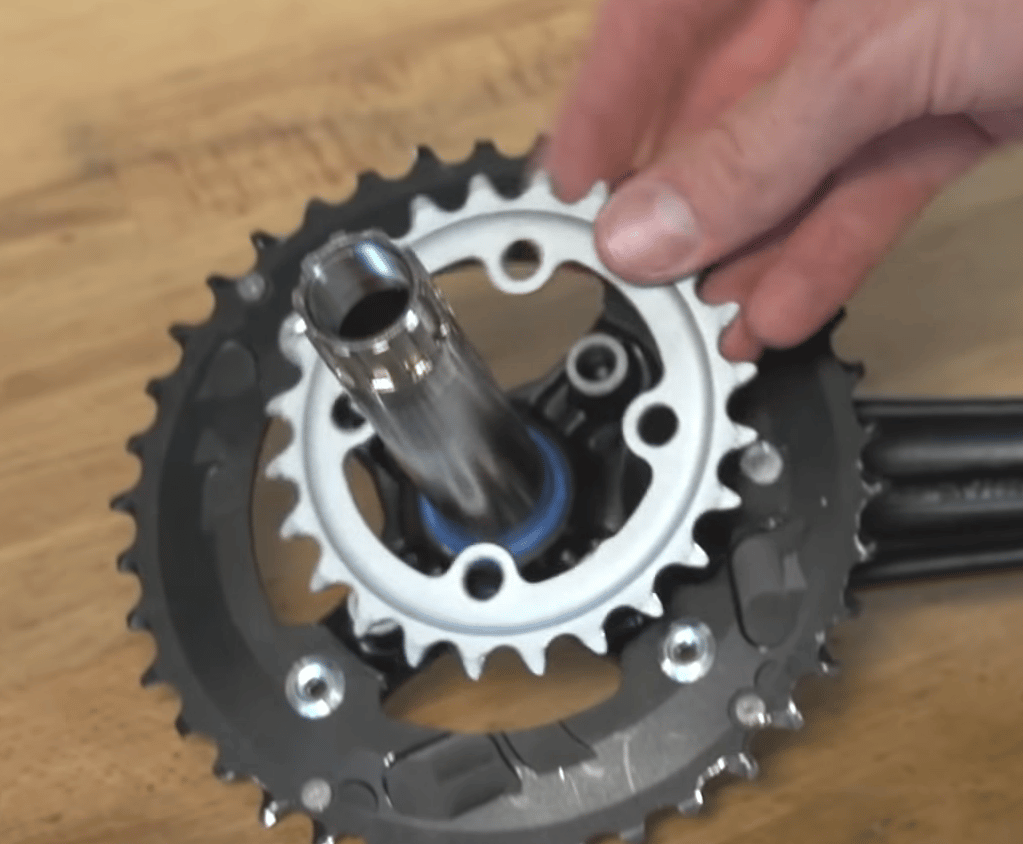
Step 15. Fit the Larger Chainring
Always fit the larger outer chainring before the smaller inner one. Check the chainring for an alignment arrow that indicates the correct position with respect to the crank. Alternatively, you can make use of the chain pip as a guide. This is the small stop pin or tab on the outer chainring that must align with the crank arm. It helps prevent the chain from getting stuck between the chainring and crankarm as it comes off the big ring. Position the chainring so the pip sits behind the crank and protrudes away from the bike. Ensure the chainring brand name faces outward away from the bike and the ramped edges of the ring face inward.
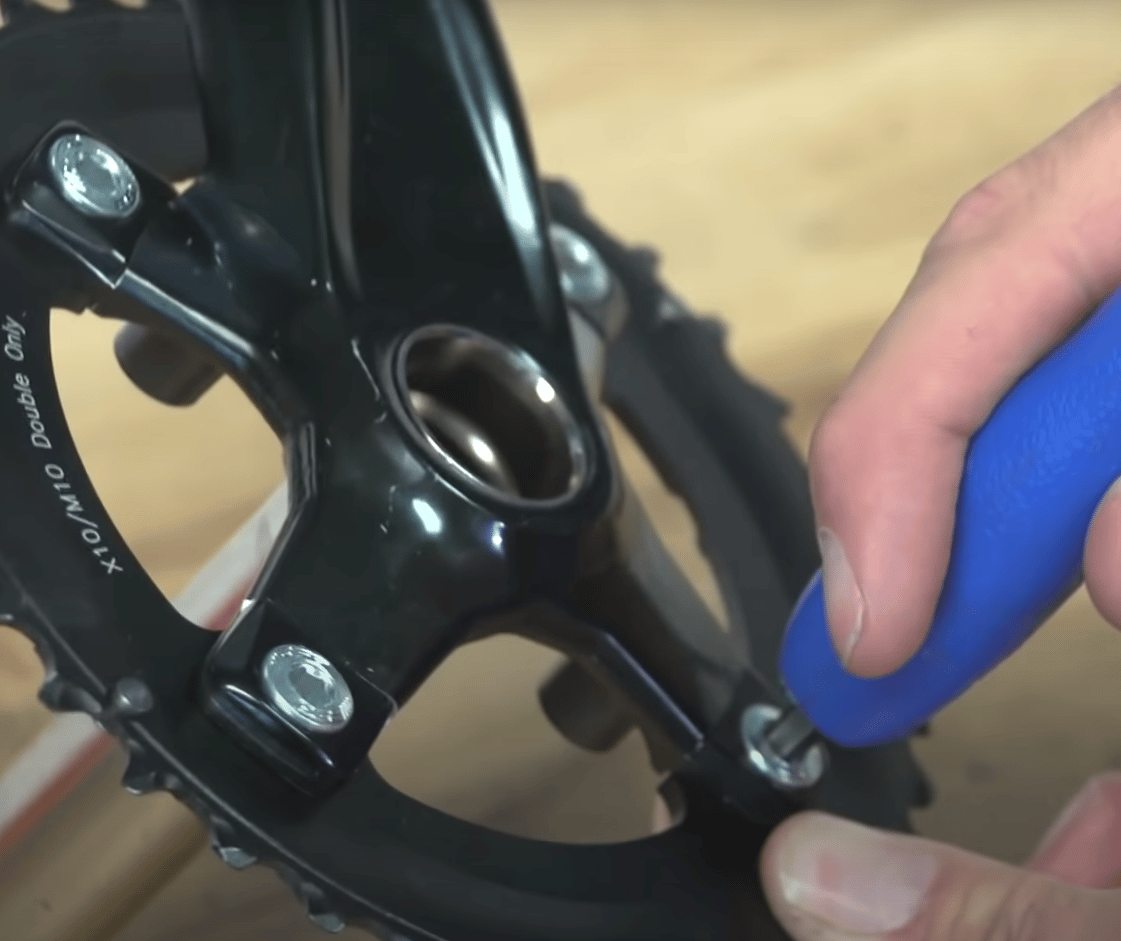
Set the chainring up against the crank spider so the bolt holes on the chainring line up with those on the crank. Fit in one of the chainring bolts by hand, applying a thread locker compound like this. Repeat for the opposing bolt, and then the rest. Hold the back side of each bolt still with your chainring bolt tool and tighten the other side using your Allen key. Once all the bolts are installed, go over them all again, tightening each to the manufacturer’s recommended torque spec. This video tutorial by the Global Cycling Network explains the process very clearly.
Step 16. Fit the Smaller Chainring
You can now install the inner ring. Position the chainring so that the bump lines up under the crankarm. Ensure the chainrings are aligned, so the bolt holes match up in the correct position and are not facing inward toward the spider. If there is any brand name or labeling on the ring, check that it faces outward as you put the chainring on.
Like with the outer chainring, fit the bolts back on with the thread locker and tighten each a little at a time. Then check with a torque wrench and tighten to the recommended torque spec.
Step 17. Reinstall the Crankset
Reinstall the crankset by reversing the removal steps. First, grease the axle and insert it through the bottom bracket as far as possible by hand. You can also use a rubber hammer to fit it properly. Next, slide the non-drive side crankarm onto the axle. Finally, push down and re-engage the safety tab.
You can now screw on the center crank bolt. Apply grease and anti-seize and tighten to the specified torque, usually 27Nm or more. Replace the dust cap if the crank has one. Lastly, tighten the two pinch bolts using a torque wrench.
Step 18. Reinstall the Chain
Now that the crankset is installed, it’s time to reinstall your chain. First, clean the chain and lubricate its moving parts as explained in our quick steps to clean a mountain bike chain properly and lube it. Now, check that your gear is still in the small/small gear combo. Then route your chain through the rear derailleur, over the upper and lower jockey wheels. Next, thread the chain over the smallest rear cog and guide it over the smallest front chainring. Finally, connect the two ends of the chain using a quick link and master link pliers or connector pin and a chain tool, as applicable. You can check out our article on mountain bike chain installation for a detailed guide on the topic.
Step 14. Test the Installation
Now that you know how to replace a mountain bike chainring, you just have one last step. Once you’ve connected the chain, test the entire installation. Begin by turning the crank slowly and checking if the chainrings wobble back and forth. As this book, Zinn and The Art of Mountain Bike Maintenance by Lennard Zinn explains, excessive wobbling of the chainring compromises shifting. So, ensure there is no excessive wobbling. The chainring should run smoothly with no creaking or metallic noise.
Next, refer to the manufacturer’s instructions for the correct torque specifications and check that all the bolts and nuts are properly tightened. Finally, recheck the torque after one ride since the crank could settle in and loosen the bolts. It is also recommended you check the torque periodically.
Your crankarms might spin less freely due to the fresh grease. This usually resolves itself as you ride and the bottom bracket beds in.
Is Replacing a Front Chainring Different From Replacing a Rear Chainring?
One may think that replacing your front chainring would be different from replacing your rear chainring but it is not.
The process for replacing a front chainring is the same as replacing a rear chainring. For both chainrings, remove the chains and the crankset, remove the chainring bolts and the chainrings, install the new large and small chainrings, reinstall the crankset and chain, and test the installation.
Chainring Size Guide
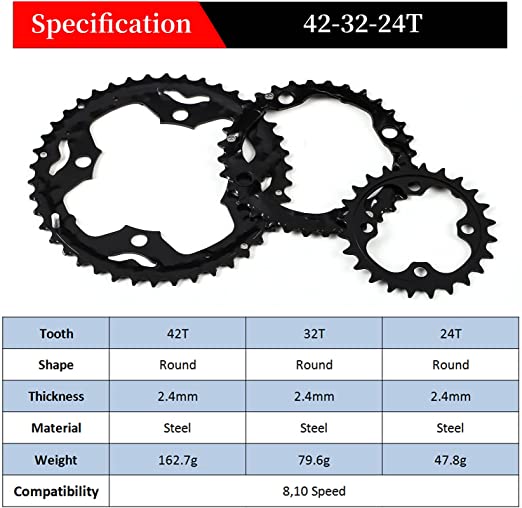
As stated earlier, chainrings are crucial to the efficiency of your bike. When you are learning how to replace a mountain bike chainring, it’s important to note that mountain bikes usually vary between single-ring, double-ring, and triple-ring cranksets, each having its own benefits.
Chainring sizes are as follows: a chainring with 24 teeth is typically 103.7 mm in diameter, and a chainring with 30 teeth is typically 128 mm in diameter for adult bicycles.
Triple-ring systems provide a wide range of gears; double-rings allow for weight-saving, while single-ring sets are preferred for simplicity. MTB chainring sizes are often expressed in the number of teeth and diameter. The higher the number of teeth, the higher the gear ratio and the harder it is to pedal the bike forward. As a result, riders that regularly ride steep terrains usually prefer smaller chainrings for easy pedaling. On the other hand, riders who spend time on flat terrains or want more top-end speed prefer bigger chainrings. However, some bikes have a limit on the maximum chainring size due to the bike clearance.
Most mountain bikes come with 30t or 32t chainrings; however, you can upgrade your chainring size as you need. Your chainring size matters as it determines the gear range you’ll use on your local terrain. Below we provide a table to help you determine if a chainring will fit your bike and the right number of teeth your chainring should have.
| Number of Teeth | Diameter (mm) | Diameter (in) |
| 24 | 103.7 mm | 4.01 in |
| 26 | 111.8 mm | 4.42 in |
| 28 | 119.9 mm | 4.74 in |
| 30 | 128.0 mm | 5.06 in |
| 32 | 136.1 mm | 5.38 in |
| 34 | 144.2mm | 5.69 in |
| 36 | 152.2 mm | 6.01 in |
| 38 | 160.3 mm | 6.33 in |
| 40 | 168.4 mm | 6.65 in |
| 42 | 176.5 mm | 6.97 in |
| 44 | 184.6 mm | 7.28 in |
| 46 | 192.7 mm | 7.60 in |
| 48 | 200.8 mm | 7.92 in |
| 50 | 208.8 mm | 8.24 in |
| 52 | 216.9 mm | 8.56 in |
Mountain bike chainrings usually come in 2-tooth increments. You can usually change two teeth up or down without changing your bike chain length. Decreasing by more than two teeth will mean you have to shorten your chain. As the table shows, chainring size can vary from as low as 24 to as high as 50 teeth. Depending on your need, you can easily switch from a bigger chainring to a smaller one and vice versa. You can also increase or decrease the number of rings on your bike. You just have to take note of a few factors to ensure you have the best fit. If you’re unsure of which size to get, you can compare chainring options using this gear calculator from Sheldon Brown.
A smaller chainring allows for easier pedaling and more efficient climbing. If you’re switching to a smaller chainring, you will have to shift your front derailleur down a bit. You may also have to switch your crankset entirely.
A bigger chainring allows you to ride faster downhill and on flat terrains. You will have to shift your front derailleur up if switching to a bigger chainring. You should avoid having a difference of more than 16 teeth between your outer and inner ring.
How to Find a New MTB Chainring That Fits Your Bike
Chainrings come in various sizes and designs that can be used for different purposes. Also, there are several crankset manufacturers, meaning that the chainring might not always be compatible with your other components. As a result, it is important to check for full compatibility when purchasing your chainring so that you can replace a mountain bike chainring properly. However, buying the right one can be quite tricky.
To find a chainring that fits a specific bike, count the teeth, calculate the BCD, and count the bolts.
Here are the steps to consider before buying your new mountain bike chainring:
Step 1. Count the Teeth
One of the most important factors to consider when purchasing a new MTB chainring is the chain size. The chain size is determined by the number of teeth. You can cross-check the table above to get the diameter based on the number of teeth. You can get a smaller chainring for an easy gear combination or a larger chainring for higher speed. You can also get both using a double-ring set to switch between the options. An example of a standard chainring size format is 50/34T. This signifies that the outer ring has 50 teeth while the inner ring has 34 teeth. Most chainring manufacturers label the number of teeth on the chainring. If not, you can simply count the number of teeth the chainring has.
One important point to note is that the difference between your adjacent chainrings should not be more than 16 teeth. Any more and your shifting performance will be affected. Your chain will also slip off often.
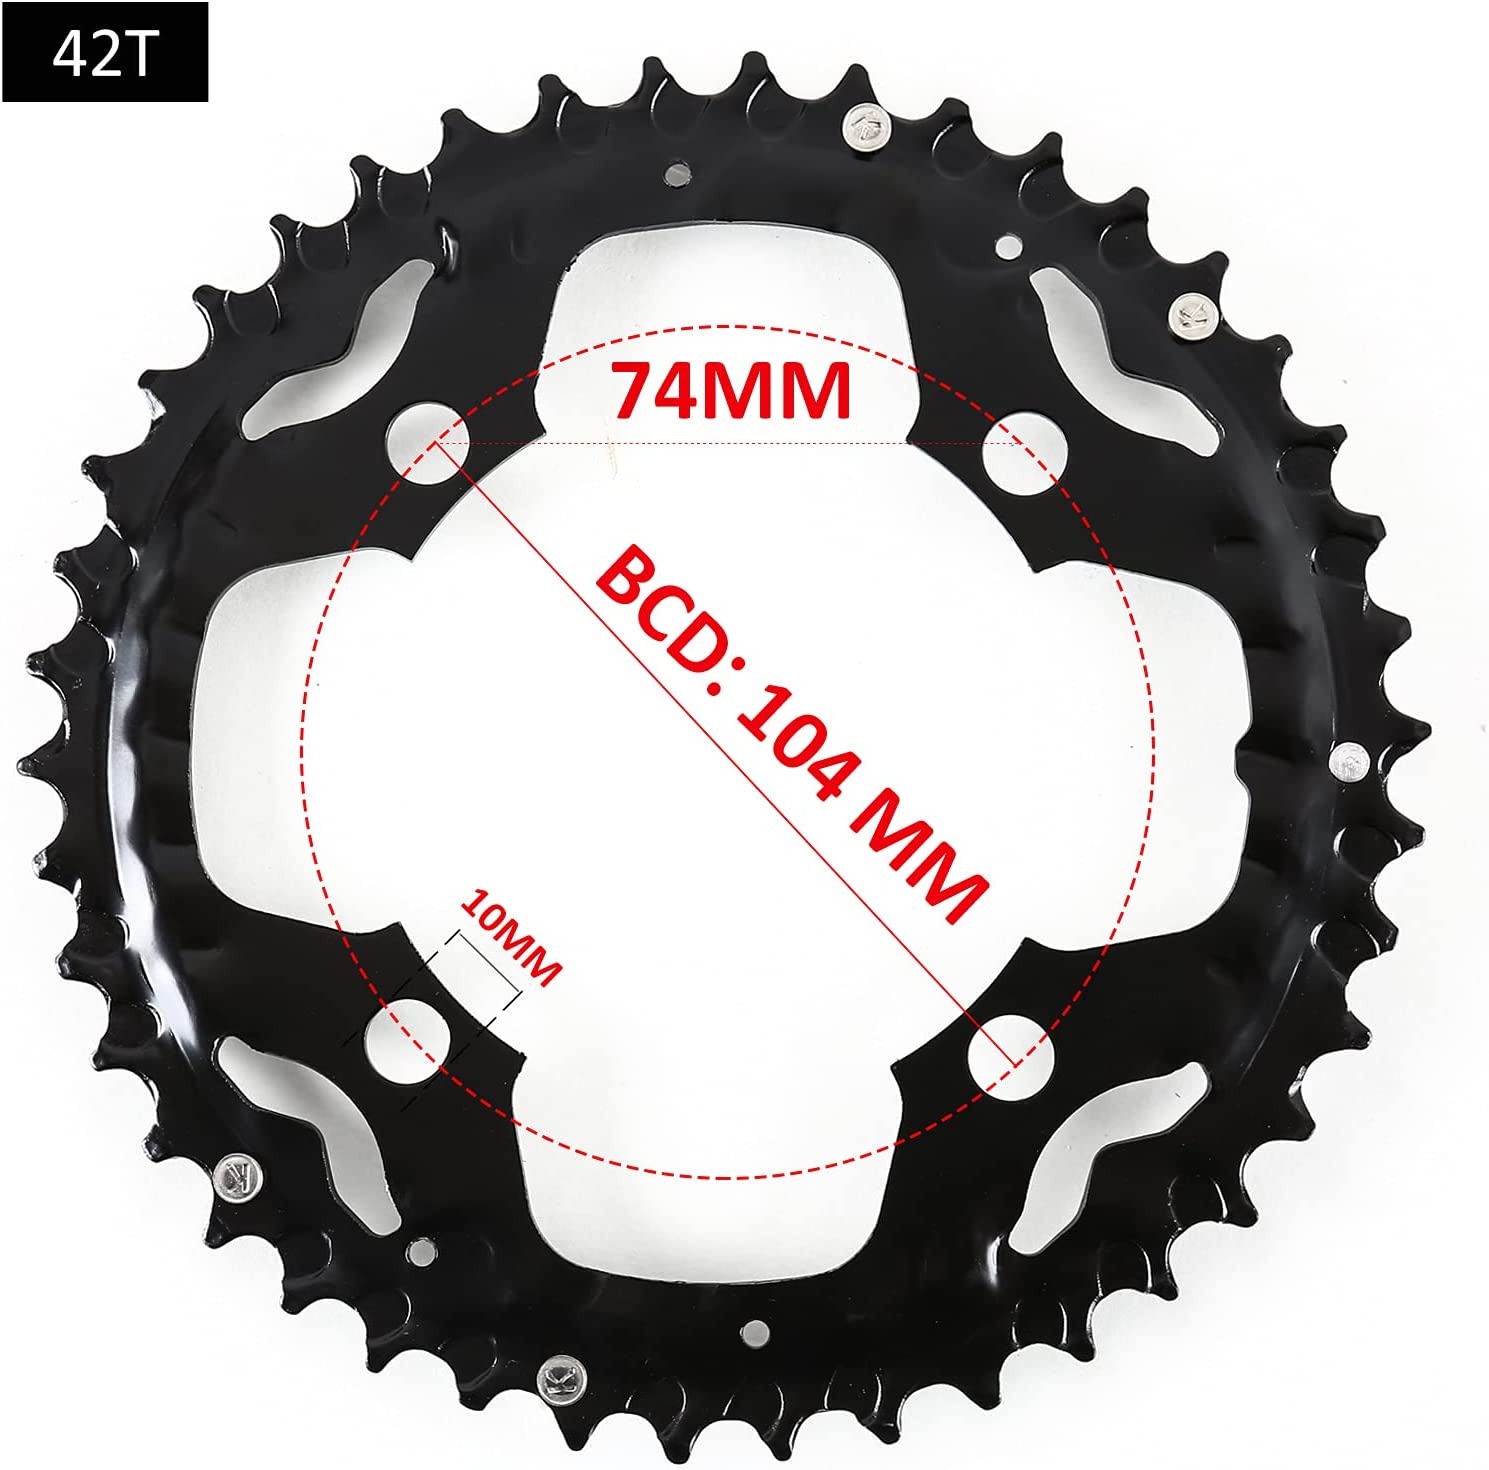
Step 2. Calculate the BCD
BCD stands for Bolt Center Diameter. This stands for the diameter of a circle as drawn right through the center of the hole on the crankset, usually measured in millimeters. It refers to the size of the mounting for chainrings. This must match for the chainrings and crank to fit properly. The most common BCDs for four bolt holes are 64mm, 80mm, 104mm, and 120mm. For five bolt holes, common BCDs include 74mm, 110mm, 130mm, and 135mm.
Many chainrings and cranksets usually have the BCD stamped right on them. If not, you’ll have to measure it.
Here are the methods for you to measure the BCD:
Method 1. Measure the Distance Between Opposite Diagonal Bolt Holes
This method works for cranksets with an even number of bolt holes. Position a caliper like this and place the lower jaws in the center of two diagonal bolt holes. Round the distance to the nearest millimeter. You can then check the measurement on a crib sheet like this from Sheldon Brown to get the chainring size and chainrings compatible with the crankset.
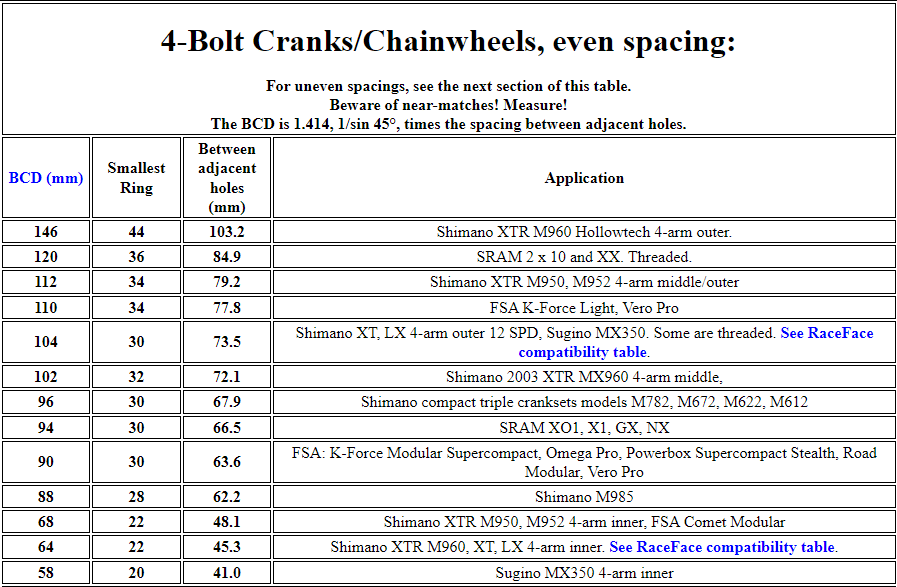
Method 2. Measure the Distance Between Adjacent Bolt Holes
This method works for cranksets with an uneven number of bolt holes. Take a ruler and place it across the adjacent bolt holes to measure the distance between the edges. You can also check the measurement on a crib sheet to get the BCD and compatible chainrings.
Now that you have your BCD, you can then search for a chainring with the same BCD for optimum compatibility.
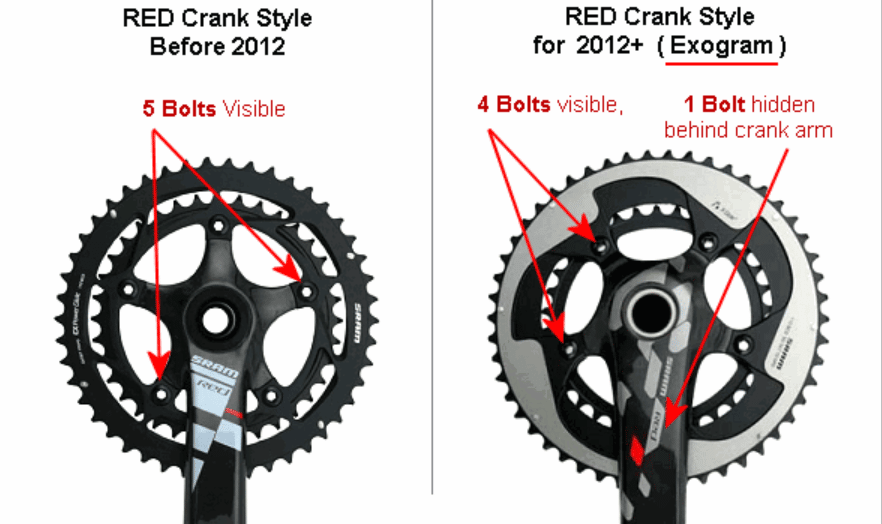
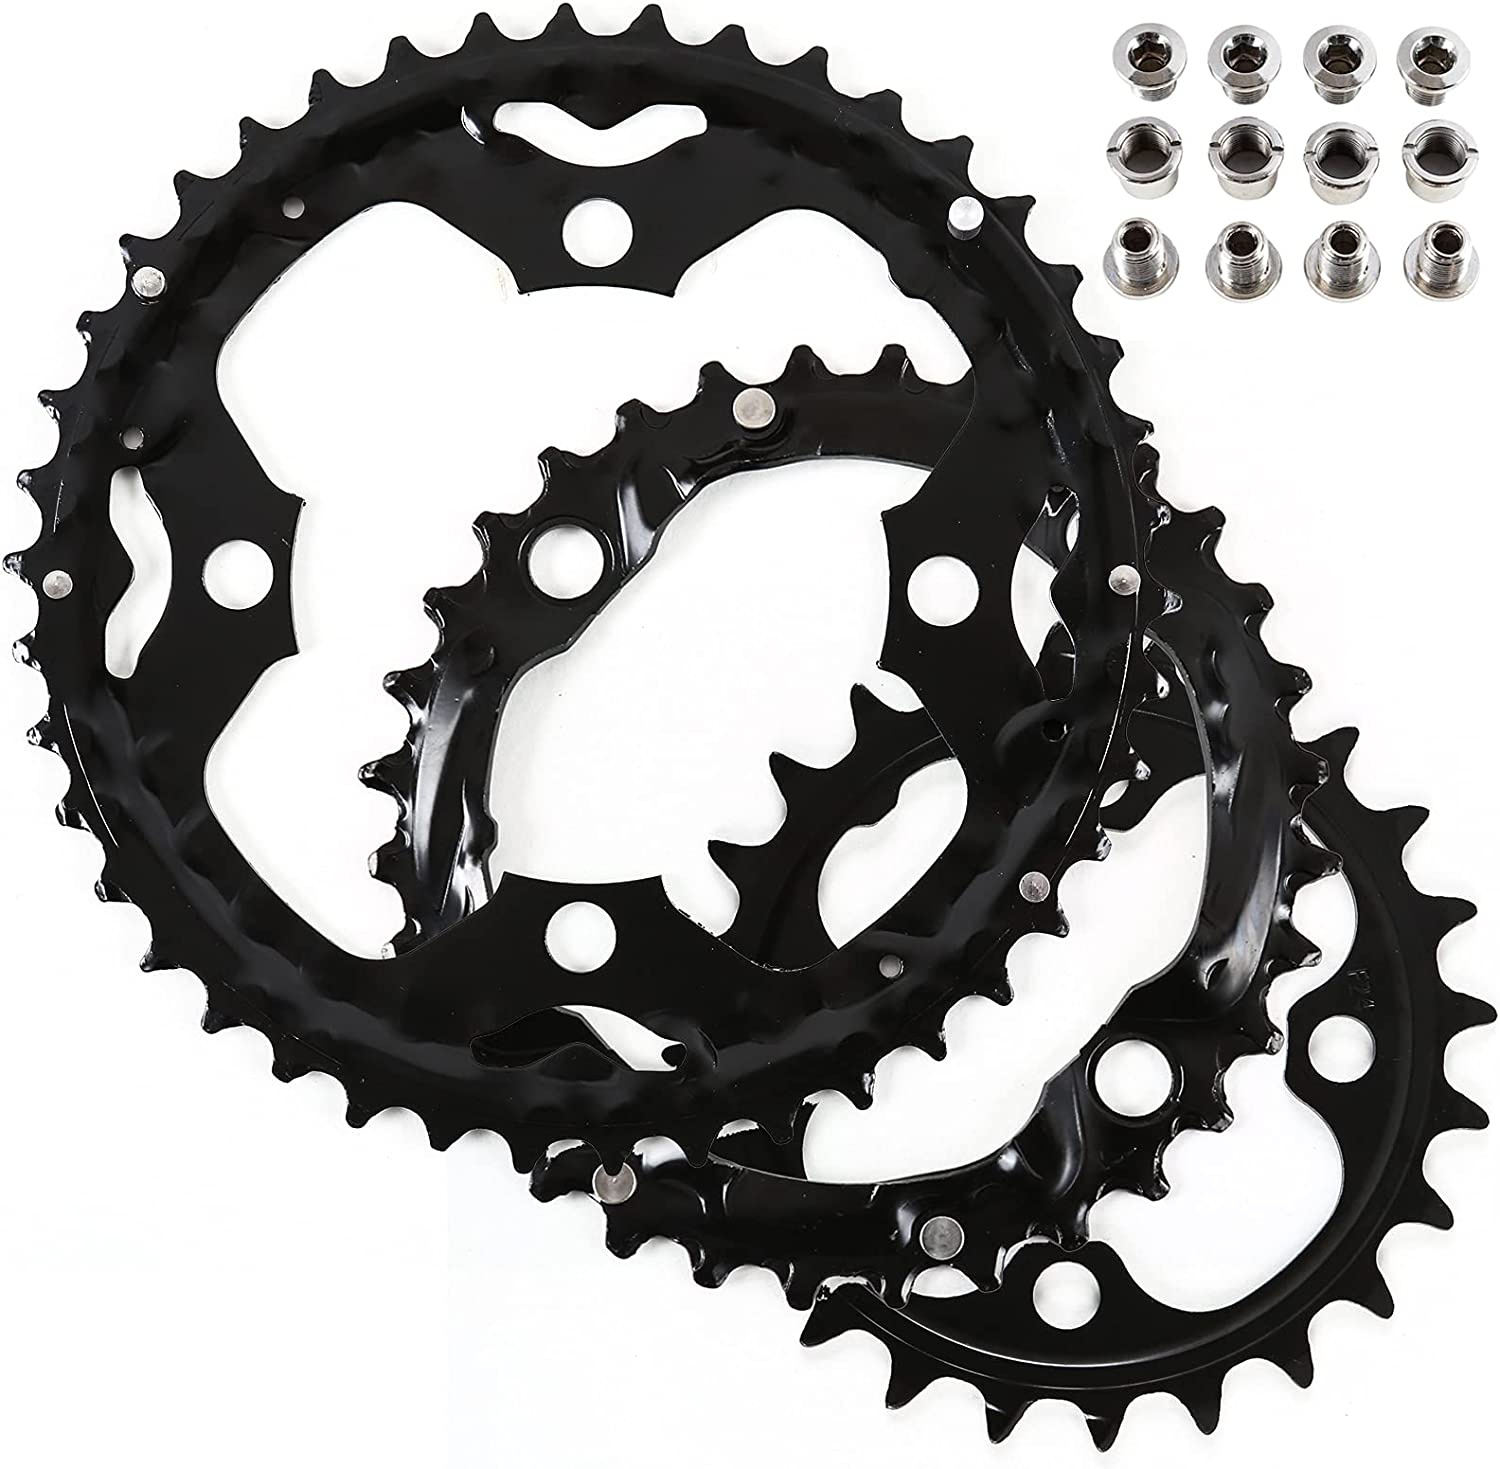
Step 3. Count the Bolts
Another factor to consider when purchasing your chainring is the number of bolt holes. Chainrings typically use either 4 or 5 bolts. Before getting a new chainring, count the number of bolt holes on your former chainring or your crank. You must have the exact number for your new chainring to fit with your crankset. Whether you’re getting a bigger or smaller-sized chainring, as long as you have the same number of bolts, fixing it should be easy.
Once you have the number of teeth, the BCD, and the number of bolts, you can take the measurements to a bike shop or online and find a good replacement chainring.