
Mountain Bike Wax vs. Chain Lube: Tips & Tricks to Choose the Right One for Your Needs
When it comes to bike maintenance, the type of lubricating agent you use is very important. Lubricating your mountain bike is essential for your bike's optimal performance and longevity. Failing to lubricate your bike components properly will wear them down faster and reduce the efficiency of your bike. As a result, you must choose a lubricating product that is suitable for your bike. There are two main bike lubricant types: bike wax and chain lube. In this article, we'll compare the differences between mountain bike wax vs. chain lube, suitability, and benefits to help you determine whether chain wax vs. chain lube will be ideal for you.
The difference between mountain bike wax vs. chain lube is that mountain bike wax is better for riding on harsh wet, dry, dusty, or dirty terrains. Mountain bike chain wax is cheaper and cleans the drive train better than chain lube. Chain lube is a long-lasting and fast-acting lubricating agent.
According to this article by Bike Radar proper use of lubricant increases the efficiency of a bike chain transmission, especially in harsh environments. Therefore, regular and proper lubrication is crucial to attain maximum drivetrain efficiency and durability. In addition to a lubricant, several other bike accessories can help increase your bike's longevity and efficiency. Our articles that discuss whether mountain bike fenders work and whether pedal straps are good, focus on two of these accessories.
Mountain Bike Wax vs. Chain Lube: What are Their Differences?
Mountain bike chain wax and lube are the most popular type of lubricants on the market, and each has its strengths and drawbacks.
Both chain wax and chain lube improve the durability and longevity of a bike chain by decreasing wear and tear due to friction. However, chain wax is more difficult to coat onto a chain and it is longer lasting than chain lube.
Chain wax like this is essentially solidified oil, usually petroleum-based or from paraffin wax as discussed by Healthline. Chain lube is usually made with Teflon or PTFE- polytetrafluoroethylene as explained by the Encyclopedia of Toxicology, base. They help to lubricate your chain to keep your rear tire rotating efficiently. Incidentally, if you're interested in getting new tires, check out our article on how to choose mountain bike tires for maximum grip to determine the best option for you.
These two products are different however, both chain wax and chain lube like this perform similar functions. First, they improve the durability and longevity of your bike chain by decreasing wear and tear due to friction. They also help to prevent rusting of your bike components as they have water-resistant and anti-corrosive qualities. By repelling water from moisture or rainfall, they prevent rusting of the metal parts of your bike, keeping it in good condition. In addition, they serve as cleaning agents for your chain and drivetrain by helping to dissolve any dust and dirt building up in crevices. By performing these functions, they both help your bike run seamlessly to provide the best riding experience.
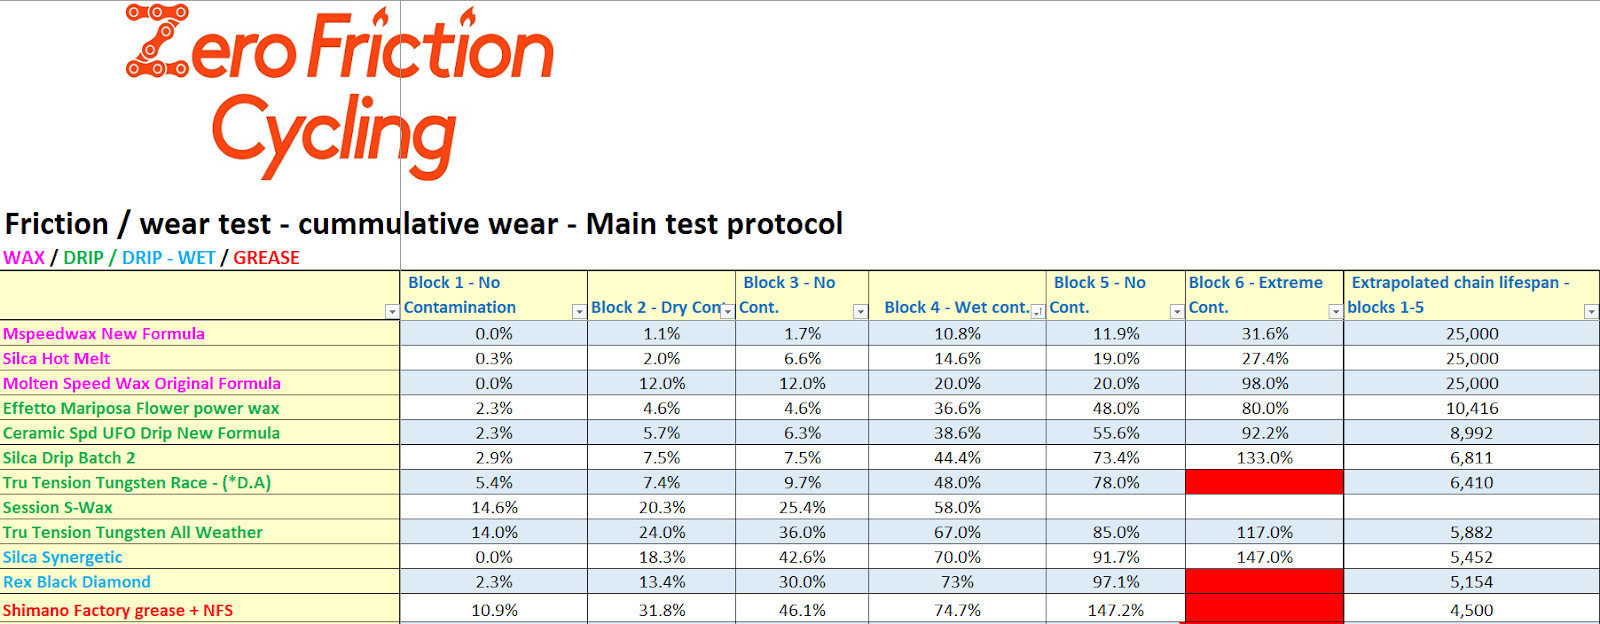
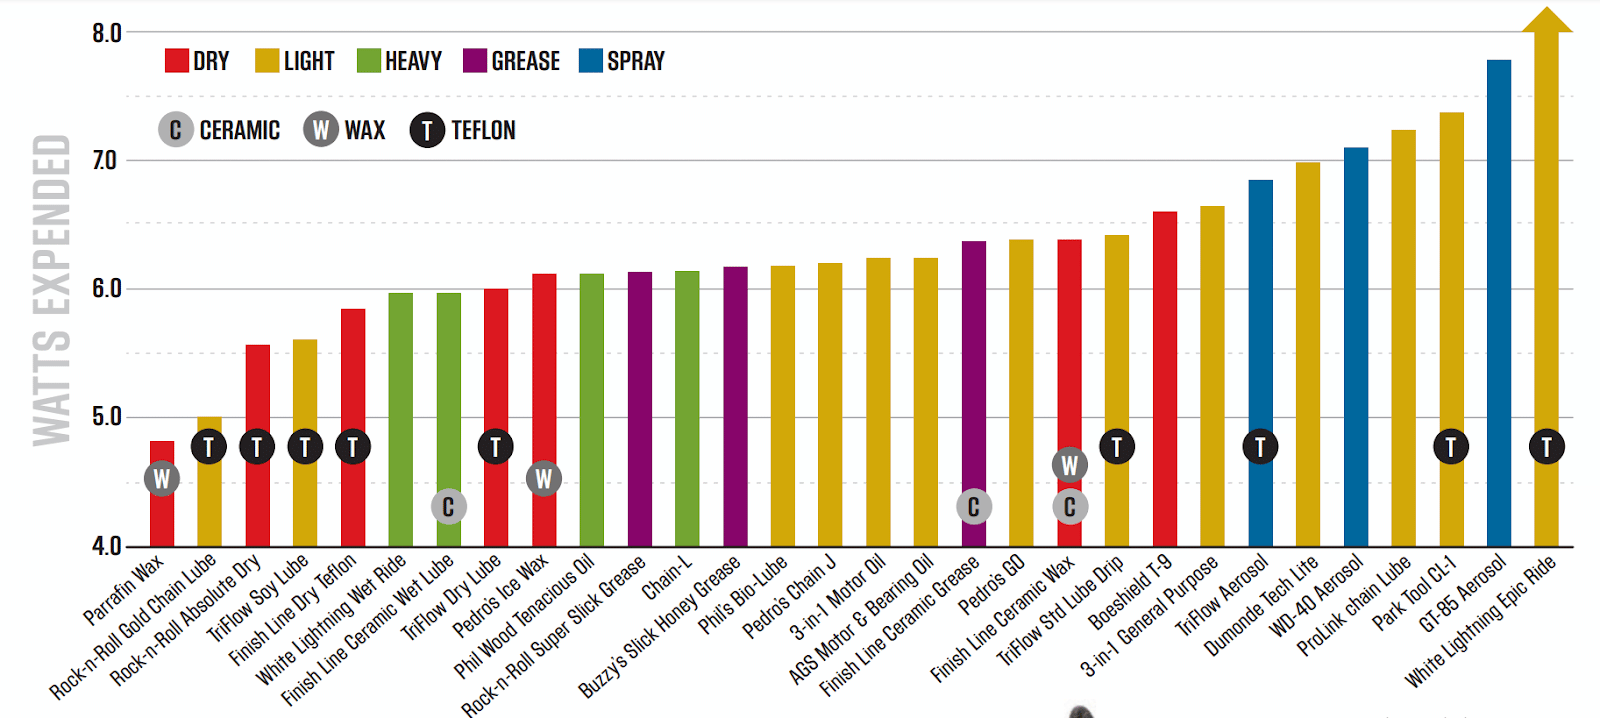
Although chain lube and wax have the same functions, they are also quite different. Knowing the differences between the two options will help you in making a decision on which to use. For more information on the best type of lubricant for your riding conditions, check out these test results from Zero Friction Cycling. Here are the major differences between chain lube and chain wax:
Difference 1. Chain Lube can Be Dropped on a Chain, and Chain Wax Must Be Coated On
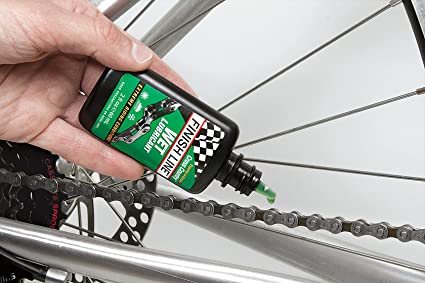
The major difference between chain lube and wax is the form in which they are made. Chain lube has an aerosol or oil drip form like this, making it easier and faster to apply. When you want to lubricate your chain or any other movable part of your bike, all you need to do is direct the canister and spray or drip the lube onto the component. As a result, it is less time-consuming. In addition, because of its form, the lube can reach the hidden crevices of your chain. However, you can also miss when spraying the can and create a mess when lubricating. There is also the danger of overlubricating the chain with oil lube, leading to the chain falling off frequently. Read through our article on how to easily fix a mountain bike chain that keeps coming off if you're experiencing this problem.
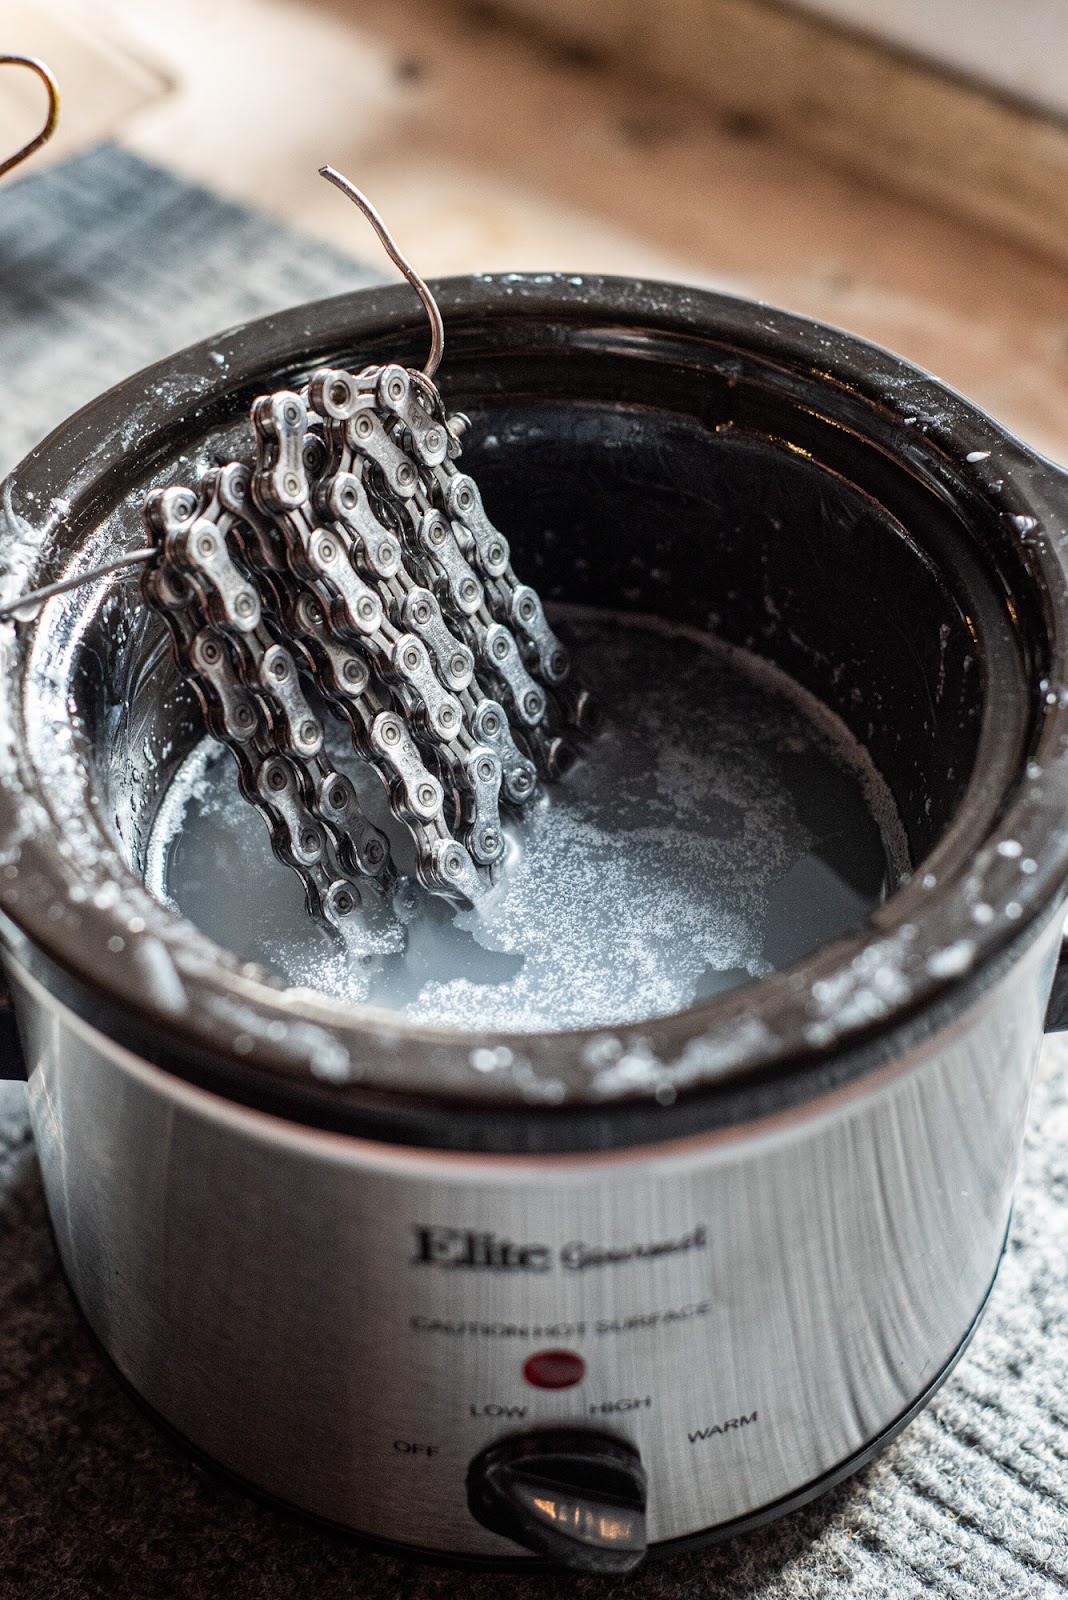
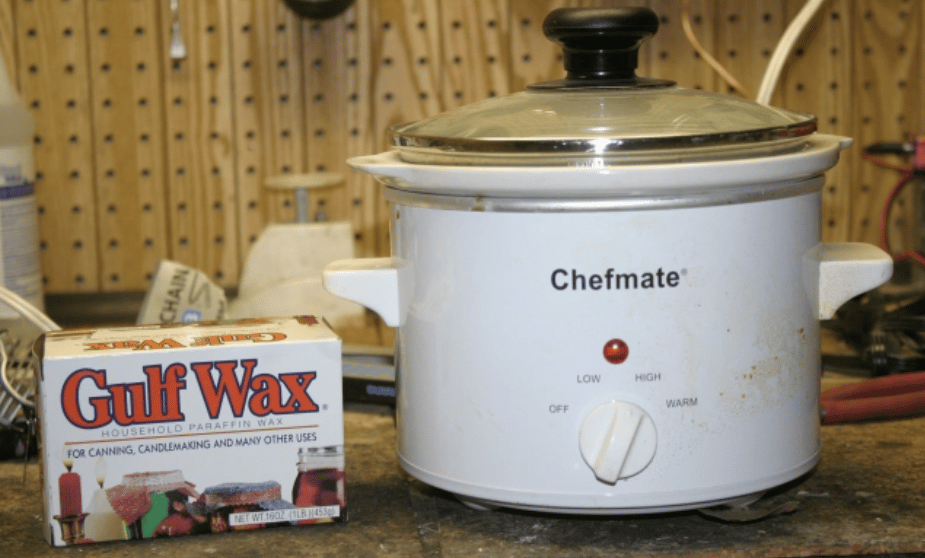
On the other hand, chain wax like this usually has a paste form, which can be applied using a brush applicator on whichever part of your bike you wish. Preparing a chain before waxing and manually brushing the wax on to coat the components is more time-consuming. However, the process itself is not difficult. Also, it is not as easy to apply it to the hard-to-reach parts of your chain. However, manually applying it makes it a more accurate option. A more efficient method of applying chain wax is to melt the wax in a slow cooker like this and soak the chain in it.
Difference 2. Reapply Lube Every 100 miles and Reapply Chain Wax Every 200 Miles
Another difference between mountain bike wax vs. chain lube is the application frequency. Chain lube should be reapplied every 100 miles for maximum efficiency, while wax should be reapplied every 200 miles. Chain wax tends to stay in place longer than lube, enabling the chain to stay efficient for longer periods. Therefore, although chain lube tends to reach the deeper parts of the chain faster, wax works its way in with time as well.
On a single application of chain wax, you can usually get over 200 miles (300 km) of blissful smooth-riding, according to this independent research carried out by Zero Friction Cycling. However, testing showed an increase in friction and wear around that point. Rewaxing every 200 miles or so will help keep your chain in optimal condition for a long time with little wear and tear. As a result, your chain’s lifespan will increase to about over 9000 miles (15000km). Compared to chain lube, with chain wax, you'll ride faster and longer, re-lubing your chain less.
Difference 3. Chain Wax Protects Against Drivetrain Damage and Extends the Life of the Chain More Than Chain Lube
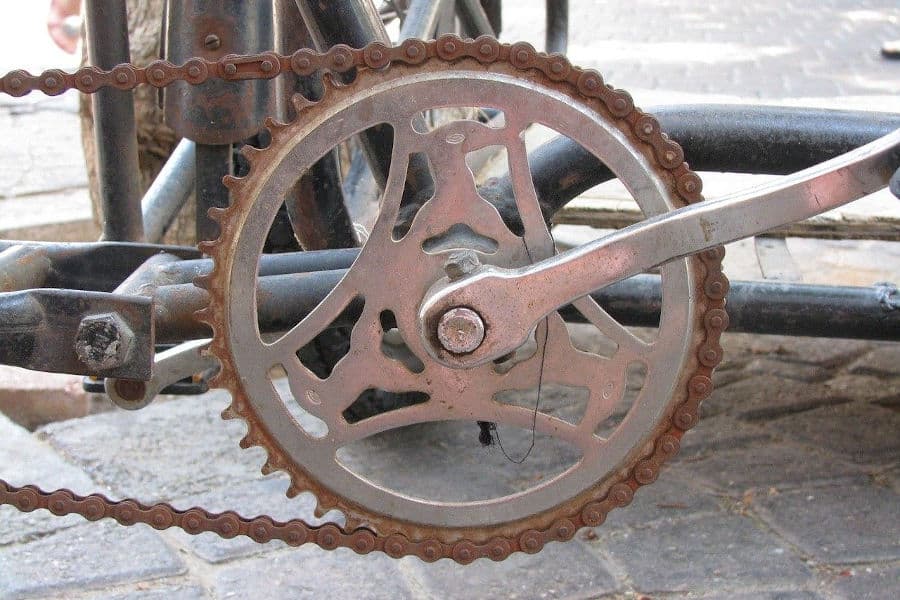
As this interview with Shimano by Bike Rumor details, lubricating your chain (and cleaning with neutral detergent) is an effective way of extending the lifespan of your gears and chain. Chain wax extends the lifespan of your chain longer than chain lube. This is because chain wax has a better resistance against water, sand, and dirt.
One of the biggest drawbacks of chain lube is that while it protects against friction, it doesn't do much against dirt and debris. In addition, chain lube has an adhesive quality that makes it attract dirt which can build up in the recesses of your components. The built-up dirt forms a grimy paste that lets your chain and drivetrain wear out faster. Typical chain lube also has less anti-fling properties, meaning it doesn't hold as well to the surface of your chain and so gets flung across the road when riding at high speeds. As a result, chain wax is usually preferred in dusty and dirty terrains.
You might also consider fitting a bike fender to help protect your drivetrain components in those harsh conditions. You can read through our article on how to install a mountain bike fender and how to install mudguards on a mountain bike to learn more.
How to Decide What Lube to Use on a Mountain Bike Chain
Chain maintenance begins with proper chain lubricant selection and use. Therefore, it is important you take the time to think about your needs and circumstances and choose a lubricant tailored to your needs.Mountain bike wax vs. chain lube both have pros and cons, so choosing one depends on your preferences and what you value in your riding experience. In addition, there are several factors you can consider to make the best choice for your particular ride.
Use chain wax if you ride frequently in wet or muddy conditions because it stays on the chain longer and is more water resistant. Chain lube is better for recreational cyclists that ride in sunny weather since they don’t ride as often.
Let's discuss these factors in more detail:
Factor 1. Different Lubes Perform Better Under Different Riding Conditions
One of the biggest factors determining the type of lube to go for is your riding conditions. Dry weather can be mild and not require an agent that's too strong. A simple, easy-to-use lube will usually suffice. On the other hand, wet weather brings a lot of muck, water, and grime, so a product like this that will not only last longer but also repel dirt and water is essential. Another accessory to pack for wet weather riding is a pair of bike gloves like this. Our article on how to choose mountain bike gloves with grip will be useful to you when preparing for wet weather.
This factor is particularly important as different lubes work best in dry or wet weather. For instance, some of the best lubes would vanish completely after an extended period in the rain, while others can't bear a week of dry-weather riding.
Muddy terrains will also need a water-resistant lubricant to help protect against rust and corrosion. In addition, you will also require a product that can get into the crevices of the chain to protect against mud seeping into those regions. Sandy terrains require a lubricant that doesn't absorb dirt and dust but rather repels them.

Factor 2. Recreational Cycling and Racing Require Different Lubes
Depending on the type of activity, your choice of lube will also differ. If you're riding recreationally for fun, then a fast-acting lube that will allow you to start riding in minutes will be a better option. Rather than spending time trying to coat a lubricant on every part of your bike, a product that you can quickly apply is much more practical and convenient.
On the other hand, for pro-riders involved in racing, it is best to take the time to apply a long-lasting, high-quality lubricant. As you'll be riding at high speeds, a product that has great anti-fling properties and will stick longer to your bike components, is a better option. Even if the process is time-consuming, it is worth it for the maximum protection of your bike. You also need a product that increases the efficiency of your chain and drivetrain, helping the components waste fewer watts.
Factor 3. Short and Long-Distance Rides Require Different Lubes
If you're only planning to ride a short distance, then you can quickly apply a less time-consuming lubricant, as long as it works well. However, the best lubricant for long distances will be one with longer application intervals. This means you should get a product with lubricating effects that last for extended periods, meaning you'll have to stop less to reapply the lube. Such lubricant will be worth the initial stress in the long run. As a result, you'll be able to ride faster and longer, providing a smooth biking experience.
If you're riding long distances and looking for tools to pack together with your chain lubricant, check out our article on mountain bike tool kit essentials. Our related article on mountain bike tool bag ideas will also come in handy.
However, regardless of the type of lubricating agent you go with, you need to make a few considerations to get the best product out there. First, the lubricant, whether mountain bike wax vs. chain lube, must show high resistance to water. It must be anti-rust and anti-corrosion. This not only ensures the product sticks better and longer but also protects your chain from rust.
The lubricant must also show high resistance to dust. The best products repel dust rather than attract it, ensuring the lubrication effects last for extended periods. Lastly, the lubricating product must be able to stick to the chain well, even at high speeds. These qualities are especially helpful in regions with high humidity and wetness. So, ensure you get a chain lube or chain wax product with these properties.

You might also find interest in learning how to choose the right mountain bike handlebar upgrades. If so, be sure to check out our related article for more tips and tricks.
Is Chain Wax Better Than Lube? - What are the Benefits?
There has been a lot of research and many experiments to determine which is better between chain wax and chain lube.
The benefits of chain wax are the ability to wax several chains at once, less frequent drivetrain cleaning, and cost-efficiency.
One, in particular, is this extensive study by Velo News and Friction Facts. Their study concluded that chain wax consistently outperforms chain lube. In terms of efficiency, they found even simple paraffin wax to be faster than the best bike lube under both ideal and harsh conditions. In terms of longevity, chain wax remained completely resistant to water, sand, and dirt and was even faster after riding in grime for an hour. This video tutorial by Cycling Tips explains exactly how to wax your mountain bike chain.
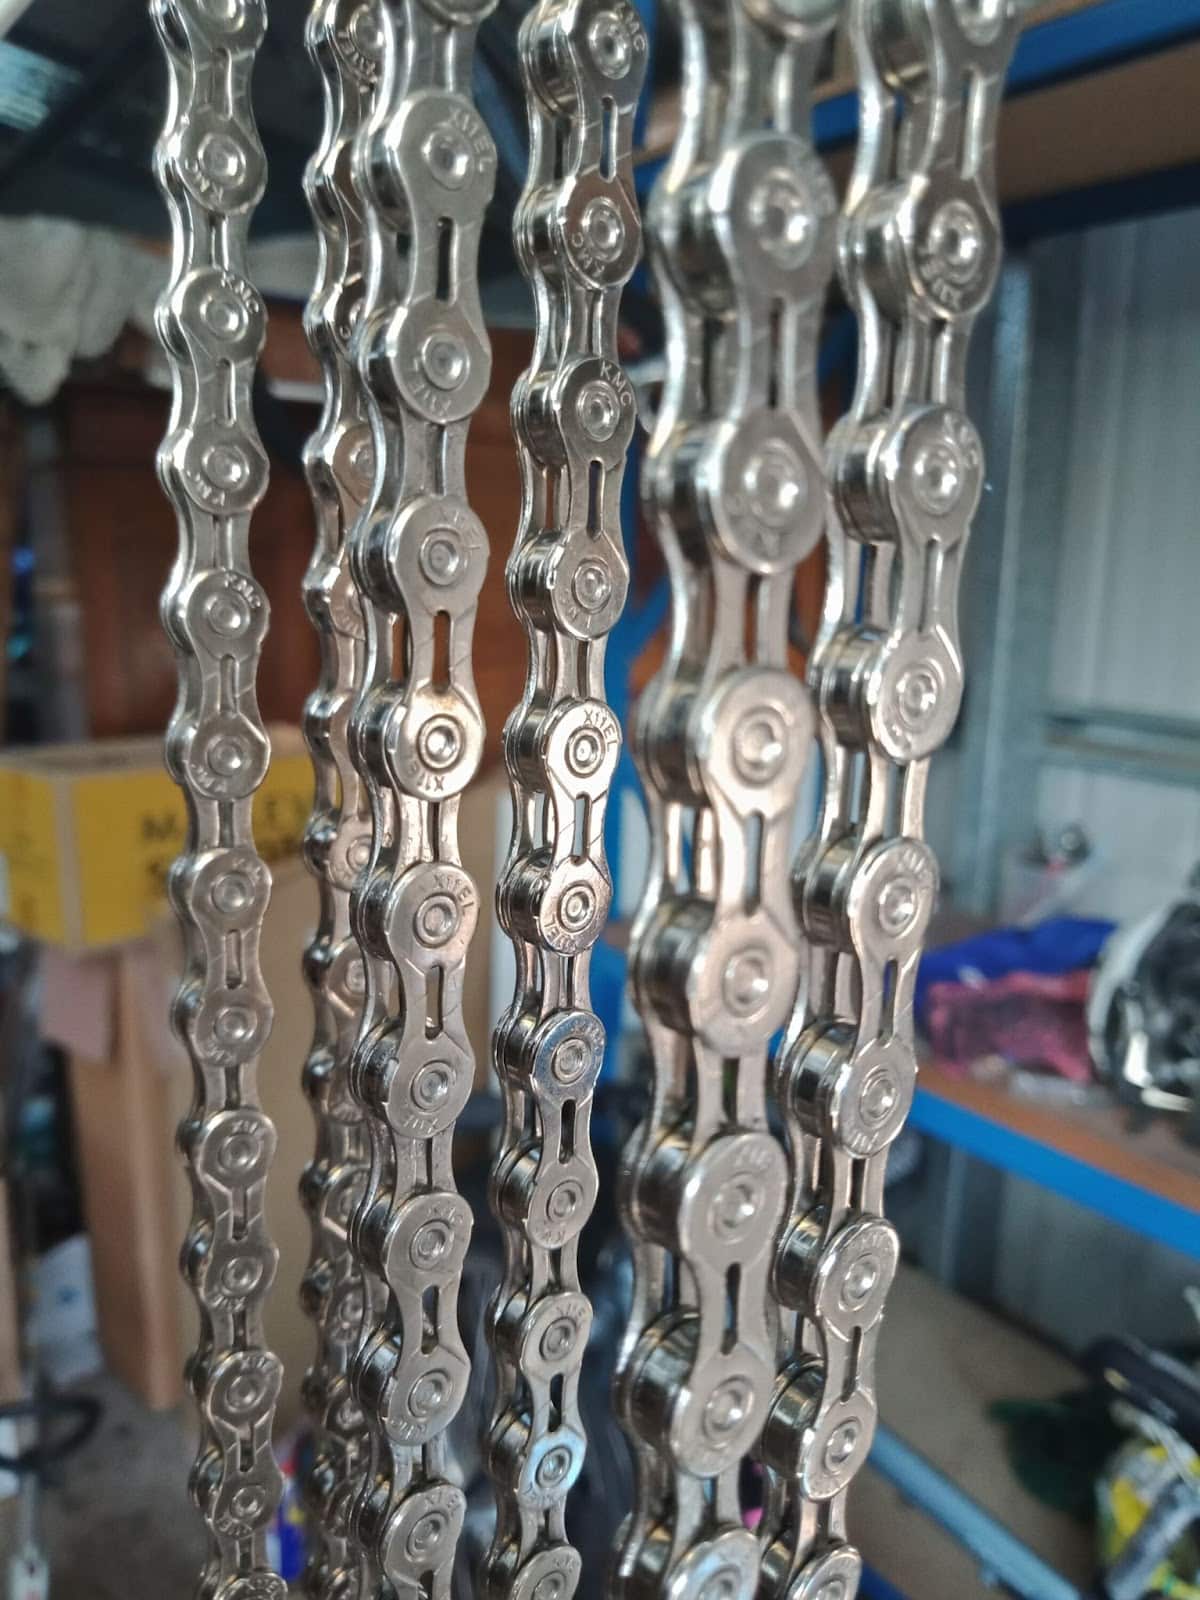
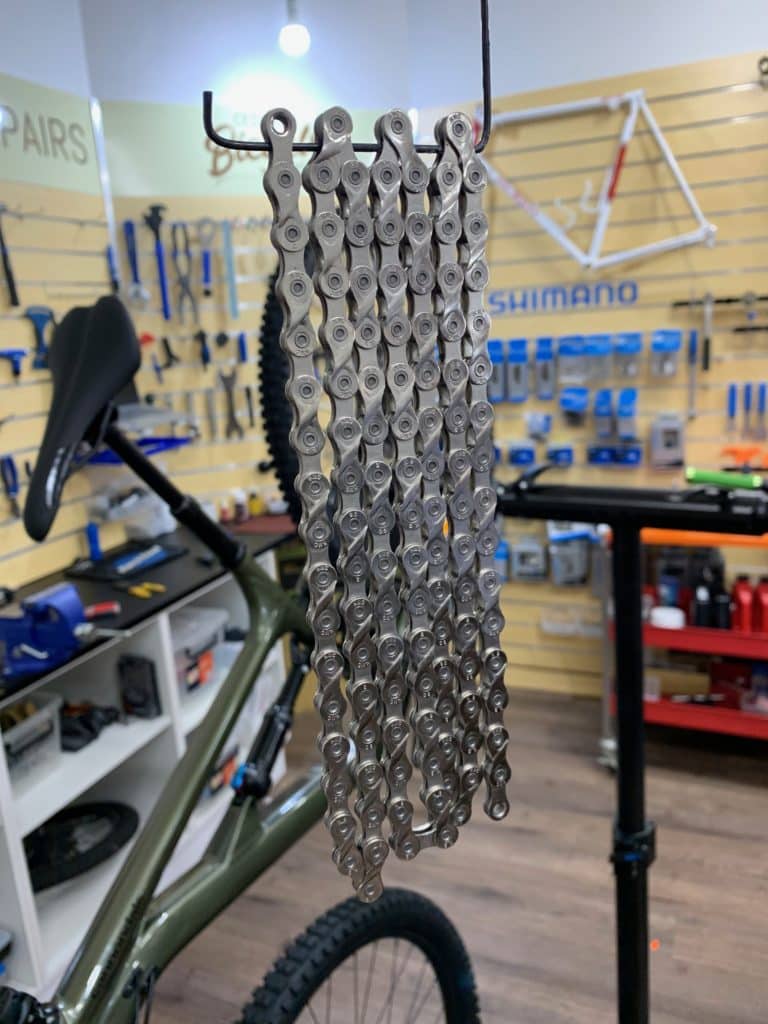
Benefit 1. You Can Wax Several Chains at Once
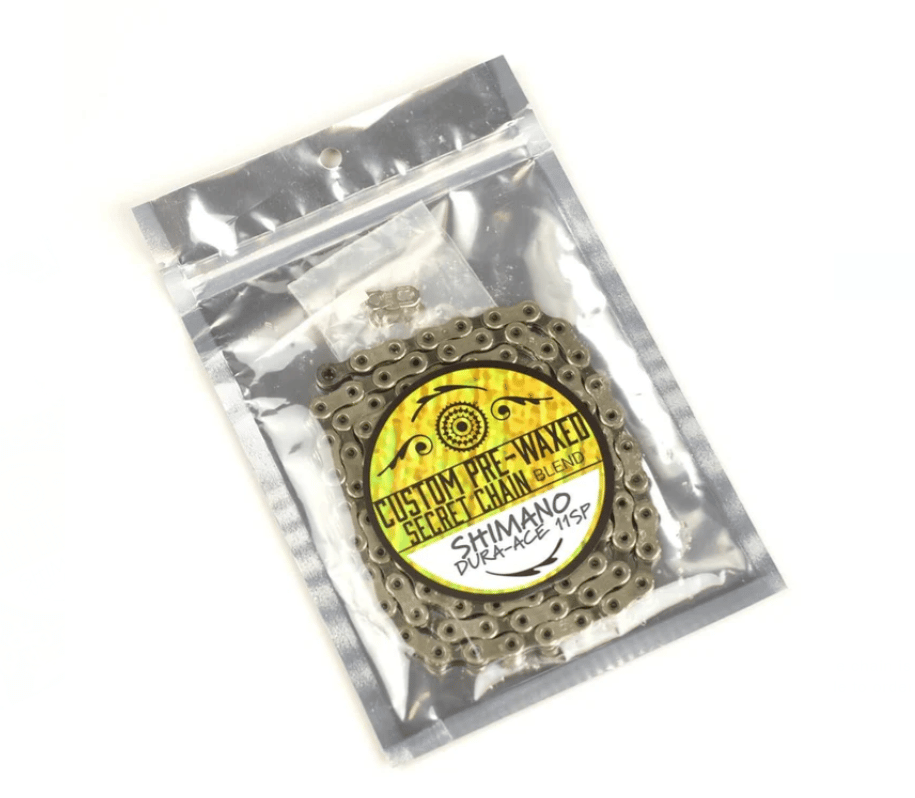
One of the benefits of chain wax is the fact that you can wax several chains at once. Because of the intensive application process of the chain wax, many riders are usually discouraged when it comes to waxing their chains. However, by waxing several chains at once, you can easily maximize effort and save time on rides. Re-lubing, in that case, is as quick and easy as switching a chain. With chain wax, you can prepare batches of chains all at once, which you then rotate as the wax wears off each. Some manufacturers even sell pre-waxed chains like this. In contrast, chain lube can only be applied one at a time.
Although the process of waxing your chain is quite time-consuming, it is not difficult. Contrary to popular belief, waxing is not an exhausting, arcane process that requires a lot of work. You can easily start and repeat the process with a few basic tools and time. In addition, due to the efficiency of chain wax, you'll not need to rewax as often as with chain lubes.
Benefit 2. Chain Wax Protects the Chain Better Than Chain Lube so You can Clean the Drivetrain Less Often
Another benefit of using a chain wax over a chain lube is that the chain wax serves as better protection for your chain and drivetrain. This effect is due to the form of the chain wax. Chain wax solidifies at standard temperatures, and as a result, it acts as a barrier against dirt, dust, and grime. These contaminants won't be able to stick to the wax. Before they can slow the bike down and wear any component, they are simply shed off. In addition, rewaxing your chain easily flushes out any contaminant on the insides of the chain.
On the other hand, chain lube doesn't form a solid barrier – they only coat the internal parts of the chain. As a result, dirt usually sticks to the lubed chain, building up inside the rollers and forming a paste that wears down the chain.
Due to these effects, you'll have less need to clean your drivetrain often with chain wax than chain lube. Waxing your chain leads to a clean, easy-to-maintain drivetrain. Your bike will stay cleaner for much longer, and your drivetrain will operate at maximum efficiency. Whatever time you lose in waxing will be regained in cleaning. Additionally, waxing results in a much cleaner chain than oiling or greasing.
Even the best drip or spray lubes don't come close to the dirt-repellent properties of chain wax. With chain wax, your fingers won't get dirty and grimy, and you won't get any imprint or tattoo from your lubricated components on your calf while riding. Your bike will be able to ride through just about anything without squeaking or squealing, remaining dry, clean, and efficient.
Benefit 3. Chain Wax is Cheaper Since it Needs Less Reapplications
Using chain wax is also more cost-efficient than chain lube, as wax extends the overall lifespan of the chain longer. The dirtier your chains and other drivetrain components are, the quicker they wear out. Therefore, by resisting dirt, dust, grime, water, and rust, chain wax preserves the efficiency and life of the chain. As a result, you'll not need to reapply the lubrication or change out your chains often. You can make use of a chain wear checker like this to know when it is time to replace your chain.
Good chains like this can be quite pricey, and other drivetrain components are even more expensive. With wax, you'll be saving money on chains and other replacement parts as your bike will stay cleaner with only half of the maintenance needed for chain lubes. You can expect at least double the lifespan of your components. In addition, you'll be saving time and money on cleaning/solvent disposal.
Chain lubes are simply not as efficient as chain wax and can also be quite expensive, depending on the brand. Although chain lubes are easier to apply in the short term, it is more difficult to achieve the same sort of effects as when using chain wax. In addition, it would require more effort and solvent costs to fully flush and reset every ride. In conclusion, chain wax is the cheapest overall.
Benefits of Mountain Bike Chain Lube
Even though mountain bike wax is a great product, chain lube is still popular and is used regularly.
The benefits of mountain bike chain lube are it is good for wet environments and is easy and quick to apply.
So you can keep on using chain lube for your mountain bike chain and here is why:
Benefit 1. Good for Wet Environments
Chain lube is good for wet environments as it doesn't come off as easily when driving through waterways. In addition, it has good water-repellent qualities that help prevent rust and corrosion in your chain, ensuring it remains in good condition.
Benefit 2. Chain Lube is Easy and Quick to Apply
Chain lube is incredibly easy and quick to apply due to its spray, aerosol, or drip form. For cases where you want to use your mountain bike as soon as you lubricate the chain, chain lube is the better option. Applying it is less time-consuming as you only need to drip or spray it onto the surface. It also tends to penetrate the deeper parts of your chain, efficiently lubricating the chain. You don't need to bust out a crock-pot whenever you want to re-lube your chain.
Materials Needed to Switch to Mountain Bike Wax from Chain Lube
| Material | Use | Example | Cost |
| New Bike Chain | To replace the old chain and help propel the bike forward by transmitting power from the pedals to the rear wheel. | Sram Mtb Bike Chain | $205 |
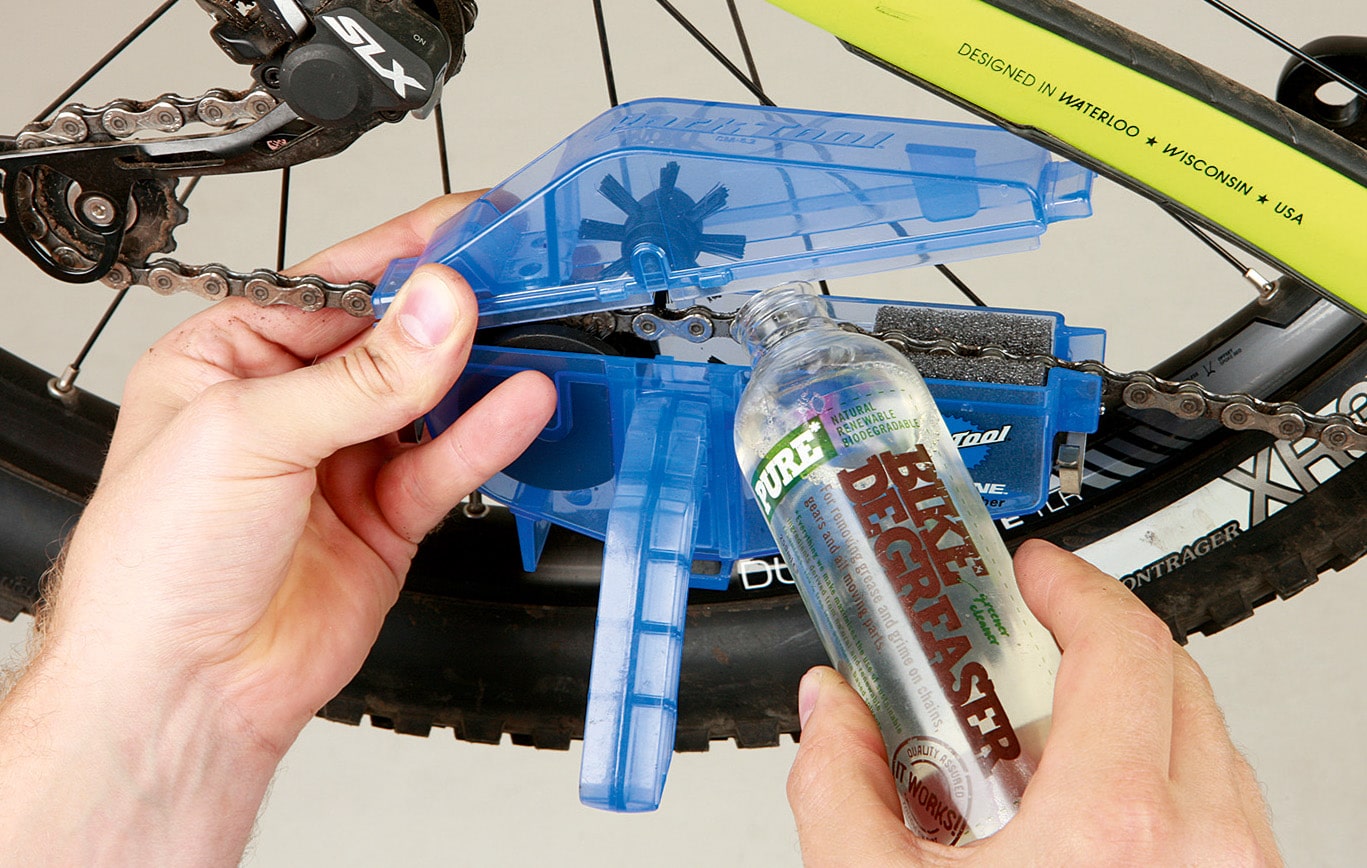
| Degreaser | To remove any grease and grime from all moving parts of the drivetrain. | BioDegreaser | $10 |
| Covered Container | To fill with degreaser for submerging the chain during the degreasing process.Can also be filled with alcohol to soak the chain. | Plastic Storage Container | $5 |
| Isopropyl Alcohol | To remove any residue film left from the degreasing process so that the new lube has direct access to the chain metal. | Isopropyl Alcohol Cleaner | $20 |
| Rag | Used to wipe the chain dry after applying degreaser and alcohol. | Lint-free Cotton Rags | $10 |
| Gloves | To protect your hands while handling the degreaser, alcohol, and wax. | Black Vinyl Disposable Gloves | $10 |
| Cleaning Kit | For brushes and other chain cleaning tools. | Bike Cleaning Kit | $40 |
| Bike Chain Wax | To lubricate the moving parts of the chain to reduce friction, increase efficiency and protect against dirt and rust. | Silica Hot Melt Bike Chain Wax | $45 |
| Swisher Tool | To submerge and shake the chain in the wax bath.Also used to lift the chain out of the cooker after waxing. | Molten Speed Wax Chain Swisher Tool | $20 |
| Slow Cooker or Pot | To melt the chain wax for easy application to the chain. | Crock Pot Slow Cooker | $50 |
| Master Link Pliers | To disengage and connect chains using quick links. | Park Tool Master Link Pliers | $20 |
| Chain Tool | To disengage and connect chains using connection pins. | Universal Bike Chain Tool | $10 |
| Quick Links | Function as outer links to connect and disconnect chains easily and quickly. | Chain Master Links for Bike | $10 |
| Connection Pins | To attach connecting links for easy attachment and separation of chains. | Shimano Bicycle Chain Pins | $15 |
Related articles:
How to fix a mountain bike seat that keeps sliding down
How to Switch to Wax Lube From Oil Lube
One common misconception when considering mountain bike wax vs. chain lube, is that waxing is a complicated and difficult process. However, that is simply not true. Although waxing takes a bit of time, the steps are easy and straightforward. In addition, the time spent waxing the chain will end up being worth it in the end as the process is much more efficient and effective as a result. Waxing helps compensate for that time in the long run as you do not have to spend as much time cleaning your drivetrain.
To switch to wax lube from oil lube, first, start with a new chain, soak the chain in a degreaser, wipe the chain with alcohol, let the chain dry, melt the wax, submerge the chain, agitate the wax, hang to cool, and flex the chain.
Chain wax usually comes in the form of a paste which can be used to coat the chain or melted to soak the chain. If you've made up your mind to switch to wax lube due to the many benefits we highlighted above, below is a step-by-step guide on waxing your bike chain. You can watch this video by Global Cycling Network for a demonstration of the process.
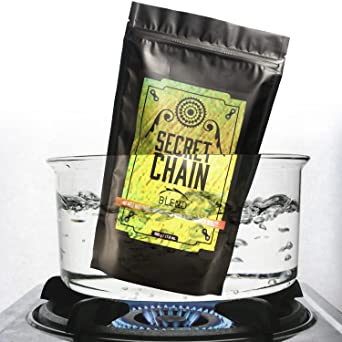
After waxing your chain, for future maintenance, all you need to do is simply listen for the drivetrain to get noisy. Then remove the chain and submerge it in a wax bath for an hour or so. This helps to save time as compared to chain lube. To re-wax your chain, simply pour boiling water into a container and submerge and agitate the chain gently. The hot water melts the wax and any other contaminants. Once cleaned, you can then go through the steps discussed below again.
Step 1. Start With A New Chain
Using a brand new chain like this is usually ideal for the initial waxing process. This is because it takes a lot of effort and the added cost of solvent to fully clean a used chain and prepare it for waxing. A new chain will be completely clean with no dirt, debris, or wear. The best chains for waxing will be from manufacturers like SRAM, Campagnolo, YBN, or Connex. It is best you choose a chain with surface coatings that are suitable for wax adhesion, thereby ensuring the optimal lifespan of the wax.

Additionally, when purchasing a new chain, you must ensure it is fully compatible with your drivetrain. You must check for the speed of transmission, gear combination, and any manufacturer's recommendations for the best, most compatible chains. You can check out this video by Western Bike Works for more information on chain compatibility. In addition, our article on mountain bike chain installation goes into further detail on choosing the best chain. Also, if you're using a chain with a quick link or connection pin system, check to see if the links or pins are reusable. If not, it is best to have extras on hand for future rewaxing. 10-speed chains like this and upwards usually have single-use links.
Remove the chain from its package and size it to its proper length. You can use several methods to get the correct length, such as comparing it to a previous chain, using a chain length formula, or the largest chainring and cog test. Next, remove any excess links using a chain tool. Once the chain is at its appropriate length, it's ready for degreasing.
Step 2. Soak the Chain in Degreaser
Use a strong citrus degreaser like this to clean the chain. This step is necessary as a new chain usually has grease and metal shavings residues from its manufacturing and assembly process. While the packaging grease is usable and quite durable, it is not as efficient for repelling dirt and dust from the chain. In addition, wax usually won't adhere well to the factory grease.
There are several methods for degreasing your chain. First, you can get a soft-bristled brush like from a set like this to brush the degreaser onto the chain. Then, put the degreaser fluid in an old bottle, keep dipping it in the brush, and apply it to the chain. You can also use a chain cleaning kit like this instead of a brush. The cleaning device uses rotating brushes, which will automatically scrub the chain's components, such as the inner links, outer links, and rollers. It is also less messy as it will better contain the fluids. This cleaning kit contains these tools and more. However, these methods won't really take care of the finer particles inside the rollers.
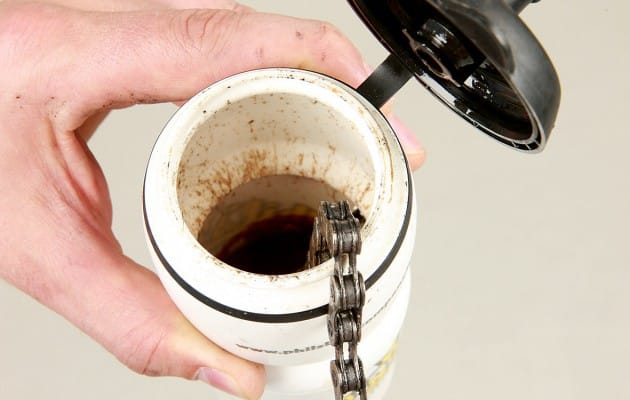
For the most detailed degreasing method, get a container to use as a cleaning bath like a plastic storage container. You can utilize any jar as long as it fits the chain. Fill the container with the degreaser and place the new chain in it. Tighten the lid and agitate the chain for about two minutes. Then drain the degreaser into a waste container – you'll usually see grease and metal shavings leftover. Rinse and wipe down the container with a rag. Again, fill the container with the degreaser and allow the chain to soak for a while. Then, shake the container thoroughly again.
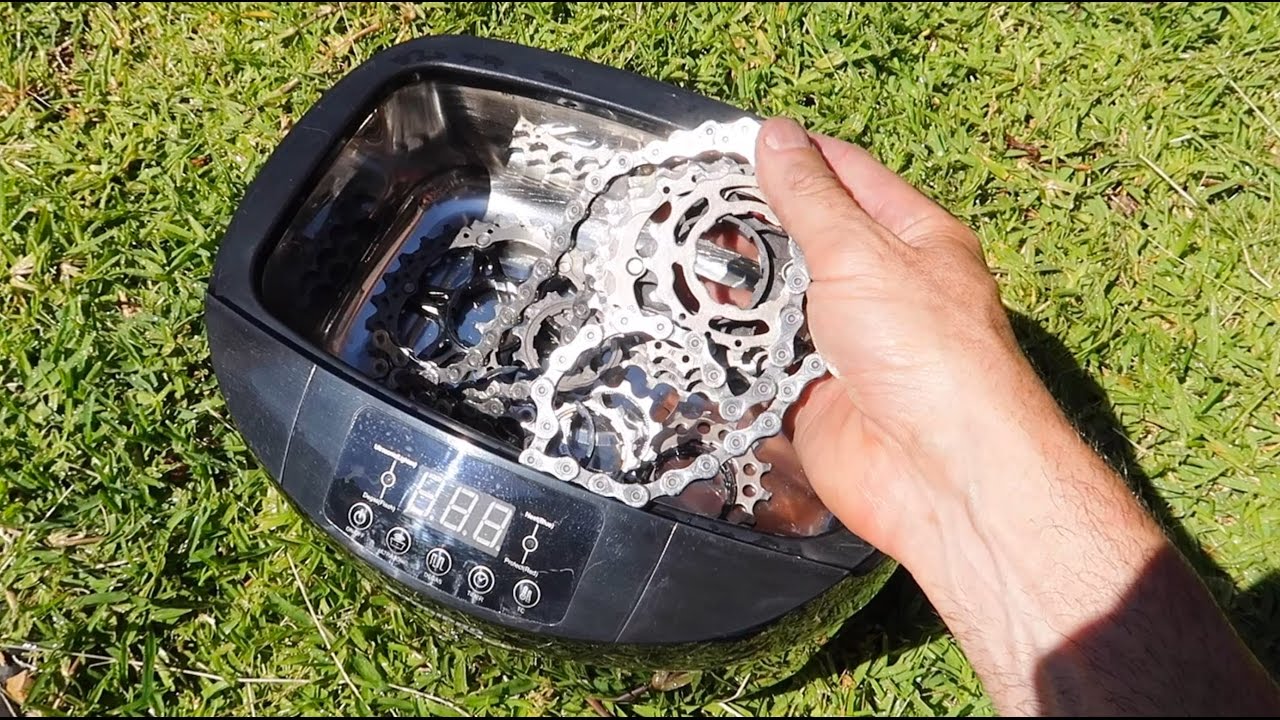
Ultrasonic cleaners like this are also increasingly popular for getting the chain clean. They make use of heat, solvent, and vibration to clean the plates and rollers of the chain. However, they're quite expensive and usually get varying reviews.
Step 3. Repeat Until the Degreaser Is Clean
Continue to shake the container vigorously. Once the degreaser fluid is dirty, empty the container, fill it with fresh degreaser, and repeat the process. Next, place the chain inside the container and shake. Repeat this process until the fresh degreaser stays clean on shaking. Finally, thoroughly rinse the jar with water and wipe with a rag. You can also wipe the chain with a rag.
Take note not to dump your degreaser into a gutter or down a sink. Instead, it is best to fill detergent bottles with the used degreasers and take them to a hazardous-waste facility when full. You can also try to filter the degreaser using coffee filter papers like this so that it can be reused.
Step 4. Wipe the Chain With Alcohol
Now that you have fully degreased your chain, you need to clean it with alcohol to prepare the chain for waxing. This is particularly important as degreasers tend to leave a heavy film behind. Denatured alcohol (methylated spirit) or isopropyl alcohol like this will help with this process. You can wipe the chain with the alcohol to remove any degreaser residue. You can also make use of a chain cleaning tool by simply replacing the degreaser with the alcohol. Then run the chain cleaning tool over the length of the chain and let the rotating brushes do their work.
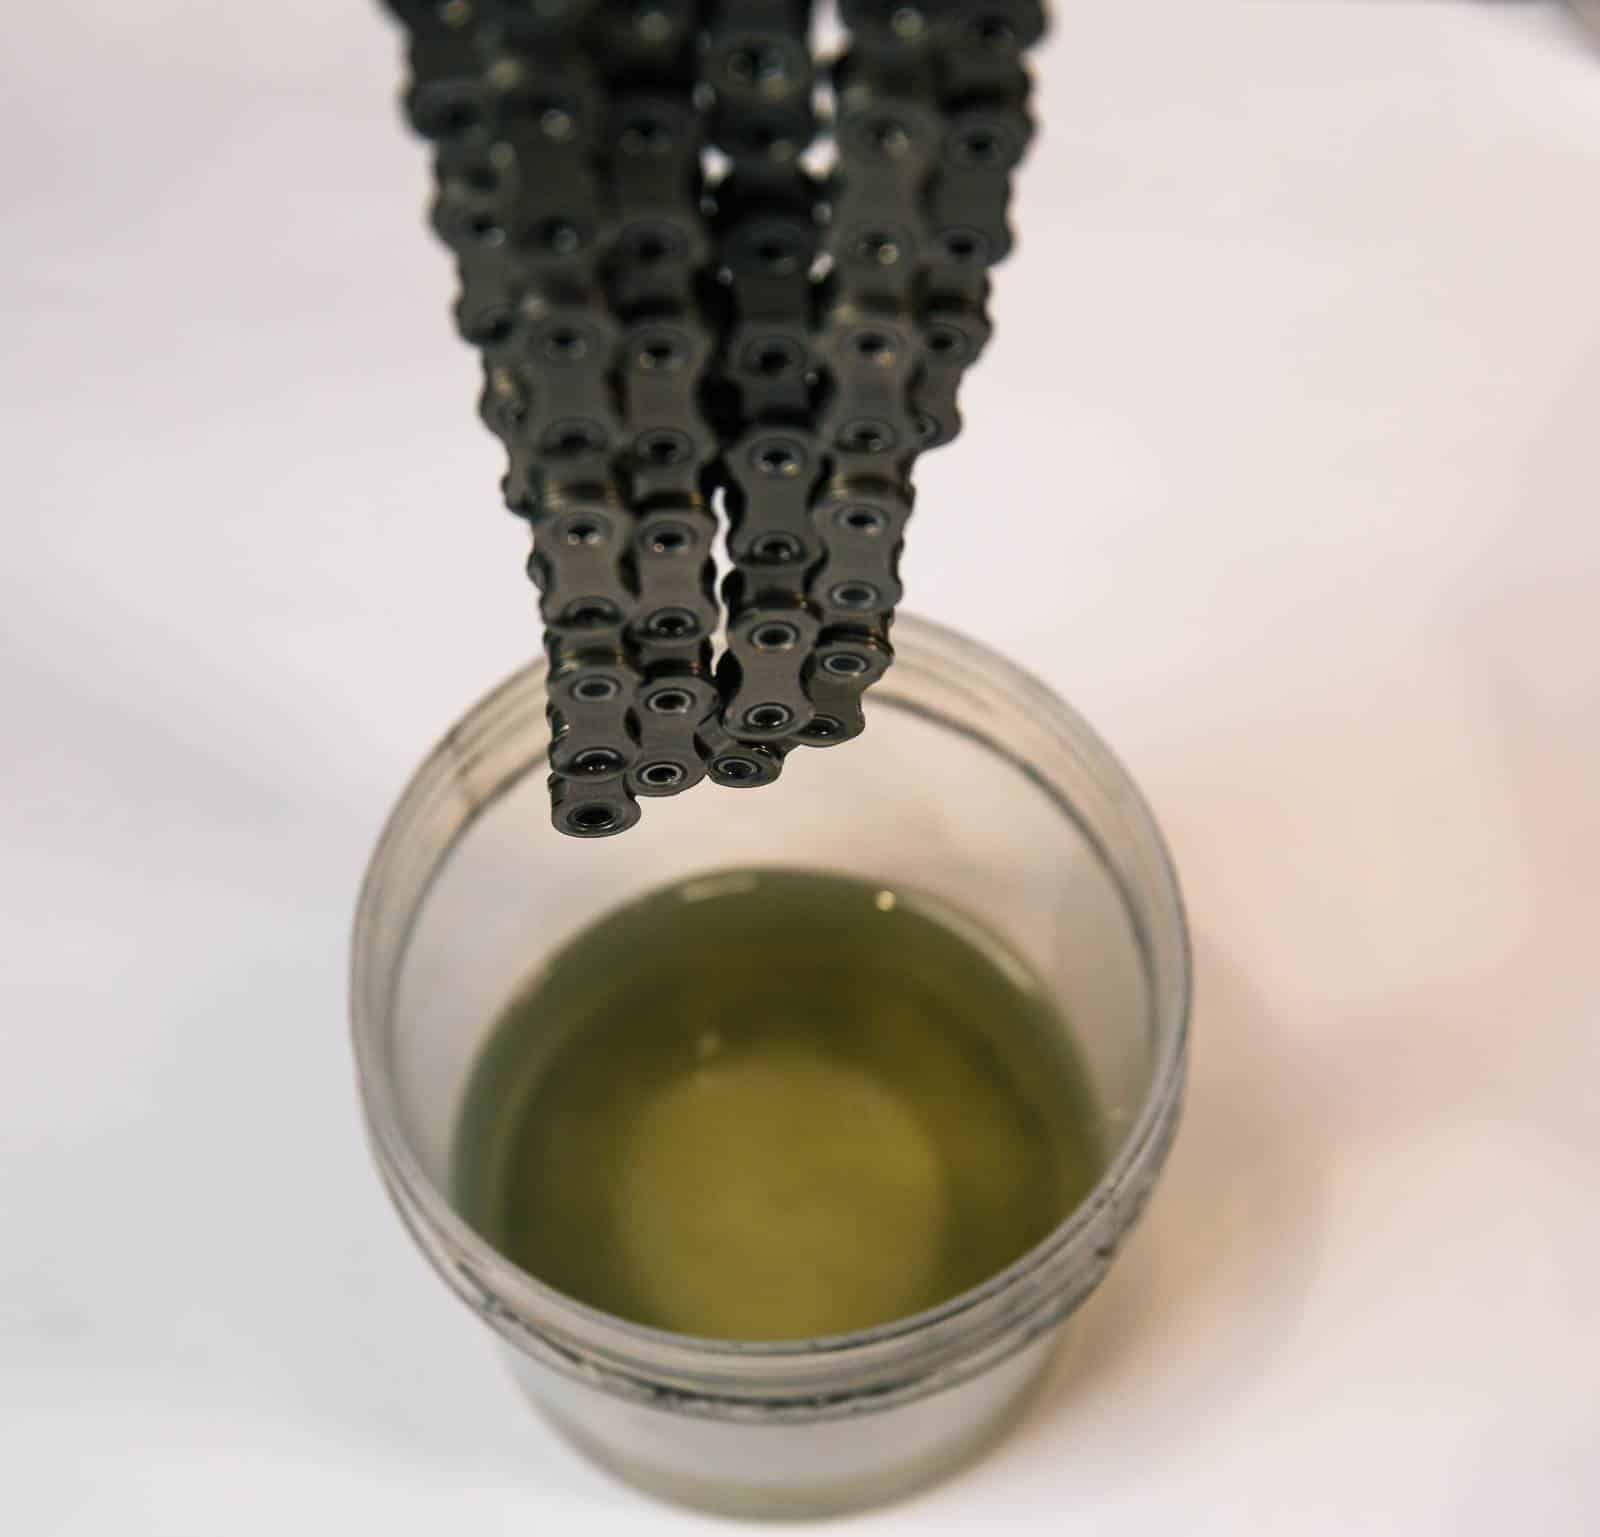
Alternatively, you can fill your container with the alcohol and soak the chain in it for a few minutes. Then start agitating and shaking it. Like with the degreaser, keep replacing the alcohol and shaking until you're certain the chain is clean. You can also use coffee filter papers to clean the alcohol for reuse.
Step 5. Let the Chain Dry
To dry and clean off the chain, wrap it in a clean, lint-free cloth and wipe off any residue. You can then set the chain aside in a sunny location to dry further for about an hour. Alternatively, use an air compressor like this and apply compressed air to speed up the process. You can also use a hair dryer like this if you have one. Ensure that the chain is completely dry before applying the wax.
Step 6. Melt The Wax
Now that you've cleaned and dried the chain of all factory grease and contaminants, it is time to begin the waxing process. Wear rubber or latex gloves like this for safety. You can purchase a good chain wax like this. This article by Zero Friction details the performance of many options. A good wax should last about 30 rewaxes with a single bag. Alternatively, you can make your own DIY wax at home using food-grade paraffin like this. However, a manufactured product is usually ideal.
Next, you need to melt the wax. The most efficient method is using a slow cooker like this as it will provide low and consistent heating. The less wax you need to cover the chain sufficiently, the better. Therefore, a small cooker is best, usually less than 3.5L. Ensure the wax can generously cover your chain. Plug and switch on the slow cooker and set it to a low setting. The wax may take 30 minutes or more to melt completely.
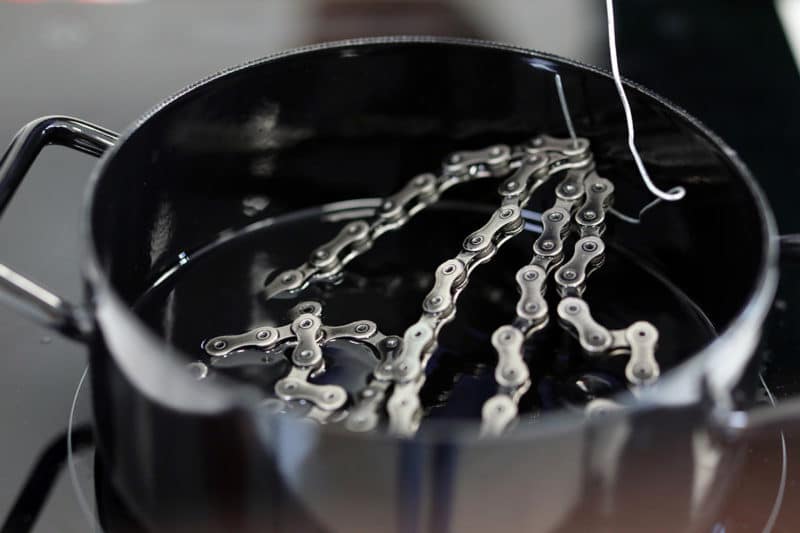
Step 7. Submerge The Chain
With your wax fully melted and ready, thread your chain onto a swishing tool. You can use a dedicated tool like this or a twisted coat hanger. Next, submerge the chain into the wax in the warming slow cooker and leave it to soak for a while. Remember to also include your quick links or connection pins in the wax as well. Remove the links and pins after about 30 seconds and set them aside to cool.

Step 8. Agitate The Wax
Get your swisher or coat hanger and use it to agitate the chain in the wax. Ensure the chain remains submerged as you shake vigorously. Leave the chain to soak again for about 30 minutes. Then agitate the chain again, and that's it. This process will allow the wax to penetrate and coat the inner parts of the chain.
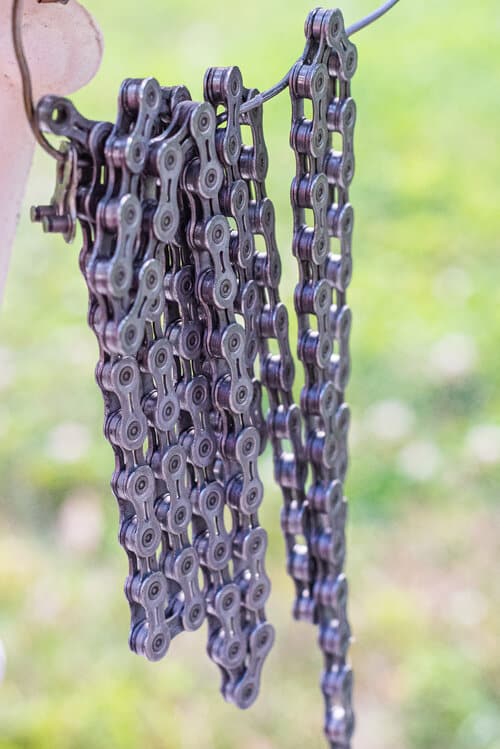
Step 9. Hang To Cool
To remove the chain from the cooker, hook a chain link with your swishing tool. Then carefully remove the chain from the wax bath and allow the excess wax to drip down into the bath. Next, hang your chain on a bike hook or coat hook to cool and dry for roughly 20 minutes. Clean off any wax that drips onto the floor. You can also make use of aluminum foil like this to catch any dripping wax.
Unplug your slow cooker and close the lid. The good news is you do not need to clean the cooker – you can simply leave the wax there and remelt when next you need to wax your chains.
Step 10. Flex The Chain
Once your chain is cool and dry, you will have to loosen the links as the chain will be stiff. Take the waxed chain and flex each link over your index finger. You can also make use of a metal rod or PVC piping to pull the chain and break each link free. There may be some white waxy residue on the outside of your chain. These will usually flake off on your first bike ride with the chain. You can also use a clean cloth to wipe away any excess wax.
Step 11. Install the Chain
Now that your chain is waxed, you can fit it on your bike. Turn off the rear derailleur's clutch mechanism or engage the Cage Lock feature, depending on which one your bike has. Next, thread your waxed chain over and through the largest front chainring and front derailleur. Then run the chain through the rear derailleur, over the smallest cog, and around the upper and lower jockey wheel.
If the chain uses a quick link, connect the two ends using a master link plier like this. Pull the chain together and assemble your waxed quick link using the teeth of the plier to snap it into place. If your chain uses a connection pin, use a chain tool like this to push the pins through the links. Place the chain in the tool's outer slot and tighten the handle clockwise to drive the pin.

Test your chain and the installation. Cycle through all the gears to ensure the chain can shift properly. Also, check that the chain has the proper tension. Next, test the other drivetrain components for correct alignment and functionality. For the first few minutes of riding, the waxed chain might feel a bit stiff. The wax usually wears in after a while and you can then enjoy a smooth and clean ride.
